


Models
>
JCB860DF2WW
JCB860DF2WW General Electric Range - Overview
Sections of the JCB860DF2WW
[Viewing 4 of 4]


Keep searches simple, eg. "belt" or "pump".

Temperature Sensor
PartSelect #: PS10059162
Manufacturer #: WB21X22134
The temperature sensor, also known as the oven temperature sensor assembly is usually found in the back of the oven. The function of the oven temperature sensor assembly is to measure the temperature ...
$38.48
In Stock

Light Bulb - 40W
PartSelect #: PS217532
Manufacturer #: 40A15
This 40-Watt light bulb is sold individually and is a genuine OEM replacement option for your home appliances. It is specially designed to withstand extreme temperatures, so this bulb is compatible wi...
$11.02
In Stock

Dual Radiant Element - 9 Inch
PartSelect #: PS2321567
Manufacturer #: WB30T10133
The dual radiant element for your range or cooktop provides the heat that you cook with. It is found under the main cooktop. If your element will not heat, you will need to replace it with this part. ...
$124.69
In Stock

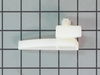
Drawer Support
PartSelect #: PS2320972
Manufacturer #: WB02K10158
This is a replacement drawer support for your oven. The drawer support provides stability to the drawer unit as it opens and closes. If your oven drawer is hanging or will not slide in or out efficien...
$11.07
In Stock


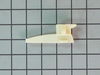
RECEPTACLE PUSH-IN
PartSelect #: PS752188
Manufacturer #: WB08T10026
This part is the replacement light socket for your oven. The oven light socket provides power to the light, and at the same time holds the light bulb in place.
$8.54
In Stock

Lens
PartSelect #: PS1020380
Manufacturer #: WB25T10041
This part is a replacement lens for your oven or range. The lens is red in color, and when the elements are turned on, the light behind the lens will turn on to inform the user that the element is, in...
$12.51
In Stock


Surface Burner Switch - 240V
PartSelect #: PS2339825
Manufacturer #: WB24T10153
This switch controls the stove top surface burner.
$104.59
In Stock


SCREW 10-32 TR T
PartSelect #: PS222157
Manufacturer #: WB01T10008
This part is a replacement screw for your oven. It is made of black metal and is sold individually. This screw is approximately 1/4 inch in diameter and about 1/2 inch in length. It is designed to con...
$12.20
In Stock
Questions And Answers for JCB860DF2WW
We're sorry, but our Q&A experts are temporarily unavailable.
Please check back later if you still haven't found the answer you need.
Common Symptoms of the JCB860DF2WW
[Viewing 7 of 7]Element will not heat
Fixed by
these parts
these parts


Show All
Little to no heat when baking
Fixed by
these parts
these parts
Show All
Oven not heating evenly
Fixed by
these parts
these parts
Show All
Oven is too hot
Fixed by
these parts
these parts
Show All
Door won’t close
Fixed by
these parts
these parts

Show All
Will Not Start
Fixed by
these parts
these parts
Show All
Little to no heat when broiling
Fixed by
these parts
these parts
Show All


Keep searches simple. Use keywords, e.g. "leaking", "pump", "broken" or "fit".
Oven would go in to a F2 Error
Removed six 1/4" hex nuts on rear of oven. Then through front/inside removed a single 1/4" hex nut to actually remove sensor. Unplug sensor connector, remove. Reversed steps, push oven back in place and plugged in. Tested oven function.
Parts Used:
-
Peter from stamford, CT
-
Difficulty Level:Really Easy
-
Total Repair Time:15 - 30 mins
-
Tools:Nutdriver
143 of 206 people
found this instruction helpful.
Was this instruction helpful to you?
Thank you for voting!
9" Radiant Element did not heat up.
I started by Unscrewing the range top. 2 small screws. I took off the old piece by unclipping the piece . Then I color coded each wire so that I would know exactly where I would place the wires for the new part. 30 min maximum time spent changing the part. Please don't forget to unplug the range before you start.
Parts Used:
-
Andrea from ORLANDO, FL
-
Difficulty Level:Easy
-
Total Repair Time:30 - 60 mins
-
Tools:Screw drivers
41 of 52 people
found this instruction helpful.
Was this instruction helpful to you?
Thank you for voting!
Oven wouldn't preheat above 300 degrees
Unplugged appliance and removed 5 screws on back of stove/oven and removed plate. Disconnected the sensor and unscrewed it on the inside of the oven. Pulled the cord through and replaced with new sensor. Replaced all parts and plugged in the appliance and tested. Worked great.
Parts Used:
-
Gerald from Cape Canaveral, FL
-
Difficulty Level:Really Easy
-
Total Repair Time:15 - 30 mins
-
Tools:Nutdriver
48 of 78 people
found this instruction helpful.
Was this instruction helpful to you?
Thank you for voting!