This ceramic terminal block kit includes one ceramic block and terminal assembly with mounting bracket. Terminal blocks generally provide an easy solution for connecting individual wires.
This part is the replacement light socket for your oven. The oven light socket provides power to the light, and at the same time holds the light bulb in place.
This light bulb lens covers the interior light bulb in an oven, range, or stove. No tools are necessary to replace this part. Simply slide off the wire bracket to remove the existing light bulb lens. ...
This large broiler pan is found in the bottom of your oven and is used to catch drippings from broiling foods. This part includes the grate and bottom pan and is made of porcelain. The grate measures ...
This door gasket or seal is used in ranges and ovens. The rubber gasket creates a protective seal between the oven door and the opening of the oven. The function of this seal is to trap heat and preve...
$183.95
In Stock
Questions And Answers for JBP36G0W4
Be the first to ask our experts a question about this model!
✖
Ask a Question
Ask our experts a question on this model and we'll respond as soon as we can.
Old gasket had become brittle. Was able to find the 22 yr old model and part on PartSelect (could not track it down on GE's site. Inner panel was removed with four screws. Old gasket came out. Installed new gasket making sure the bead fit into the groove provided in the door panel. Re-assembled. All is well. Thanks
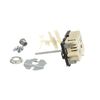
1. Removed the back panel. 2. Disconnected the wires from the old switch while connecting wires to the new switch one at a time. 3. Installed the new switch and broke off the excess metal on the post which fits into the burner knob on front of the range. 4. Replaced the burner knob and replaced the back panel.
On Friday, the day after Thanksgiving, I placed an order for two replacement burners, four new pans, and two receptacle ASM's for my 30+ year old GE stove. I didn't know the exact model number, but because of your very informative website, I was able to look at the parts and find what I needed.
Much to my amazement, the parts
... Read more arrived the next day (24 hours after ordering!). I didn't pay for overnight or weekend delivery. You quickly fulfilled the order and shipped it the same day. It really was a great surprise to see the parts so quickly.
To top it off, the installation was so simple that my 3 and 5 year olds helped out (after disconnecting the power first!) the installation was so straight forward, that my 5 year old unscrewed the nut that held the receptacle in place while the 3 year old unwrapped the new pans. All I needed was a Phillips head screw driver and a open ended wrench to complete the job. I replaced all the parts and had a stove that looked brand new (and worked) within 10 minutes.
After 5 years of fighting a stove the intermittently worked, worrying about where to get parts, and wondering if I needed to purchase a new stove, it is all over. My wife is happy, I am happy, and my kids are happy that they had a fun Saturday project to help dad with. If I only knew about PartSelect 5 years ago, we would have been cooking worry free, knowing the stove is actually heating up.
The procedure was simple! Here is what I did: 1.) disconnected the power by lifting up the lever under the stove that held the power cable. 2.) Removed the burners by simply pulling them out of the socket, and removed the drip pans. 3.) used a wrench set to remove the screw holding the ceramic terminal block in place 4.) removed the wires from the back of the terminal block with a Phillips head screw driver. On one of the burners, the terminal block assembly was so damaged, I used the pliers to break the ceramic and then held onto the receiving terminal to loosen the screw. 5.) connected the new terminal block. I made sure by simply screwing on the wires. I made sure I clipped in the new plastic covering that protected the screws. 6.) re-attached the terminal assembly block to the stove top. BE CAREFUL so as to not over-tighten, you can strip the screw 7.) installed the new drip pans. 8.) re-connected the power by simply plugging in the main power and re-camping the quick-disconnect. 9.) Checked the stove to make sure everything worked. 10.) Cooked dinner!