Your coupon for will be reflected when you check out!
✖
Your coupon for
✖
Hello!
You're visiting the PartSelect site in U.S.
Would you like to shop on the Canadian site?
Stay on this site
Go to Canadian site
✖
Model Number Locations
1Select Category Type
Select Category Type
2Select Product Type
Select Product Type
3Select {MODEL} Type
Select {MODEL} Type
Sample Model Number Tags
Model numbers can be made up of numbers (1005400, for example) or a combination of letters and numbers (LAT1000AAE). The model number will most likely appear on either a paper sticker or a metal plate. Your appliance's model number tag may look similar to the sample model number tags shown here (model number highlighted in yellow):
Model has been saved to My Models. If you're not signed in, your lists are available on this device and will expire within 30 days.
Model has been saved to My Models.
This 40-Watt light bulb is sold individually.
It is specially designed to withstand extreme temperatures, so this bulb is compatible with a variety of appliance types including refrigerators, ranges,...
This compression ring is meant to hold the evaporator fan motor in place in the freezer compartment of your refrigerator. This is is a genuine OEM part. The tools needed to complete this repair are a ...
The lid bumper or evaporator fan motor bumper in your refrigerator prevents the fan motor from scraping against the side bracket. If your refrigerator/freezer is noisy, the bumper could be worn down o...
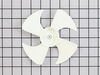
The condenser fan blade assembly helps to regulate the temperature in your refrigerator or freezer. This fan assembly has 4 blades, but other fans may have 3 blades, so be sure to check the number of ...
This part is the replacement drawer slide rail for your refrigerator. The crisper draw will slide in and out along this rail. If the rail is damaged or missing, the crisper will either hang from one s...
This part is the replacement compressor start relay for your refrigerator. It is made of black plastic and is approximately 1 ¼ inches long and 1 inch wide. The compressor start relay attaches to the ...
Also known as AC/DC Fan Motor. This evaporator fan motor is located in the back of the freezer, and circulates air over the refrigerator coils. These coils will convert the heat into cool air, which is then circulated.
Introducing GE's Genuine Left Hand Slide Pan - a perfect replacement part designed to uphold the quality and functionality of your appliances. This meticulously crafted slide rail is specifically desi...
$37.91
In Stock
Order now and your part arrives by Jun 18
Questions And Answers for HTS22GBPCRWW
Be the first to ask our experts a question about this model!
✖
Ask a Question
Ask our experts a question on this model and we'll respond as soon as we can.
After determining that it was the defrost system, I ordered the thermostat. Make sure you look closely. Mine had two thermostats, and so I had to wait a couple of days for the extra part. 1. Remove ice maker if installed. 2. Remove center casing on ceiling and back wall. There may be two screws that need removed. 3. L
... Read moreocate and remove two screws on upper back wall. 4. Remove back wall carefully, revealing coil system. 5. If this was the problem, the coils will be iced over and need thawed. Either time or a hair dryer... 6. The thermostats clip onto the copper tubing, simply pull them off, keeping close attention to the color of the wires. 7. Be very careful touching the bottom of the coils as the defrost conductor coils are along the bottom and encased in easily breakable glass. If you need to replace this as well, remove the center brace (wire)by pulling towards you and then down. remove wire attachments at both ends and rotate coil out of end braces. 8. Replacing thermostats...you must CUT the wires, and attach new thermostats with wire couplers or wire nuts and then wrap with electrical tape that is rated for the cold. 9. Re-attach all parts and replace back wall and coverings. 10. Enjoy!
First I removed the rear cover, located at the bottom of the refrigerator. Then I cleaned out the dirt & dust on and around the compressor. The relay has a cover, that is secured with a spring loaded clip. To release the clip, push in with your fingers, while disengaging the end clip with a screwdriver. Once one side is off the ot
... Read moreher lifts off. Remove cove exposing the relay. There is one wire terminated, with a spade clip, remove it. With a strait blade screwdriver, pry the relay off the 2 post it slides on to. (Don't be surprised if it breaks into pieces, as they are sometimes brittle. ) Slide the new relay onto the 2 posts, replace the wire onto the right terminal, and replace the relay cover & clip. Replace the rear cover. Plug in and test.
No instructions came with new parts. Access to element was impossible until I accidentally discovered that the two styrofoam cushions at the ends of the coils were removable. Once removed, access to the heater and thermostat was very easy.
Unplug appliance, remove freezer shelf, cold air ducts, back of freezer, disconnect lig
... Read moreht, (My model does not have ice maker. This may also need to be disconnected.) 1.Remove styrofoam cushions at end of coils 2.Locate element between bottom two coils 3.Disconnect the male/female connections 4.Remove support clip under center of element 5.Remove element 6.Replace new element in reverse
Connecting the thermostat wires was challenging because they were somewhat behind the coils.
1.With styrofoam removed, unclip thermostat from coil 2.Carefully cut wires (leave enough to connect new wires) 3.Connect new thermostat wires (color of wires matched on my fridge) 4.Clip new thermostat in place 5.Replace styrofoam 6.Button it all up
With these steps, this job would take maybe 30 minutes; somewhat longer if your model has an icemaker.