Models > GTS16DTHJRWW > Symptoms > Fridge too warm

Parts That Fix General Electric Refrigerator GTS16DTHJRWW Fridge too warm

Fridge too warm is a commonly reported symptom for the GTS16DTHJRWW General Electric Refrigerator, and we have put together a full guide on how to fix this. This advice is based on feedback from people who own this exact appliance. We have listed the most common parts for your GTS16DTHJRWW General Electric Refrigerator that will fix Fridge too warm. We have included repair instructions, and helpful step-by-step video tutorials. If you are experiencing this issue, not to worry, DIYers just like you have fixed this, and shared their experience to help you!

Fixes Symptom 37% of time
★★★★★
★★★★★
135 Reviews

Rated by 47 customers 


Really Easy 

30 - 60 mins 

Ratings submitted by customers like you who bought this part.   

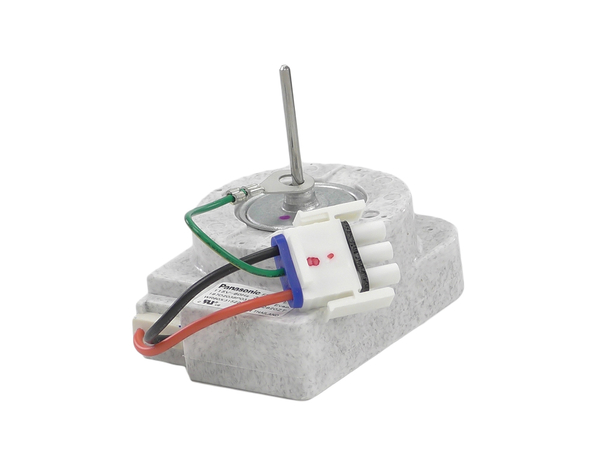
This 115-volt 60Hz evaporator fan motor is located in the back of the freezer and circulates air over the refrigerator coils. These coils will convert the heat into cool air, which is then circulated. If the motor has failed, the freezer/refrigerator will become too warm because the fan motor is not circulating the cool air from the freezer into the refrigerator. This is a genuine OEM part. Please remember to disconnect the power to the appliance before starting your repair.

$ 74.43
  In Stock
PartSelect Number PS12741350
Manufacturer Part Number WR60X31522

Replacing your General Electric Refrigerator Evaporator Fan Motor

Replacing your Evaporator Fan Motor

Customer Repair Stories

Loud Fan Motor

Unplug refrigerator.Remove the floor of the freezer box by removing the 4 philips head screws. Remove the cover over the fan by pulling it straight up and out. Remove the styrafoam duct by pulling it straight up and out. Remove the back wall of the freezer by removing the 4 philips head screws. Unplug fan. Remove the fan, bracket and all, by removing the two philips head screws on the back wall. Take the two halves of the bracket appart by removing the two hex head scews on the back of the bracket. Remove the "O" ring from the fan blade and remove the blade. There is a rubber grommet on both the front and back halves of the bracket. Make sure they are set properly in the brackets to secure and position the motor properly so the fan blade doesn't hit anything when it spins. Install the new motor onto the bracket the same way you took the old one off. Check the positions of the brackets, rubber grommets and motor to make sure they're properly installed and secure. Replace the "O" ring onto the fan blade and install it onto the new motor with a firm push on the center of the blade. Install the brackets and fan onto the back wall and plug in the new motor. Reinstall the back wall of the freezer box and make sure the motor is secure. Plug the refrigerator back in and check to make sure the fan blade doesn't hit anything while it's turning. Finish reassembling the freezer box.
  • Arthur from East Meadow, NY
  • Difficulty Level:
    Easy
  • Total Repair Time:
    30 - 60 mins
  • Tools:
    Nutdriver, Screw drivers
47 of 50 people found this instruction helpful.
Was this instruction helpful to you?
Thank you for voting!

Freezer Fan

I removed two srews from the back panel inside fthe reezer compartment and the two that hold the air manifold/baffle? and pulled the baffle out. Then, I removed the two srews that hold the front part of the fan bracket behind the baffle and the back panel came out easily. Two more screws and one quick connect plug attached to the fan and I was done with removal. Insallation was even quicker, I slid the original fan right off the old motor and slid it on the new motor's shaft. Piece of cake! Thanks Partselect.
  • Luis from College Station, TX
  • Difficulty Level:
    Really Easy
  • Total Repair Time:
    15 - 30 mins
  • Tools:
    Screw drivers, Socket set
254 of 277 people found this instruction helpful.
Was this instruction helpful to you?
Thank you for voting!
Fixes Symptom 20% of time
★★★★★
★★★★★
7 Reviews

Rated by 14 customers 


Easy 

15 - 30 mins 

Ratings submitted by customers like you who bought this part.   

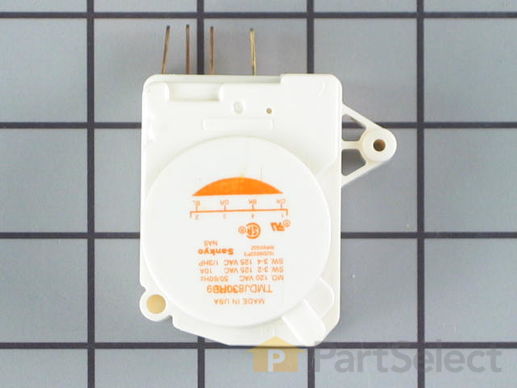
This defrost timer will cycle for 25 minutes after every six hours of run time. The timer itself is made of plastic, and its terminals are bent, the leads are internal, and the label is orange. If you notice that your fridge is too warm, the fridge is running for a long time or is leaking, it could be due to the defrost timer becoming inactive. The defrost timer is found underneath the light cover (may need to remove lightbulb) and will need to be removed along with the air inlet assembly and housing.

$ 93.29
  In Stock
PartSelect Number PS310869
Manufacturer Part Number WR9X502

Replacing your General Electric Refrigerator Defrost Timer - 120V 60Hz

Replacing your Defrost Timer - 120V 60Hz

Customer Repair Stories

display showed dE

popped off front grille, removed 2 screws for bracket, then had to remove one screw for timer. unplugged old timer, reversed procedure, all works.
  • Nancy from Hamburg, NY
  • Difficulty Level:
    Easy
  • Total Repair Time:
    Less than 15 mins
  • Tools:
    Nutdriver
74 of 116 people found this instruction helpful.
Was this instruction helpful to you?
Thank you for voting!

refrigerator was not cooling but the freezer worked fine.

My husband put on the defrost timer. At first I thought the part was not going to fix the problem. After about 5 hours my refrigerator was still warm. I went to work and when I got home that evening my refrigerator was cooling and down to 28 degrees. So if you replace this part wait at least 12-24 hours. Give it time to stablize. My husband says it has to go through its cycle. It works on a 24 hour timer. My refrigerator is working fine and this has saved me alot of money. My husband says, once you put on the timer you may have to use a flat screwdriver and turn the small dial clockwise one click to start it. He removed the kick grill and replaced the part. Dont forget to shut breaker off to replace this part. Turn power back on and start the timer. We are so happy that we now have a working refrigerator.
  • Wanda from Cabins, WV
  • Difficulty Level:
    Really Easy
  • Total Repair Time:
    15 - 30 mins
  • Tools:
    Nutdriver, Screw drivers
86 of 100 people found this instruction helpful.
Was this instruction helpful to you?
Thank you for voting!
Fixes Symptom 13% of time
★★★★★
★★★★★
35 Reviews

Rated by 27 customers 


Really Easy 

Less than 15 mins 

Ratings submitted by customers like you who bought this part.   

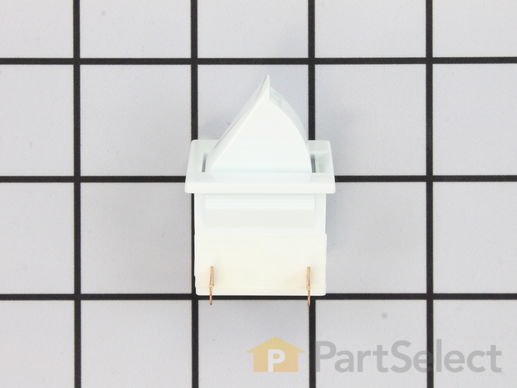
This is the light switch that goes in your refrigerator. If the light is not working or stays on, you may need to replace the switch. It is made of mainly white plastic, and is an OEM part, directly from the manufacturer. Be sure to disconnect the refrigerator from the power source before you begin this repair. To remove the switch, simply use a flathead screwdriver to pop the switch out from the refrigerator wall, then disconnect the wires. Reconnect the wires to the new switch, snap it into place, and the repair is complete.

$ 8.69
  In Stock
PartSelect Number PS10066583
Manufacturer Part Number WR23X23343

Customer Repair Stories

Light would not work when I opened door.

I lifted the old switch with a flat screwdriver, attached wires, and popped into place. Saved 80 bucks for a repair call.
  • joe from spartanburg, SC
  • Difficulty Level:
    Really Easy
  • Total Repair Time:
    Less than 15 mins
  • Tools:
    Nutdriver
22 of 26 people found this instruction helpful.
Was this instruction helpful to you?
Thank you for voting!

dropped something on the light switch and it broke off

we just pried out the old switch and pulled it out the rest of the way with a pair of needle nose pliers. Pulled off the wires on the broken switch and reattached to the new one and just slid/clicked it back into the hole.
  • Lorinda from Dallas, TX
  • Difficulty Level:
    Really Easy
  • Total Repair Time:
    Less than 15 mins
  • Tools:
    Pliers, Screw drivers
57 of 63 people found this instruction helpful.
Was this instruction helpful to you?
Thank you for voting!
Fixes Symptom 12% of time
★★★★★
★★★★★
7 Reviews

Rated by 14 customers 


Really Easy 

30 - 60 mins 

Ratings submitted by customers like you who bought this part.   

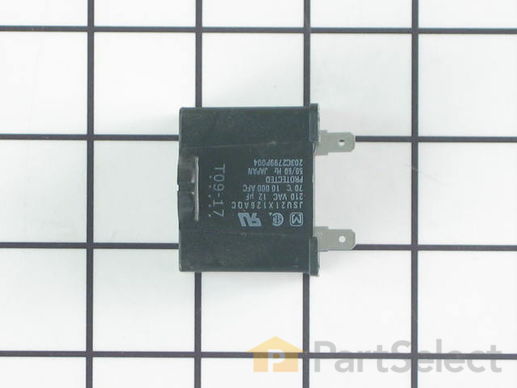
This part helps the compressor kick on and off while maintaining a constant temperature to keep things frozen in your freezer. This part has been updated by the manufacturer and may appear different than the original, but should function the same.

$ 108.60
  In Stock
PartSelect Number PS11764031
Manufacturer Part Number WR55X24064

Replacing your General Electric Refrigerator Run Capacitor

Replacing your Run Capacitor

Customer Repair Stories

Refrigerator to warm

Instructions say run capacitor is by motor, but on this frige its in the refrigerator compartment. The capacitors looks different, one square and the other long
  • Lloyd from PITTSBURG, CA
  • Difficulty Level:
    Easy
  • Total Repair Time:
    15 - 30 mins
  • Tools:
    Screw drivers
5 of 5 people found this instruction helpful.
Was this instruction helpful to you?
Thank you for voting!

Freezer not getting cold enough to freeze ice cream

I took the advice off of your website about the only thing that will fix
the problem is change the run capacitor. I felt assured that I would
have a working refrigerator freezer after making this change. I was
pretty disheartened when it didn`t solve anything. I was not going to
take the new part back out after the small challenge of putting it in.
The next day I found out how to test the old capacitor and it was still
good. I will just have to eat the $49. I did learn not to take advice from
a website even if it seems like a sure thing
  • Gary from ROSETO, PA
  • Difficulty Level:
    A Bit Difficult
  • Total Repair Time:
    30 - 60 mins
  • Tools:
    Screw drivers
6 of 7 people found this instruction helpful.
Was this instruction helpful to you?
Thank you for voting!
Fixes Symptom 7% of time
★★★★★
★★★★★
5 Reviews

Rated by 5 customers 


Easy 

30 - 60 mins 

Ratings submitted by customers like you who bought this part.   

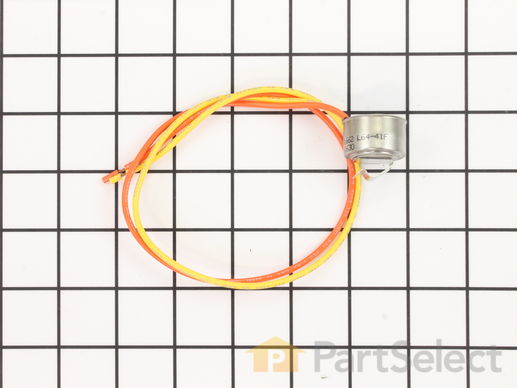
this part acts as a safety device against over-heating in case of mechanical failure.

$ 25.99
  In Stock
PartSelect Number PS1155320
Manufacturer Part Number WR50X10071

Customer Repair Stories

fridge stoped cooling

unplug fridge! removed ice maker. removed the back panel in frezer. I uncliped thermostat; cut wires on thermostat and installed new thermostat.
  • stephen from vernon, AL
  • Difficulty Level:
    Easy
  • Total Repair Time:
    30 - 60 mins
  • Tools:
    Nutdriver, Screw drivers
Was this instruction helpful to you?
Thank you for voting!

Freezer is too hot

Open the freezer panel which attached with screwws and locate the defrost thermmostate behind the back pannel. Cut off the old thermostat wires and connect the new wires.
  • David from New York, NY
  • Difficulty Level:
    Really Easy
  • Total Repair Time:
    15 - 30 mins
  • Tools:
    Screw drivers
4 of 8 people found this instruction helpful.
Was this instruction helpful to you?
Thank you for voting!
Fixes Symptom 6% of time
★★★★★
★★★★★
21 Reviews

Rated by 29 customers 


Easy 

30 - 60 mins 

Ratings submitted by customers like you who bought this part.   

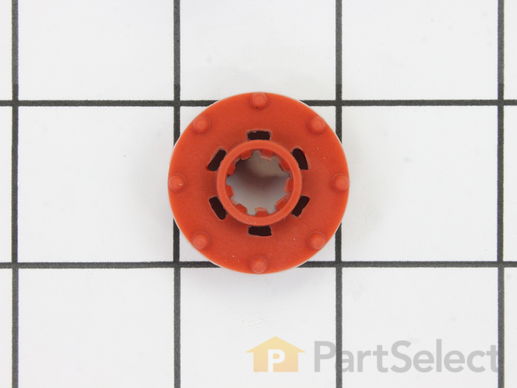
If you notice that your refrigerator or freezer is noisy or too warm, you may need to replace the evaporator fan grommet. This part is red in color, and is about 1 inch in diameter. The evaporator fan grommet is located behind the evaporator fan cover in the back of the freezer. You will need to remove the evaporator fan cover to access the evaporator fan and complete this repair. Before you begin this repair, ensure the power to the refrigerator is disconnected. You will need a pair of needle nose pliers, a small flat blade screw driver and both a 1/4 and 5/16-inch nut driver to complete this repair.

$ 13.21
  In Stock
PartSelect Number PS963756
Manufacturer Part Number WR02X12008

Replacing your General Electric Refrigerator Evaporator Fan Grommet - Red

Replacing your Evaporator Fan Grommet - Red

Customer Repair Stories

Fan making noise.

Remove ice maker and all of it's accessories in order to remove the panel covering the fan. Don't drop the screws!
Unscrew the lower fan bracket. You will see the lower red rubber grommet. Hold fan motor with one hand and push the fan off the shaft and into the compartment above. Then remove the round retainer thing below it by holding it and pulling down on the motor assembly. Install new grommet on upper part. and put it all together.
REMEMBER where the fan is on the shaft. It has about one inch of shaft placement. I put mine so that most of it was above the hole that the fan goes into and about 20 percent showing below the sheet metal.
Also check to see if your fan is damaged. Mine was not.
This refrigerator has been awesome! I have had many issues but have been able to fix all of them for the last 15 years!
  • Matthew from Escondido, CA
  • Difficulty Level:
    Really Easy
  • Total Repair Time:
    30 - 60 mins
  • Tools:
    Screw drivers
1 person found this instruction helpful.
Was this instruction helpful to you?
Thank you for voting!

Fan was not centered in the middle of the back panel opening.

Bent the motor bracket down, then using a rat tail file, elongated the holes in the back panel of the refrigerator to secure the fan in the "centered" position. This was a problem that was with the refrig. since it was made. The parts involved were perfect. NO problem at all installing them.
  • James from GREENSBORO, NC
  • Difficulty Level:
    Easy
  • Total Repair Time:
    30 - 60 mins
  • Tools:
    Screw drivers, Socket set
1 person found this instruction helpful.
Was this instruction helpful to you?
Thank you for voting!
Fixes Symptom 3% of time
★★★★★
★★★★★
7 Reviews

Rated by 16 customers 


Easy 

30 - 60 mins 

Ratings submitted by customers like you who bought this part.   

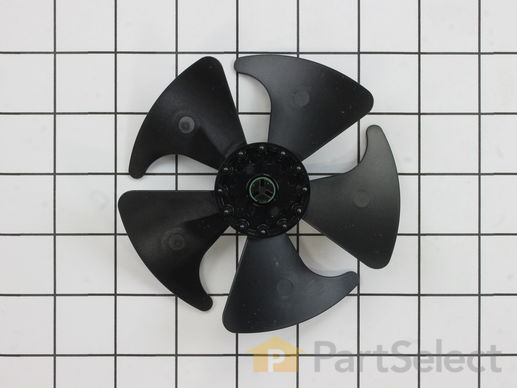
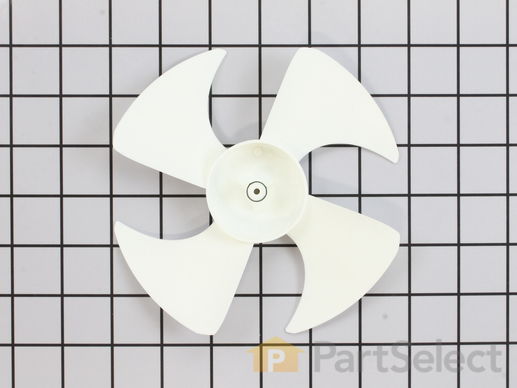
This blade attaches to the evaporator motor.

$ 17.07
  In Stock
PartSelect Number PS1018129
Manufacturer Part Number WR60X10204

Replacing your General Electric Refrigerator Evaporator Fan Blade

Replacing your Evaporator Fan Blade
Fixes Symptom 1% of time
★★★★★
★★★★★
2 Reviews

Rated by 14 customers 


Easy 

30 - 60 mins 

Ratings submitted by customers like you who bought this part.   

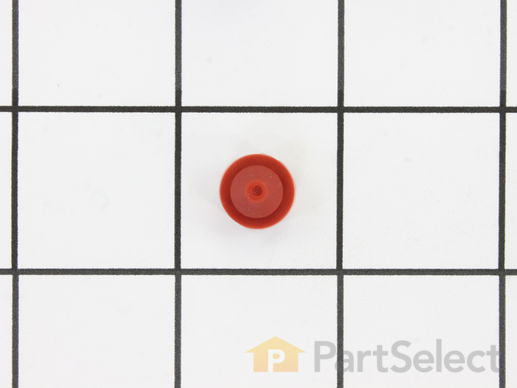
The lid bumper or evaporator fan motor bumper in your refrigerator prevents the fan motor from scraping against the side bracket. If your refrigerator/freezer is noisy, the bumper could be worn down or missing, and the sound could be a result of the motor scraping the side bracket. You will find it between the fan motor and the side bracket on the evaporator fan motor assembly. To access the bumper, you will need to remove the evaporator fan motor assembly from the freezer. This part is made of orange rubber and is less than half an inch in diameter. It has a rounded top and a slightly pointed bottom, and is sold individually.

$ 10.97
  In Stock
PartSelect Number PS284979
Manufacturer Part Number WR02X10540

Replacing your General Electric Refrigerator Lid Bumper

Replacing your Lid Bumper

Customer Repair Stories

noisy refrigerator

I followed your video and completely dismantled the refrigerator evaporator motor, fan, brackets, and grommet, I completely cleaned the refrigerator including the cooling coils. I then ordered the evaporator motor ,fan, grommets, lid bumper, and brackets. The order would take a week to arrive. In the meantime I cleaned and reassembled all the old parts, waiting for the new ones to come. Guess what! The refrigerator was quiet as a mouse. I really did not need the new parts, but I kept them anyway just for good luck. Not bad for a refrigerator that's twenty four years old.
  • James from NEW YORK, NY
  • Difficulty Level:
    Easy
  • Total Repair Time:
    1- 2 hours
  • Tools:
    Nutdriver, Pliers, Screw drivers, Socket set
1 person found this instruction helpful.
Was this instruction helpful to you?
Thank you for voting!

Defroster fan burned up

First I removed the ice tray rack lifting it out of the way to reach the back cover of the fan. Then, the whole back inside panel had to be removed. Two screws removed the fan and bracket from the freezer unit. The missing bumper lid just snapped into place. Replaced everything in reverse order. Pretty easy job.
  • Peter M. from Lincoln Park, NJ
  • Difficulty Level:
    Easy
  • Total Repair Time:
    30 - 60 mins
  • Tools:
    Nutdriver, Pliers, Screw drivers, Socket set
3 of 6 people found this instruction helpful.
Was this instruction helpful to you?
Thank you for voting!
Fixes Symptom 1% of time
★★★★★
★★★★★
2 Reviews

Rated by 9 customers 


Easy 

30 - 60 mins 

Ratings submitted by customers like you who bought this part.   

The condenser fan blade assembly helps to regulate the temperature in your refrigerator or freezer. This fan assembly has 4 blades, but other fans may have 3 blades, so be sure to check the number of blades on your fan. The fan blade is made of white plastic and is approximately 6 inches in diameter. If your freezer section is too warm, or you notice a strange noise coming from your refrigerator when it is running, you may need to replace the condenser fan blade assembly. This part is sold individually.

$ 17.89
  In Stock
PartSelect Number PS1022410
Manufacturer Part Number WR60X10207

Replacing your General Electric Refrigerator Condenser Fans Blade Assembly

Replacing your Condenser Fans Blade Assembly

Customer Repair Stories

Noise in the back of freezer

I must thank yo for sending the fan so fast. If I ever have to deal with any appliance again, you are first on my list.
  • MaryLou from Levittown, NY
  • Difficulty Level:
    A Bit Difficult
  • Total Repair Time:
    Less than 15 mins
3 of 5 people found this instruction helpful.
Was this instruction helpful to you?
Thank you for voting!