Models > GSL25JFPABS > Symptoms > Fridge too warm

Parts That Fix General Electric Refrigerator GSL25JFPABS Fridge too warm

Fridge too warm is a commonly reported symptom for the GSL25JFPABS General Electric Refrigerator, and we have put together a full guide on how to fix this. This advice is based on feedback from people who own this exact appliance. We have listed the most common parts for your GSL25JFPABS General Electric Refrigerator that will fix Fridge too warm. We have included repair instructions, and helpful step-by-step video tutorials. If you are experiencing this issue, not to worry, DIYers just like you have fixed this, and shared their experience to help you!

Fixes Symptom 34% of time
★★★★★
★★★★★
66 Reviews

Rated by 44 customers 


Easy 

30 - 60 mins 

Ratings submitted by customers like you who bought this part.   

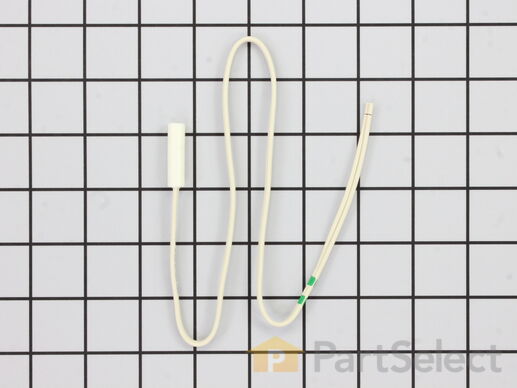
This sensor (Temperature Sensor, Thermistor, Refrigerator Temperature Sensor) sends the temperature reading of the compartment to the control board. If you notice your refrigerator is too warm, too cold, or not defrosting properly, then there may be a problem with your sensor. The temperature sensor can break from material fatigue or through normal use, and should be replaced. It is attached to the evaporator and control housing in your appliance. It measures approximately 1.25 inches long with 18 inch wire leads, and is constructed out of plastic. This part comes in white, beige. It includes the sensor, with wire leads.

$ 27.00
  In Stock
PartSelect Number PS304103
Manufacturer Part Number WR55X10025

Replacing your General Electric Refrigerator Temperature Sensor

Replacing your Temperature Sensor

Replacing your General Electric Refrigerator Temperature Sensor

Replacing your Temperature Sensor

Customer Repair Stories

refrigerator was getting too cold

I removed the old temperature sensor by cutting the wires. I attached the wires of the new sensor with wire nuts and mounted it in the same bracket.
  • Larry from Menomonie, WI
  • Difficulty Level:
    A Bit Difficult
  • Total Repair Time:
    15 - 30 mins
143 of 199 people found this instruction helpful.
Was this instruction helpful to you?
Thank you for voting!

my refigerator was warm but the freezer was cold and working correcttly

I went to a GE repair center to explain my problem, the service center reccomended that I have a techinician come out o look at it. $75.00 for the visit and what ever labor and materials wuld cost.

I went on line to see if there were others having this same problem and found that there were many with the same problem.
  • michele from North Smithfield, RI
  • Difficulty Level:
    Really Easy
  • Total Repair Time:
    15 - 30 mins
  • Tools:
    Pliers
272 of 342 people found this instruction helpful.
Was this instruction helpful to you?
Thank you for voting!
Fixes Symptom 34% of time
★★★★★
★★★★★
18 Reviews

Rated by 103 customers 


Easy 

30 - 60 mins 

Ratings submitted by customers like you who bought this part.   

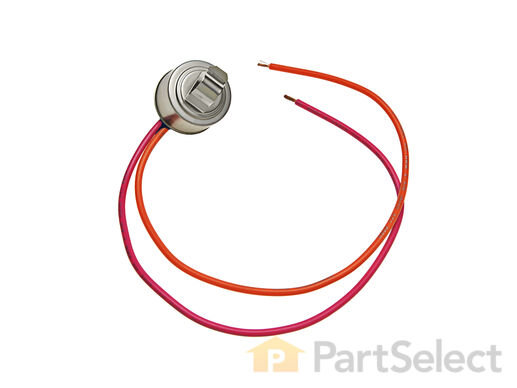
This defrost termination thermostat (Defrost Limiter Thermostat, High Limit Thermostat, Refrigerator Defrost Bi-Metal Thermostat) acts as a safety device to stop the evaporator coil from overheating, by turning off the defrost heater at the end of the defrost cycle. This part attaches to the tubing of the evaporator coil in the freezer. A faulty defrost termination thermostat may result in the defrost heater never heating and a solid frost buildup on the evaporator coil, which results in too warm temperatures. The thermostat contacts are normally closed and have continuity until it reaches 140 degrees. If this high limit thermostat is open at room temperature or colder, it is defective. This limit thermostat has an attached mounting clip and comes with pink and amber wire leads. The thermostat is 1 inch in diameter and 1/2 inch thick, the 2 wire leads are 10 inches long.

$ 29.26
  In Stock
PartSelect Number PS1017716
Manufacturer Part Number WR50X10068

Replacing your General Electric Refrigerator Defrost Thermostat

Replacing your Defrost Thermostat

Customer Repair Stories

freezer was freezing up.

took the back off and defrosted with a hairdryer. disconected the part pulled the part out cut the wires. put the other part on and instaled it. put it back together and it seems to be working just fine. thank you
  • doyle from kingston, WA
  • Difficulty Level:
    Really Easy
  • Total Repair Time:
    15 - 30 mins
  • Tools:
    Nutdriver, Socket set
3 of 3 people found this instruction helpful.
Was this instruction helpful to you?
Thank you for voting!

Ice cubes froze in the tray and frost was all underneath

I read stories from the website how others did it so I figured I would give it a try. I put all the frozen stuff in the refrigerator piled up. Took out the shelves. Took out 2 screws with a socket extension ( nut driver will work fine.) Remove the light bulb. lifted up on the back panel...it came right out. Saw the coils and on top the sensor. Took it off, cut the wires, spliced in the color coded new one ( pink to pink, orange to orange) Stuck it in the top coil in the original position and crossed my fingers! I put all the pieces back easily, restocked the freezer and waited. HOORAY!! My ice cubes are all separate and free. NO frost inside. A very easy fix for $20.

Note: If there is a large amount of ice build up on your coils a hair dryer works great. The drain is on the bottom anyway. Also , you may want to seal around the wire nuts to keep moisture out. I did
  • Michael from Sylva, NC
  • Difficulty Level:
    Easy
  • Total Repair Time:
    30 - 60 mins
  • Tools:
    Socket set
5 of 6 people found this instruction helpful.
Was this instruction helpful to you?
Thank you for voting!
Fixes Symptom 13% of time
★★★★★
★★★★★
29 Reviews

Rated by 42 customers 


Easy 

30 - 60 mins 

Ratings submitted by customers like you who bought this part.   

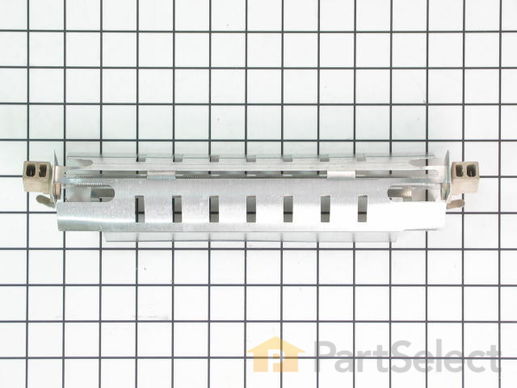
The defrost heater keeps the cooling coils from frosting over. The heater will get hot and melt any ice or frost build up around the coils.

$ 106.51
  In Stock
PartSelect Number PS303781
Manufacturer Part Number WR51X10055

Customer Repair Stories

Refrigerator Not Cooling due to ice buildup on coils

Removed shelves from freezer section and removed protective cover using a screwdriver and nutdriver. 5 screws.
Upon removal of the cover, I noticed the coils totally cover with ice. At this point I noticed that the defrost heater was burnt out. I removed the heater using screwdriver and pliers and tested the heater according to instructions from Parts Select website.
Since the coil was exposed, I also tested the defrost thermostat according to Parts select instructions and found it to be working properly. i also tested the defrost timer and found it OK.
I replaced the heater, closed the protective cover, replaced the shelves and plugged the unit on.
It has been working just fine since then..
In addition to saving money, i saved myself the agravation of looking for a repairman and having to wait for THEIR convenience to to the work.
  • FERNANDO from MIAMI, FL
  • Difficulty Level:
    Really Easy
  • Total Repair Time:
    30 - 60 mins
  • Tools:
    Pliers, Screw drivers
35 of 41 people found this instruction helpful.
Was this instruction helpful to you?
Thank you for voting!

Not cold & saw ice accumulated on freezer back panel

-Disconnect the power supply wire& turn temp control inside refrigerator to 0!
-15 mins spent on remove (5 screws) the back panel inside freezer, melt ice then replace the heater (2 screws) on the bottom! Black wire on left & pink wire on the right! Make sure both end has good connection to the heater!

-30 mins to drain all water from the bottom (back side) of the refrigerator, suck & clean all dust & dirt from the front & back side!

-Set both temp control knots to 5 & put back all the food!

-If no ice build up on the panel after 10 days & then the repair is good!
  • Eddie from Freeport, NY
  • Difficulty Level:
    Really Easy
  • Total Repair Time:
    Less than 15 mins
  • Tools:
    Screw drivers
52 of 64 people found this instruction helpful.
Was this instruction helpful to you?
Thank you for voting!
Fixes Symptom 8% of time
★★★★★
★★★★★
10 Reviews

Rated by 143 customers 


Easy 

15 - 30 mins 

Ratings submitted by customers like you who bought this part.   

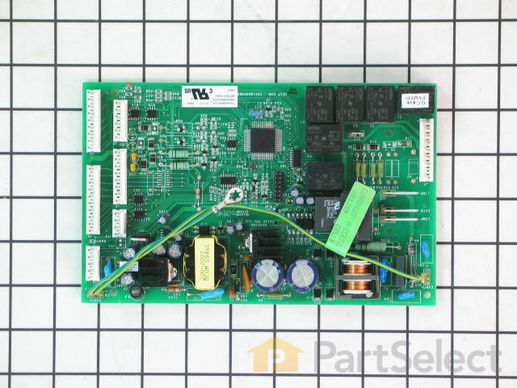
This electronic board (Main Control Board Assembly, Control Board, Motherboard) controls the temperature and defrost functions of the unit. This control board is located on the back of the refrigerator, and measures 8 inches by 5 inches. It’s constructed of metal and plastic, and comes in green. This kit includes one main control board with built in defrost controls. If broken due to electrical surges or normal use, your fridge may experience temperatures that are too warm or too cold, or inconsistent defrost cycles. If this happens, the part should be replaced.

$ 413.05
  On Order
PartSelect Number PS2364946
Manufacturer Part Number WR55X10942

Replacing your General Electric Refrigerator Main Electronic Control Board

Replacing your Main Electronic Control Board

Customer Repair Stories

Refrigerator wouldn't cool, constant clicking noise

Unplug refrigerator. First I removed 3 screws to remove cover for Board ASM Main located on back of refrigerator then loosen Board by pressing on each of 4 plastic pins then unscrew ground wire (green) then transfer all plugs from old Board to new Board, put back new board through pins, screw back ground wire then put back cover then plug back refrigerator, took 5 minutes
  • Alejandro from New York, NY
  • Difficulty Level:
    Really Easy
  • Total Repair Time:
    Less than 15 mins
  • Tools:
    Screw drivers
148 of 176 people found this instruction helpful.
Was this instruction helpful to you?
Thank you for voting!

The refrigerator made continous "whooing" sounds that increased and decreased in pitch. Sounded like a ghost. Would keep us up at night. Also noticed that the heater was not heating under the evaporator coils.

After checking the stories, the consensus of opinion was to change the mother board. I had a tremendous help from Tom Paone at quality@applianceeducator.com. He also told me to change the motherboard but to make sure that the coils were totally defrosted before starting up the refrigerator after changing the board.

Took off three nuts around the board at the back of the unit. Removed the input wires and you have to push in the plastic tabs holding the board in. Then just put the new board in place and push till the tabs click. Re-install the wires and put the cover back on.

Really simple task,

It is now a week since doing this and the unit is working perfectly. No soulds and good nights sleep. The ghost has moved on.
  • John from Holly Springs, NC
  • Difficulty Level:
    Really Easy
  • Total Repair Time:
    Less than 15 mins
  • Tools:
    Nutdriver
556 of 645 people found this instruction helpful.
Was this instruction helpful to you?
Thank you for voting!
Fixes Symptom 4% of time
★★★★★
★★★★★
44 Reviews

Rated by 23 customers 


Easy 

30 - 60 mins 

Ratings submitted by customers like you who bought this part.   

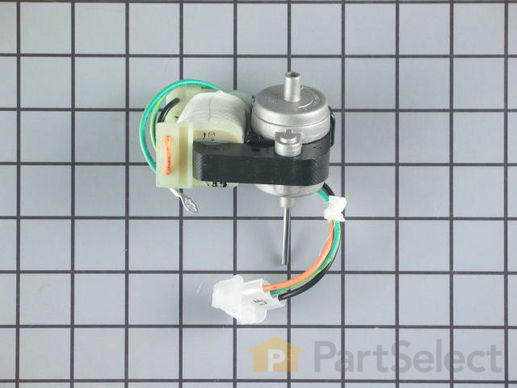
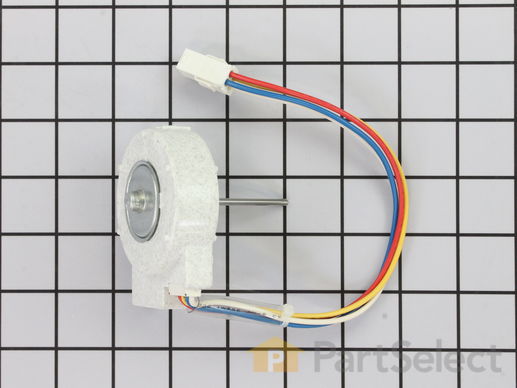
This fan motor is most times used with frost-free refrigerators with a condenser coil. When the compressor runs, so does this fan, circulating air through the refrigerator grille, cooling the compressor and condenser coils. This fan motor also helps to evaporate excess water in the drain pan.

$ 52.03
  In Stock
PartSelect Number PS1766247
Manufacturer Part Number WR60X10220

Replacing your General Electric Refrigerator Condenser Fan Motor

Replacing your Condenser Fan Motor

Customer Repair Stories

Refrigerator

The hard part was cleaning the dust around the coil and fan area. Its plug and play right after that. Two nuts on the fan housing and a wire harness snaps on and off. Bam! 1,2,3 Up and running. . Like new. . . Thank you ps
  • Robert from Cutler Bay, FL
  • Difficulty Level:
    Really Easy
  • Total Repair Time:
    15 - 30 mins
  • Tools:
    Nutdriver, Screw drivers, Wrench (Adjustable)
7 of 11 people found this instruction helpful.
Was this instruction helpful to you?
Thank you for voting!

Condenser Fan Motor stopped turning

1. Unplugged the fridge. 2. unplugged the fan connection and removed the wire holding clip. 3. removed the 2 screws holding the motor bracket in place and removed the bracket. 4. Pulled gently back on the motor so that the fan pressed against the front bracket until the fan slid off the motor shaft. 5. Pulled the rubber motor mounts off of the old motor and placed on the new motor. 6. Slide the new motor in place pressed the fan all the way onto the shaft. 7. Placed the rear motor bracket in place and started the screws by hand making sure the ground wire was attached to the furthest away screw. 8. tightened the screws down. 9. Pushed in the wire holding clip into the clip hole. 10. Plugged back in the fan. 11. Plugged back in the fridge. 12. Turned down the temp on the fridge to kick on the compressor and checked to assure the fan was operating and then set the temp back to normal. 13. Vacuumed the condenser coils to get them all clean and ready for more years of service!
  • Arthur from Alamosa, CO
  • Difficulty Level:
    Really Easy
  • Total Repair Time:
    Less than 15 mins
  • Tools:
    Socket set
14 of 15 people found this instruction helpful.
Was this instruction helpful to you?
Thank you for voting!
Fixes Symptom 2% of time
★★★★★
★★★★★
2 Reviews

Rated by 4 customers 


Easy 

30 - 60 mins 

Ratings submitted by customers like you who bought this part.   

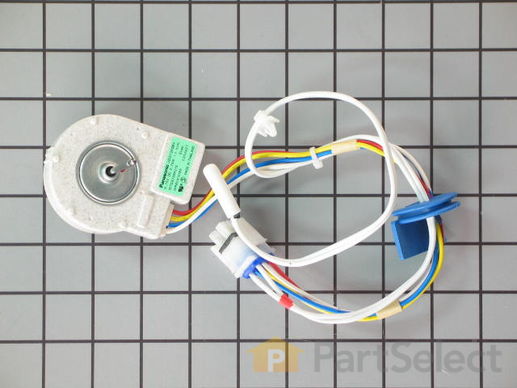
This fan motor circulates the air through the refrigerator grille and cools the compressor and condenser coils. It also helps to evaporate extra water in the drain pan.

$ 76.38
  In Stock
PartSelect Number PS1483567
Manufacturer Part Number WR60X10209

Replacing your General Electric Refrigerator DC Condenser Fan Motor - 12V

Replacing your DC Condenser Fan Motor - 12V

Customer Repair Stories

fan not running

Removed rear and front grills,brushed and vacuumed area- probably caused the fan motor to fail- unplugged fan, removed fan,motor,and shroud in 1 piece, carefully slipped fan off motor shaft, unscrewed shroud and motor. assembled in reverse order. Frige is in tight area, .I'll now roll it out and clean often
  • Ray from Bensalem, PA
  • Difficulty Level:
    A Bit Difficult
  • Total Repair Time:
    15 - 30 mins
  • Tools:
    Nutdriver, Socket set
74 of 102 people found this instruction helpful.
Was this instruction helpful to you?
Thank you for voting!

Warm freezer and no ice

This story starts with a GE side-by-side refrigerator that has always had wide temperature swings and a temperamental water dispenser. The ice maker was not making ice, and the built in digital thermometer showed it was running warm. I suspected that the heat exchanger was full of dust and so looked there. What I found was that the condenser tank was hot to the touch and the fan wasn’t running. As an experiment, I aimed a fan at the it for a while I saw that the freezer temperature dropped back to normal.
.The fan is marked as 11.2 DC so I checked for voltage at the fan and found some. With three wires and no wiring diagram I wasn’t sure this answered all the questions, but hooking the fan to a 12 volt power supply didn’t get it to spin.
I priced parts at a couple websites before using partselect.com . They also have a good diagram to look at (Sears diagrams are really poor). I ordered the part with 2-day shipping; it arrived on time, was correct and fixed the problem.
  • Paul from Suwanee, GA
  • Difficulty Level:
    Easy
  • Total Repair Time:
    30 - 60 mins
  • Tools:
    Nutdriver
94 of 125 people found this instruction helpful.
Was this instruction helpful to you?
Thank you for voting!
Fixes Symptom 1% of time
★★★★★
★★★★★
5 Reviews

Rated by 5 customers 


A Bit Difficult 

1- 2 hours 

Ratings submitted by customers like you who bought this part.   

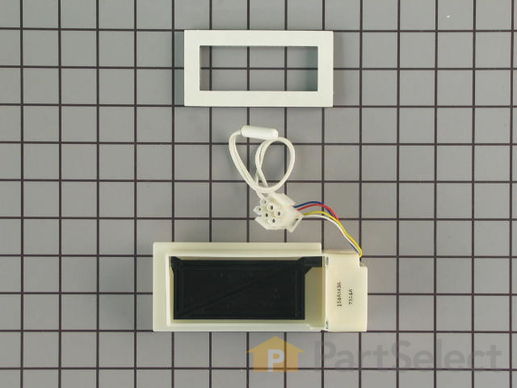
This evaporator fan motor is located in the back of the freezer, and circulates air over the refrigerator coils. These coils will convert the heat into cool air, which is then circulated. The thermistor snaps on to the top portion of the evaporator. The thermistor sends the evaporator temperature signals to the main control board. The thermistor must be replaced when replacing the evaporator fan.

$ 180.22
  In Stock
PartSelect Number PS304658
Manufacturer Part Number WR60X10074

Customer Repair Stories

Refrigerator was noisy when running. The noise increased with time and got so loud it hurt your ears with a high pitch sound.

Empy all the food from the freezer and remove the ice container and the lower ice maker section with a 1/4 inch nut driver, unplug the unit and set aside. Remove all shelving and set aside. Remove light cover and unscrew the bulb and remove. Remove cover/with light fixture by removing the necessary screws with the nut driver. The cover has the fan assembly attached; unplug and remove fan assembly, remove the thermistor from coil attached with a clip. Reassemble in the reverse procedure.
  • Randolph from Lynchburg, VA
  • Difficulty Level:
    A Bit Difficult
  • Total Repair Time:
    1- 2 hours
  • Tools:
    Nutdriver, Screw drivers, Wrench set
9 of 17 people found this instruction helpful.
Was this instruction helpful to you?
Thank you for voting!

Fan was noisy and finally quit. Top of freezer was 50, bottom of freezer was freezing.

First I removed the top shelf, ice drawer and second shelf. Next, I used a 1/4" socket and removed the three screws holding the ice maker lower unit, unpluged and removed from unit. I removed the light cover revealing two screws. I then removed the plastic unit holding the fan. I unpluged all plugs and uncliped the white sensor from the back coils. Once the fan was out, I replaced it with the new one by unbolting the fan bracket and putting the new one in place. I clipped the new sensor in place and replaced all the parts in reverse order. I saved $200 in repair costs thanks to PartSelect.com.
  • Richard from Pretty Prairie, KS
  • Difficulty Level:
    A Bit Difficult
  • Total Repair Time:
    30 - 60 mins
  • Tools:
    Nutdriver, Screw drivers, Socket set
25 of 35 people found this instruction helpful.
Was this instruction helpful to you?
Thank you for voting!
Fixes Symptom 1% of time
★★★★★
★★★★★
2 Reviews

$ 141.25
  In Stock
PartSelect Number PS288221
Manufacturer Part Number WR09X10050
Fixes Symptom 1% of time
★★★★★
★★★★★
11 Reviews

Rated by 16 customers 


Easy 

30 - 60 mins 

Ratings submitted by customers like you who bought this part.   

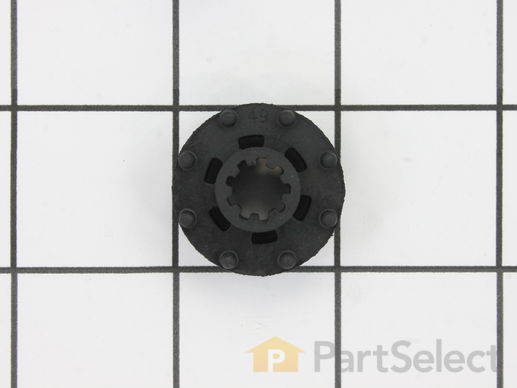
This evaporator fan motor grommet, or condenser fan grommet is built for refrigerators. It provides a cushion between the fan motor and the motor mounting bracket. It is made or round, black plastic and is approximately one inch in diameter. If your grommet is torn or damaged and you are getting noise from the fan motor, you may need to replace it. This is an OEM part sourced directly from the manufacturer.

$ 11.59
  In Stock
PartSelect Number PS284555
Manufacturer Part Number WR02X10098

Replacing your General Electric Refrigerator Evaporator/Condensor Fan Grommet

Replacing your Evaporator/Condensor Fan Grommet

Customer Repair Stories

Had a 'ticking' sound

Separately (from a different site) purchased new compressor fan and motor. I purchased the grommets here because the other site listed the grommets as temporarily out of stock. I did watch one of the videos on PartSelect about the grommet replacement. Repair was pretty simple, biggest challenge was getting to the screw on the far side of the motor. Removed the two screws holding the fan motor into place. Removed motor and blade. Reinstalled with new fan blade, new grommet and new motor.
  • John from PARKVILLE, MO
  • Difficulty Level:
    Easy
  • Total Repair Time:
    30 - 60 mins
  • Tools:
    Socket set
1 person found this instruction helpful.
Was this instruction helpful to you?
Thank you for voting!

Noisy

I didn’t do the repair because I ordered two grommets. When they arrived, one of the packages was empty! Instead of just sending me another one, they refunded the part so I still need one. By the way, I was not refunded half the shipping either which was more than the part itself.
  • Brad from SPRING MILLS, PA
  • Difficulty Level:
    Very Difficult
  • Total Repair Time:
    More than 2 hours
1 person found this instruction helpful.
Was this instruction helpful to you?
Thank you for voting!
Fixes Symptom 1% of time
★★★★★
★★★★★
2 Reviews

Rated by 26 customers 


Easy 

30 - 60 mins 

Ratings submitted by customers like you who bought this part.   

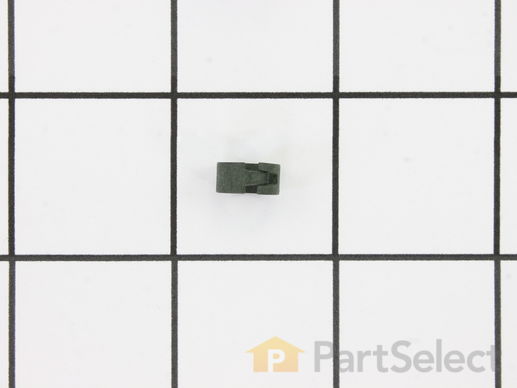
This compression ring is meant to hold the evaporator fan motor in place in the freezer compartment of your refrigerator. This is is a genuine OEM part. The tools needed to complete this repair are a Phillips screw driver and small flat blade screw driver. Be sure to turn off your refrigerator before removing the evaporator fan cover so the fan does not turn on during repair. It is recommended to check the grommets, evaporator fan, and fan blades during repair in case they also need replacning. The compression ring may need replacing if the fan is noisy, or the refrigerator compartments are too warm. This part is sold individually.

$ 9.88
  In Stock
PartSelect Number PS1015726
Manufacturer Part Number WR02X12149

Replacing your General Electric Refrigerator Compression Ring

Replacing your Compression Ring
Fixes Symptom less than 1% of time
★★★★★
★★★★★
9 Reviews

Rated by 12 customers 


Easy 

30 - 60 mins 

Ratings submitted by customers like you who bought this part.   

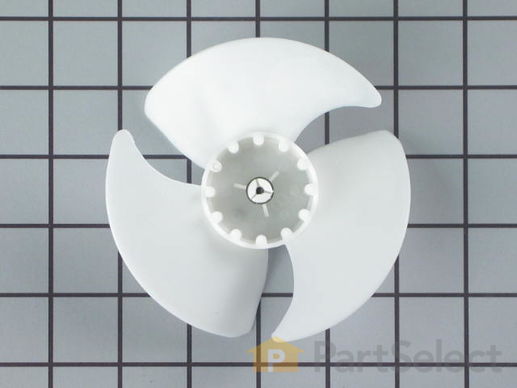
This evaporator fan blade is for your refrigerator, and it circulates air so that the temperature of the fridge is regulated. This model has 3 blades, and is a little more than 4 inches in diameter. It is made of white plastic and is sold individually. If your refrigerator is noisy and you hear a clicking sound, it is a good indication that the evaporator fan blade is warped or damaged. If the fridge or freezer sections become too warm, the fan could be to blame as well.

$ 72.79
  In Stock
PartSelect Number PS12730613
Manufacturer Part Number WR60X30922

Customer Repair Stories

Ice built up around evaporator fan blades and blades chipped and broke. Refrigerator was making loud vibrating noises.

Removed ice bucket, and unplugged ice maker. Removed light cover. Removed ice maker. Pulled fan blades straight up and removed. Pushed new blades on to motor shaft. Fairly easy .
  • David from KNOXVILLE, TN
  • Difficulty Level:
    Really Easy
  • Total Repair Time:
    15 - 30 mins
  • Tools:
    Nutdriver
1 person found this instruction helpful.
Was this instruction helpful to you?
Thank you for voting!

INTERMITENT LOUD NOISE FROM EVAPORATOR FAN IN FREEZER

The repair did not go exactly the way it was described in the YouTube video, but basically it was similar. After unplugging the power cord, emptying the freezer, removing the shelves and the ice reservoir, I removed the ice maker assembly by unscrewing a Philips head screw and unplugging the power connector. The connector had little retaining tabs on each side that I pried open with a straight blade screwdriver. Then the ice maker lifted right out. Next I removed one screw holding the auger motor assembly, unplugged the power connector, and lifted out the assembly. This where things got difficult. After flailing around a bit, I removed the panel on the back wall of the freezer below the evaporator fan assembly, exposing the evaporator coil. I saw that the fan assembly was attached with two screws at the top and two screws at the bottom. The top screws were easily removed, but when I removed the bottom screws, which were situated in very tight quarters, I DROPPED BOTH SCREWS DOWN BEHIND THE EVAPORATOR COIL. Be prepared with a magnetic nutdriver so this doesn't happen to you. I could not retrieve the lost screws, but fortunately it appears that the top screws hold the assembly securely enough. The assembly was loose, but it was still attached by a power cord that I could not disconnect. I removed the tracks on the side walls for the ice bucket, and then I could maneuver the fan motor assembly just enough that I could reach over the top of it, grab and pull off the old fan blade, and slide the new fan blade onto the shaft. Reassembly was straightforward, replacing each part (except two lost screws) in reverse order to disassembly. After getting everything put back in and plugging in the power cord, I was amazed at how quiet it ran.
  • Bert from SAN JOSE, CA
  • Difficulty Level:
    A Bit Difficult
  • Total Repair Time:
    30 - 60 mins
  • Tools:
    Nutdriver, Screw drivers
4 of 4 people found this instruction helpful.
Was this instruction helpful to you?
Thank you for voting!
Fixes Symptom less than 1% of time
★★★★★
★★★★★
1 Review

Rated by 1 customer 


Very Easy 

15 - 30 mins 

Ratings submitted by customers like you who bought this part.   

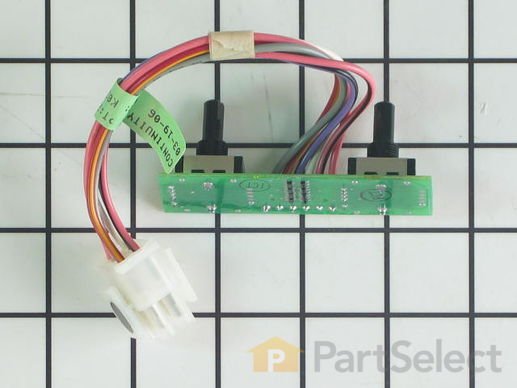
Also known as Control Board and Harness.

$ 114.92
  In Stock
PartSelect Number PS304206
Manufacturer Part Number WR55X10150

Customer Repair Stories

Refrigerator compressor would not start

After on two occessions from a refrigeration man who did not fix it I decided to work on it myself. Knowing it was not the overload relay or capacitor I changed the temperature control board but without success, next I took the main control biard, located on the back lower left off for inspection and found that there was a contact terminal on one of the relays melted, after resouldering contact I reinstaled the board and then plug back my refrigerator into the outlet and there it goes like brand new. It was quite easy and quick to do because the board has precisely matching plug-in-terminal wiring harness, for diconnect and reconnect, very smart way. To remove cover for access, take board off, fix and replace, it took me aproxmately fifteen minuites, only using a quarter inch stud driver. Great way. So thrust yourself and save some $Bucks. Reynold.
  • Reynold from Dacula, GA
  • Difficulty Level:
    Really Easy
  • Total Repair Time:
    15 - 30 mins
  • Tools:
    Nutdriver
Was this instruction helpful to you?
Thank you for voting!

Fan not working properly because temperature controldamage

Replace the temperature control and the fan
  • GERARDO from rialto, CA
  • Difficulty Level:
    Very Easy
  • Total Repair Time:
    15 - 30 mins
  • Tools:
    Screw drivers, Socket set
1 person found this instruction helpful.
Was this instruction helpful to you?
Thank you for voting!
Fixes Symptom less than 1% of time
★★★★★
★★★★★
3 Reviews

Rated by 2 customers 


Really Easy 

30 - 60 mins 

Ratings submitted by customers like you who bought this part.   

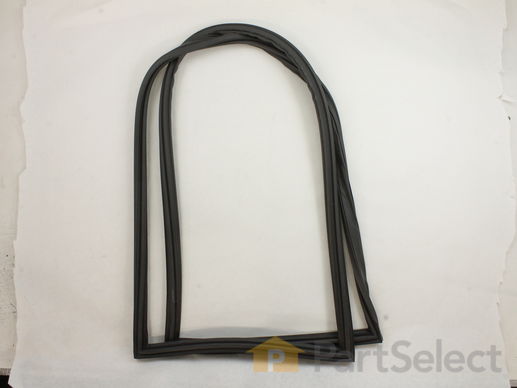
This door gasket is used to seal the refrigerator door when closed to keep the cool air inside and the room air out.

$ 136.88
  In Stock
PartSelect Number PS10063443
Manufacturer Part Number WR24X23250

Customer Repair Stories

Refrigerator leaking cold air

My son changed the gasket for me. He used a spatula to remove the gasket, cleaned, and re-applied the new gasket.
If you need help and live close to 77082 you can call him. He charges $50.00. Carlos 832-967-8582.
Thanks,
  • EMMA from HOUSTON, TX
  • Difficulty Level:
    Really Easy
  • Total Repair Time:
    15 - 30 mins
2 of 2 people found this instruction helpful.
Was this instruction helpful to you?
Thank you for voting!
Fixes Symptom less than 1% of time
★★★★★
★★★★★
2 Reviews

Rated by 14 customers 


Easy 

30 - 60 mins 

Ratings submitted by customers like you who bought this part.   

The lid bumper or evaporator fan motor bumper in your refrigerator prevents the fan motor from scraping against the side bracket. If your refrigerator/freezer is noisy, the bumper could be worn down or missing, and the sound could be a result of the motor scraping the side bracket. You will find it between the fan motor and the side bracket on the evaporator fan motor assembly. To access the bumper, you will need to remove the evaporator fan motor assembly from the freezer. This part is made of orange rubber and is less than half an inch in diameter. It has a rounded top and a slightly pointed bottom, and is sold individually.

$ 10.97
  In Stock
PartSelect Number PS284979
Manufacturer Part Number WR02X10540

Replacing your General Electric Refrigerator Lid Bumper

Replacing your Lid Bumper

Customer Repair Stories

noisy refrigerator

I followed your video and completely dismantled the refrigerator evaporator motor, fan, brackets, and grommet, I completely cleaned the refrigerator including the cooling coils. I then ordered the evaporator motor ,fan, grommets, lid bumper, and brackets. The order would take a week to arrive. In the meantime I cleaned and reassembled all the old parts, waiting for the new ones to come. Guess what! The refrigerator was quiet as a mouse. I really did not need the new parts, but I kept them anyway just for good luck. Not bad for a refrigerator that's twenty four years old.
  • James from NEW YORK, NY
  • Difficulty Level:
    Easy
  • Total Repair Time:
    1- 2 hours
  • Tools:
    Nutdriver, Pliers, Screw drivers, Socket set
1 person found this instruction helpful.
Was this instruction helpful to you?
Thank you for voting!

Defroster fan burned up

First I removed the ice tray rack lifting it out of the way to reach the back cover of the fan. Then, the whole back inside panel had to be removed. Two screws removed the fan and bracket from the freezer unit. The missing bumper lid just snapped into place. Replaced everything in reverse order. Pretty easy job.
  • Peter M. from Lincoln Park, NJ
  • Difficulty Level:
    Easy
  • Total Repair Time:
    30 - 60 mins
  • Tools:
    Nutdriver, Pliers, Screw drivers, Socket set
3 of 6 people found this instruction helpful.
Was this instruction helpful to you?
Thank you for voting!
Fixes Symptom less than 1% of time
★★★★★
★★★★★
2 Reviews

Rated by 9 customers 


Easy 

30 - 60 mins 

Ratings submitted by customers like you who bought this part.   

This is a replacement evaporator fan grommet for your refrigerator. The fan grommet absorbs the vibration from the evaporator fan motor for quiet operation while it runs. If your evaporator fan is unusually noisy, it could be because the grommet is damaged. This grommet is made of grey plastic and is approximately one inch in diameter. To access the fan grommet and complete this repair, you will need to remove the evaporator fan motor assembly. This part is sold individually.

$ 8.06
  In Stock
PartSelect Number PS773826
Manufacturer Part Number WR02X11331

Customer Repair Stories

Loud Squeal when fan was running

WE (WIFE) took out the old parts an replaced with new one ..Be careful to get the placement of the Grommet or they "POP" out on you. fast ship on the parts too.
  • Daniel from BURNEY, CA
  • Difficulty Level:
    Easy
  • Total Repair Time:
    30 - 60 mins
  • Tools:
    Nutdriver, Socket set
1 person found this instruction helpful.
Was this instruction helpful to you?
Thank you for voting!

Squeky Evaporator Fan

I made my wife fix it.
  • Douglas from LAFAYETTE, LA
  • Difficulty Level:
    Really Easy
  • Total Repair Time:
    30 - 60 mins
  • Tools:
    Screw drivers
2 of 2 people found this instruction helpful.
Was this instruction helpful to you?
Thank you for voting!
Fixes Symptom less than 1% of time
★★★★★
★★★★★
59 Reviews

Rated by 25 customers 


Really Easy 

Less than 15 mins 

Ratings submitted by customers like you who bought this part.   

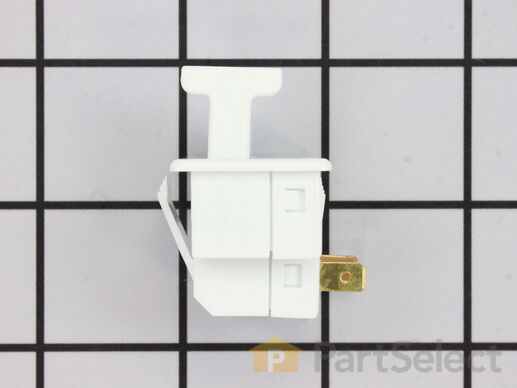
The interior light of your refrigerator is controlled by a switch that is activated when the door is opened and closed. If your refrigerator light will not turn on, there could be an issue with the switch. The switch is spring loaded and is a generally closed type of switch meaning there should be no continuity when the button is depressed, and continuity through the switch when the button is not depressed. This plastic, white, OEM switch is sourced directly from the manufacturer, is sold individually and is easy to replace. The repair usually takes less than 15 minutes and requires a flat blade screwdriver and needle nose pliers.

$ 8.56
  In Stock
PartSelect Number PS8758429
Manufacturer Part Number WR23X10725

Replacing your General Electric Refrigerator Light Switch

Replacing your Light Switch

Customer Repair Stories

The refrigirator light would not come on.

Poped out with screwdriver the old swithch and unplugged the two wires. Plugged in the wires to the new swithch and pushed it back in the hole where the old switch was before.
  • Jania from Novato, CA
  • Difficulty Level:
    Really Easy
  • Total Repair Time:
    Less than 15 mins
  • Tools:
    Screw drivers
24 of 38 people found this instruction helpful.
Was this instruction helpful to you?
Thank you for voting!

Sticking Light Switch

I applied some tips learned by reading other reviews. So before I started I grabbed my trusty vise grip pliers and a small screw driver. I locked onto the switch actuator, the part that the refrigerator door pushes in, with the vise grips and pulled on it just hard enough to get the screw driver inserted in the right side to push in the catch clip so the switch could be pulled out further each time the catch clip was depressed to the next detent. Then I used the screw driver on the left site to encourage the switch past the detents on the left and very quickly the switch was out of the mount. The wires from the refrigerator pulled out with the old switch. I unplugged the old switch from the wires and plugged in the new switch and shoved the new switch back into the mount, wiggled it a couple of times to make sure it was secure and the job was done. Once I applied the vise gripes at first, the whole job took less than a minute.
  • Jonathan from Lilburn, GA
  • Difficulty Level:
    Really Easy
  • Total Repair Time:
    Less than 15 mins
  • Tools:
    Pliers, Screw drivers
116 of 144 people found this instruction helpful.
Was this instruction helpful to you?
Thank you for voting!
Fixes Symptom less than 1% of time
★★★★★
★★★★★
87 Reviews

Rated by 72 customers 


Easy 

30 - 60 mins 

Ratings submitted by customers like you who bought this part.   

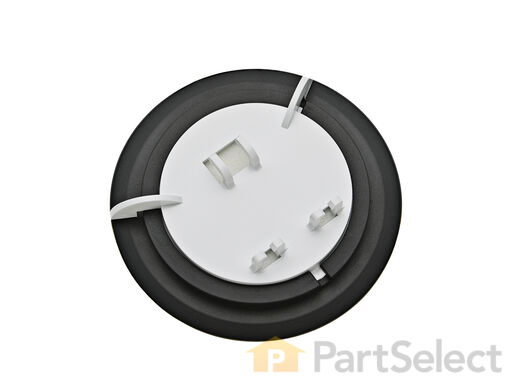
This “Dispenser Door Assembly” (Door Recess Assembly, Ice Door Assembly, Dispenser Door, Refrigerator Dispenser Ice Chute Door Kit, Dispenser Door Flap, Ice Chute Door, Flapper) keeps the room air from infiltrating the freezer. Once the lever is pressed, the door flap opens and allows the ice to dispense into your container. If your door flapper is broken, it could allow outside air to enter the freezer and alter the inside temperature. You may notice frost buildup surrounding the dispenser area. The door flap can disconnect from the dispenser lever, or the tabs that hold it in place may break. Frequent use may distort the sealing face and cause air leaks and frost buildup. This part mounts in the ice dispenser, and measures approximately 3.25 inches in diameter. It is constructed of plastic and rubber, and comes in white/black. This part is sold individually.

$ 15.58
  In Stock
PartSelect Number PS964304
Manufacturer Part Number WR17X11653

Replacing your General Electric Refrigerator Dispenser Door Assembly or Flapper

Replacing your Dispenser Door Assembly or Flapper

Customer Repair Stories

Flapper not sealing. Frost buildup on inside of freezer door

Followed previous instructions from a previous post. Inserted small screwdriver in the 2 outer holes up under the face plate to remove it then removed 4 screws holding the inner assembly which allowed access to the flapper assembly. Replaced it and reassembled everything. Problem solved
  • D from ZELLWOOD, FL
  • Difficulty Level:
    Easy
  • Total Repair Time:
    15 - 30 mins
  • Tools:
    Screw drivers
15 of 16 people found this instruction helpful.
Was this instruction helpful to you?
Thank you for voting!

This seems to be a design problem because I have to replace this part about every other year since we bought it. I tried to talk to GE but all they want to do is send a service man out to replace the part for about 100.00, But I do it for around 15.00. I just think they should find out why the rubbe

The repair is easy, just pop the grill off around the ice and water door, then there are 4 screwws to take out so the touch pad can be moved out of the way to unsnap the old door assm. and snap in the new one and wait about a year and a hald to order another one!!!!!
  • Jeff from Columbia City, IN
  • Difficulty Level:
    Really Easy
  • Total Repair Time:
    Less than 15 mins
  • Tools:
    Screw drivers
26 of 35 people found this instruction helpful.
Was this instruction helpful to you?
Thank you for voting!
Fixes Symptom less than 1% of time
★★★★★
★★★★★
76 Reviews

Rated by 62 customers 


Really Easy 

15 - 30 mins 

Ratings submitted by customers like you who bought this part.   

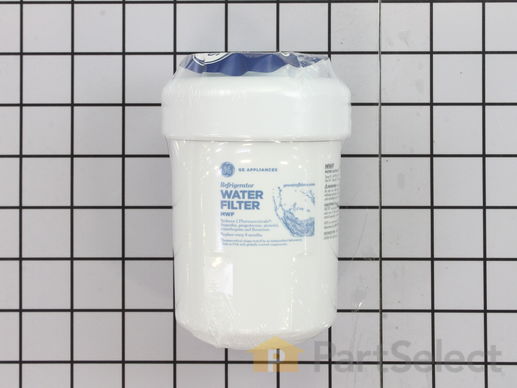
This OEM ice and water filter fits side-by-side and bottom-freezer GE models. The most common reason you would need to change this part is if you have never updated your model and it is no longer filtering your water. This also may lead to your refrigerator not dispensing water or ice properly. Manufacturers recommend you change your filter every six months to ensure it properly filters impurities. Depending on the model, a red light might also indicate that the filter is due for a replacement. Note: As per the manufacturer, this is an updated water filter. If you have never installed the updated part or your old model was made by Culligan, you may need the adapter to install the filter. See related parts. This filter is located inside the refrigerators upper right corner. It is common for water to drip from the dispenser when being changed so place a cloth underneath before you begin this repair. To remove the filter, turn it to the left until it releases without pulling down. Fill the new filter with tap water to prepare it. Position the new filter into the holder taking note of the arrows. The arrow on the front should be facing out. Gently push up on the filter and turn it to the right to secure it. Do not over-tighten. To release air in the system run 1-1/2 gallons of water through it. If your model has a reset button, press and hold this for a few seconds to reset it.

$ 73.07
  In Stock
PartSelect Number PS8746144
Manufacturer Part Number MWFP

Replacing your General Electric Refrigerator Refrigerator Ice and Water Filter

Replacing your Refrigerator Ice and Water Filter

Customer Repair Stories

water running slow

unscrewed old filter by hand, installed new filter.
  • David from Tacoma, WA
  • Difficulty Level:
    Really Easy
  • Total Repair Time:
    Less than 15 mins
35 of 57 people found this instruction helpful.
Was this instruction helpful to you?
Thank you for voting!

Replace water filter

Unscrew old filter and remove(counterclockwise). Line up arrow on new filter with arrow on connection housing. Turn clockwise till resistance met. Do not overtighten. Follow directions. Simple.
  • Alfred from Novato, CA
  • Difficulty Level:
    Really Easy
  • Total Repair Time:
    Less than 15 mins
224 of 338 people found this instruction helpful.
Was this instruction helpful to you?
Thank you for voting!