Models > GSE25GSHKCSS > Symptoms > Noisy

Parts That Fix General Electric Refrigerator GSE25GSHKCSS Noisy

Noisy is a commonly reported symptom for the GSE25GSHKCSS General Electric Refrigerator, and we have put together a full guide on how to fix this. This advice is based on feedback from people who own this exact appliance. We have listed the most common parts for your GSE25GSHKCSS General Electric Refrigerator that will fix Noisy. We have included repair instructions, and helpful step-by-step video tutorials. If you are experiencing this issue, not to worry, DIYers just like you have fixed this, and shared their experience to help you!

Fixes Symptom 55% of time
★★★★★
★★★★★
135 Reviews

Rated by 47 customers 


Really Easy 

30 - 60 mins 

Ratings submitted by customers like you who bought this part.   

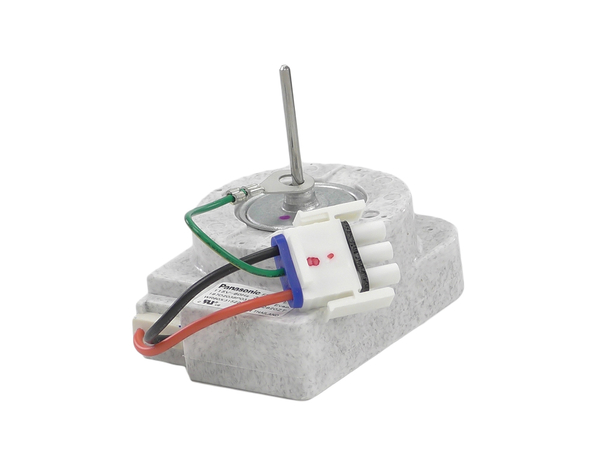
This 115-volt 60Hz evaporator fan motor is located in the back of the freezer and circulates air over the refrigerator coils. These coils will convert the heat into cool air, which is then circulated. If the motor has failed, the freezer/refrigerator will become too warm because the fan motor is not circulating the cool air from the freezer into the refrigerator. This is a genuine OEM part. Please remember to disconnect the power to the appliance before starting your repair.

$ 74.43
  In Stock
PartSelect Number PS12741350
Manufacturer Part Number WR60X31522

Replacing your General Electric Refrigerator Evaporator Fan Motor

Replacing your Evaporator Fan Motor

Customer Repair Stories

Loud Fan Motor

Unplug refrigerator.Remove the floor of the freezer box by removing the 4 philips head screws. Remove the cover over the fan by pulling it straight up and out. Remove the styrafoam duct by pulling it straight up and out. Remove the back wall of the freezer by removing the 4 philips head screws. Unplug fan. Remove the fan, bracket and all, by removing the two philips head screws on the back wall. Take the two halves of the bracket appart by removing the two hex head scews on the back of the bracket. Remove the "O" ring from the fan blade and remove the blade. There is a rubber grommet on both the front and back halves of the bracket. Make sure they are set properly in the brackets to secure and position the motor properly so the fan blade doesn't hit anything when it spins. Install the new motor onto the bracket the same way you took the old one off. Check the positions of the brackets, rubber grommets and motor to make sure they're properly installed and secure. Replace the "O" ring onto the fan blade and install it onto the new motor with a firm push on the center of the blade. Install the brackets and fan onto the back wall and plug in the new motor. Reinstall the back wall of the freezer box and make sure the motor is secure. Plug the refrigerator back in and check to make sure the fan blade doesn't hit anything while it's turning. Finish reassembling the freezer box.
  • Arthur from East Meadow, NY
  • Difficulty Level:
    Easy
  • Total Repair Time:
    30 - 60 mins
  • Tools:
    Nutdriver, Screw drivers
47 of 50 people found this instruction helpful.
Was this instruction helpful to you?
Thank you for voting!

Freezer Fan

I removed two srews from the back panel inside fthe reezer compartment and the two that hold the air manifold/baffle? and pulled the baffle out. Then, I removed the two srews that hold the front part of the fan bracket behind the baffle and the back panel came out easily. Two more screws and one quick connect plug attached to the fan and I was done with removal. Insallation was even quicker, I slid the original fan right off the old motor and slid it on the new motor's shaft. Piece of cake! Thanks Partselect.
  • Luis from College Station, TX
  • Difficulty Level:
    Really Easy
  • Total Repair Time:
    15 - 30 mins
  • Tools:
    Screw drivers, Socket set
255 of 278 people found this instruction helpful.
Was this instruction helpful to you?
Thank you for voting!
Fixes Symptom 13% of time
★★★★★
★★★★★
2 Reviews

Rated by 26 customers 


Easy 

30 - 60 mins 

Ratings submitted by customers like you who bought this part.   

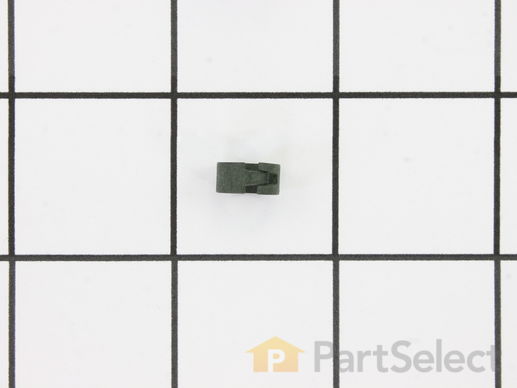
This compression ring is meant to hold the evaporator fan motor in place in the freezer compartment of your refrigerator. This is is a genuine OEM part. The tools needed to complete this repair are a Phillips screw driver and small flat blade screw driver. Be sure to turn off your refrigerator before removing the evaporator fan cover so the fan does not turn on during repair. It is recommended to check the grommets, evaporator fan, and fan blades during repair in case they also need replacning. The compression ring may need replacing if the fan is noisy, or the refrigerator compartments are too warm. This part is sold individually.

$ 9.88
  In Stock
PartSelect Number PS1015726
Manufacturer Part Number WR02X12149

Replacing your General Electric Refrigerator Compression Ring

Replacing your Compression Ring
Fixes Symptom 10% of time
★★★★★
★★★★★
9 Reviews

Rated by 12 customers 


Easy 

30 - 60 mins 

Ratings submitted by customers like you who bought this part.   

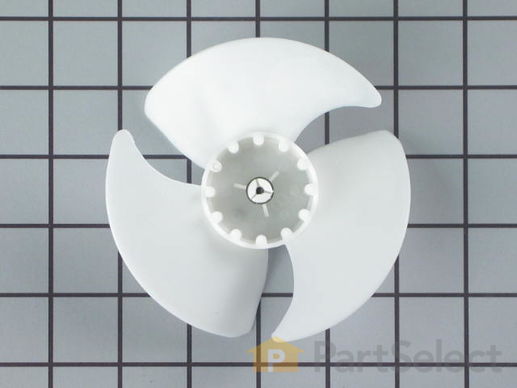
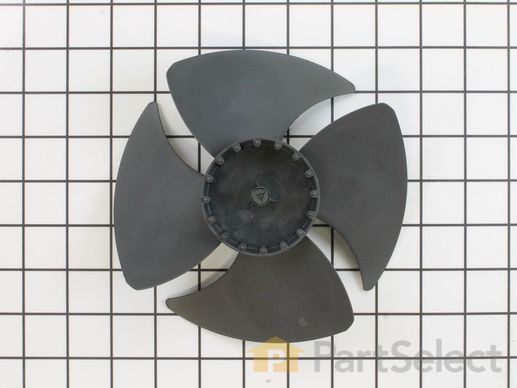
This evaporator fan blade is for your refrigerator, and it circulates air so that the temperature of the fridge is regulated. This model has 3 blades, and is a little more than 4 inches in diameter. It is made of white plastic and is sold individually. If your refrigerator is noisy and you hear a clicking sound, it is a good indication that the evaporator fan blade is warped or damaged. If the fridge or freezer sections become too warm, the fan could be to blame as well.

$ 72.79
  In Stock
PartSelect Number PS12730613
Manufacturer Part Number WR60X30922

Customer Repair Stories

Ice built up around evaporator fan blades and blades chipped and broke. Refrigerator was making loud vibrating noises.

Removed ice bucket, and unplugged ice maker. Removed light cover. Removed ice maker. Pulled fan blades straight up and removed. Pushed new blades on to motor shaft. Fairly easy .
  • David from KNOXVILLE, TN
  • Difficulty Level:
    Really Easy
  • Total Repair Time:
    15 - 30 mins
  • Tools:
    Nutdriver
1 person found this instruction helpful.
Was this instruction helpful to you?
Thank you for voting!

INTERMITENT LOUD NOISE FROM EVAPORATOR FAN IN FREEZER

The repair did not go exactly the way it was described in the YouTube video, but basically it was similar. After unplugging the power cord, emptying the freezer, removing the shelves and the ice reservoir, I removed the ice maker assembly by unscrewing a Philips head screw and unplugging the power connector. The connector had little retaining tabs on each side that I pried open with a straight blade screwdriver. Then the ice maker lifted right out. Next I removed one screw holding the auger motor assembly, unplugged the power connector, and lifted out the assembly. This where things got difficult. After flailing around a bit, I removed the panel on the back wall of the freezer below the evaporator fan assembly, exposing the evaporator coil. I saw that the fan assembly was attached with two screws at the top and two screws at the bottom. The top screws were easily removed, but when I removed the bottom screws, which were situated in very tight quarters, I DROPPED BOTH SCREWS DOWN BEHIND THE EVAPORATOR COIL. Be prepared with a magnetic nutdriver so this doesn't happen to you. I could not retrieve the lost screws, but fortunately it appears that the top screws hold the assembly securely enough. The assembly was loose, but it was still attached by a power cord that I could not disconnect. I removed the tracks on the side walls for the ice bucket, and then I could maneuver the fan motor assembly just enough that I could reach over the top of it, grab and pull off the old fan blade, and slide the new fan blade onto the shaft. Reassembly was straightforward, replacing each part (except two lost screws) in reverse order to disassembly. After getting everything put back in and plugging in the power cord, I was amazed at how quiet it ran.
  • Bert from SAN JOSE, CA
  • Difficulty Level:
    A Bit Difficult
  • Total Repair Time:
    30 - 60 mins
  • Tools:
    Nutdriver, Screw drivers
4 of 4 people found this instruction helpful.
Was this instruction helpful to you?
Thank you for voting!
Fixes Symptom 8% of time
★★★★★
★★★★★
2 Reviews

Rated by 14 customers 


Easy 

30 - 60 mins 

Ratings submitted by customers like you who bought this part.   

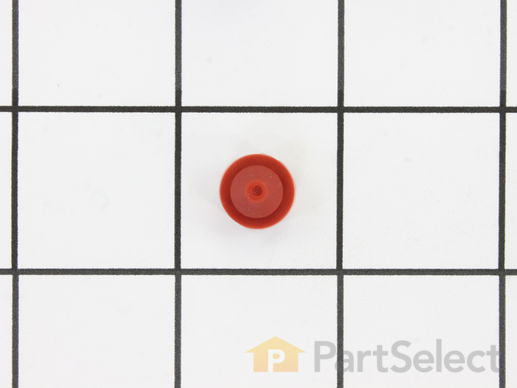
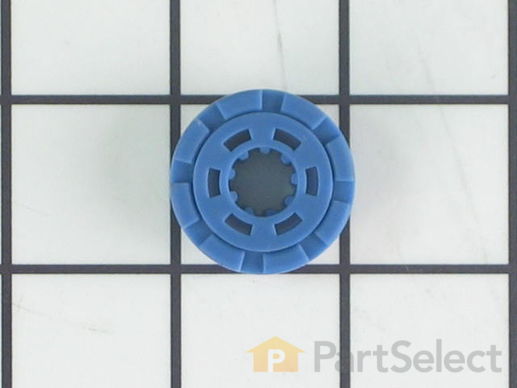
The lid bumper or evaporator fan motor bumper in your refrigerator prevents the fan motor from scraping against the side bracket. If your refrigerator/freezer is noisy, the bumper could be worn down or missing, and the sound could be a result of the motor scraping the side bracket. You will find it between the fan motor and the side bracket on the evaporator fan motor assembly. To access the bumper, you will need to remove the evaporator fan motor assembly from the freezer. This part is made of orange rubber and is less than half an inch in diameter. It has a rounded top and a slightly pointed bottom, and is sold individually.

$ 10.97
  In Stock
PartSelect Number PS284979
Manufacturer Part Number WR02X10540

Replacing your General Electric Refrigerator Lid Bumper

Replacing your Lid Bumper

Customer Repair Stories

noisy refrigerator

I followed your video and completely dismantled the refrigerator evaporator motor, fan, brackets, and grommet, I completely cleaned the refrigerator including the cooling coils. I then ordered the evaporator motor ,fan, grommets, lid bumper, and brackets. The order would take a week to arrive. In the meantime I cleaned and reassembled all the old parts, waiting for the new ones to come. Guess what! The refrigerator was quiet as a mouse. I really did not need the new parts, but I kept them anyway just for good luck. Not bad for a refrigerator that's twenty four years old.
  • James from NEW YORK, NY
  • Difficulty Level:
    Easy
  • Total Repair Time:
    1- 2 hours
  • Tools:
    Nutdriver, Pliers, Screw drivers, Socket set
1 person found this instruction helpful.
Was this instruction helpful to you?
Thank you for voting!

Defroster fan burned up

First I removed the ice tray rack lifting it out of the way to reach the back cover of the fan. Then, the whole back inside panel had to be removed. Two screws removed the fan and bracket from the freezer unit. The missing bumper lid just snapped into place. Replaced everything in reverse order. Pretty easy job.
  • Peter M. from Lincoln Park, NJ
  • Difficulty Level:
    Easy
  • Total Repair Time:
    30 - 60 mins
  • Tools:
    Nutdriver, Pliers, Screw drivers, Socket set
3 of 6 people found this instruction helpful.
Was this instruction helpful to you?
Thank you for voting!
Fixes Symptom 5% of time
★★★★★
★★★★★
2 Reviews

Rated by 9 customers 


Easy 

30 - 60 mins 

Ratings submitted by customers like you who bought this part.   

This is a replacement evaporator fan grommet for your refrigerator. The fan grommet absorbs the vibration from the evaporator fan motor for quiet operation while it runs. If your evaporator fan is unusually noisy, it could be because the grommet is damaged. This grommet is made of grey plastic and is approximately one inch in diameter. To access the fan grommet and complete this repair, you will need to remove the evaporator fan motor assembly. This part is sold individually.

$ 8.06
  In Stock
PartSelect Number PS773826
Manufacturer Part Number WR02X11331

Customer Repair Stories

Loud Squeal when fan was running

WE (WIFE) took out the old parts an replaced with new one ..Be careful to get the placement of the Grommet or they "POP" out on you. fast ship on the parts too.
  • Daniel from BURNEY, CA
  • Difficulty Level:
    Easy
  • Total Repair Time:
    30 - 60 mins
  • Tools:
    Nutdriver, Socket set
1 person found this instruction helpful.
Was this instruction helpful to you?
Thank you for voting!

Squeky Evaporator Fan

I made my wife fix it.
  • Douglas from LAFAYETTE, LA
  • Difficulty Level:
    Really Easy
  • Total Repair Time:
    30 - 60 mins
  • Tools:
    Screw drivers
2 of 2 people found this instruction helpful.
Was this instruction helpful to you?
Thank you for voting!
Fixes Symptom 4% of time

Rated by 6 customers 


Easy 

30 - 60 mins 

Ratings submitted by customers like you who bought this part.   

$ 16.69
  In Stock
PartSelect Number PS284777
Manufacturer Part Number WR02X10322
Fixes Symptom 2% of time
★★★★★
★★★★★
2 Reviews

Rated by 4 customers 


Easy 

30 - 60 mins 

Ratings submitted by customers like you who bought this part.   

This fan motor circulates the air through the refrigerator grille and cools the compressor and condenser coils. It also helps to evaporate extra water in the drain pan.

$ 76.38
  In Stock
PartSelect Number PS1483567
Manufacturer Part Number WR60X10209

Replacing your General Electric Refrigerator DC Condenser Fan Motor - 12V

Replacing your DC Condenser Fan Motor - 12V

Customer Repair Stories

fan not running

Removed rear and front grills,brushed and vacuumed area- probably caused the fan motor to fail- unplugged fan, removed fan,motor,and shroud in 1 piece, carefully slipped fan off motor shaft, unscrewed shroud and motor. assembled in reverse order. Frige is in tight area, .I'll now roll it out and clean often
  • Ray from Bensalem, PA
  • Difficulty Level:
    A Bit Difficult
  • Total Repair Time:
    15 - 30 mins
  • Tools:
    Nutdriver, Socket set
74 of 102 people found this instruction helpful.
Was this instruction helpful to you?
Thank you for voting!

Warm freezer and no ice

This story starts with a GE side-by-side refrigerator that has always had wide temperature swings and a temperamental water dispenser. The ice maker was not making ice, and the built in digital thermometer showed it was running warm. I suspected that the heat exchanger was full of dust and so looked there. What I found was that the condenser tank was hot to the touch and the fan wasn’t running. As an experiment, I aimed a fan at the it for a while I saw that the freezer temperature dropped back to normal.
.The fan is marked as 11.2 DC so I checked for voltage at the fan and found some. With three wires and no wiring diagram I wasn’t sure this answered all the questions, but hooking the fan to a 12 volt power supply didn’t get it to spin.
I priced parts at a couple websites before using partselect.com . They also have a good diagram to look at (Sears diagrams are really poor). I ordered the part with 2-day shipping; it arrived on time, was correct and fixed the problem.
  • Paul from Suwanee, GA
  • Difficulty Level:
    Easy
  • Total Repair Time:
    30 - 60 mins
  • Tools:
    Nutdriver
94 of 125 people found this instruction helpful.
Was this instruction helpful to you?
Thank you for voting!
Fixes Symptom 1% of time
★★★★★
★★★★★
2 Reviews

Rated by 2 customers 


Easy 

30 - 60 mins 

Ratings submitted by customers like you who bought this part.   

$ 33.78
  In Stock
PartSelect Number PS11726966
Manufacturer Part Number WR60X24484
Fixes Symptom 1% of time
★★★★★
★★★★★
3 Reviews

Rated by 2 customers 


Really Easy 

30 - 60 mins 

Ratings submitted by customers like you who bought this part.   

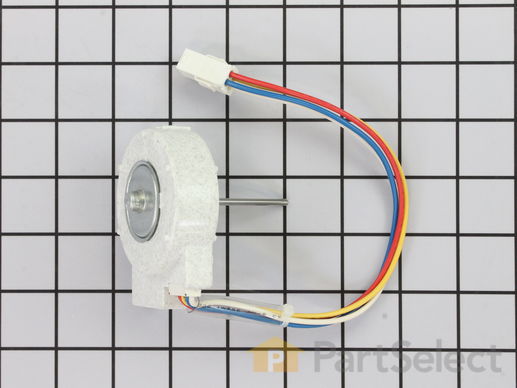
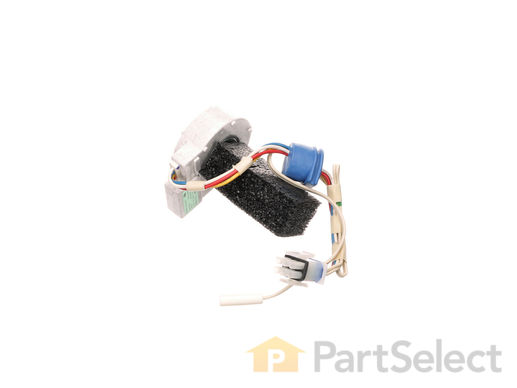
Includes the wiring harness and thermistor. This evaporator fan motor is located in the back of the freezer, and circulates air over the refrigerator coils. These coils will convert the heat into cool air, which is then circulated.

$ 208.68
  In Stock
PartSelect Number PS2364950
Manufacturer Part Number WR60X10307

Replacing your General Electric Refrigerator Evaporator Fan Motor

Replacing your Evaporator Fan Motor

Customer Repair Stories

Fan not working

Take off all , then install.. following the version..
  • JIAN from Brooklyn, NY
  • Difficulty Level:
    Really Easy
  • Total Repair Time:
    30 - 60 mins
  • Tools:
    Socket set
3 of 4 people found this instruction helpful.
Was this instruction helpful to you?
Thank you for voting!
Fixes Symptom 1% of time
★★★★★
★★★★★
7 Reviews

Rated by 14 customers 


Really Easy 

30 - 60 mins 

Ratings submitted by customers like you who bought this part.   

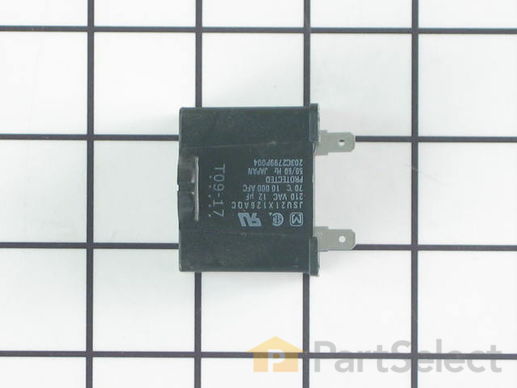
This part helps the compressor kick on and off while maintaining a constant temperature to keep things frozen in your freezer. This part has been updated by the manufacturer and may appear different than the original, but should function the same.

$ 108.60
  In Stock
PartSelect Number PS11764031
Manufacturer Part Number WR55X24064

Replacing your General Electric Refrigerator Run Capacitor

Replacing your Run Capacitor

Customer Repair Stories

Refrigerator to warm

Instructions say run capacitor is by motor, but on this frige its in the refrigerator compartment. The capacitors looks different, one square and the other long
  • Lloyd from PITTSBURG, CA
  • Difficulty Level:
    Easy
  • Total Repair Time:
    15 - 30 mins
  • Tools:
    Screw drivers
5 of 5 people found this instruction helpful.
Was this instruction helpful to you?
Thank you for voting!

Freezer not getting cold enough to freeze ice cream

I took the advice off of your website about the only thing that will fix
the problem is change the run capacitor. I felt assured that I would
have a working refrigerator freezer after making this change. I was
pretty disheartened when it didn`t solve anything. I was not going to
take the new part back out after the small challenge of putting it in.
The next day I found out how to test the old capacitor and it was still
good. I will just have to eat the $49. I did learn not to take advice from
a website even if it seems like a sure thing
  • Gary from ROSETO, PA
  • Difficulty Level:
    A Bit Difficult
  • Total Repair Time:
    30 - 60 mins
  • Tools:
    Screw drivers
6 of 7 people found this instruction helpful.
Was this instruction helpful to you?
Thank you for voting!