Models > GSE25ESHBSS > Symptoms > Ice maker won’t dispense ice

Parts That Fix General Electric Refrigerator GSE25ESHBSS Ice maker won’t dispense ice

Ice maker won’t dispense ice is a commonly reported symptom for the GSE25ESHBSS General Electric Refrigerator, and we have put together a full guide on how to fix this. This advice is based on feedback from people who own this exact appliance. We have listed the most common parts for your GSE25ESHBSS General Electric Refrigerator that will fix Ice maker won’t dispense ice. We have included repair instructions, and helpful step-by-step video tutorials. If you are experiencing this issue, not to worry, DIYers just like you have fixed this, and shared their experience to help you!

Fixes Symptom 50% of time
★★★★★
★★★★★
201 Reviews

Rated by 145 customers 


Easy 

30 - 60 mins 

Ratings submitted by customers like you who bought this part.   

$ 67.45
  In Stock
PartSelect Number PS17626595
Manufacturer Part Number WR29X43990

Customer Repair Stories

Plastic auger cracked. This part moves the ice in the bin forward to the dispenser

1) Removed the ice bin and emptied the ice.
2) Removed 5 screws total
3) (hardest part) JImmied a flat blade screwdriver into the left top side of the housing and pried gently to disengage the plastic holding clip. This only allows the left side of the housing to move up about a half-inch. Did the same on the right side and 'walked' the assembly out of the bin.
4) Removed the C clip and washer that holds the auger. and removed the auger assembly.
5) Before removing the screw at the end of the assembly, it is a good idea to take pictures of the ice crushing part of the assembly so that it goes back on correctly.
6) Removed the screw and carefully stacked the ice crush blades and washers.
7) Installed the ice crush blades on the new auger, re-installed the screw, washer and C clip.
8) Re-assembly is easy, you just need to set the end of the auger in the back of the ice bin and slowly re-install the housing portion.
  • robert from wesley chapel, FL
  • Difficulty Level:
    Easy
  • Total Repair Time:
    30 - 60 mins
  • Tools:
    Pliers, Screw drivers
122 of 172 people found this instruction helpful.
Was this instruction helpful to you?
Thank you for voting!

Plastic Auger blades broke in ice tray

I used a digital camera and photographed the assembled unit and the metal blades before I started the repair. Then, I removed the top screw on the clear shield. Flip over ice tray and removed two Phillips screws on bottom. Exterior plastic white cover comes off next. The cover sides have hard push-in white plastic tabs. Push them in; pry up top cover with small flathead screwdriver. Slide white top cover up and you will now see the metal blades and assembly. Auger is held in place with a metal c-clip and washer on the end. Use flat head screwdriver to pry off c-clip. Then you will see a nylon round slotted nut. The threads are reverse, use pliers and loosen nut. It is not that tight but pliers are needed. Then it all is loose and ready for removal. I slid all the blades off at one time and kept them stacked together. Slide out auger and clear flat shield cover. Install new auger, clear shield, and metal blade stack. When you put it all back together take a look at the long metal J-hook on the bottom make sure it is in the slot before you make everything tight. Failing to do this will prevent cubed ice from dispensing.
It is not that hard to do the repair it just takes some patience and paying attention to details.
  • Tim from Newport News, VA
  • Difficulty Level:
    A Bit Difficult
  • Total Repair Time:
    30 - 60 mins
  • Tools:
    Pliers, Screw drivers
583 of 622 people found this instruction helpful.
Was this instruction helpful to you?
Thank you for voting!
Fixes Symptom 10% of time
★★★★★
★★★★★
33 Reviews

Rated by 99 customers 


Easy 

30 - 60 mins 

Ratings submitted by customers like you who bought this part.   

This part is a possible option when ice door won't open or shut properly or when water is not dispensing.

$ 64.74
  In Stock
PartSelect Number PS1483583
Manufacturer Part Number WR62X10055

Replacing your General Electric Refrigerator Dispenser Door Solenoid Assembly

Replacing your Dispenser Door Solenoid Assembly

Customer Repair Stories

Ice maker door not opening

Removed panel from front of freezer door by pushing up on three spring loaded screws located in the opening where the ice door opens and closes. they are about 1 inch apart on the bottom of the opening. Push up to free ice maker panel. Remove three screws from solenoid, located at the top right. Remove wire, replace with new and that is it. Fixed the problem!! Our ice maker hadn't worked for months. Be careful if you remove the round ice maker door to clean. There is a spring that located on the left side of sprocket. The spring fell off and took me a while to figure where it came from. Recieved package in three days and the job took minutes. Works great! Very easy to complete.
  • scott from lake orion, MI
  • Difficulty Level:
    Really Easy
  • Total Repair Time:
    Less than 15 mins
  • Tools:
    Nutdriver, Screw drivers
8 of 9 people found this instruction helpful.
Was this instruction helpful to you?
Thank you for voting!

Icemaker flap not closing, frosting up

Watched video, however could not get outer casing off. Under the panel are three small holes, pushed up with an Allen key, used a small screwdriver to wedge out, came out easily, followed instructions from video on removing and replacing solenoid
  • Graeme from Sarasota, FL
  • Difficulty Level:
    Easy
  • Total Repair Time:
    15 - 30 mins
  • Tools:
    Screw drivers
9 of 10 people found this instruction helpful.
Was this instruction helpful to you?
Thank you for voting!
Fixes Symptom 8% of time
★★★★★
★★★★★
48 Reviews

Rated by 32 customers 


Really Easy 

Less than 15 mins 

Ratings submitted by customers like you who bought this part.   

  No Longer Available
PartSelect Number PS11701246
Manufacturer Part Number WR17X23255

Customer Repair Stories

part of auger broke

We ordered the basket with auger and all I had to do was take the old one out and slide the new one in. EASY !
  • Gary from Spring Hill, FL
  • Difficulty Level:
    Really Easy
  • Total Repair Time:
    Less than 15 mins
22 of 28 people found this instruction helpful.
Was this instruction helpful to you?
Thank you for voting!

Plastic piece on front of ice bucket auger cracked an broke off

I just pulled the old Ice bucket assembly out and replaced it with the new one. Couldn't get any easier.
  • Gunars from Arlington, TX
  • Difficulty Level:
    Really Easy
  • Total Repair Time:
    Less than 15 mins
81 of 104 people found this instruction helpful.
Was this instruction helpful to you?
Thank you for voting!
Fixes Symptom 6% of time
★★★★★
★★★★★
87 Reviews

Rated by 72 customers 


Easy 

30 - 60 mins 

Ratings submitted by customers like you who bought this part.   

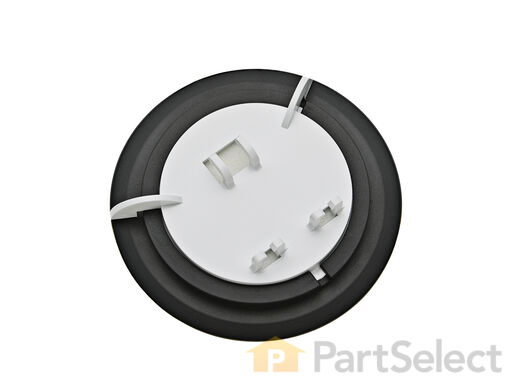
This “Dispenser Door Assembly” (Door Recess Assembly, Ice Door Assembly, Dispenser Door, Refrigerator Dispenser Ice Chute Door Kit, Dispenser Door Flap, Ice Chute Door, Flapper) keeps the room air from infiltrating the freezer. Once the lever is pressed, the door flap opens and allows the ice to dispense into your container. If your door flapper is broken, it could allow outside air to enter the freezer and alter the inside temperature. You may notice frost buildup surrounding the dispenser area. The door flap can disconnect from the dispenser lever, or the tabs that hold it in place may break. Frequent use may distort the sealing face and cause air leaks and frost buildup. This part mounts in the ice dispenser, and measures approximately 3.25 inches in diameter. It is constructed of plastic and rubber, and comes in white/black. This part is sold individually.

$ 15.58
  In Stock
PartSelect Number PS964304
Manufacturer Part Number WR17X11653

Replacing your General Electric Refrigerator Dispenser Door Assembly or Flapper

Replacing your Dispenser Door Assembly or Flapper

Customer Repair Stories

Flapper not sealing. Frost buildup on inside of freezer door

Followed previous instructions from a previous post. Inserted small screwdriver in the 2 outer holes up under the face plate to remove it then removed 4 screws holding the inner assembly which allowed access to the flapper assembly. Replaced it and reassembled everything. Problem solved
  • D from ZELLWOOD, FL
  • Difficulty Level:
    Easy
  • Total Repair Time:
    15 - 30 mins
  • Tools:
    Screw drivers
15 of 16 people found this instruction helpful.
Was this instruction helpful to you?
Thank you for voting!

This seems to be a design problem because I have to replace this part about every other year since we bought it. I tried to talk to GE but all they want to do is send a service man out to replace the part for about 100.00, But I do it for around 15.00. I just think they should find out why the rubbe

The repair is easy, just pop the grill off around the ice and water door, then there are 4 screwws to take out so the touch pad can be moved out of the way to unsnap the old door assm. and snap in the new one and wait about a year and a hald to order another one!!!!!
  • Jeff from Columbia City, IN
  • Difficulty Level:
    Really Easy
  • Total Repair Time:
    Less than 15 mins
  • Tools:
    Screw drivers
26 of 35 people found this instruction helpful.
Was this instruction helpful to you?
Thank you for voting!
Fixes Symptom 5% of time
★★★★★
★★★★★
77 Reviews

Rated by 77 customers 


Easy 

15 - 30 mins 

Ratings submitted by customers like you who bought this part.   

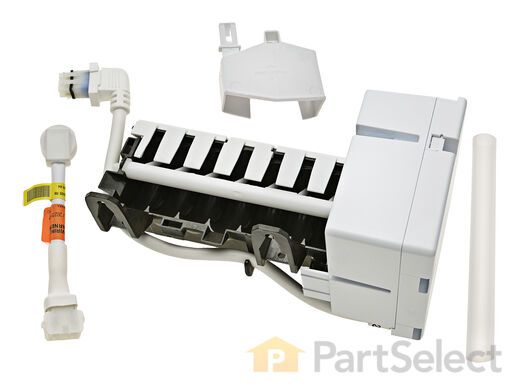
This 10 by 5 inch ice maker (Electromechanical Icemaker Kit, Ice Maker Assembly) produces ice. This particular model will produce seven crescent shaped cubes every cycle. It is constructed of plastic and metal, and comes in black/white. This kit includes a set of installation instructions, a 4-pin round plug-in connector, 6 post plug-in connectors, tube and fill cup. The ideal temperature of a freezer is zero degrees Fahrenheit. If the temperature in your freezer is at an appropriate level yet ice is still not being made, it could be an issue with the water inlet valve or your ice maker assembly. If you determine it is the ice maker, this is the replacement you need. The ice maker can break from normal wear and accidental damage. Ice makers will need to be replaced every 3-10 years depending on the frequency of usage and water quality. This model is mounted on the freezer wall.

$ 216.23
  In Stock
PartSelect Number PS1993870
Manufacturer Part Number WR30X10093

Replacing your General Electric Refrigerator Ice Maker

Replacing your Ice Maker

Customer Repair Stories

Ice maker stopped working

I unplugged the electrical connection. Then I removed the 2 screws holding the icemaker in place. I lifted out the old icemaker unit and put the new one in place. Then put the 2 screws back in and plugged in the new unit.

The icemaker started making ice very soon after turning the unit on.
  • Dan from West Bloomfield, MI
  • Difficulty Level:
    Really Easy
  • Total Repair Time:
    Less than 15 mins
  • Tools:
    Nutdriver
82 of 109 people found this instruction helpful.
Was this instruction helpful to you?
Thank you for voting!

ice stalactites were drooling out of the icemaker and gumming up the cubes in the receiving tray.

I first shut off water flow to the fridge. Examination of the package (which was not exact in appearance to the original) demonstrated that the electrical connectors were well-insulated so I arrogantly and successfully proceded without disconnecting the power. My fridge is old enough that the model doesn't appear exactly on anyone's list so I wasn't alarmed that it took an extra 10 minutes or so to noodle out how to adapt the slightly different inlet cowling and electrical cord with extension, but the device is pretty simple.
Soon I loosened the two mounting screws with a nut driver, used a screwdriver to pry away the plastic snap-in housing over the electrical socket on the fridge inner wall and pulled away the electrical plug. The original water fill tube remained in its cavity, ready for re-use.
The new unit's mounting points matched the original screw locations perfectly, as did the fill cowling - which on the replacement icemaker has two possible attachment points. The new unit's electrical connector required an extension pigtail to adapt to my socket, but it was included in the package. The extra cable posed a minor cosmetic issue because it hangs in the collection basket a bit, but that will soon be remedied with a tie wrap.
After the water was restored and an anxious wait of a few hours, we had well-formed ice cubes that weren't all stuck together and the stalactites haven't reappeared.
  • Gerald from Benicia, CA
  • Difficulty Level:
    Easy
  • Total Repair Time:
    15 - 30 mins
  • Tools:
    Nutdriver, Screw drivers
89 of 122 people found this instruction helpful.
Was this instruction helpful to you?
Thank you for voting!
Fixes Symptom 4% of time
★★★★★
★★★★★
36 Reviews

Rated by 46 customers 


Easy 

15 - 30 mins 

Ratings submitted by customers like you who bought this part.   

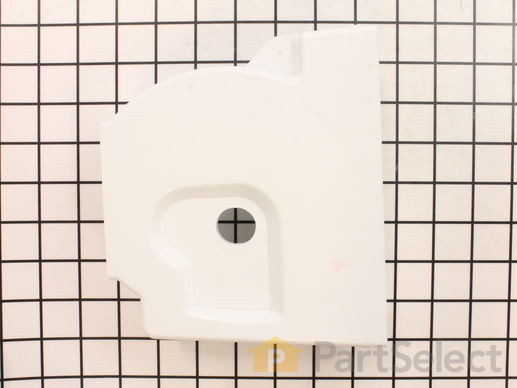
This part is white in color.

$ 27.46
  In Stock
PartSelect Number PS964165
Manufacturer Part Number WR17X11497

Replacing your General Electric Refrigerator Dispenser Crusher Cover

Replacing your Dispenser Crusher Cover

Customer Repair Stories

Cover was cracked affecting ice dispensation

Removed the ice tray and then the auger unit from the tray assembly. To accomplish auger removal, the auger assembly is attached to the tray assemble at the front. On the front bottom there two screws. Back them out. Then on the top of the tray assembly the auger assembly is held in position by two tabs. Depress them with a finger or thumb. Do not use a screw driver as this may result in breaking the plastic tab! The auger assembly will separate. The crusher plate easily separates from the auger assembly and is removed buy "spiraling" the plate up and off the auger itself. Simply reverse to install new plate.
Recommendation: Take this opportunity to thoroughly clean and COMPLETELY DRY all components prior to re-assemble and re-install into the refrigerator.
  • Andrew from Loganville, GA
  • Difficulty Level:
    Easy
  • Total Repair Time:
    15 - 30 mins
  • Tools:
    Screw drivers
10 of 12 people found this instruction helpful.
Was this instruction helpful to you?
Thank you for voting!

A piece of the crusher cover broke off into the ice bin

I removed the ice bin, removed the metal rod off the bottom, unscrewed all screws holding things together and then carefully pried the crusher assembly out of the ice bin. I made the mistake of doing it when the bin was still frozen and ended up cracking it where the "clips" from the crusher are inserted. It was much easier after the bin warmed up.

Replaced and put everything back together.
  • David from Woodland Hills, CA
  • Difficulty Level:
    Really Easy
  • Total Repair Time:
    Less than 15 mins
  • Tools:
    Screw drivers
18 of 23 people found this instruction helpful.
Was this instruction helpful to you?
Thank you for voting!
Fixes Symptom 3% of time
★★★★★
★★★★★
9 Reviews

Rated by 15 customers 


Easy 

30 - 60 mins 

Ratings submitted by customers like you who bought this part.   

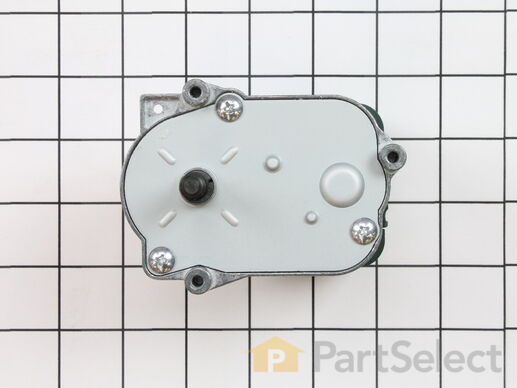
This motor is used to activate the blades to crush the ice for dispensing. This part is now threaded with a left hand thread and the J nut is no longer required.

$ 120.53
  In Stock
PartSelect Number PS1993875
Manufacturer Part Number WR60X10258

Replacing your General Electric Refrigerator Auger Motor

Replacing your Auger Motor

Customer Repair Stories

Ice Cube Dispencer Would Not Turn

Dispencer quit working a year ago, but still still dispenced water. I talked to a service technician about it. He told me the electric motor was froze up, so I orderd a new one. When it arrived I installed it in about 20 minnutes,tried the dispencer and still would not work but this time the water would not dispence eather and this time I noticed the fan quit running and the light went dim when I tried to dispence ice. So I read the customers diagnosis and repares every thing pointed to the main control board, orderd the part and water filter. When they arrived in three days I watched installing this part video and it took me 20 minnutes to install and every thing works fine.
  • EUGENE from BURLEY, ID
  • Difficulty Level:
    Easy
  • Total Repair Time:
    15 - 30 mins
  • Tools:
    Nutdriver, Pliers
12 of 15 people found this instruction helpful.
Was this instruction helpful to you?
Thank you for voting!

Bad Ice Auger Motor

Things I learned...remove only the two far left screws and one far right screw from the ice auger motor mounting plate. Disconnect both wiring harness connectors. With the assembly removed from the freezer, you'll need to get the motor seperated from the drive mechanism (fork). This was the most difficult part of the repair. The reason is that the fork (which is reverse threaded) cannot be unthreaded independantly of the motor shaft (ie. they both turn together). Locking pliers on the shaft only stripped metal from the shaft and did not supply enough torque to remove the fork. The way I finally did it was to take the old motor partially apart, then lock the gear case (keeping the shaft from rotating) with the motor's own splined internal rotor shaft. Once I finally got the fork apart from the motor shaft, swapping out motors was simple. You'll need to put the old plastic glove on the new motor to keep it dry. Also, the replacement motor I got from partselect.com did not come with threaded mounting bolt holes. Therefore, I had to use slightly larger self tapping screws I got from the hardware store. I also used locking washers as the assembly is subject to vibration.
  • Mark A. from Port Byron, IL
  • Difficulty Level:
    A Bit Difficult
  • Total Repair Time:
    More than 2 hours
  • Tools:
    Nutdriver, Pliers
57 of 67 people found this instruction helpful.
Was this instruction helpful to you?
Thank you for voting!
Fixes Symptom 2% of time
★★★★★
★★★★★
12 Reviews

Rated by 47 customers 


Easy 

30 - 60 mins 

Ratings submitted by customers like you who bought this part.   

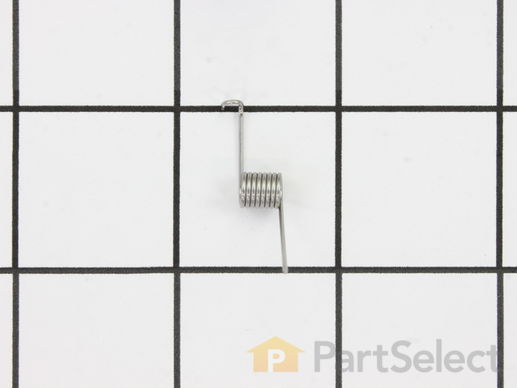
This door recess spring or dispenser lever spring in your refrigerator is used to return the ice door to the closed position or the dispenser lever to the home position once released. You will find the spring in the water dispenser assembly, behind the main control panel. If the dispenser lever is malfunctioning or the dispenser ice door is not closing, you may need to replace this door recess spring.

$ 9.17
  In Stock
PartSelect Number PS285013
Manufacturer Part Number WR02X10585

Replacing your General Electric Refrigerator Recess Door Spring

Replacing your Recess Door Spring

Customer Repair Stories

The ice cube door located on the front of the freezer (side by side freezer/refridgerator) stopped closing.

I removed the face plate (ice/water, selection panel) from the freezer door to access and remove the solenoid which was badly rusted and replaced with a new one, and a new spring too. Very simple repair for a chronic pain.
  • Todd from Milton, WI
  • Difficulty Level:
    Easy
  • Total Repair Time:
    15 - 30 mins
  • Tools:
    Screw drivers
0 of 1 people found this instruction helpful.
Was this instruction helpful to you?
Thank you for voting!

frost build up

flapper then bought the spring
  • JOHNNY from FORT WORTH, TX
  • Difficulty Level:
    Really Easy
  • Total Repair Time:
    15 - 30 mins
  • Tools:
    Pliers, Screw drivers
1 person found this instruction helpful.
Was this instruction helpful to you?
Thank you for voting!
Fixes Symptom 2% of time
★★★★★
★★★★★
11 Reviews

Rated by 13 customers 


Easy 

30 - 60 mins 

Ratings submitted by customers like you who bought this part.   

Coarse thread

$ 16.20
  In Stock
PartSelect Number PS652459
Manufacturer Part Number WR01X10315

Replacing your General Electric Refrigerator Front Dispenser Bucket Auger Nut

Replacing your Front Dispenser Bucket Auger Nut

Customer Repair Stories

Groove for retainer clip on auger nut was broken out.

After removing three screws on the ice bucket, it basicly came apart by itself. I needed to use pliers to remove the old nut because it had over tightened itself onto the shaft. Be careful here - it is a left hand nut - not a normal right hand nut! Reassembly was a snap putting the parts back together in reverse order. Unit has been working great since the repair.
  • William from Nazareth, PA
  • Difficulty Level:
    Easy
  • Total Repair Time:
    15 - 30 mins
  • Tools:
    Pliers, Screw drivers
13 of 26 people found this instruction helpful.
Was this instruction helpful to you?
Thank you for voting!

Ice Maker auger blade broken

The ice machine auger blade broke a chunk off. I decided to try to replace it myself. I bought the new auger blade and then sat there and stared at it and the ice machine for a few, trying to figure out how to change out the part. Turns out it was a qute lengthy process. The auger is threaded on one end and the ice chopping blades are on it. So I had to take each blade off the old one and put it on the new one. The blades have to be positioned just right on the shaft so it's best to just draw a line down over all the blades so as to put them on the new auger successfully. The problem I had was the end cap that screwed on the end of the shaft. It was the part I ordered here. It is made of plastic with plastic threads and at first I couldn't figure out to get it off. Turns out the threads are opposite normal. By the time I figured that out, I had just about destroyed the cap using pliers to try to unscrew it. There is a washer and half moon clip that fastens on this end nut so if you mess the nut up, chances are you won't be able to get the half moon clip to go back on. I finally did it right and now how the ice maker working right again. A hard part for me was figuring out how to set the spring shaft that works a lever to either give cubed ice or crushed. I had to keep fiddle with it before I finally got that right. At first I was only getting crushed ice even with the cubed setting and then only getting cubed ice with the crushed ice setting. After some fiddling, I got both to work but to this day can't figure out what changes from the crushed setting to the cubed setting.
  • Michael from Hanford, CA
  • Difficulty Level:
    A Bit Difficult
  • Total Repair Time:
    30 - 60 mins
  • Tools:
    Pliers, Screw drivers
18 of 28 people found this instruction helpful.
Was this instruction helpful to you?
Thank you for voting!
Fixes Symptom 2% of time
★★★★★
★★★★★
1 Review

Rated by 33 customers 


Easy 

30 - 60 mins 

Ratings submitted by customers like you who bought this part.   

The door recess crank for your refrigerator is located inside the water dispenser assembly. To access this part, you will need to take apart the dispenser assembly. To do this, you will need a putty knife and a Phillips screwdriver. If your dispenser door will not close properly, or ice is not dispensing properly, you may have a damaged door recess crank. This part is made of white plastic and is sold individually.

$ 13.84
  In Stock
PartSelect Number PS291908
Manufacturer Part Number WR17X10706

Replacing your General Electric Refrigerator Dispenser Door Recess Crank

Replacing your Dispenser Door Recess Crank
Fixes Symptom 1% of time
★★★★★
★★★★★
8 Reviews

Rated by 7 customers 


Easy 

30 - 60 mins 

Ratings submitted by customers like you who bought this part.   

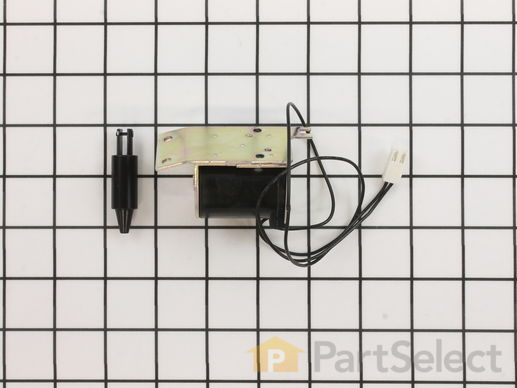
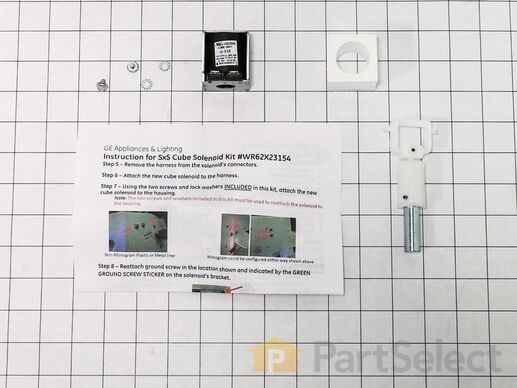
This kit includes 1 cube solenoid, 1 armature, 2 tooth washers and 2 1/4 hex head screws.

$ 112.24
  In Stock
PartSelect Number PS11699580
Manufacturer Part Number WR62X23154

Customer Repair Stories

Crushed Ice Only

Let me start by saying, I usually hire something like this out but figured I would give it a try. The install was fairly straight forward, however it would’ve been nice if the instructions would have been more useful. Instructing me to remove one screw to release the auger and solenoid enclosure wouldve been nice. There were 3 other screws that I didn’t need to remove and they were the ones holding the auger in place, which made assembling that much more difficult. Once to enclosure was removed, and the solenoid was exposed, it was a seemless process. I would however, recommend paying attention to or taking a picture of the connections on the solenoid. I was lucky to remember or got lucky. Regardless, I was able to complete the project successfully. If I had to do it again, I believe it can be done in 30 minutes or less.
  • Allen from Hills, IA
  • Difficulty Level:
    A Bit Difficult
  • Total Repair Time:
    30 - 60 mins
  • Tools:
    Screw drivers, Socket set
2 of 3 people found this instruction helpful.
Was this instruction helpful to you?
Thank you for voting!

Ice maker dispensed crushed ice but not cubes

Removed the ice bin and maker, then removed cover from the rear that covered the solenoid that controls the dispensing mechanism. Replace solenoid. The tricky part here is that there is a styrofoam cover around the solenoid pin that needs to be superglued into place and oriented properly during replacement. All electrical feeds snap out neatly and are easily replaced. Reassemble ice dispenser and bin, and viola, your back in business.
  • James from Greenville, NC
  • Difficulty Level:
    Difficult
  • Total Repair Time:
    More than 2 hours
  • Tools:
    Nutdriver, Screw drivers
42 of 60 people found this instruction helpful.
Was this instruction helpful to you?
Thank you for voting!
Fixes Symptom 1% of time
★★★★★
★★★★★
80 Reviews

Rated by 112 customers 


Really Easy 

15 - 30 mins 

Ratings submitted by customers like you who bought this part.   

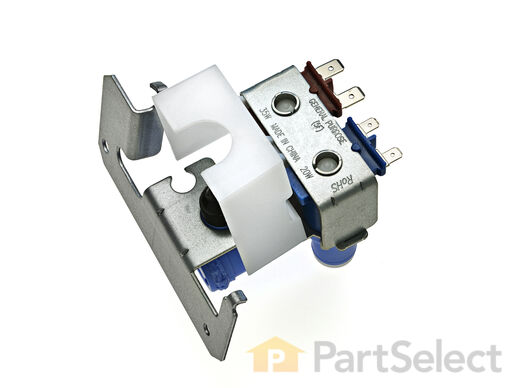
This water inlet valve (Refrigerator Water Inlet Valve Assembly) supplies water to the ice maker and the water dispenser in your refrigerator. It is located at the back of the fridge, beneath the bottom panel. It is connected directly to 2 water supplies, a wiring harness, and your inlet water tube. This part is located at the back of the fridge, beneath the bottom panel. It is connected directly to 2 water supplies, a wiring harness, and your inlet water tube. Minerals and sediments can build up over time and cause a blockage in your inlet valve. They can also cause the valve to stick open, leading to an overflow of water. If this part is malfunctioning, water flow to your appliance could be compromised. Check for small ice cubes or a lack of ice cubes/water, as this is an obvious sign the part is damaged. The water inlet valve must be replaced if the solenoids no longer have continuity or the valve has internal blockage. Test your water inlet valve with a multimeter. You can test both the water dispenser side and the ice maker side. The part measures approximately 3 inches long and 2.75 inches wide and is constructed of plastic and metal. This replacement part features 1 dual inlet water valve with quick connections. It also has 1/4 and 5/16 John Guest fittings for the outlet lines and a 1/4 compression fitting for the inlet line.

$ 93.82
  In Stock
PartSelect Number PS16226572
Manufacturer Part Number WR57X33326

Replacing your General Electric Refrigerator WATER VALVE WITH GUARD

Replacing your WATER VALVE WITH GUARD

Customer Repair Stories

Water dispenser not operating

Model includes filtered ice maker and water dispenser from front of unit. Water maker just suddenly stopped working but ice maker continued to work fine. After some phone calls to trouble shoot at a high level, I figured it was worth a try to buy the replacement part of the most likely culprit and see if it did the trick. Would have cost maybe $150 or more for service tech to make house call, provide the part and do the switch. Buying the part was only $40 and replacement was easy. Remove access panel from behind fridge and identify valve. It has intake water from the filter then has two outbound lines. One to ice maker, one to water dispenser. All function is in one part, but each outbound line has its own functioning valve. Unplug fridge, turn off water supply, disconnect all connections from old valve and reattach to new valve. When re-hooked, be patient in allowing water to re-fill line before coming out of dispenser in front. Likely to doubt it works, but surprised how long it took for water to fill line resevoir.
  • michael from pennsburg, PA
  • Difficulty Level:
    Easy
  • Total Repair Time:
    30 - 60 mins
  • Tools:
    Wrench set
192 of 228 people found this instruction helpful.
Was this instruction helpful to you?
Thank you for voting!

Refrigertor water dispenser not working BUT ice machine is working

The very first symptom here is important! The door water dispenser is not working but the ice macine is working. You may only have a frozen water tube in the door so do the following before diagnosing that your solenoid valve is bad: 1) the tube usually runs under the front of the refrigerator and usually has a quick disconnect. Undo the connection and press the dispenser. If water comes out of the tube you have a frozen or blocked tube in the door. 2) Immediately adjust the temperature in the freezer and warm the freezer compartment as much as you can without destroying the freezer contents. Wait 24 hours. This will usually unfreeze the line. Do not waste your time with a hair dryer. NOW, if this doesn't work and you are convinced you need to order and replace the solenoid, follow these steps. Assemble your tools first. I needed a good ratchet set and a screwdriver. A shop towel is helpful for spilled water. A light is handy. Pull out the refreigerator to gain access to the rear of the unit. Unplug the power and close the water valve (older homes, you may need to actually shut the house water supply). Remove the screws which hold the cover over the lower half of the refrigerator. On the left you will see the solenoid. It's always good to see that your new part matches the one you feel needs replaced. They may not match perfectly due to changing design but they should be very similar. One screw holds this part in place and access is very simple. Now simply unplug the electrical connections. In my case, one blue "blade" type connection (powering the water) and one red "blade" type connection powering the ice maker. They are not the same size and this coupled with the coloring means you will not accidently switch them. pull the tubes clear of the solenoid. This is simple and needs no explantion. Grab your new solenoid and reattach both the electrical and water lines (two, remember, ice maker and drink dispencer). Replace the single screw. Re-attach the rear, lower refrigerator cover and go to the front of the unit to check the water. You can listen carefully and hear the power engage from the new part bringing you water. Clean up, replace the refrigerator back to its place and look really tired when your wife sees that you worked "so hard"! You probably saved at least $50-$80 from a service call which can now be used to take the family to dinner after your "exhausting" 15 minute workout of removing about 10 screws and wheeling the unit in and out of place. Writing this article took longer! My 4 year old worked harder holding the flash light!
  • ralph from bristow, VA
  • Difficulty Level:
    Really Easy
  • Total Repair Time:
    Less than 15 mins
  • Tools:
    Nutdriver, Screw drivers, Socket set
1023 of 1135 people found this instruction helpful.
Was this instruction helpful to you?
Thank you for voting!
Fixes Symptom 1% of time
★★★★★
★★★★★
5 Reviews

Rated by 6 customers 


Really Easy 

15 - 30 mins 

Ratings submitted by customers like you who bought this part.   

This part drives the auger to rotate.

$ 20.35
  In Stock
PartSelect Number PS963708
Manufacturer Part Number WR02X11941
Fixes Symptom 1% of time
★★★★★
★★★★★
76 Reviews

Rated by 62 customers 


Really Easy 

15 - 30 mins 

Ratings submitted by customers like you who bought this part.   

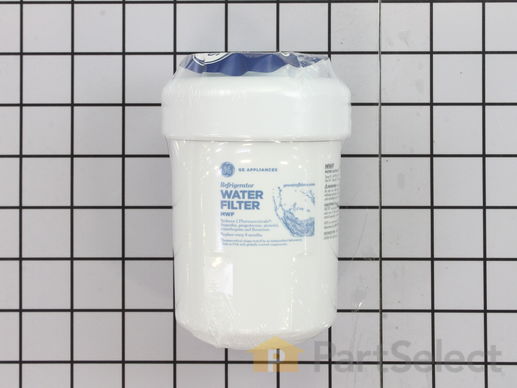
This OEM ice and water filter fits side-by-side and bottom-freezer GE models. The most common reason you would need to change this part is if you have never updated your model and it is no longer filtering your water. This also may lead to your refrigerator not dispensing water or ice properly. Manufacturers recommend you change your filter every six months to ensure it properly filters impurities. Depending on the model, a red light might also indicate that the filter is due for a replacement. Note: As per the manufacturer, this is an updated water filter. If you have never installed the updated part or your old model was made by Culligan, you may need the adapter to install the filter. See related parts. This filter is located inside the refrigerators upper right corner. It is common for water to drip from the dispenser when being changed so place a cloth underneath before you begin this repair. To remove the filter, turn it to the left until it releases without pulling down. Fill the new filter with tap water to prepare it. Position the new filter into the holder taking note of the arrows. The arrow on the front should be facing out. Gently push up on the filter and turn it to the right to secure it. Do not over-tighten. To release air in the system run 1-1/2 gallons of water through it. If your model has a reset button, press and hold this for a few seconds to reset it.

$ 73.07
  In Stock
PartSelect Number PS8746144
Manufacturer Part Number MWFP

Replacing your General Electric Refrigerator Refrigerator Ice and Water Filter

Replacing your Refrigerator Ice and Water Filter

Customer Repair Stories

water running slow

unscrewed old filter by hand, installed new filter.
  • David from Tacoma, WA
  • Difficulty Level:
    Really Easy
  • Total Repair Time:
    Less than 15 mins
35 of 57 people found this instruction helpful.
Was this instruction helpful to you?
Thank you for voting!

Replace water filter

Unscrew old filter and remove(counterclockwise). Line up arrow on new filter with arrow on connection housing. Turn clockwise till resistance met. Do not overtighten. Follow directions. Simple.
  • Alfred from Novato, CA
  • Difficulty Level:
    Really Easy
  • Total Repair Time:
    Less than 15 mins
225 of 340 people found this instruction helpful.
Was this instruction helpful to you?
Thank you for voting!
Fixes Symptom 1% of time
★★★★★
★★★★★
7 Reviews

Rated by 12 customers 


Easy 

30 - 60 mins 

Ratings submitted by customers like you who bought this part.   

This part helps to contain parts for the ice and water dispenser. The overlay and dispenser board is attached on the front of the housing shield.

$ 20.48
  In Stock
PartSelect Number PS292255
Manufacturer Part Number WR17X11170
Fixes Symptom 1% of time
★★★★★
★★★★★
3 Reviews

Rated by 12 customers 


Easy 

15 - 30 mins 

Ratings submitted by customers like you who bought this part.   

$ 52.29
  Special Order
PartSelect Number PS783777
Manufacturer Part Number WR17X11505

Customer Repair Stories

Noticed pieces of broken plastic in my ice cubes.

Of course, the first thing I did was remove the ice cube container from the freezer, and dump the ice cubes. (Conservation note: If you're in a place with water conservation rules, dump the cubes in a big pot and save them. If they melt, use the water for your house plants.) Following the advice from another DIYer, I let the container warm up before doing anything further.
Turned the container (I'll call it the "tray" from now on) over, removed the two screws holding the front cover with the Phillips screwdriver, gently pulled the cover out to disengage it from the rest of the machine.
Getting the next part out was tricky because it didn't want to release just by pushing in on the tabs on either side of the front assembly. That's where the two table knives came in, courtesy another reviewer. Be careful here not to jam or twist too energetically because the plastic housing is still quite breakable.
Just to be safe, I unscrewed one more screw that held the little bracket holding the rod with the spring on it and disengaged it. Then I discovered that I had to unclip the part that holds the auger in the front part of the assembly and slide the auger out of the way so I could pull the broken part out.
Having done all that, putting the new part in and reassembling the whole thing was pretty easy.
Slide the new part in, carefully rotate the auger back into its place, slide that assembly back into place, replace the clip holding the end of the auger, be sure the long rod engages the ice crusher gizmo, replace the screw that holds the rod in place, hook the front of the drawer back into the proper slots, rotate the cover back into position and replace and tighten the two screws.
You're done! The ice cubes you took out will probably still be frozen, so you can dump them back into the tray and slide the tray back into the freezer.
If you're cleverer than I am, maybe you won't need to do all the little things I did, but even so the whole exercise took less than 15 minutes--the ice cubes didn't even melt!
  • G from Spring Hill, FL
  • Difficulty Level:
    Easy
  • Total Repair Time:
    15 - 30 mins
  • Tools:
    Screw drivers
22 of 25 people found this instruction helpful.
Was this instruction helpful to you?
Thank you for voting!

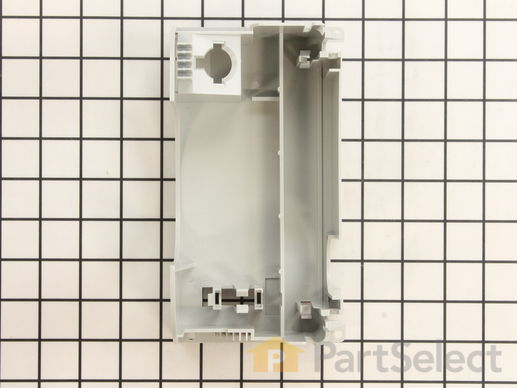
The partion between the tub and dispenser broke

Once I got the correct part, (the expanded view of the icemaker is confusing as it shows the partition at the back of the diagram) I removed the ice dispenser from the tub by removing the screws and disengage the tabs holding the dispenser assembly in the tub. The most difficult step was getting the disenser disengaged from the tub. I used two kitchen knives to wedge between the walls of the tub. It was then easy to remove and replace the broken inside partition and reassemble the dispenser. Works like new.
  • Mark from Brandon, MS
  • Difficulty Level:
    A Bit Difficult
  • Total Repair Time:
    15 - 30 mins
  • Tools:
    Screw drivers
36 of 41 people found this instruction helpful.
Was this instruction helpful to you?
Thank you for voting!
Fixes Symptom 1% of time
★★★★★
★★★★★
6 Reviews

Rated by 15 customers 


Easy 

30 - 60 mins 

Ratings submitted by customers like you who bought this part.   

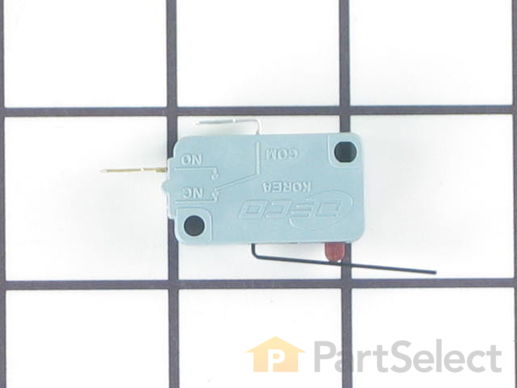
This is the replacement micro switch, or dispenser switch for your refrigerator. It is gray in color and measures approximately 1 inch by half an inch. The dispenser switch is what tells your refrigerator that it is ok to dispense ice or water. If your refrigerator is not dispensing ice or water, you may have a faulty or damaged switch. Be sure to disconnect the power to your refrigerator before you begin this repair. This switch is sold individually and is a genuine OEM replacement part sourced directly from the manufacturer.

$ 57.96
  In Stock
PartSelect Number PS8259956
Manufacturer Part Number WR23X10783

Replacing your General Electric Refrigerator Micro Switch

Replacing your Micro Switch

Customer Repair Stories

Water dispenser won't always dispense water

I followed the instructions found on this website. I removed the control panel by inserting a small Phillips screwdriver in the three holes at its bottom. I used the same screwdriver to pull the dispenser assembly down but could have used a larger one. The microswitch could be seen in the assembly at that point and was easily removed by opening the "fingers" that held it in place. I attempted to pull one of the terminals off without using a pair of needle-nosed pliers and ripped the wires right out of the terminal(I was able to find a replacement at Radio Shack). Low and behold after reinstalling the new part, it did not take care of the problem.

My problem is the water dispenser does work intermittently. When we place the glass in position and hit the lever, the lights in the control panel go off and no water is dispensed. My next guess may be the water valve or the control panel. The icemaker makes ice but I have had problems with it dispensing for nearly a year now.
  • Curtis from Corona, CA
  • Difficulty Level:
    Easy
  • Total Repair Time:
    15 - 30 mins
  • Tools:
    Pliers, Screw drivers
27 of 45 people found this instruction helpful.
Was this instruction helpful to you?
Thank you for voting!

Water dispensor would not shut off

Actually this was a two part repair of which I purchased both parts. The micro switch Pt # PS296176 and also a double outlet water valve Pt # PS304374 from Parts Select as well.

The difficult part was accessing the area to get to the micro switch.

The trim had to be removed, then the cover.

Then one unplugs the board and removed the face plate which also contains the micro switch.

Once removed the two electrical terminals had to be disconnected, the micro switch installed and terminal reconnected.

Then reverse the removal procedure.

Then on to the double outlet replacement.

Suggest watching the installation video for the replacement although it was really a straight forward repair.

Two things to remember.

1. Unplug the fridge

2. Shut off the water to the dispenser

Overall it was not bad at all.

This was my first attempt at refrigerator repair and it went well.

Good luck on yours.

John
  • John from Mason, OH
  • Difficulty Level:
    Easy
  • Total Repair Time:
    15 - 30 mins
  • Tools:
    Nutdriver, Pliers, Screw drivers, Wrench (Adjustable)
32 of 46 people found this instruction helpful.
Was this instruction helpful to you?
Thank you for voting!
Fixes Symptom less than 1% of time
★★★★★
★★★★★
2 Reviews

Rated by 5 customers 


Easy 

30 - 60 mins 

Ratings submitted by customers like you who bought this part.   

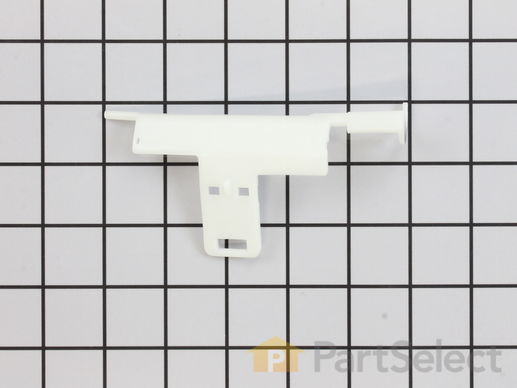
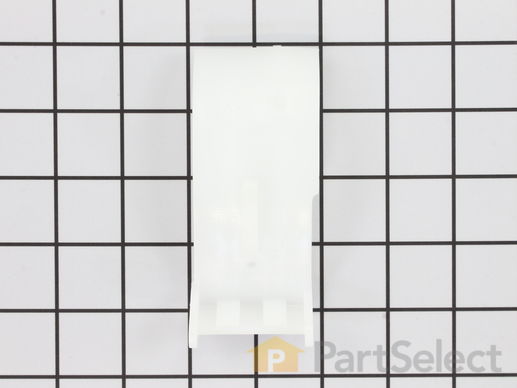
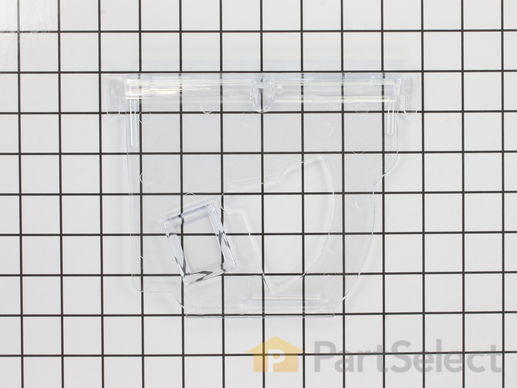
This ice deflector, or ice bucket baffle, is a genuine OEM replacement part for your refrigerator/freezer. The deflector works with the ice bucket assembly to produce crushed ice. To complete this repair, you will need a Phillips screwdriver, flat blade screwdriver, and a pair of pliers.

$ 9.01
  In Stock
PartSelect Number PS291906
Manufacturer Part Number WR17X10703

Customer Repair Stories

Ice deflector was broken

took off the front panel, removed the auger and front piece, removed the pin and spring and installed them on to the new piece and then put everything back together
  • Mark from MC GRANN, PA
  • Difficulty Level:
    Easy
  • Total Repair Time:
    30 - 60 mins
  • Tools:
    Pliers, Screw drivers
2 of 2 people found this instruction helpful.
Was this instruction helpful to you?
Thank you for voting!

Ice deflector broke again as ice froze and dispenser was taxed causing it to break

Watched an online video that I had seen before that helped immensely step by step, I fixed before and now just lowered freezer setting so ice bucket doesn’t get as full and freeze the deflector and jam deflector, causing it to break.
  • Estella from Paynes Creek, CA
  • Difficulty Level:
    Really Easy
  • Total Repair Time:
    30 - 60 mins
  • Tools:
    Pliers, Screw drivers
2 of 2 people found this instruction helpful.
Was this instruction helpful to you?
Thank you for voting!
Fixes Symptom less than 1% of time
★★★★★
★★★★★
2 Reviews

Rated by 1 customer 


Really Easy 

Less than 15 mins 

Ratings submitted by customers like you who bought this part.   

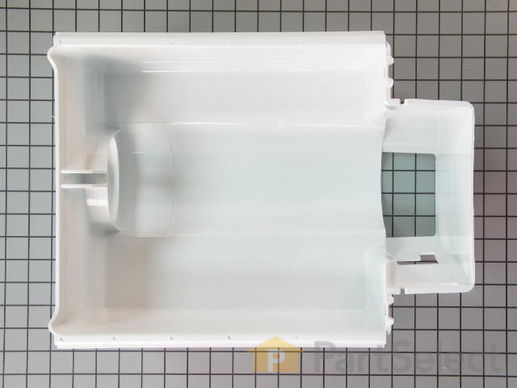
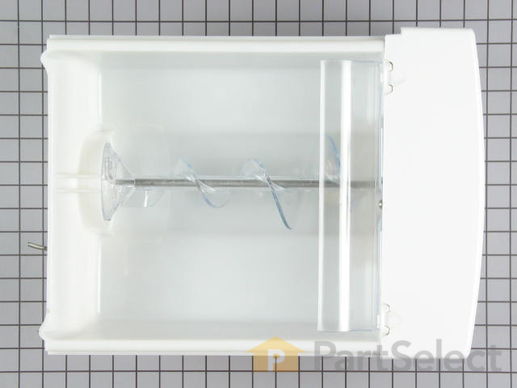
Bucket only. This part holds the ice once it's released from the icemaker.

$ 86.39
  In Stock
PartSelect Number PS300044
Manufacturer Part Number WR30X10016

Customer Repair Stories

N/A

Quick and easy - no problems
  • Richard from Tuscaloosa, AL
  • Difficulty Level:
    Really Easy
  • Total Repair Time:
    15 - 30 mins
  • Tools:
    Screw drivers
Was this instruction helpful to you?
Thank you for voting!

It was the crusher dispenser cover, not the bucket. Anyway, it was broken

used a phillips screw driver to remove two screws that held
the crusher assembly on the end of the ice bucket. Then I used the flat blade screw driver to pry the slot locks open and removed the dispenser cover. reassembly was areverse process.
  • Melvin from Duffield, VA
  • Difficulty Level:
    Really Easy
  • Total Repair Time:
    Less than 15 mins
  • Tools:
    Screw drivers
17 of 30 people found this instruction helpful.
Was this instruction helpful to you?
Thank you for voting!