Models > GSD3200J00WW > Symptoms > Leaking

Parts That Fix General Electric Dishwasher GSD3200J00WW Leaking

Leaking is a commonly reported symptom for the GSD3200J00WW General Electric Dishwasher, and we have put together a full guide on how to fix this. This advice is based on feedback from people who own this exact appliance. We have listed the most common parts for your GSD3200J00WW General Electric Dishwasher that will fix Leaking. We have included repair instructions, and helpful step-by-step video tutorials. If you are experiencing this issue, not to worry, DIYers just like you have fixed this, and shared their experience to help you!

Fixes Symptom 22% of time
★★★★★
★★★★★
12 Reviews

Rated by 56 customers 


Really Easy 

15 - 30 mins 

Ratings submitted by customers like you who bought this part.   

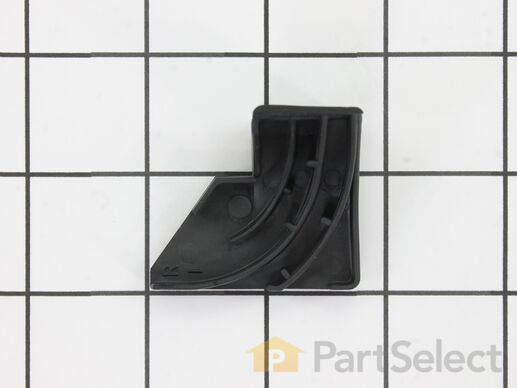
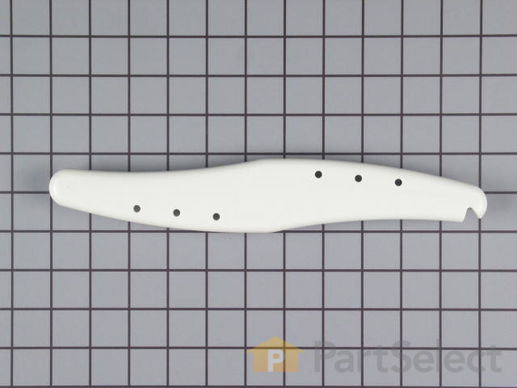
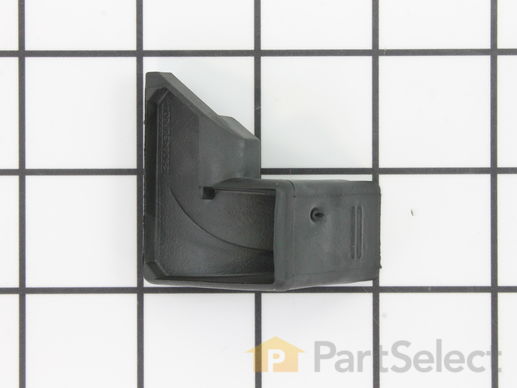
This baffle fits the lower right hand corner of some dishwashers. It is black rubber and has a matching left hand lower corner baffle. It is recommended that you replace and install both left and right at the same time. It will become evident that this part needs to be replaced if you are experiencing leaking or lack of draining. This is a very easy repair that requires no tools. Open the dishwasher door and simply use your hands to remove the baffle found in the lower right hand side of the dishwasher. Clean out any dirt and insert your new one into place.

$ 25.92
  In Stock
PartSelect Number PS263963
Manufacturer Part Number WD8X227

Replacing your General Electric Dishwasher Corner Tub Baffle - Lower Right

Replacing your Corner Tub Baffle - Lower Right

Customer Repair Stories

Dishwasher was leaking water on the lower right side.

Merely pushed the baffle into the slots in the lower right corner and the leak stopped.
  • Frances from Garner, NC
  • Difficulty Level:
    Really Easy
  • Total Repair Time:
    Less than 15 mins
Was this instruction helpful to you?
Thank you for voting!

The dishwasher leaked all over the floor.

I am a helpless old lady living alone. My dishwasher leaked......not bad at first. I put a towel in front of it. It got worse. I was adding towels each time I ran it. I asked my son to look at it. He said to find out where it was leaking from. I noticed it was coming from the right side. I looked and saw this thing (the real name was corner baffle) that looked kinda used up. I told my son what it was and he said go online and order it. I did. It came I took the old one out. It just lifted out. I cleaned all the debris out from where it sat with a toothbrush and put The new one in. Easy peasy. Don't need a grown son. I can take care of myself.
  • Linda from Fairfield, OH
  • Difficulty Level:
    Really Easy
  • Total Repair Time:
    Less than 15 mins
0 of 1 people found this instruction helpful.
Was this instruction helpful to you?
Thank you for voting!
Fixes Symptom 22% of time
★★★★★
★★★★★
19 Reviews

Rated by 53 customers 


Really Easy 

15 - 30 mins 

Ratings submitted by customers like you who bought this part.   

The corner tub baffle may also be known as the door baffle and is a part used on your dishwasher. The left and right side baffle on your dishwasher should be installed and replaced at the same time. This specific part is for the lower left side of your appliance, the right-side is sold separately. The function of the tub corner baffle is to prevent water from leaking through your dishwasher door. The function of this specific one is to stop water from leaking through the bottom left hand side of your dishwasher door. You will not need any tools to make this installation.

$ 23.87
  In Stock
PartSelect Number PS263964
Manufacturer Part Number WD8X228

Replacing your General Electric Dishwasher Corner Tub Baffle - Lower Left

Replacing your Corner Tub Baffle - Lower Left
Fixes Symptom 11% of time
★★★★★
★★★★★
18 Reviews

Rated by 24 customers 


Really Easy 

15 - 30 mins 

Ratings submitted by customers like you who bought this part.   

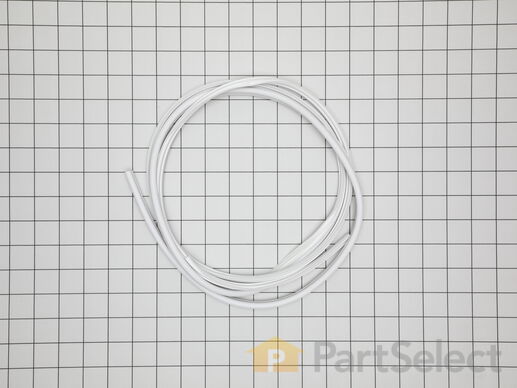
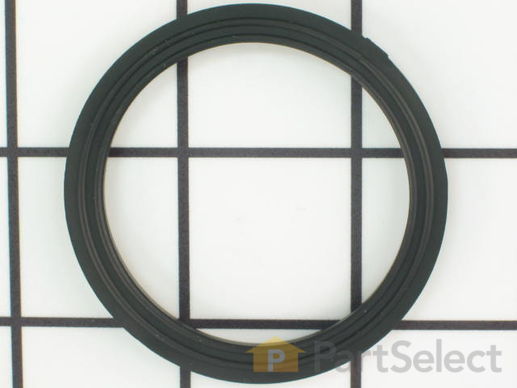
This one piece dishwasher door gasket provides a water tight seal to keep water from leaking out of your dishwasher.

$ 133.12
  In Stock
PartSelect Number PS958908
Manufacturer Part Number WD08X10057

Replacing your General Electric Dishwasher Door Gasket - White

Replacing your Door Gasket - White

Customer Repair Stories

Dishwasher leaked

Plumber had suggested trying a new gasket rather than replace the dishwasher. Ordered one and installed it. Cleaned door and installed gasket in about 30 minutes. So far it works great .... and ... cheaper than new dishwasher.
  • Robert from Colleyville, TX
  • Difficulty Level:
    Easy
  • Total Repair Time:
    15 - 30 mins
3 of 4 people found this instruction helpful.
Was this instruction helpful to you?
Thank you for voting!

Severe lwater leak around door

Removed door panel. Removed old door seal and cleaned seal recess. Installed new seal. Replaced door panel on door and ran a cycle to check for leaks. Readjusted door latch to correct small leak. Ran another leak test. Job complete and wife is happy!
  • Merle from Boulder, CO
  • Difficulty Level:
    Easy
  • Total Repair Time:
    30 - 60 mins
  • Tools:
    Screw drivers
3 of 3 people found this instruction helpful.
Was this instruction helpful to you?
Thank you for voting!
Fixes Symptom 9% of time
★★★★★
★★★★★
15 Reviews

Rated by 28 customers 


Easy 

30 - 60 mins 

Ratings submitted by customers like you who bought this part.   

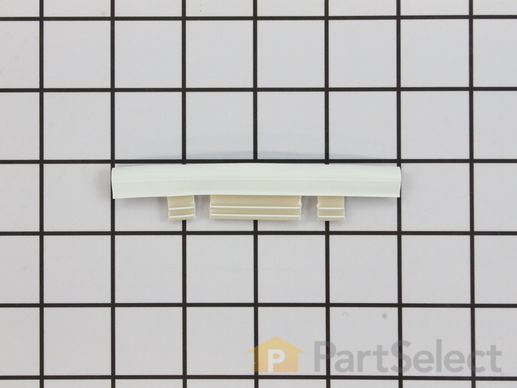
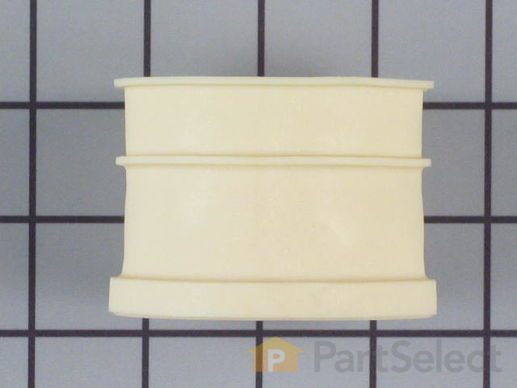
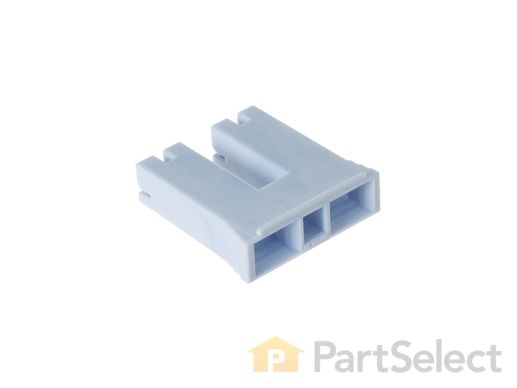
The gasket insert is connected to the gasket in the bottom of your dishwasher door. It is a small piece of white plastic that measures approximately 4 inches by 1 inch, and is sold individually. The gasket insert helps the gasket create a seal on the door, so water doesn’t leak out when the dishwasher is running. If your dishwasher is leaking, check to see if the gasket insert is damaged. If the insert is damaged, you will need to replace it. The problem may be with the gasket itself, in which case you may need to replace that part as well.

$ 21.12
  In Stock
PartSelect Number PS258653
Manufacturer Part Number WD08X10015

Replacing your General Electric Dishwasher Gasket Insert

Replacing your Gasket Insert

Customer Repair Stories

leakly gasket insert

Repaired by watching the video provided on my computer by this site . This video was a life saver and covered every detail. My thanks to this site !!!
  • BOBBY from HENDERSON, NC
  • Difficulty Level:
    Easy
  • Total Repair Time:
    30 - 60 mins
  • Tools:
    Screw drivers
2 of 2 people found this instruction helpful.
Was this instruction helpful to you?
Thank you for voting!

water leak, slow

The small 4" gasket was missing from the machine, and the large gasket was bent and out of place. I ordered the small gasket and installed it into the groove, placing the end flaps behind the large gasket. The large gasket was questionable, but I did not replace it. It seemed OK after I snapped it back into the door groove. Once the gaskets were properly aligned, I carefully replaced the inside door panel and screws. No more leak!
  • Rose from Orange Park, FL
  • Difficulty Level:
    Easy
  • Total Repair Time:
    15 - 30 mins
  • Tools:
    Screw drivers
11 of 13 people found this instruction helpful.
Was this instruction helpful to you?
Thank you for voting!
Fixes Symptom 9% of time
★★★★★
★★★★★
7 Reviews

Rated by 25 customers 


Easy 

30 - 60 mins 

Ratings submitted by customers like you who bought this part.   

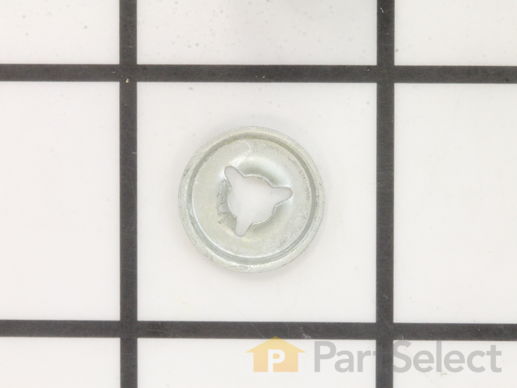
This push on nut is for your dishwasher or refrigerator. As the name suggests, it pushes into place, rather than being screwed in. It is approximately half an inch in diameter and is made of stainless steel.

$ 13.83
  In Stock
PartSelect Number PS298353
Manufacturer Part Number WR2X7054

Replacing your General Electric Dishwasher Push On Nut

Replacing your Push On Nut

Customer Repair Stories

Water leak from gate (diverter) valve

Read Joseph from Livermore, CA for good instructions. I took a camera phone photo for reference before I started. Should have taken another photo half way thru. Probably put the push-on-nut on backwards as it didn't 'lock' in - had too much play in the shaft, would have leaked. Impossible to get nut back off in good shape. I put original mangled push-on-nut on also - it added enough tension to eliminate play in the shaft. No leak..but lucky. Go ahead, you can do this repair for under $20.
  • Robert from Oak Island, NC
  • Difficulty Level:
    A Bit Difficult
  • Total Repair Time:
    30 - 60 mins
  • Tools:
    Nutdriver, Pliers, Screw drivers, Socket set
Was this instruction helpful to you?
Thank you for voting!

dishwasher leaking from solenoid drain valve

Disconnect the power. Unscrew the bottom toe kick panel. Locate the solenoid drain valve to the front left of the machine and disconnect the wired connection. Pry off the retainer clip on the drain valve spindle and set aside for reuse. Plan on getting a new one because you will most likely damage it when removing. Remove the spring from the solenoid valve spindle arm to access one of the three screws holding the solenoid drain valve to the pump. Remove the three screws. Remove the solenoid and plastic housing. Remove the push-on-nut from the spindle by cutting off the old one with wire cutters. Plan on buying a new one because you will never get it off in one piece. Pry out old valve seal with a knife or thin screw driver. Insert new seal and install new push on nut over seal. Important!! make sure the drain valve opens/closes freely by hand because you may have pushed the spindle in to far when installing the push on nut. Place the push on nut in a socket wrench socket with an extension and hammer it on gently or try to start itwith pliers and use a small length of 3/8" copper tubing. Again, check to see if drain valve rotates and pull the spindle in or out with pliers to adjust. Reassemble remaining parts in reverse order. Leak shoud be fixed but check to see if machine drains properly. You may have to dissassemble and adjust the spindle again. This is a difficult repair with the machine left in place. However, it is worth 1-2 hours of your time and for about 20 bucks in parts and shipping. Good luck!!
  • robert from wayne, NJ
  • Difficulty Level:
    Difficult
  • Total Repair Time:
    1- 2 hours
  • Tools:
    Nutdriver, Pliers, Screw drivers, Socket set
1 of 2 people found this instruction helpful.
Was this instruction helpful to you?
Thank you for voting!
Fixes Symptom 6% of time
★★★★★
★★★★★
14 Reviews

Rated by 28 customers 


Easy 

30 - 60 mins 

Ratings submitted by customers like you who bought this part.   

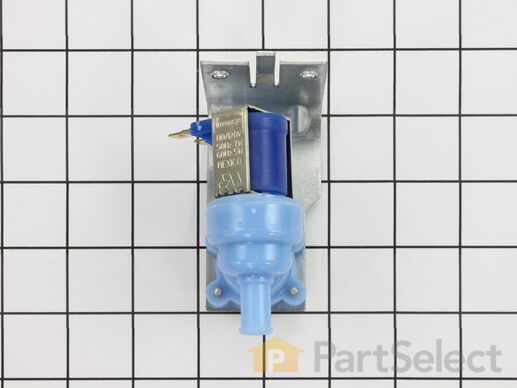
This water inlet valve should be located behind the lower kickplate panel in either the right or left corner. The attaching solenoids on the valve open and close according to the desired amount of water needed. This valve has a 3/8" inlet and comes with the mounting bracket.

$ 95.46
  In Stock
PartSelect Number PS259368
Manufacturer Part Number WD15X10003

Replacing your General Electric Dishwasher Water Inlet Valve

Replacing your Water Inlet Valve

Customer Repair Stories

Dishwasher was not filling with water or cycling.

In order to access the fill valve, dishwasher had to be removed from under countertop. Disconnected water supply line and drain hose under sink. Unplugged unit and removed 2 screws holding unit to countertop. I was then able to pull unit out and replace valve. After reinstallation, the same problem existed. Further research pointed to the control module, approx. $100.00 or the motor, approx. $250.00 - $300.00. I than began looking at new dishwashers, but I did email GE with the problem. They suggested I use citric acid or vinegar in hot water, pour into right rear portion of tub and wait 1/2 hour. After doing that, the dishwasher worked perfectly.
  • Jeffrey from Punta Gorda, FL
  • Difficulty Level:
    A Bit Difficult
  • Total Repair Time:
    30 - 60 mins
  • Tools:
    Screw drivers, Wrench set
41 of 46 people found this instruction helpful.
Was this instruction helpful to you?
Thank you for voting!

Dish washer is not running through cycles

First and formost before you buy read everything in trouble shooting your dishwasher. Then you do not buy parts you do not need. First you turn off power, then water. Remove two screws, a rubber hose and a hard line by unscrewing if you are lucky some contractors might sweat this on. No biggie just two extra steps that's all. do in reverse to assemble...
  • mike from huntley, IL
  • Difficulty Level:
    Easy
  • Total Repair Time:
    Less than 15 mins
  • Tools:
    Pliers, Screw drivers, Wrench (Adjustable), Wrench set
93 of 107 people found this instruction helpful.
Was this instruction helpful to you?
Thank you for voting!
Fixes Symptom 4% of time
★★★★★
★★★★★
3 Reviews

Rated by 13 customers 


Easy 

30 - 60 mins 

Ratings submitted by customers like you who bought this part.   

This connector has female threads.

$ 29.54
  In Stock
PartSelect Number PS259558
Manufacturer Part Number WD18X214

Replacing your General Electric Dishwasher Pump To Wash Arm Rubber Connector

Replacing your Pump To Wash Arm Rubber Connector

Customer Repair Stories

Water Leak In Rubber Connector Pin Hole At Seam

Shut of water to the built in dishwasher and shot of electric breaker , removed the water line and removed electric hookup at washer. Removed the drain pipe connected to the garbage disposal unit for more darin pipe room when pulling the appliance out from under the counter. Pull out the appliance, and carefully layed it flat on the back. Loosed the 2 connector clamps with a srewdriver from the upper and lower rubber connectors and the small drain rubber connector, used a plier. Loosed the screw on wire hold down pulled the housing pump out of the rubber connectors and used a wire hanger to help support the dangling housing pump unit. Unscrewed the damanged rubber connector using a washcloth for a better grip. , Rescrewed in the new rubber connector. ( Hint- used petrolem vasaline on the rubber connector base for a water tight fit) . Reconnected all , replaced elctric and water line, reconnected the darin pipe to the garabage disposal. Turned water back on. All worked at well.
  • Allan from Stony Point, NY
  • Difficulty Level:
    Easy
  • Total Repair Time:
    1- 2 hours
  • Tools:
    Nutdriver, Pliers, Screw drivers, Socket set
7 of 7 people found this instruction helpful.
Was this instruction helpful to you?
Thank you for voting!

Rubber connector was leaking (slit in rubber)

First I removed the dishwasher from underneath the countertop and laid it on its back. I used a nut driver to remove the pump support wire and the two clamps holding the rubber connectors to the pump. It helped to hook the pump support wire in a hole in the left side of the frame and reconnect it to the pump to hold it up out of the way. I was able to remove the rubber connector by hand and unscrew it. To install the new rubber connector tightly, I slipped a piece of 2" PVC pipe (outside diameter is 2-3/8") inside the connector and tightened the clamp around the connector and PVC pipe. This allowed me to use the pipe to tighten the rubber connector. I reassembled the dishwasher pump and connections and put the dishwasher back into service
  • David E from Colorado Springs, CO
  • Difficulty Level:
    Easy
  • Total Repair Time:
    15 - 30 mins
  • Tools:
    Nutdriver, Screw drivers, Socket set
38 of 45 people found this instruction helpful.
Was this instruction helpful to you?
Thank you for voting!
Fixes Symptom 3% of time
★★★★★
★★★★★
6 Reviews

Rated by 7 customers 


Really Easy 

30 - 60 mins 

Ratings submitted by customers like you who bought this part.   

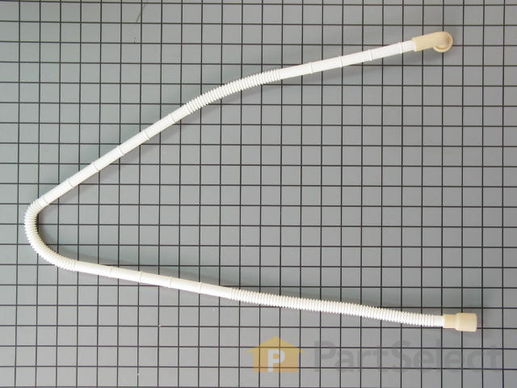
This is the replacement upper spray arm water supply hose for dishwasher. It is made of white plastic and has a connector piece on each end. This hose supplies water to the upper spray arm, so it can be sprayed onto your dishes when the dishwasher is running. The main reason to replace the supply hose is if it is cracked and leaking, and the spray arm is not getting enough water. This part is sold individually and is a genuine OEM part sourced directly from the manufacturer.

  No Longer Available
PartSelect Number PS260738
Manufacturer Part Number WD24X214

Customer Repair Stories

Had a leak in the line from the pump underneath up to the spayer attachment on the top.

Replaced the old hose with new one; very inexpensive part, only cost me 10 dollars. Way better than replacing the entire dish washer. Thank you so much for providing the "do it yourselfer" the items for simple and easy tasks. :)
  • dan from NACOGDOCHES, TX
  • Difficulty Level:
    Very Easy
  • Total Repair Time:
    Less than 15 mins
  • Tools:
    Screw drivers
1 person found this instruction helpful.
Was this instruction helpful to you?
Thank you for voting!

water coming our of dishwasher from upper part of spray arm water supply hose, hole in upper part of hose due to corosion

unscrewed 2 screws found on upper part of dishwasher that connected hose to spray arm found inside of dishwasher to remove hose. gently squeezed rubber gasket to work it into the hole found at the top center of the dishwasher, made sure rubber disc shaped gasket was seated properly into spray arm, screw spray arm back into place. The job was much easier than I thought It took about 20 minutes it saved me from buying a new dishwasher, the delivery of the hose was faster than the speed of light it took about i business day, I order the hose on saturday it arrived tuesday evening. Thanks for your excellent service
  • Skteven from Philadelphia, PA
  • Difficulty Level:
    Really Easy
  • Total Repair Time:
    15 - 30 mins
  • Tools:
    Socket set
40 of 42 people found this instruction helpful.
Was this instruction helpful to you?
Thank you for voting!
Fixes Symptom 3% of time
★★★★★
★★★★★
4 Reviews

Rated by 14 customers 


Easy 

1- 2 hours 

Ratings submitted by customers like you who bought this part.   

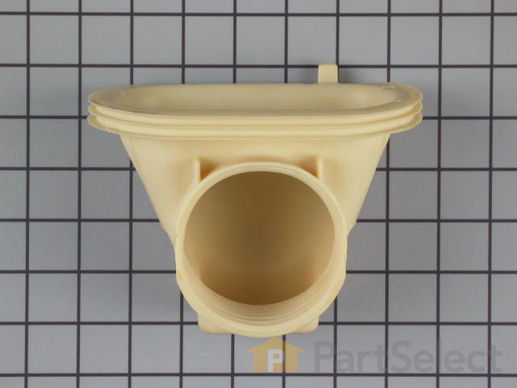
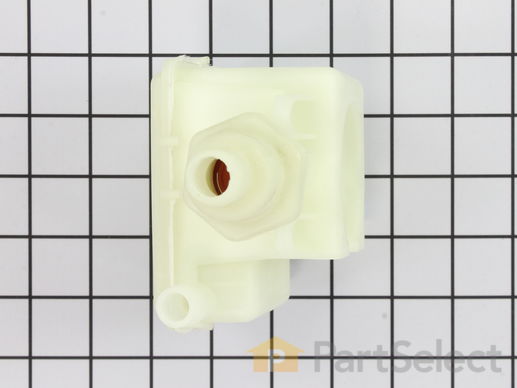
This part is the replacement sump housing or sump insert for your dishwasher. It is made of plastic and is approximately 7 inches by 5 inches. The sump housing is attached to the bottom of the dishwasher tub and collects water for the pump. If your dishwasher is leaking, you may need to replace the sump housing. Be sure to disconnect the dishwasher from the water and power source before you begin this repair. This part is sold individually and is an authentic OEM part sourced directly from the manufacturer.

$ 45.28
  In Stock
PartSelect Number PS259557
Manufacturer Part Number WD18X213

Customer Repair Stories

A house mouse tore through the rubber housing

I pulled the dishwasher out from under the counter. Loosened the collar holding the sump housing to the pump motor. Unscrewed the cover inside the base of dishwasher to release the collection opening of the sump. It's very flexible so I pulled it out by hand. Put the new one in and screwed everything back down. Pushed the dishwasher back under the counter. Simple Simple Simple.
  • Alan from Rossville, GA
  • Difficulty Level:
    Really Easy
  • Total Repair Time:
    Less than 15 mins
  • Tools:
    Pliers, Screw drivers, Socket set
7 of 7 people found this instruction helpful.
Was this instruction helpful to you?
Thank you for voting!

Mice ate holes in the Sump housing

First shut off the Power and Water to Dishwasher, removed from under counter, removed sump screen and retaining clamp from sump housing and then loosened seal from inside dishwasher cavity. Upon removal I went in search of a replacement part and found Parts Select on the web, entered my model and make at there web site and found the part I needed, I could verify the size by the easy picture on a one inch tile background for the dimenision . I called in the order since I wanted overnight service, I received the part and after cleaning the area where it goes I proceded to put things back together, this took about a hour and a half and the dishwasher is back in service
  • David from East Greenwich, RI
  • Difficulty Level:
    A Bit Difficult
  • Total Repair Time:
    1- 2 hours
  • Tools:
    Nutdriver, Pliers, Screw drivers, Wrench (Adjustable)
16 of 18 people found this instruction helpful.
Was this instruction helpful to you?
Thank you for voting!
Fixes Symptom 2% of time
★★★★★
★★★★★
5 Reviews

Rated by 13 customers 


Easy 

30 - 60 mins 

Ratings submitted by customers like you who bought this part.   

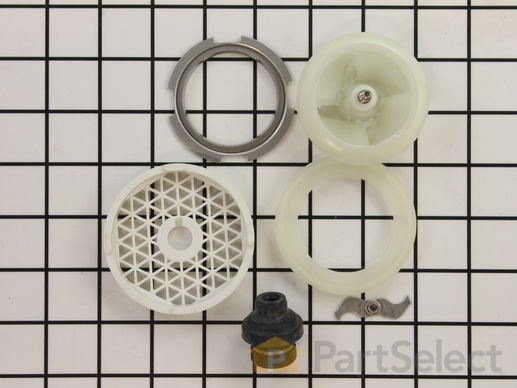
The impeller and seal kit is used in a dishwasher. The kit includes all the parts needed to do this repair, including the impeller, seal, blade, filter, skidder and skidder holder. If your washer is leaking, not cleaning dishes properly, or not draining, then replacing some parts in the pump can help solve the issues mentioned. The tools needed for this installation project are: 5/16 nut driver, 1/4 inch nut driver, flat-blade screwdriver, Phillips screwdriver, and pliers. Refer to the manual provided by the manufacturer for installation instructions and accurate guidance. Remember to unplug your dishwasher from the power source and wear work gloves as a safety precaution.

  No Longer Available
PartSelect Number PS259598
Manufacturer Part Number WD19X10032

Replacing your General Electric Dishwasher Impeller and Seal Kit

Replacing your Impeller and Seal Kit

Customer Repair Stories

Dishwasher was leaking between the pump motor and pump assembly

The repair went smoothly. There were actually instructions included with the parts, so that was nice. The only "gotcha" I found was that . . . after you take off the old food-chopper, you have unscrew the old impeller from the motor shaft. This was a bit difficult and you'll want some good pliers to do it. Don't worry about stripping where the food chopper screwed on-to, that part is attached to the impeller and there is a new one on the new impeller. When I re-installed everything onto the dishwasher, it rattled the first couple of times while the wear-ring was finding it's seat. Don't worry, that's normal. It went away by the third wash. I think I still have a small crack in the pump housing, though. The pump housing is two halves of molded plastic fused together along a seam, and I think the seam is starting to leak. It's about one drop every 45 seconds. I'm thinking JB Weld will fix it.
  • Jesse from Royal Oak, MI
  • Difficulty Level:
    A Bit Difficult
  • Total Repair Time:
    30 - 60 mins
  • Tools:
    Pliers, Screw drivers
10 of 13 people found this instruction helpful.
Was this instruction helpful to you?
Thank you for voting!

Dishwasher pump leaked all the time

I received my dishwasher as a hand me down, my Aunt never liked the way it cleaned. After it sitting for about 2 years i installed it in my house and found that it leaked all the time from where motor shaft went into the pump housing. After disassembling everything and scouring parts sites online, I found the parts, ordered them. 3 days later i had the parts, and the next day I had a fully functioning leak free dishwasher.
  • Rob from Newell, IA
  • Difficulty Level:
    A Bit Difficult
  • Total Repair Time:
    30 - 60 mins
  • Tools:
    Pliers, Screw drivers, Socket set, Wrench (Adjustable)
15 of 21 people found this instruction helpful.
Was this instruction helpful to you?
Thank you for voting!
Fixes Symptom 2% of time
★★★★★
★★★★★
9 Reviews

Rated by 57 customers 


Easy 

1- 2 hours 

Ratings submitted by customers like you who bought this part.   

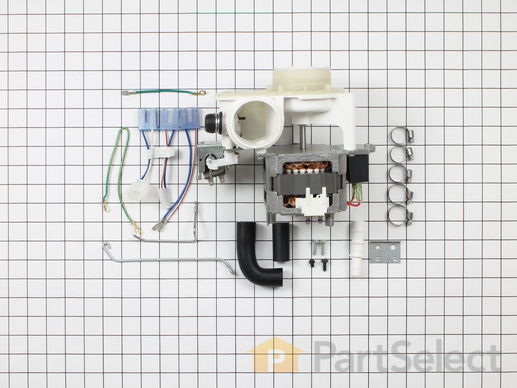
This is a pump and motor kit for your dishwasher. This assembly replaces many old-style pump and motor kits that were manufactured since 1970. The instructions are included with this kit in to assist you. Take note that this is a completely redesigned kit by the manufacturer and now includes the drain solenoid. You may need to replace this part is if your appliance is leaking, not draining properly, noisy, or will not start or clean your dishes properly.

$ 249.86
  In Stock
PartSelect Number PS260801
Manufacturer Part Number WD26X10013

Replacing your General Electric Dishwasher Motor and Pump Kit

Replacing your Motor and Pump Kit

Customer Repair Stories

dishwasher pump valve leaking at shaft

took dishwasher out- put on table to work on-removed wire brace- disconected drain outlet- disconnected top drive seal- removed wire clip connector- removed motor unit----------------
installed new motor/drain unit--used new longer wire brac used adapter to connect electical leads-
tightened clamps and bingo it worked and didnt' leak. good job on the supplying of all the necessary adapers.
  • richard from las vegas, NV
  • Difficulty Level:
    Easy
  • Total Repair Time:
    1- 2 hours
  • Tools:
    Screw drivers, Socket set, Wrench (Adjustable)
40 of 47 people found this instruction helpful.
Was this instruction helpful to you?
Thank you for voting!

Motor was getting noisier every time we used the dishwasher. We knew it was just a matter of time before it totally quit.

The most difficult part was removing the dishwasher from below the counter. Once that was complete, I simply turned the washer onto it's front surface to access the pump easier. Simply disconnected the electrical connectors, loosened the three hose clamps holding the hoses to the pump. Lastly removed a stiff arm bracket holding the pump. Reversed the order to install the new one using a longer bracket provided with the new unit. Hooked up the electrical connections last and slid the washer back in place. The washer runs like new now and is not making noise. The replacement part was a perfect match.
  • Glenn from Clemmons, NC
  • Difficulty Level:
    Easy
  • Total Repair Time:
    30 - 60 mins
  • Tools:
    Nutdriver, Pliers, Screw drivers
48 of 51 people found this instruction helpful.
Was this instruction helpful to you?
Thank you for voting!
Fixes Symptom 1% of time
★★★★★
★★★★★
4 Reviews

Rated by 5 customers 


Really Easy 

30 - 60 mins 

Ratings submitted by customers like you who bought this part.   

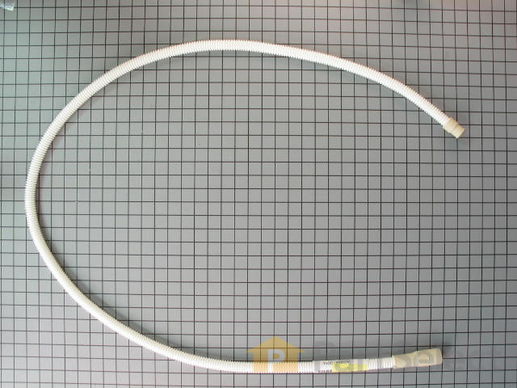
This drain hose is an OEM, manufacturer-approved replacement part for your dishwasher. The drain hose filters out the wastewater from the dishwasher. If there is a hole in it, water will leak out of your dishwasher. Shut off the water and power to the unit before beginning this repair. Accessing the drain hose involves unscrewing the dishwasher and pulling it out. Remove the clamp holding the hose in place to its connection under the sink, using a 5/16ths socket. Disconnect the fill line. Use a 1/4 inch nut driver to loosen the clamp at the other end of the drain hose. Keep a towel handy for any water still inside. Keep the clamps for use on your new drain hose. Reinstall all hoses and lines in reverse order.

$ 34.01
  In Stock
PartSelect Number PS260686
Manufacturer Part Number WD24X10014

Customer Repair Stories

Couldn't drain water

I connected one end of hose to the drain using a hose clamp and screwdriver then connected the other end to the dishwasher using anouther hose clamp and a screwdriver..
  • Janice from Rockville, MO
  • Difficulty Level:
    Really Easy
  • Total Repair Time:
    Less than 15 mins
  • Tools:
    Screw drivers
4 of 9 people found this instruction helpful.
Was this instruction helpful to you?
Thank you for voting!

Stinky Dishwasher

I pulled the dishwasher out and detached the drain hose. I attached the new drain hose after cleaning out the connection to the garbage disposal.

Now my dishwasher doesn't stink anymore!
  • Jeremy from Hailey, ID
  • Difficulty Level:
    Easy
  • Total Repair Time:
    30 - 60 mins
  • Tools:
    Screw drivers, Socket set
8 of 9 people found this instruction helpful.
Was this instruction helpful to you?
Thank you for voting!
Fixes Symptom 1% of time

Rated by 6 customers 


Really Easy 

15 - 30 mins 

Ratings submitted by customers like you who bought this part.   

  No Longer Available
PartSelect Number PS260687
Manufacturer Part Number WD24X10015

Customer Repair Stories

Leaking small hose.

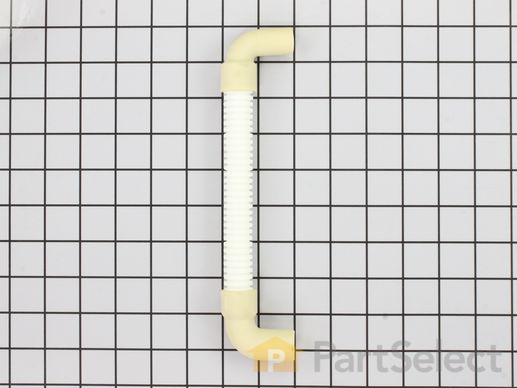
At first I thought I would call a repair man.Then I thought-that will be at least $100!So we went online and found the part.Took about four days to arrive.I pulled the dishwasher out and turned it on it's front.The little leaking hose was easy to remove,two clamps,and the new one installed.Total cost-$14.00.
  • Bruce from Isleton, CA
  • Difficulty Level:
    Easy
  • Total Repair Time:
    15 - 30 mins
  • Tools:
    Pliers, Screw drivers
2 of 3 people found this instruction helpful.
Was this instruction helpful to you?
Thank you for voting!

The plastic hose chamber was damaged and leaked when dishwasher was in use.

First I removed the four screws that secure the dishwasher to the underside of the countertop. Then I removed the four screws from the front cover at the toespace. Next I used an adjustable wrench to turn the feet to lower the unit enough to slide it out of the compartment. I unplugged the dishwasher and turned it on its side in order to access the hose chamber. I used a pliers to loosen the clamps at each end of the hose chamber and removed the the damaged item. Next I slid the ends of the new part into place and used the pliers to reposition the clamps. Finally I returned the dishwasher to an upright position, slid it back into the compartment, adjusted the feet to raise it to the proper height, put the toespace cover back on, secured the top of the unit to the underside of the countertop and I was good to go. No more water leakage.
  • Casey from Monrovia, CA
  • Difficulty Level:
    Really Easy
  • Total Repair Time:
    15 - 30 mins
  • Tools:
    Pliers, Screw drivers, Wrench (Adjustable)
5 of 5 people found this instruction helpful.
Was this instruction helpful to you?
Thank you for voting!
Fixes Symptom 1% of time
★★★★★
★★★★★
4 Reviews

Rated by 25 customers 


Easy 

30 - 60 mins 

Ratings submitted by customers like you who bought this part.   

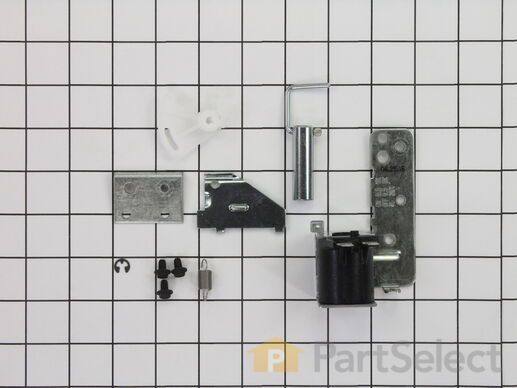
This kit includes the armature and linkage assembly.

$ 78.79
  In Stock
PartSelect Number PS260117
Manufacturer Part Number WD21X10060

Replacing your General Electric Dishwasher Drain Solenoid Kit

Replacing your Drain Solenoid Kit

Customer Repair Stories

Dishwasher not draining

Actually, the problem started with a Timer Motor failure, and that let the dishwasher run for 4 hours (doh!). Immediately, I tested and ordered the timer, which unfortunately didn't come as just a motor, it came as an assembly. I installed it, and the dishwasher ran the cycle just fine.

Except it didn't drain.

After poking around, I noticed the drain solenoid had apparently been overworked; the timer must have failed on DRAIN. The solenoid was severely overheated, and thankfully didn't cause a fire, but it was somewhat melted. Replaced the solenoid, and all is well, especially when my wife was eyeballing a $1000 Bosch!
  • Christopher from Woodbridge, VA
  • Difficulty Level:
    Really Easy
  • Total Repair Time:
    Less than 15 mins
  • Tools:
    Pliers
15 of 17 people found this instruction helpful.
Was this instruction helpful to you?
Thank you for voting!

D/W would not drain. Water standing in bottom.

It is a simple process to replace the drain solenoid on these dishwashers, having replaced several in the past few months.

After removing the front bottom panels, I removed the 2 screws holding the old solenoid, unplugged the wire harness, and then switched over the springs to the new solenoid. Assembly was installing 2 screws, and plugging in the wire harness.

I work on a 260 + unit property, as well as working for a property management company who rents single family homes.

PartSelect.com is an excellent source of parts, shipping in a quick manner, allowing the repairs to be completed in a timely manner. Thank you.
  • Ed from Cornelius, NC
  • Difficulty Level:
    Really Easy
  • Total Repair Time:
    Less than 15 mins
  • Tools:
    Nutdriver, Screw drivers
65 of 71 people found this instruction helpful.
Was this instruction helpful to you?
Thank you for voting!
Fixes Symptom 1% of time
★★★★★
★★★★★
1 Review

Rated by 5 customers 


Easy 

15 - 30 mins 

Ratings submitted by customers like you who bought this part.   

This part attaches to the inner door panel.

$ 39.91
  In Stock
PartSelect Number PS2345692
Manufacturer Part Number WD35X10346

Customer Repair Stories

It was leaking.

Took off old jet dry dispenser and replaced with new and now not leaking.
  • Lisa from PALESTINE, TX
  • Difficulty Level:
    Really Easy
  • Total Repair Time:
    15 - 30 mins
1 person found this instruction helpful.
Was this instruction helpful to you?
Thank you for voting!

threads were faulty

Removed the 7 screws from inner side of door; removed set screw from handle; removed inner door cover; pulled old part out; pushed new part in and Voila! Replaced all screws, no problem. Thanks for your great customer service!
  • Donna from TUCSON, AZ
  • Difficulty Level:
    Easy
  • Total Repair Time:
    Less than 15 mins
  • Tools:
    Screw drivers
3 of 6 people found this instruction helpful.
Was this instruction helpful to you?
Thank you for voting!
Fixes Symptom 1% of time
★★★★★
★★★★★
11 Reviews

Rated by 12 customers 


Really Easy 

Less than 15 mins 

Ratings submitted by customers like you who bought this part.   

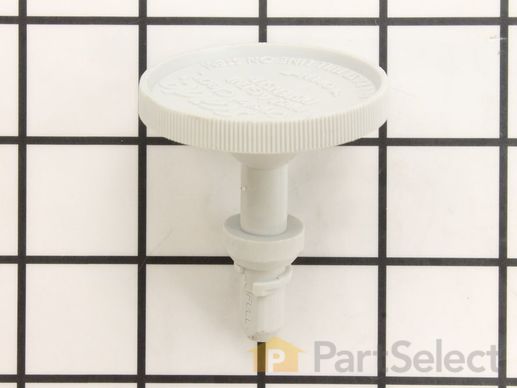
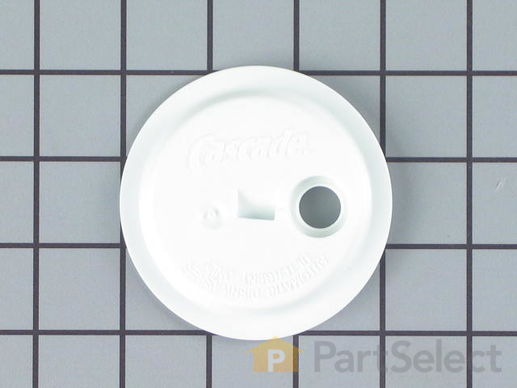
This part helps keep the rinse aid the dispenser until its needed.

$ 18.37
  In Stock
PartSelect Number PS2351824
Manufacturer Part Number WD12X10284

Replacing your General Electric Dishwasher Rinse Aid Fill Cap

Replacing your Rinse Aid Fill Cap

Customer Repair Stories

Replace rinse aid fill cap

Opened the package and screwed in the new rinse aid fill cap. No problems. It fit and works just fine.
  • Judy from Salem, OR
  • Difficulty Level:
    Really Easy
  • Total Repair Time:
    Less than 15 mins
8 of 9 people found this instruction helpful.
Was this instruction helpful to you?
Thank you for voting!

Lost Despenser Lid, Droped It And Havent Seen It Since.

Ordered the part, by using the diagram on the ge website identified the part and ordered it right them and when it came (delivered really fast) took it out of the bag and screwed it in the jet dry despenser and is working great.
  • ANNE from SWANNANOA, NC
  • Difficulty Level:
    Really Easy
  • Total Repair Time:
    Less than 15 mins
26 of 31 people found this instruction helpful.
Was this instruction helpful to you?
Thank you for voting!
Fixes Symptom 1% of time
★★★★★
★★★★★
2 Reviews

Rated by 1 customer 


Easy 

Less than 15 mins 

Ratings submitted by customers like you who bought this part.   

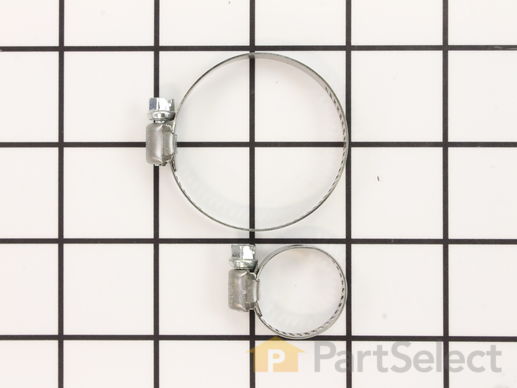
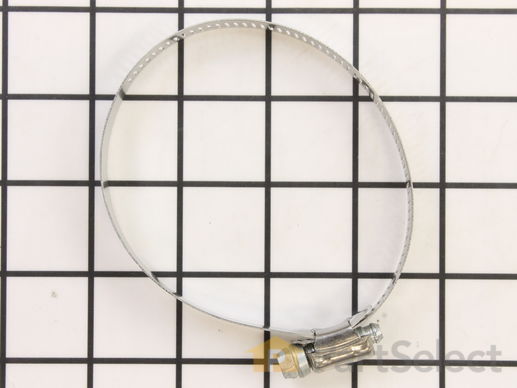
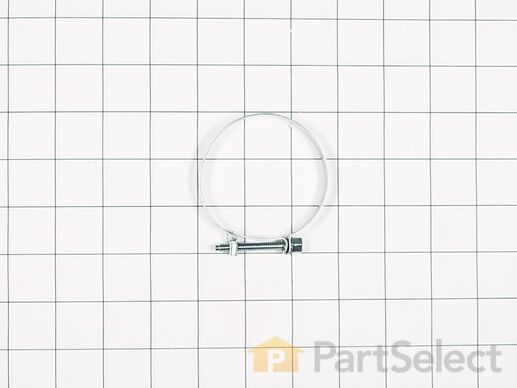
This is a water hose clamp kit for a variety of appliances including dishwashers and washers. This is a genuine replacement part. The kit includes two hose clamps. The smaller of the two is 1 inch in diameter while the larger one is 2 inches in diameter. The hose clamps secure the end of the water hose in place to prevent the hose from leaking. If you notice leaking from the hose of your appliance, you may need to replace this kit. Protect your hands with work gloves during this repair to avoid injury.

$ 15.89
  In Stock
PartSelect Number PS270806
Manufacturer Part Number WH1X2036
Fixes Symptom less than 1% of time
★★★★★
★★★★★
5 Reviews

Rated by 8 customers 


Easy 

30 - 60 mins 

Ratings submitted by customers like you who bought this part.   

Water is forced through this spray arm by the unit's pump and motor assembly. The force of the water propels the spray arms, spraying water and detergent onto the dishes on the dishrack. This spray arm does not come with the screws.

$ 86.81
  In Stock
PartSelect Number PS755622
Manufacturer Part Number WD28X10103

Customer Repair Stories

Replace Top Spray Arm

As suggested. Pull washer, remove screws from top and replace with new part. Very simple and easy if you follow steps furnished by this site.
  • John from Norman, OK
  • Difficulty Level:
    Really Easy
  • Total Repair Time:
    30 - 60 mins
  • Tools:
    Nutdriver, Screw drivers
4 of 7 people found this instruction helpful.
Was this instruction helpful to you?
Thank you for voting!

spray arm falls off

Turn off power at breaker box.
Remove lower covers and 2 screws into counter top.
Verify sufficient length on water and electrical connection to allow sliding dishwasher out approx. 2/3. I disconnected the electrical at the j box on the dishwasher. If you must disconnect the water line, shut off supply, usually located under nearby sink, and provide a rag or sponge for small amounts of water left in supply line.
Carefully pull back the insulation to expose two screws on top where water line runs into the center.
Pull the top tray part way out and reach in to hold the spray arm while removing the screws. The spray arm will easily drop out.
Hold the new spray arm in place making sure the raised screw posts push into the holes, then reinstall the two screws. Done. Pull insulation back into place, retape if necessary. Reconnect electrical and water if necessary.
Slide unit back in, checking alinement. Rescrew to counter top and reinstall lower covers. Task complete. 15 mins if prepared. 30 mins if both elect. & water are disconnected and you are somewhat hesitant.
  • JAMES from AUBURN, WA
  • Difficulty Level:
    Really Easy
  • Total Repair Time:
    Less than 15 mins
  • Tools:
    Nutdriver, Screw drivers
4 of 6 people found this instruction helpful.
Was this instruction helpful to you?
Thank you for voting!
Fixes Symptom less than 1% of time
★★★★★
★★★★★
19 Reviews

Rated by 70 customers 


Really Easy 

15 - 30 mins 

Ratings submitted by customers like you who bought this part.   

This is used for the check valve.

$ 24.34
  In Stock
PartSelect Number PS260690
Manufacturer Part Number WD24X10018

Replacing your General Electric Dishwasher Piston and Nut Assembly

Replacing your Piston and Nut Assembly

Customer Repair Stories

Nothing more than a worn out check valve,easilly accessible and easilly changed. The valve wouldnt close fully due to deteriation of the piston stopper.

Removed bottom tray from the dishwasher and in the back there is a screen with 5 hex head screws. Removed the screws and then lifted the screen out to expose the vavle. Unscrewed the valve by hand an installed the new one,hand tighten only. Reversed order for reassembly.
  • Kevin from Roanoke, VA
  • Difficulty Level:
    Really Easy
  • Total Repair Time:
    Less than 15 mins
  • Tools:
    Nutdriver
17 of 19 people found this instruction helpful.
Was this instruction helpful to you?
Thank you for voting!

Dishwasher wouldn't fully drain

I removed the four screws holding the screen and molded plastic cage inside the rear of the dishwasher to expose the check valve assembly. I then unscrewed the piston and nut assembly with my hand and replaced it with the new one. I found that the rubber cone shaped valve on the old piston and nut assembly was entirely disintegrated. This easy repair solved the problem.
  • Dan from Minnetonka, MN
  • Difficulty Level:
    Really Easy
  • Total Repair Time:
    Less than 15 mins
  • Tools:
    Nutdriver
189 of 204 people found this instruction helpful.
Was this instruction helpful to you?
Thank you for voting!
Fixes Symptom less than 1% of time

$ 8.06
  In Stock
PartSelect Number PS2322317
Manufacturer Part Number WD21X10355
Fixes Symptom less than 1% of time

Rated by 1 customer 


Really Easy 

30 - 60 mins 

Ratings submitted by customers like you who bought this part.   

This hose is used to fill the dishwasher with water.

$ 57.31
  On Order
PartSelect Number PS259549
Manufacturer Part Number WD18X202
Fixes Symptom less than 1% of time
★★★★★
★★★★★
1 Review

Rated by 3 customers 


Really Easy 

30 - 60 mins 

Ratings submitted by customers like you who bought this part.   

  No Longer Available
PartSelect Number PS260545
Manufacturer Part Number WD22X10024

Customer Repair Stories

accumulation of dirt in behind screen in back of washer

Pulled dishwasher out. Unscrewed 4 screws holding body valve, disconnected 2 hoses and replaced valve, put machine back together in reverse order.
  • William from Belmar, NJ
  • Difficulty Level:
    Really Easy
  • Total Repair Time:
    15 - 30 mins
  • Tools:
    Screw drivers, Wrench set
14 of 20 people found this instruction helpful.
Was this instruction helpful to you?
Thank you for voting!

22 Yr Old Dishwasher Would Not Pump Out Water

22 Year old dishwasher . . . Not worth repairing I thought so I pulled it out to dispose of it. Before I did, I went online to see if any parts were still available. . . To my surprise partselect. Com had it all! My problem was a plugged chamber located on rear wall of unit. A 20 minute repair once the new part arrived. Part arrived in 3 days but was broken inside of pkg. I called and the operator apologized profusely. . . She told me to keep the defective and explained my cc would temporarily be charged for replacement but as soon as they received a credit from supplier my credit will appear on my cc stmt. I had a replacement the following day. . . What a company!!!!
  • Joseph from Lowell, MA
  • Difficulty Level:
    Really Easy
  • Total Repair Time:
    1- 2 hours
  • Tools:
    Pliers, Screw drivers, Wrench (Adjustable)
14 of 19 people found this instruction helpful.
Was this instruction helpful to you?
Thank you for voting!
Fixes Symptom less than 1% of time

Rated by 5 customers 


Easy 

30 - 60 mins 

Ratings submitted by customers like you who bought this part.   

  No Longer Available
PartSelect Number PS263956
Manufacturer Part Number WD8X219
Fixes Symptom less than 1% of time
★★★★★
★★★★★
1 Review

Rated by 1 customer 


Easy 

15 - 30 mins 

Ratings submitted by customers like you who bought this part.   

$ 291.75
  In Stock
PartSelect Number PS261608
Manufacturer Part Number WD31X10004

Customer Repair Stories

Inside dishwasher door broke at door hinge.

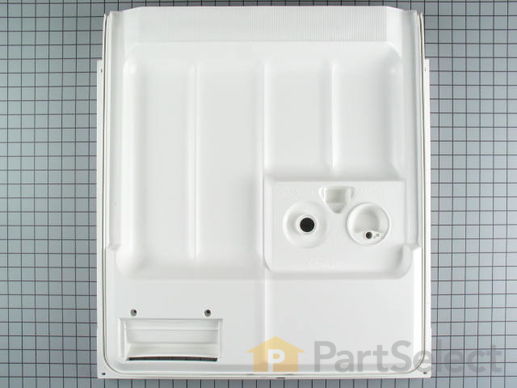
Removed the existing inner door by removing screws along the edge of the inside door. Had trouble removing the door latch but after lifting it on one side of the plastic door fitting, it eventually lifted out. I also had some trouble getting the spring loaded soap door back into the replacement inner door. After playing with it for awhile I realized that the soap door should be in the open position when putting the spring latch back on. The soap door won't close until you get the entire inner door mounted and back on. I also want to note the the inside vent in the upper part of the inner door needs to be removed from the old inner door and installed in the new one. I missed that at first and it allowed condensation to get inside the door which caused the dishwashers alarm to go off during the dry cycle. One last note that I initially decided not to replace the existing sound proofing material in the new door based on advice from a website that stated that I wouldn't notice the sound difference. That was definitely untrue. I had to disassemble the door, replace the sound proofing and then it sounded fine. Overall it was a little difficult to figure out but considering how inexpensive the replacement door was compared with a having a service repairman come out, it was worth the trouble.
  • Jeff from Rancho Cucamonga, CA
  • Difficulty Level:
    A Bit Difficult
  • Total Repair Time:
    1- 2 hours
  • Tools:
    Screw drivers
Was this instruction helpful to you?
Thank you for voting!
Fixes Symptom less than 1% of time

$ 13.84
  In Stock
PartSelect Number PS259697
Manufacturer Part Number WD1X1392
26 CLAMP
Fixes Symptom less than 1% of time

$ 20.66
  In Stock
PartSelect Number PS259688
Manufacturer Part Number WD1X1376
Fixes Symptom less than 1% of time

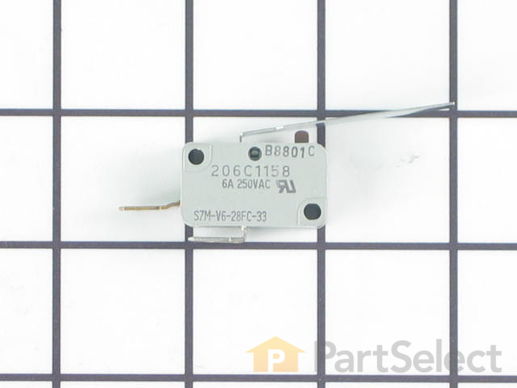
Water that fills your dishwasher lifts this float, and when it reaches a certain level, it acts as a trigger for the float switch. The float triggers the float switch to shut off, thereby shutting off the flow of water into the dishwasher.

$ 7.49
  In Stock
PartSelect Number PS260235
Manufacturer Part Number WD21X479

Replacing your General Electric Dishwasher Float Switch

Replacing your Float Switch
Fixes Symptom less than 1% of time
★★★★★
★★★★★
1 Review

Rated by 2 customers 


Easy 

30 - 60 mins 

Ratings submitted by customers like you who bought this part.   

$ 8.54
  In Stock
PartSelect Number PS259460
Manufacturer Part Number WD16X297