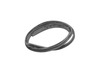
This is a lower rack roller for your dishwasher. It attaches in the lower roller assembly on the bottom of your rack to allow the rack to smoothly slide in and out. This replacement part is 1.5 inches...
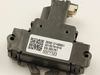
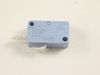
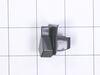
This is replacement door latch for your dishwasher. The door latch is attached to the tub frame, and connects to the door strike to keep your dishwasher door closed during operation. If you have a bro...
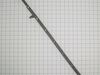
This lower spray arm assembly in your dishwasher distributes water and detergent during the washing cycle by spinning around and spraying water in different directions. You can usually find it attache...
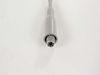
The element heating assembly is found at the bottom of the dishwasher tub, and helps to warm the water in the wash cycle, and dry the dishes afterward. If the water does not heat up during the wash cy...
This mounting bracket is manufactured to secure your dishwasher to your countertop. Mounting brackets should be installed so the dishwasher doesn’t tip forward. You can fit the bracket to either the c...
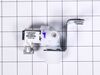
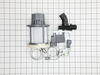
This is a washer inlet valve assembly for your dishwasher. This valve allows water to flow into your dishwasher at the proper rate. If your dishwasher tub is not filling with water or filling when the...
This drain pump kit is for dishwashers. The drain pump kit removes the water from the dishwasher tub during the drain phase of the dishwashing cycle. The kit may include multiple parts; refer to your ...
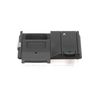
This is the user interface control board for various dishwashers. The user interface panel is what you directly interact with on your dishwasher to start and stop it and select the specific cycle you ...
The detergent dispenser in your dishwasher stores the detergent until it is ready to be dispensed. If your dishes are not coming clean, or you notice the detergent is still in the dispenser at the end...
This OEM mid spray or center wash arm assembly distributes water and detergent in your dishwasher during the wash cycle. It has small nozzles that spray water onto your dishes and is located between t...
$16.91
In Stock
Questions And Answers for GDT695SGJ0BB
We're sorry, but our Q&A experts are temporarily unavailable.
Please check back later if you still haven't found the answer you need.
1. Turn off breaker supplying power to dishwasher in electrical panel 2. Open dishwasher door 3. Unscrew the screws that secure the dishwasher to the counter. 4. Tip dishwasher forward. Identify the non-functioning door latch. It looks exactly like the replacement. Unclip the wire harness from the door latch. 5.
... Read more On the inside of the dishwasher, there are 2 screws directly under the door latch. Unscrew them and carefully set aside. 6. Remove old door latch. 7. Set new door latch in place. Holding securely, replace screws removed in step 5. Toward the end they get a little tougher to screw in. 8. Plug wire harness into new door latch. 9. Re-align dishwasher and re-secure to counter in previous position. 10. Test latch to make sure it closes properly. 11. Turn on breaker in electrical panel. The dishwasher should now function properly.
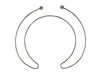
1. Pull out dishwasher (not all the way) 2. Open the door. 3. Remove the white rope holding the door hinge (both sides) 4. Remove the door by pulling up when the door is open about 4-8 inches. 5. Lay the door on the floor ( put something under the door so not to scratch the front. 6. Remove the small bolt at the bottom of the door (both
... Read moresides). 7. Slide the hinge back, up, then out. 8. Where the hinges were are another set of bolts, remove those (both sides) 9. Grab the top part of the door (the part with the buttons) and slide apart. 10. Remove the styrofoam carefully. 11. Disconnect the wiring harness. 12. Remove the 6 screws holding the Despenser tray in place. 13. Put in new Despenser tray and put everything back together.
I first tested for 120volts to my dishwasher to verify it was getting power from my electrical panel. Then tested pins 2 and 5 on the control board to make sure there was 14 volts going to the user interface harness. After I verified that I knew it was the user interface that was bad. I watched a video I found on YouTube and followed it.
... Read moreThis repair was fairly easy while watching the video and making sure that you use the correct pin out that comes in the box for your model. I’m not an appliance repair person and it took me about an hour start to finish. I’m going to attach the video I https://youtu.be/TI8cUjy5YOE