Models > FGHS2631PF2 > Symptoms > Fridge too warm

Parts That Fix Frigidaire Refrigerator FGHS2631PF2 Fridge too warm

Fridge too warm is a commonly reported symptom for the FGHS2631PF2 Frigidaire Refrigerator, and we have put together a full guide on how to fix this. This advice is based on feedback from people who own this exact appliance. We have listed the most common parts for your FGHS2631PF2 Frigidaire Refrigerator that will fix Fridge too warm. We have included repair instructions, and helpful step-by-step video tutorials. If you are experiencing this issue, not to worry, DIYers just like you have fixed this, and shared their experience to help you!

Fixes Symptom 52% of time
★★★★★
★★★★★
24 Reviews

Rated by 22 customers 


Easy 

30 - 60 mins 

Ratings submitted by customers like you who bought this part.   

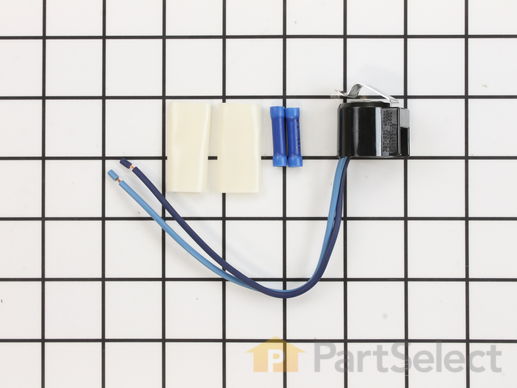
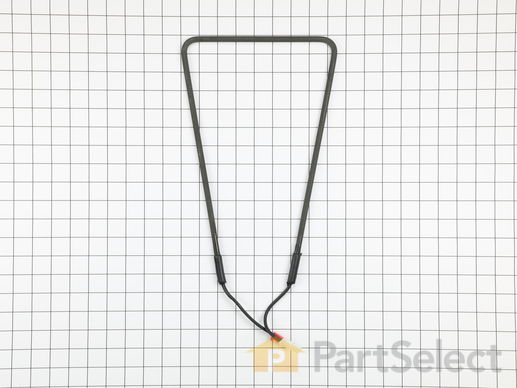
If you find that there is excessive frost in your freezer, or the freezer will not defrost, you may need to replace the defrost thermostat. The defrost thermostat kit comes with the clip, leads, and heat shrink. To access the defrost thermostat for this repair, you will need to remove your freezer shelves, as well as the back panel of your freezer. To complete this repair, you will need a 1/4-inch nut driver, a set of wire strippers and crimpers, and a heat gun or blow dryer. Before you begin this repair, be sure to disconnect the power source from the appliance.

$ 20.58
  In Stock
PartSelect Number PS469522
Manufacturer Part Number 5303918214

Replacing your Frigidaire Refrigerator Defrost Thermostat Kit

Replacing your Defrost Thermostat Kit

Customer Repair Stories

Refrigerator would sometimes freeze everything

we researched the internet with our symptoms and most sites said it was the thermostat. At $800+ for a new refrigerater, we decided to order the thermostat. Found schematics on the net, the thermostat was located in teh freezer compartment . Unplugged, removed food from freezer, removed the bottom shelf in freezer, and the back panel It was EASY to find. Cut 2 wires, replaced with new thermostat. DONE! The new thermostat came with new connecters.
  • donna from brandon, FL
  • Difficulty Level:
    Really Easy
  • Total Repair Time:
    15 - 30 mins
  • Tools:
    Screw drivers
84 of 95 people found this instruction helpful.
Was this instruction helpful to you?
Thank you for voting!

Running but not cooling off and frost in the back of the freezer

Unplugged the refrigerator. Removed the 4 hex head screws on the lower back panel at the back of the freezer. Used a blow dryer to defrost the pipes and area surrounding the thermostat. Unplug the connection from the back of the freezer, unplug the 2 wires, one that goes to the heater, one that comes from power. Unclip the thermostat from the pipe and note which pipe you unclipped it from. Cut the wires on the old thermostat midway between the plugs and the sensor. Using the supplied butt connectors, strip the wire ends on color matched wires (should be a dark blue or black) and crimp them together. Repeat with the other wire. Discard the white shrink wrapping. I wasn't able to get it small enough with a hair dryer or lighter. Plug the thermostat back into it's respective plugs. Clip the thermostat back onto the pipe you removed it from. Replace the back panel with the four screws. Ensure the bottom of the panel is set inside of the drip tray. Replace any shelving you removed. Plug the refrigerator back into the wall. Your done!
  • Leo from Bentonville, AR
  • Difficulty Level:
    Easy
  • Total Repair Time:
    15 - 30 mins
  • Tools:
    Nutdriver, Pliers
266 of 316 people found this instruction helpful.
Was this instruction helpful to you?
Thank you for voting!
Fixes Symptom 13% of time
★★★★★
★★★★★
16 Reviews

Rated by 12 customers 


Easy 

15 - 30 mins 

Ratings submitted by customers like you who bought this part.   

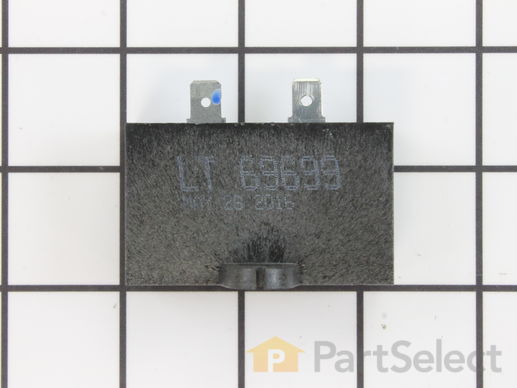
This part helps the compressor kick on and off while maintaining a constant temperature to keep things frozen in your freezer. The run capacitor is attached to the compressor. This part is 120 volts and 15 mfd. The run capacitor helps the compressor kick on and off while maintaining a constant temperature to keep things frozen in your freezer. If your refrigerator is too warm, will not start, or your freezer section is too warm, you may need to replace this part. This is a genuine OEM part. Please remember to disconnect power to your refrigerator before starting your repair.

$ 51.77
  In Stock
PartSelect Number PS3495561
Manufacturer Part Number 297286803

Customer Repair Stories

Coming from the refrigerator, there was an intermittent "clicking noise", occurring about every 30 seconds. The frig. eventually failed .

I removed the back cover and removed the clip holding the compressor- run capacitor and start relay. I replaced these 2 components and clean the dust from the frig., and from the bottom of the floor. I replaced the back cover ; Loss about $300 worth of meat when when the frig. failed. Then I thought that, during these turbulent times, there are many which don't have a refrigerator or any meat to place in it, The refrigerator is "running" normal again.
  • winifred from LOUISVILLE, KY
  • Difficulty Level:
    Easy
  • Total Repair Time:
    30 - 60 mins
  • Tools:
    Nutdriver, Pliers
4 of 4 people found this instruction helpful.
Was this instruction helpful to you?
Thank you for voting!
Fixes Symptom 9% of time
★★★★★
★★★★★
8 Reviews

Rated by 1 customer 


A Bit Difficult 

30 - 60 mins 

Ratings submitted by customers like you who bought this part.   

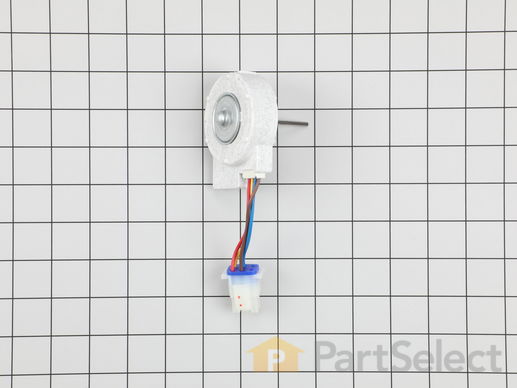
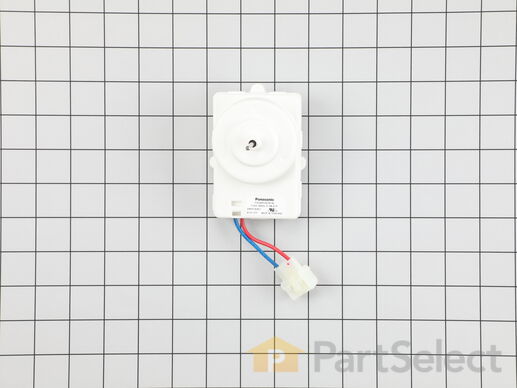
This evaporator fan motor circulates air over the refrigerator coils.

$ 129.35
  In Stock
PartSelect Number PS1526073
Manufacturer Part Number 241509402

Customer Repair Stories

motor falure of evaporator fan

removed fan unit from frig and installed new motor and then replaced back in frig. No tools needed. need to unplug unit and take apart and put new motor in the unit and then plug back in.
  • john from Concho, AZ
  • Difficulty Level:
    A Bit Difficult
  • Total Repair Time:
    30 - 60 mins
14 of 31 people found this instruction helpful.
Was this instruction helpful to you?
Thank you for voting!
Fixes Symptom 8% of time
★★★★★
★★★★★
2 Reviews

Rated by 3 customers 


Easy 

1- 2 hours 

Ratings submitted by customers like you who bought this part.   

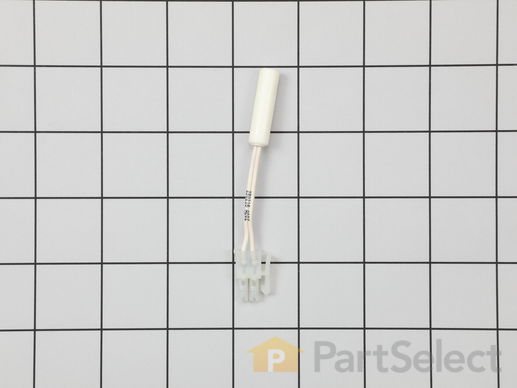
This temperature sensor, also known as a thermistor, is responsible for preventing the evaporator within your refrigerator from overheating during its defrosting cycle. This sensor is compatible with various makes and models of refrigerator and is sold as an individual part. This sensor works with the electronic control board within your refrigerator to control the temperature by turning the compressor on or off. If your fridge is too warm or too cold, consider changing the thermistor with this genuine OEM part, and make sure to disconnect the power to the refrigerator before doing any repairs.

$ 51.23
  In Stock
PartSelect Number PS1765215
Manufacturer Part Number 240597203

Customer Repair Stories

2 drawer undercounter beverage ref not getting cold enough. Wont get below 48°

Took drawers out by removing 2 screws on top of rail near front, then popped black plastic cover off in lower right inside cabinet...sensor just un plugged and new one plugged in easily...did not fix problem though...display set at 34 but bottom drawer reads about 40 at best and upper drawer reads around 55...dont think the 3 little fans inside on back wall have been running
  • Tim from SYLVANIA, OH
  • Difficulty Level:
    Really Easy
  • Total Repair Time:
    15 - 30 mins
  • Tools:
    Screw drivers
4 of 5 people found this instruction helpful.
Was this instruction helpful to you?
Thank you for voting!

My fridge temp was warm. Freezer temp was ok, but fluctuated some.

I checked the dampener, it worked. The compressor and fan worked. I knew because my freezer was still hovering around 10 degrees. Coils were clean. Thermistor was the only thing it could be. Took all my shelves out. Removed four screws. Took the back panel off. The thermistor sits tucked in on the side. I piped it out, in clipped it. Used my multimeter to test the numbers. Numbers were off just a bit. Ordered the part. Crossed my fingers.,took less then 5 minutes to put the part in. Plugged in the fridge. It was sitting at 33 degrees in about an hour and a half. I can’t believe I fixed it. I knew NOTHING about refrigerators. For how big my fridge is, it would have cost 3,000 and up to get a new one with the same cu ft size. Instead, it cost me $44. That includes shipping. Thank you Parts Select!! Made it so easy to pick the correct part for my model fridge!
  • Cindy from AMARILLO, TX
  • Difficulty Level:
    Really Easy
  • Total Repair Time:
    Less than 15 mins
  • Tools:
    Screw drivers
24 of 38 people found this instruction helpful.
Was this instruction helpful to you?
Thank you for voting!
Fixes Symptom 4% of time
★★★★★
★★★★★
2 Reviews

Rated by 1 customer 


Really Easy 

15 - 30 mins 

Ratings submitted by customers like you who bought this part.   

$ 111.73
  In Stock
PartSelect Number PS3501052
Manufacturer Part Number 242018301
Fixes Symptom 4% of time
★★★★★
★★★★★
17 Reviews

Rated by 5 customers 


Really Easy 

Less than 15 mins 

Ratings submitted by customers like you who bought this part.   

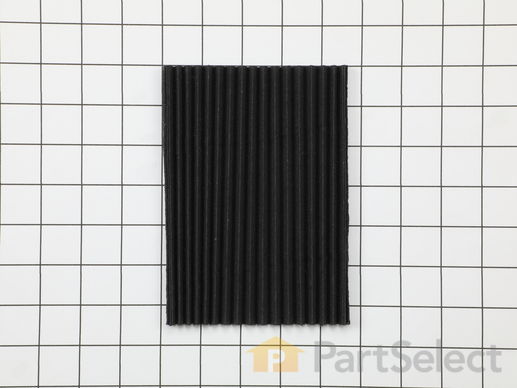
This manufacturer-approved air filter system for refrigerators eliminates odors and any impurities. It does this by neutralizing and removing odor-causing molecules. For best results, it is important to change the filter every 6 months to ensure that food is kept fresh, and the humidity is controlled. This part measures about 7 inches wide and 5 inches deep. Follow installation instructions provided by the manufacturer when installing this part to ensure accurate results and further guidance. Remember to unplug the refrigerator from the power source before starting this project. The air filter may be located in different places depending on your appliance, but is usually on the inner right or left side. See your manual for exact location. Our customers rated this as a very easy repair that takes only a few minutes; just locate and remove the old air filter and insert the new one to complete the repair, which requires no tools.

$ 31.75
  In Stock
PartSelect Number PS1993820
Manufacturer Part Number EAFCBF

Customer Repair Stories

routine maintenance

slide old filter out and insert new one
  • fred from Austin, TX
  • Difficulty Level:
    Really Easy
  • Total Repair Time:
    Less than 15 mins
2 of 2 people found this instruction helpful.
Was this instruction helpful to you?
Thank you for voting!

you r label (this end in arrow is wrong

placed filter in sideways
  • melvin from BASKING RIDGE, NJ
  • Difficulty Level:
    Really Easy
  • Total Repair Time:
    Less than 15 mins
14 of 22 people found this instruction helpful.
Was this instruction helpful to you?
Thank you for voting!
Fixes Symptom 4% of time
★★★★★
★★★★★
5 Reviews

Rated by 5 customers 


Easy 

30 - 60 mins 

Ratings submitted by customers like you who bought this part.   

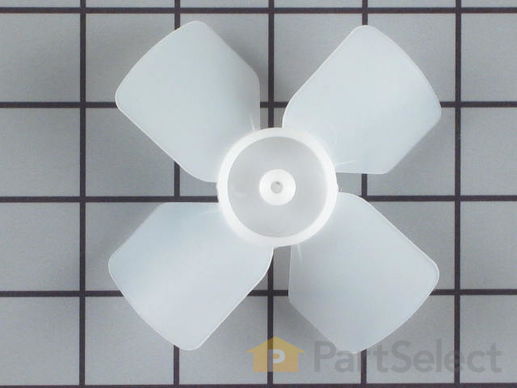
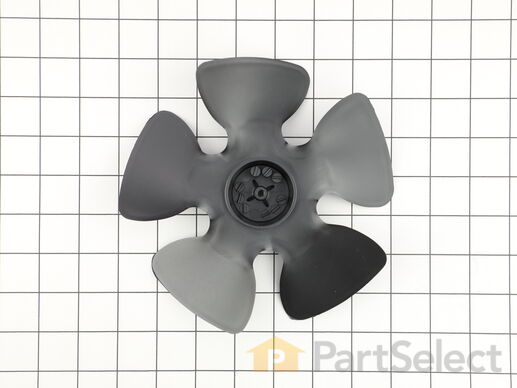
This evaporator fan blade is a genuine OEM part that is sourced directly from the manufacturer. The evaporator fan blade circulates air through the refrigerator to control the amount of cold air goes that goes to internal compartments of the unit. It may need to be replaced if the fridge is noisy or not cold enough. This part is made of plastic and is sold individually. It will be necessary to disconnect power to the refrigerator and empty the freezer compartment of the refrigerator. The tools needed to complete this repair are a 1/4 inch nut driver and a pair of needle nose pliers.

$ 47.83
  In Stock
PartSelect Number PS473177
Manufacturer Part Number 5308000010

Replacing your Frigidaire Refrigerator Evaporator Fan Blade

Replacing your Evaporator Fan Blade

Customer Repair Stories

loud noise fan blade broke,off balance

take 1/4 hex screws out clean out dust ,remove old fan blade replace with new install bolts .
  • EDWIN from ELWOOD, IN
  • Difficulty Level:
    Really Easy
  • Total Repair Time:
    15 - 30 mins
  • Tools:
    Nutdriver
Was this instruction helpful to you?
Thank you for voting!

I had a broken fan blade due to ice build up from a leaking ice maker.

1. I took out one screw on the ice maker and loosened the other two screws and unplugged and removed the ice maker.
2. Next I took out 2 screws from the bottom of the auger drive box and unplugged the wiring harness and removed the box. The wiring harness was a little tricky. The lock on the plug pushes in to unlock even though it looks like it pulls out,.
3.next you must remove 2 screws from the left side bracket that holds the auger box and remove the bracket.
4.Now take out 8 screws that hold the back panel in place and remove the back panel.
5. now your looking at the evaporator fan blade and motor. The simple way to replace the fan blade is to unplug the motor and remove it from the freezer. It just sits in with nothing holding it. The fan requires a little pressure but should pull right off. Install new fan blade and put everything back in the same order it was removed.
  • gary from ARANSAS PASS, TX
  • Difficulty Level:
    Easy
  • Total Repair Time:
    30 - 60 mins
  • Tools:
    Nutdriver
3 of 5 people found this instruction helpful.
Was this instruction helpful to you?
Thank you for voting!
Fixes Symptom 2% of time
★★★★★
★★★★★
2 Reviews

Rated by 3 customers 


Easy 

30 - 60 mins 

Ratings submitted by customers like you who bought this part.   

$ 81.93
  In Stock
PartSelect Number PS2581596
Manufacturer Part Number 242044113

Customer Repair Stories

Freezer stopped defrosting and refrigerator stopped cooling. Fan in freezer cycling on and off constantly.

Went the typical route of part replacement since I don't own an ohm meter...pull and replace one part at a time. Started with the cheaper parts first, replaced the freezer fan for $40, same problem. Replaced the defrost heater element for $40, same problem. Replaced the thermostat $15 and controller board $150 at same time, bingo problem solved. Had to defrost with the hair dryer each time, biggest pain. Had an issue finding a Utube that showed the water filter system and thermistor removal for this model, otherwise straightforward, but not a 30 minute job.
  • Thomas from SPRINGDALE, AR
  • Difficulty Level:
    A Bit Difficult
  • Total Repair Time:
    1- 2 hours
  • Tools:
    Nutdriver, Pliers, Screw drivers
11 of 11 people found this instruction helpful.
Was this instruction helpful to you?
Thank you for voting!

Refrigerator would not go into Defrost

When I first noticed that my refrigerator coil was iced up, I read a little bit about the defrost cycle of a refrigerator. I decided to try replacing the least expensive parts first. First I tried the defrost themostat, it was a very easy repair. My coil still froze up after a couple of days. Then I learned how to force my fridge into a defrost mode (on a frigidaire you just click the light button in the fridge 5 times in under 6 seconds). Then I noticed that the defrost heater was not heating up...this repair was more difficult. You have to first remove the two shelves, bin, and tracks. Then you remove the back panel...4 screws. Then you have to take out a couple of screws and drill out one rivet on the drain pan and pull the drain pan out so you can get the defrost heater which snakes up through the coil from the bottom of the coil. Be careful, as the drain pan and coil fins are very sharp, I sliced a couple fingers messing around with these parts. The defrost heater itself is relatively easy to put in once the coil is in the right position (there are videos on youtube on how to do this). After I put in the new heating element, and buttoned everything back up, I was excited to check my work...I forced the fridge into defrost by clicking the light switch 5 times, and the heater still didn't come on! It dawned on me that this problem started about 5 days after a major power outage (hurricane Irene)...When the power came on, it must have surged, and zapped the defrost control board...Long story short, I replaced the control board (about $75.00 from partselect.com) and my problem is fixed...at least I have a 100% brand new defrost system now...Of course it won't be too long until my wife wants another fridge to match her Stainless Steel applicances...oh well, this one will do fine in the garage.
  • Robert from North Chesterfield, VA
  • Difficulty Level:
    A Bit Difficult
  • Total Repair Time:
    30 - 60 mins
  • Tools:
    Nutdriver, Screw drivers
59 of 66 people found this instruction helpful.
Was this instruction helpful to you?
Thank you for voting!
Fixes Symptom 2% of time

Rated by 1 customer 


A Bit Difficult 

1- 2 hours 

Ratings submitted by customers like you who bought this part.   

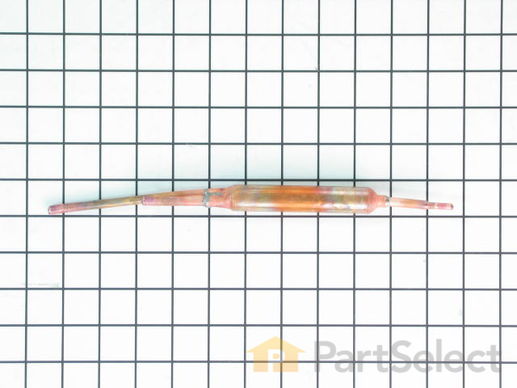
A filter-drier in a refrigerator has two essential functions. The first is to absorb system contaminants, such as water, which can create acids. The second is to provide physical filtration. This means trapping moisture, small metal chips, and dirt found in the refrigerant gas. If your refrigerator motor is constantly running, but the refrigerator is not getting cold, the issue could be due to a damaged or faulty filter-drier. Faulty filter-driers are sometimes the cause for abnormal freezer compartment temperatures and partially frosted evaporators. This filter-drier is approximately 11 inches long. Remember to disconnect the power from your refrigerator before beginning this repair.

$ 12.10
  In Stock
PartSelect Number PS464532
Manufacturer Part Number 5303305677
Fixes Symptom 1% of time
★★★★★
★★★★★
3 Reviews

Rated by 4 customers 


Really Easy 

30 - 60 mins 

Ratings submitted by customers like you who bought this part.   

This is a genuine condenser fan blade, which works with refrigerators, freezers and wines and beverage coolers.

$ 16.93
  In Stock
PartSelect Number PS11703633
Manufacturer Part Number 241639502

Customer Repair Stories

Fridge started making a loud racket. Condenser Fan Blade then disintegrated to dust and pieces. The plastic had degraded significantly.

The repair itself total time was quick and easy. Since the original fan blade blew apart, it was only a matter of putting the new one on in it's place. This can be done by feeding the blade between the cowling and Condenser coil and applying pressure to get it on the shaft.

If your fan is still on the shaft, simply push it off and extract it the same way. Then place the new one on the shaft.

In my case, since the part would take a couple days to get, and I had food both in the fridge and the freezer, I removed and unplugged the Condenser Fan Motor and the cowling frame and temporarily spliced a small fan I had into the line for the condenser motor. This kept the fridge working long enough to get the replacement part.

Side note. Direction of airflow is towards the Compressor, and draws air across the Condenser coils.

Hope this helps someone. :)
  • Jack from WALLING, TN
  • Difficulty Level:
    Really Easy
  • Total Repair Time:
    15 - 30 mins
  • Tools:
    Nutdriver, Socket set
2 of 2 people found this instruction helpful.
Was this instruction helpful to you?
Thank you for voting!

One blade broke from condenser fan

The part i recieved, from parts select was a larger in circumfrence (<1/4) than the original. However i was not aware of this until after i treid to repair it.

I removed the broken fan from the condenser. This was very sipmle.

When i pluged the refridgerator back in to the outlet the fan tried to start up but soon began to make aloud noise, due to there not being enough clerance.
  • Chris from Lockport, NY
  • Difficulty Level:
    Really Easy
  • Total Repair Time:
    Less than 15 mins
10 of 22 people found this instruction helpful.
Was this instruction helpful to you?
Thank you for voting!