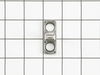
This is a replacement screw for your washer or dryer. The screw is approximately half an inch in length and is a Phillips-head screw. It screws in from the outside of the drum, into the vane/baffle. T...
We're sorry, but our Q&A experts are temporarily unavailable.
Please check back later if you still haven't found the answer you need.
2 questions answered by our experts.
Sort by:
< Prev
1
Next >
Search filter:
Clear Filter
Your search term must have 3 or more characters.
Keep searches simple. Use keywords, e.g. "leaking", "pump", "broken" or "fit".
Sorry, we couldn't find any existing answers that matched.Try using some different or simpler keywords, or submit your new question by using the "Ask a Question" button above!
Susan
October 27, 2022
I need the front to the detergent dispenser. A clip broke off and I can’t get it to stay on
For model number EFLS527UIW2
Hi Susan,
Thank you for your question. The part number listed under your model number for the handle assembly is PS12365900. If you need help placing an order for it, customer service is open 7 days a week and anyone will be happy to assist you. Please feel free to give us a call. We look forward to hearing from you!
Hi Mike, thank you for contacting us. To remove the front cover, we would suggest following these general instructions: First, disassemble the top panel by removing the screws on the rear side using a Philips head screwdriver. Next, remove the door boot seal by taking off the retainer using needle nose pliers. Peel the boot seal off the lip of the front panel. Lift and support the front of the washer. Unthread the four screws securing the bottom of the front panel. Pull out the dispenser drawer, and depress the tab to fully release it. Unthread the screws inside the dispenser drawer housing. Next, unthread the screws securing the top of the front panel. Lift the front panel, and pull it out to detach. Disconnect the wiring connector to fully remove the panel. We hope this information helps!
I googled the problem, read the recommendation found the part and read that it was an easy fix. Took the broken part off the door and noticed the broke off piece was in the latch on the machine. Ordered the two parts, paid the $30 2-day delivery. Parts arrived and the machine was up and runnning in under 5 minutes
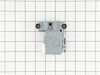
Remove two screws on attachment plate slide door lock plate out. Disconnect wire harness. Remove two screws on back side. Then reverse the process, done!
P.S. don't pay $32 for next working day it still took 3 days to arrive. doesn't help when your leaving in two.
Ruemove the back panel with a square drive bit. Belt removal was easy: rotate the large whelk while coaxing the belt off with hand pressure from behind. Comparing the old to new belts, the circumference difference was about 2”. Loop the new belt over the small motor wheel and start looping over the big drum wheel; it will be reluctant.
... Read more Place a small smooth pry bar between the belt and wheel while rotating the big wheel using the bar to keep the belt on the wheel. Then turn the big wheel by hand a few times to assure the belt rides correctly.


 – Part Number: 5304520351")