Your coupon for will be reflected when you check out!
✖
Your coupon for
✖
Hello!
You're visiting the PartSelect site in U.S.
Would you like to shop on the Canadian site?
Stay on this site
Go to Canadian site
✖
Model Number Locations
1Select Category Type
Select Category Type
2Select Product Type
Select Product Type
3Select {MODEL} Type
Select {MODEL} Type
Sample Model Number Tags
Model numbers can be made up of numbers (1005400, for example) or a combination of letters and numbers (LAT1000AAE). The model number will most likely appear on either a paper sticker or a metal plate. Your appliance's model number tag may look similar to the sample model number tags shown here (model number highlighted in yellow):
Model has been saved to My Models. If you're not signed in, your lists are available on this device and will expire within 30 days.
Model has been saved to My Models.
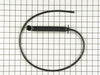
This hose clamp is used in a wide variety of household appliances. Most often it is found in washers, dishwashers, refrigerators, freezers, dehumidifiers, garbage disposals, or air conditioners. This ...
Introducing the genuine Whirlpool Air Tube for Tub Fill Volume, a trusted OEM component designed to flawlessly fit certain Whirlpool, KitchenAid, Maytag, Jenn-Air, Amana, Inglis, and Magic Chef models...
This timer knob spring is almost an inch and a half long, and is not quite an inch in diameter. It is made of metal and is used with the timer knobs of both washers and dryers.
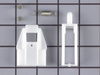
This kit is part of the lid switch mechanism and will stop the spin cycle if the load is unbalanced. When you lift the lid, it resets the plunger and your cycle will resume.
removed back of control panel to find that a mouse chewed the air tube. tried to splice it with a barb connector, it did not work. Ordered part received it 2 days later and installed it. I would recommend buying parts from these folks!
I started by unplugging the washing machine from the wall outlet. I then proceded to remove four screws from the top of the control panel. After removing the screws I put two flat head screwdrivers on each side of the lid and applied force to pry the lid from the ball joints holding it in place. This was the part that was the most difficu
... Read morelt in my opinion. After the lid was off, I removed the bolt that was holding the fuse switch in place and removed that from the slots. Next I unscrewed the two screws on opposite sides of the switch head where it makes the contact with the lid. This allows you to remove the switch assembly out of the unit. Once the assembly was out, I assembled pieced the new parts together by looking at the old parts. Then, I placed the new assembly back in the unit. Be careful when you put in the new assembly that you test the switch and make sure you hear the "Click" from the switch. After that I reversed all the steps and put the unit back together.
It should have been extremely easy, but it was a little difficult because my laundry room is very small and I had extremely limited space to work in and also had limited lighting. However, after taking many minutes to strategically plan how to maneuver in the tiny space, I was able to loosen the giant clamp on the hose inside the washer
... Read moreand attach the new hose! It worked like a charm! My 25 year old Maytag is working again! The part came in a bag certified as a genuine Whirlpool part and looked exactly like the old one! No complaints! The online installation videos are wonderful!