Models > 85419

85419 LG Microwave - Overview

Sections of the 85419

[Viewing 1 of 1]
Keep searches simple, eg. "belt" or "pump".
Light Bulb - 120V 30W – Part Number: 6912W1Z004B
Light Bulb - 120V 30W
★★★★★
★★★★★
(9)
PartSelect #: PS3530415
Manufacturer #: 6912W1Z004B
This is a light bulb and it is a part for your microwave. This bulb uses 30 watts, operates on 125 volts, and is an incandescent lamp. The function of this bulb is to illuminate the surface underneath...
$13.94
  In Stock
Order within the next 11 hrs and your part ships today!
Glass Cooking Tray – Part Number: 1B71961H
Glass Cooking Tray
★★★★★
★★★★★
(10)
PartSelect #: PS3517413
Manufacturer #: 1B71961H
This OEM glass cooking tray is a removable glass plate, measuring 13 inches in diameter, that spins inside the microwave during operation. It ensures that heat is evenly distributed in the microwave t...
$37.33
  In Stock
Order within the next 11 hrs and your part ships today!
Door Handle – Part Number: 5304440323
Door Handle
★★★★★
★★★★★
(2)
PartSelect #: PS979589
Manufacturer #: 5304440323
Screws NOT included.
$167.49
  In Stock
Order within the next 11 hrs and your part ships today!
Air Duct Bracket – Part Number: 4810W1A151A
Air Duct Bracket
★★★★★
★★★★★
(2)
PartSelect #: PS3523851
Manufacturer #: 4810W1A151A
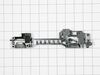
This bracket holds the metal or plastic flapper that closes off the exhaust duct when the fan is not running and opens when the fan turns on. If the exhaust fan on your microwave does not appear to be...
$21.24
  In Stock
Order within the next 11 hrs and your part ships today!
Turntable Assembly – Part Number: 5889W2A012F
Turntable Assembly
★★★★★
★★★★★
(5)
PartSelect #: PS3528549
Manufacturer #: 5889W2A012F
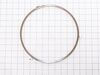
This turntable assembly, also known as a rotating ring, is a genuine OEM replacement part for your microwave. It is brown in color and about 10 inches in diameter. This part supports the glass turntab...
$15.41
  In Stock
Order within the next 11 hrs and your part ships today!
Holder Assembly,Locker – Part Number: 3501W1A019D
Holder Assembly,Locker
★★★★★
★★★★★
(8)
PartSelect #: PS3519053
Manufacturer #: 3501W1A019D
  No Longer Available
Magnetron – Part Number: 2B71165R
Magnetron
★★★★★
★★★★★
(6)
PartSelect #: PS3517729
Manufacturer #: 2B71165R
$132.02
  In Stock
Order within the next 11 hrs and your part ships today!
Capacitor,High Voltage – Part Number: 0CZZW1H004B
Capacitor,High Voltage
PartSelect #: PS3517241
Manufacturer #: 0CZZW1H004B
$30.74
  On Order
Frame Assembly,Door – Part Number: 3213W1A049F
Frame Assembly,Door
★★★★★
★★★★★
(1)
PartSelect #: PS3518595
Manufacturer #: 3213W1A049F
$71.03
  Special Order
DOOR ASSEMBLY – Part Number: 3581W1A352J
DOOR ASSEMBLY
PartSelect #: PS3563045
Manufacturer #: 3581W1A352J
  No Longer Available

Questions And Answers for 85419

Be the first to ask our experts a question about this model!

Common Symptoms of the 85419

[Viewing 4 of 4]
No heat
Fixed by
these parts
Fixing Fixing
Show All
Door not closing properly
Fixed by
these parts
Fixing
Show All
Won’t turn on
Fixed by
these parts
Fixing
Show All
Tray won’t turn
Fixed by
these parts
Fixing
Show All
Keep searches simple. Use keywords, e.g. "leaking", "pump", "broken" or "fit".
Broken Handle
Removed the retaining clip that keeps the door on, took the door off. Removed the plastic rim that is clipped into place. Removed old screws holding on handle and replaced.
Parts Used:
Door Handle
  • Brent from Bend, OR
  • Difficulty Level:
    Easy
  • Total Repair Time:
    Less than 15 mins
  • Tools:
    Screw drivers
42 of 61 people found this instruction helpful.
Was this instruction helpful to you?
Thank you for voting!
Handle was broken R&R required.
Open the door and start at the outside perrimeter of the plastic moulding by inserting the putty knife and gently prying up.I started at the 2 latches that secure the door when it closes.Work your way around to the top and bottom. I was able to leave the portion of the plastic moulding by the door hinges still intact while removing the screws for the handle and replacing with the new one.After handle is on gently snap moulding back in place.Remember start at the inside of the door in the small opening at the outter edge of the door.
Parts Used:
Door Handle
  • Frank from Punta Gorda, FL
  • Difficulty Level:
    A Bit Difficult
  • Total Repair Time:
    Less than 15 mins
  • Tools:
    Screw drivers
22 of 28 people found this instruction helpful.
Was this instruction helpful to you?
Thank you for voting!
Broken micorwave handle
It was really simple. I used the putty knife the seperate the plastic trim, paying particular to start near the latches as someone else posted. Once the trim was pulled back Wow the screws were right there. I unscrewed the broken handle and attached the new handle. It was really easy and my wife thinks I'm amazing thanks for the help.
Parts Used:
Door Handle
  • Dennis from Hephzibah, GA
  • Difficulty Level:
    Really Easy
  • Total Repair Time:
    Less than 15 mins
  • Tools:
    Screw drivers
13 of 17 people found this instruction helpful.
Was this instruction helpful to you?
Thank you for voting!