


Models
>
22304
22304 ((1988)) Kenmore Range - Overview
Sections of the 22304
[Viewing 1 of 1] Kenmore Range")
Exact Part matches for your search term
[Viewing 3 of 3]
DISCONTINUED
This part number matches the current model number 22304
PartSelect #: PS9351455
Manufacturer #: 22304
No Longer Available
Flat washer, 8-pack
This part number matches the current model number 22304
PartSelect #: PS12426820
Manufacturer #: 22304
No Longer Available
Washer Flat 1/2 Zinc
This part number matches the current model number 22304
PartSelect #: PS16702992
Manufacturer #: 22304
$3.99
Special Order
Keep searches simple, eg. "belt" or "pump".

Grease Filter
PartSelect #: PS11743846
Manufacturer #: WP707929
The function of the grease filter is to trap grease into the filter from the exhaust air. The grease filter is intended to be used with certain downdraft cooktops and ranges. This grease filter is rou...
$38.84
In Stock

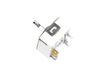
Screw, 8/18 x 3/8
PartSelect #: PS11746840
Manufacturer #: WP90767
This screw is sold individually.
$5.42
In Stock

Surface Burner Switch - 240V
PartSelect #: PS12347301
Manufacturer #: W11120791
This surface burner switch, also known as an infinite switch, controls and regulates the heat output of the burners on a stovetop. The user simply adjusts the knob on the user interface panel, which i...
$90.92
In Stock

Door Hinge
PartSelect #: PS11744215
Manufacturer #: WP74008014
The hinges control the rate that the oven door opens and closes, and allows the door to stay open at an angle. This hinge can be used on either the left or right hand side of your oven, and is approxi...
$98.27
In Stock

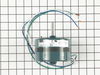
Fan Switch Kit
PartSelect #: PS2002868
Manufacturer #: 12001129
This down-draft fan switch kit comes with the switch itself and two metallic push nuts. At 125 volts,this switch will allow for 6 amps, and at 250 volts, this switch will allow for 250 volts. This swi...
No Longer Available

Infinite Switch Knob
PartSelect #: PS11757573
Manufacturer #: WPY703899
This infinite switch knob is an inch and a half in diameter. It is made of plastic and has an orange indicator line as well as orange lettering denoting the 'off' position. There is also white numberi...
$26.31
In Stock

Wall Vent Cap Kit - 6 Inch duct
PartSelect #: PS2105233
Manufacturer #: A406
This wall vent cap kit comes with a spring loaded damper and instructions. It is designed for a 6" diameter outside vent.
No Longer Available

Rock Plate
PartSelect #: PS2088651
Manufacturer #: 74011338
This part is used as a support for the grill element. Sold individually.
No Longer Available

Wall Vent Cap Kit - 5 Inch duct - with Gray Cover
PartSelect #: PS2105196
Manufacturer #: A405
This wall vent cap kit comes with a spring loaded damper. This part can be painted.
No Longer Available

Glass Grease Collecting Jar
PartSelect #: PS11757591
Manufacturer #: WPY707869
This jar is a little over five inches long. It is made of glass and is used for collecting the grease drippings of gas ranges.
$45.50
In Stock

Grill Element
PartSelect #: PS11742861
Manufacturer #: WP5700M426-60
This is a five prong element carrying 240 volts
$232.28
On Order

Frame Screw
PartSelect #: PS11743908
Manufacturer #: WP7101P126-60
Sold Individually.
$7.76
In Stock
Questions And Answers for 22304
We're sorry, but our Q&A experts are temporarily unavailable.
Please check back later if you still haven't found the answer you need.
Common Symptoms of the 22304
[Viewing 5 of 5]Element will not heat
Fixed by
these parts
these parts

Show All
Door won’t close
Fixed by
these parts
these parts

Show All
Will Not Start
Fixed by
these parts
these parts

Show All
Touchpad does not respond
Fixed by
these parts
these parts

Show All
Oven is too hot
Fixed by
these parts
these parts
Show All


Keep searches simple. Use keywords, e.g. "leaking", "pump", "broken" or "fit".
replaced filter

-
ELOISE from MILFORD, OH
-
Difficulty Level:Really Easy
-
Total Repair Time:Less than 15 mins
482 of 504 people
found this instruction helpful.
Was this instruction helpful to you?
Thank you for voting!
Old grease filter that I actually did not know I had to change
Removed the old grease screen and cleaned the entire area thoroughly and replaced the screen
Parts Used:
-
deborah from fort pierce, FL
-
Difficulty Level:Really Easy
-
Total Repair Time:Less than 15 mins
448 of 534 people
found this instruction helpful.
Was this instruction helpful to you?
Thank you for voting!
Burner had one temperature--hot, regardless of setting
1. Killed power and removed the regulator's knob, noted the position of the old control.
2. Took off the cover for the center vent and loosened the two screw holding the housing in place--the screws didn't have to come out completely as it is a U-shaped friction hold.
3. Unscrewed the two screws holding the old control switch in ... Read more place--lifted the housing enough to get at the old switch and carefully pulled it loose--it was a front burner so the control switch was about as far back as it could be but still wasn't that hard to get at.
4. Turned the new switch to orient the wire connectors, then, using a needle-nose pliers, removed each friction connector, one at a time, and fitted them on the new switch (note: one of the wires fitted best if it went under as opposed to around the base of the new switch).
5. Replaced the control back through the housing and screwed it in place, making sure the orientation of the control matched the way it looked originally.
6. Slide the housing back over the two screws and tightened, replace vent.
7. Replaced the knob and turned on the power.
(The above took me about twice as long to write as it did to make the repair and I write professionally but am not a professional electrician.)
Also, I bought a second control switch because, given the age of the unit, I'm sure another one will go. The second one will assure that it won't happen :-).
Read less
Parts Used:

-
James H from Oxford, NY
-
Difficulty Level:Really Easy
-
Total Repair Time:Less than 15 mins
-
Tools:Pliers, Screw drivers
105 of 119 people
found this instruction helpful.
Was this instruction helpful to you?
Thank you for voting!