This Idler Pulley includes the tri-ring and gasket and everything included here is manufacturer-certified. This part maintains correct tension on the drive belt in order to spin the drum properly. If ...
$26.95
In Stock
Order within the next 6 hrs and your part ships today!
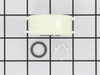
If you notice that your dryer is noisy or will not tumble, you may need to replace the tri ring. This part is triangular, and is less than an inch in size. Tri rings can be found both on the idler pul...
$13.42
In Stock
Order within the next 6 hrs and your part ships today!
If your washer shakes or vibrates loudly when it reaches its max speed, check that the leveling legs are even. To ensure that the washer is firmly on the ground using all four legs, adjust the legs so...
$11.40
In Stock
Order within the next 6 hrs and your part ships today!
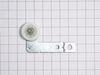
The idler pulley wheel is now sold with this arm. This idler pulley is for dryers.
Idler pulley maintains correct tension on the drive belt to spin the drum.
$26.79
In Stock
Order within the next 6 hrs and your part ships today!
1) Disconnected power cord from wall. 2) Disconnected vent hose from back of dryer. 3)Removed dryer rear panel. 4)Disengaged tension spring on idle wheel arm. 5) Removed worn idle wheel. 6)Installed new Idler wheel assembly. 7) Vacuumed dust from rear of dryer (optional, recommended). 8) Reinstalled rear cover, vent hose and power cord. E
... Read moreasy repair 15-30
I recommend you order the idler pulley as soon as you start to hear the unusual noise indicating metal against metal. Replace the idler pulley before it fails and possibly causes more damage to the drive system. Simply removed the power cord at the back of the dryer and then the multiple screws holding the back panel in place as well as
... Read more the clip holding the exhaust vent in place. You may need to remove the top panel to access a few of these screws. A diagram of the belt routing is in the paperwork I found behind the front lower panel of the dryer. This too is easily removed with just a few screws.
First, I opened up the front of the dryer and then unscrewed the entire back piece. I assembled the new exhaust piece from the kit. Next, I took out the old straight rear exhaust and then replaced it with the elbow shaped left eshaust from the kit. Lastly, reattache the back and front pieces of the dryer.


 Diagram and Parts List for Kenmore Dryer")