Models > NED7200TW10 > Symptoms > Noisy

Parts That Fix Amana Dryer NED7200TW10 Noisy

Noisy is a commonly reported symptom for the NED7200TW10 Amana Dryer, and we have put together a full guide on how to fix this. This advice is based on feedback from people who own this exact appliance. We have listed the most common parts for your NED7200TW10 Amana Dryer that will fix Noisy. We have included repair instructions, and helpful step-by-step video tutorials. If you are experiencing this issue, not to worry, DIYers just like you have fixed this, and shared their experience to help you!

Fixes Symptom 46% of time
★★★★★
★★★★★
5 Reviews

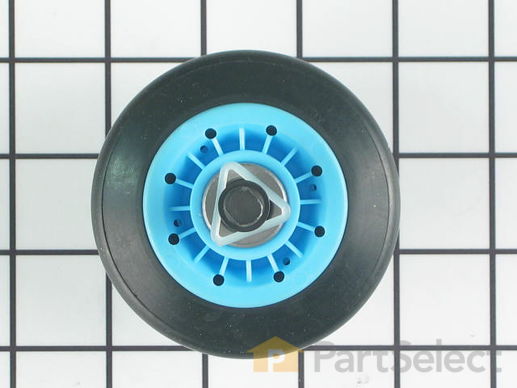
Sold individually.

$ 57.22
  In Stock
PartSelect Number PS11749648
Manufacturer Part Number WPW10177428

Customer Repair Stories

Bumpung or pounding sound.

I was working on my daughter’s Maytag dryer model MDE 9700 AYW. The dryer had been making a bumping sound for some time. It had the same symptoms a few years back, but it was still under warranty. The repairman had to replace a drum roller. He told her at the time he should replace all of them but he only had one with him. So when my daughter heard a similar sound she assumed it was a drum roller again so I ordered the roller without taking the dryer part. She has four boys that generate a lot of laundry, so she needs her dryer daily. I wasn’t sure how long it would take to get the part or do the repairs. The roller arrived very quickly, I think in a couple of days. The drum rollers on the dryer did not need to be replaced. What I found was bumping the side to the dryer because the sheet metal had popped inward. The drum has very little clearance on either side. The side probably could’ve used another crease or something to make it more rigid. My time wasn’t, wasted. I think it was will spent. I found that 3+ years of lint at piled up significantly on everything. The lint on the shroud for the heating coil had already turned brown and could have caused a fire. I would suggest to anyone who’s had a dryer for a while should open it up and vacuum out the lint buildup.
It only takes a Phillips screwdriver and very little time. It’s a very little investment for your peace of mind.
  • Don from TAYLOR, AZ
  • Difficulty Level:
    Really Easy
  • Total Repair Time:
    30 - 60 mins
  • Tools:
    Screw drivers
Was this instruction helpful to you?
Thank you for voting!

Drum support roller failed

This was a simple repair. Removed the small access panel where the vent pipe comes through, the roller is right there. Unscrewed the support roller bolt, looking for all the pieces that had broken and fallen inside the housing of the dryer. Using the washers and nut from the old one, put the new roller in place, be aware that you have to lift the drum a little bit to get this new roller in. It could take two people depending on your strength. Tightened down the roller, spin the drum by hand to make sure it was ok, then put the access panel back on and fired it up for a test run.
  • Candance from hillsboro, OR
  • Difficulty Level:
    Really Easy
  • Total Repair Time:
    Less than 15 mins
  • Tools:
    Screw drivers, Wrench (Adjustable)
Was this instruction helpful to you?
Thank you for voting!
Fixes Symptom 38% of time
★★★★★
★★★★★
24 Reviews

Rated by 7 customers 


Easy 

1- 2 hours 

Ratings submitted by customers like you who bought this part.   

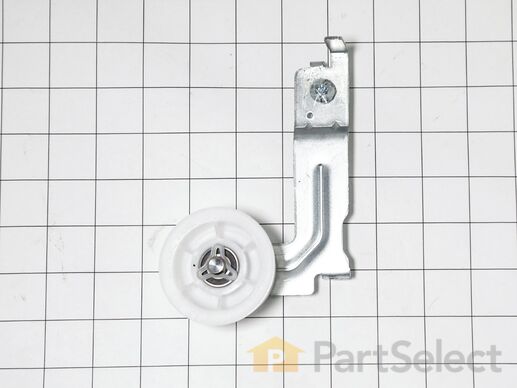
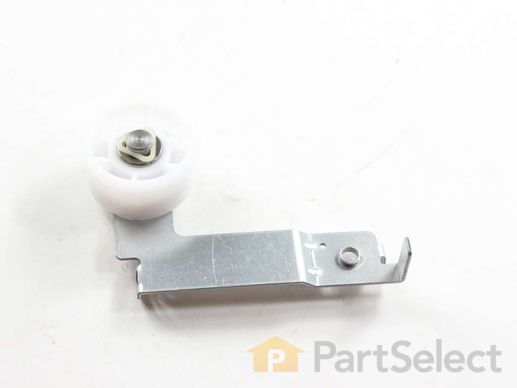
This idler pulley assembly is sourced from the original manufacturer for use in dryers. The assembly includes the pulley wheel and bracket. It is found near the motor where it provides tension to the dryer belt, allowing it to rotate the drum during the drying cycle. Over time, the pulley wheel and its bearings can wear out leading to squeaking and grinding noises when the drum rotates. The bracket or pulley wheel can also fall out of alignment which can damage the belt and cause it to slip off. Eventually, a faulty idler pulley assembly will prevent the drum from rotating altogether. Depending on your dryer model, you may need to disassemble the dryer to access the pulley assembly. Remove the dryer belt from the idler pulley wheel and detach the assembly from the dryer frame. Position the new assembly in its place and secure it in position. Thread the belt over the pulley and around the dryer drum, ensuring that the grooved side lays flat against the drum. Manually spin the drum to check that the belt is properly tensioned and reassemble your appliance.

$ 62.67
  In Stock
PartSelect Number PS11771601
Manufacturer Part Number DC93-00634A

Replacing your Samsung Dryer Idler Pulley Assembly

Replacing your Idler Pulley Assembly

Customer Repair Stories

Dryer would not spin

The design of my dryer is a bit different from the video on PartSelect - but it is very close. And if you watch the really good video on PartSelect plus a few others on Youtube you can figure out how Samsung in general designs the different components. You can fix this yourself definitely.

Cost of part to fix - about $50. ... Read more />Repairman - didn't even ask. Would probably be $300-400.
Cost of replacement $1,000.

I rated the repair "A bit difficult" only because this is the first time I have ever repaired an appliance. If I were to repair this one again, I'd rate it as Easy.

I'm really thankful for the PartSelect video. This makes DIY repairs possible.

Thanks.
  • John from EARLYSVILLE, VA
  • Difficulty Level:
    A Bit Difficult
  • Total Repair Time:
    More than 2 hours
  • Tools:
    Screw drivers
1 person found this instruction helpful.
Was this instruction helpful to you?
Thank you for voting!

Tension/Dead Man Wheel Broke/Shattered

Dryer would not start but electronics were working.

Pulled top of dryer off; noticed the belt was loose but not broken.
Went in through the back (1 screw and removed the exhaust pipe/plate); noticed the wheel was broken and thus the belt had fallen off.

Ordered replacement wheel/arm.
One screw to remove old one, one screw to install new one...tentioned the belt. Dryer was good as new.
  • Noah from OXFORD, KS
  • Difficulty Level:
    Really Easy
  • Total Repair Time:
    Less than 15 mins
  • Tools:
    Screw drivers
11 of 20 people found this instruction helpful.
Was this instruction helpful to you?
Thank you for voting!
Fixes Symptom 6% of time

Rated by 2 customers 


Easy 

30 - 60 mins 

Ratings submitted by customers like you who bought this part.   

Also called Roller.

  No Longer Available
PartSelect Number PS11741820
Manufacturer Part Number WP35001086
Fixes Symptom 6% of time
★★★★★
★★★★★
1 Review

Rated by 1 customer 


A Bit Difficult 

More than 2 hours 

Ratings submitted by customers like you who bought this part.   

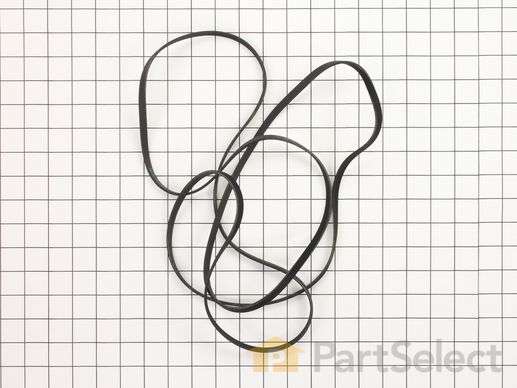
This drive belt is made to slip on the motor pulley to bring the basket up to the speed required and this makes the belt get wear and tear.

$ 75.45
  In Stock
PartSelect Number PS11750299
Manufacturer Part Number WPW10205415

Customer Repair Stories

Just replace the belt

Self with you tube
app thanks.
  • Alice & Jose from LAMESA, TX
  • Difficulty Level:
    A Bit Difficult
  • Total Repair Time:
    More than 2 hours
  • Tools:
    Screw drivers
2 of 4 people found this instruction helpful.
Was this instruction helpful to you?
Thank you for voting!
Fixes Symptom 4% of time
★★★★★
★★★★★
2 Reviews

Rated by 4 customers 


Easy 

More than 2 hours 

Ratings submitted by customers like you who bought this part.   

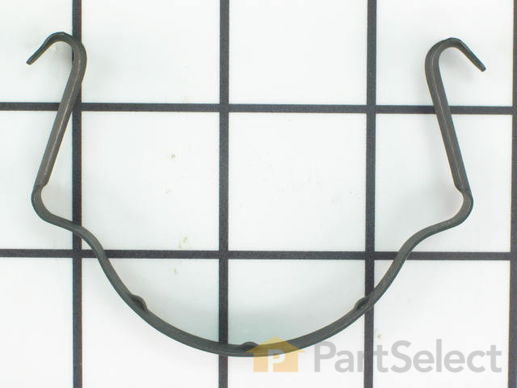
This clamp is used to secure the drive motor.

$ 11.13
  In Stock
PartSelect Number PS11743369
Manufacturer Part Number WP660658

Customer Repair Stories

Dryer drum wouldn't turn and motor would shut off

First I was told by the maytag repair man that the motor was shot and it would be 467 dollars to repair. Since I didn't have that kind of money I decided to take it apart to see if I could replace the motor myself. Once I had it apart I saw the part that held the motor in place was broken off and the motor was out of place causing it too shut itself off. Once I figured it all out it took about 2 minutes to replace the less than 6 dollar part! Thanks partSelect!!!
  • Cynthia M from Westfield, MA
  • Difficulty Level:
    Easy
  • Total Repair Time:
    More than 2 hours
  • Tools:
    Screw drivers
2 of 3 people found this instruction helpful.
Was this instruction helpful to you?
Thank you for voting!