Models > FDB1050REC2 > Symptoms > Leaking

Parts That Fix Frigidaire Dishwasher FDB1050REC2 Leaking

Leaking is a commonly reported symptom for the FDB1050REC2 Frigidaire Dishwasher, and we have put together a full guide on how to fix this. This advice is based on feedback from people who own this exact appliance. We have listed the most common parts for your FDB1050REC2 Frigidaire Dishwasher that will fix Leaking. We have included repair instructions, and helpful step-by-step video tutorials. If you are experiencing this issue, not to worry, DIYers just like you have fixed this, and shared their experience to help you!

Fixes Symptom 48% of time
★★★★★
★★★★★
182 Reviews

Rated by 85 customers 


Really Easy 

15 - 30 mins 

Ratings submitted by customers like you who bought this part.   

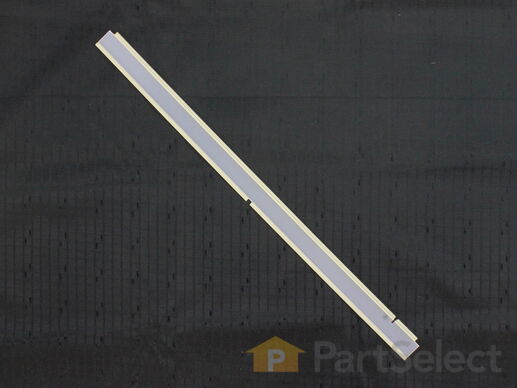
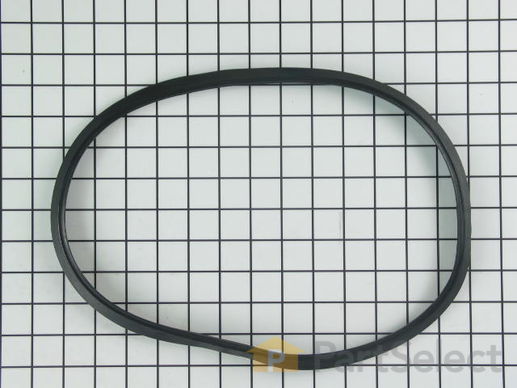
This dishwasher door gasket (Bottom Gasket, Gasket, Door Seal, Dishwasher Door Lower Seal) helps prevent water from leaking out of the bottom edge of your dishwasher door by creating a watertight seal. This part is attached to the bottom of your dishwasher inner door panel. It is frequently exposed to water and detergent during its lifetime. The water and chemicals can eventually wear down the gasket and compromise the integrity of the seal. If the gasket is malfunctioning, the integrity of the door seal will be effected. You will notice leaking through the bottom of your dishwasher door. If your dishwasher is leaking water from the bottom of the door, first inspect the seal for food particles near the bottom and sides, and remove the buildup, as it can stop the door from closing properly and keeping a tight seal; if not, you may need to replace the bottom door gasket. Check the door gasket for tears, cuts, or wear. This part is sold individually and measures 22.5 inches by 1.25 inches. It is constructed of plastic, and comes in yellow/grey. Includes one lower door gasket.

$ 21.04
  In Stock
PartSelect Number PS9495545
Manufacturer Part Number 809006501

Replacing your Frigidaire Dishwasher Dishwasher Bottom Door Gasket

Replacing your Dishwasher Bottom Door Gasket

Customer Repair Stories

Leaking under door

Received the part 3 working days after order. Part was exactly like the original.
Removed the door. Slipped off old gasket and replaced with new gasket. Replaced door and tried rinse cycle. Worked perfectly.
  • Ronald from Berwick, PA
  • Difficulty Level:
    Really Easy
  • Total Repair Time:
    Less than 15 mins
  • Tools:
    Screw drivers
109 of 128 people found this instruction helpful.
Was this instruction helpful to you?
Thank you for voting!

Bottom Door Seal fell apart and started leaking.

First I opened the door all the way. Second I reached down to the bottom gasket then grabed it on the right end of the seal that is on the right side of the door. Then I pulled the end outward from the bottom of the door toward the heater coil in the bottom of the washer. It came out real easy. You see it just snaps into a little plastic groove under the door. I then cleaned up the area for food and soap particules. I then placed the new gasket in place by lining up the notch toward the right end with the piece of plastic that encloses the right end of the plastic notch on the bottom right end of the door. Then push it in untill it stops going into the notch. It snaps in but does not make a snaping sound. It just won't go in no more.
  • Scott from Flowood, MS
  • Difficulty Level:
    Really Easy
  • Total Repair Time:
    Less than 15 mins
381 of 427 people found this instruction helpful.
Was this instruction helpful to you?
Thank you for voting!
Fixes Symptom 26% of time
★★★★★
★★★★★
42 Reviews

Rated by 41 customers 


Really Easy 

15 - 30 mins 

Ratings submitted by customers like you who bought this part.   

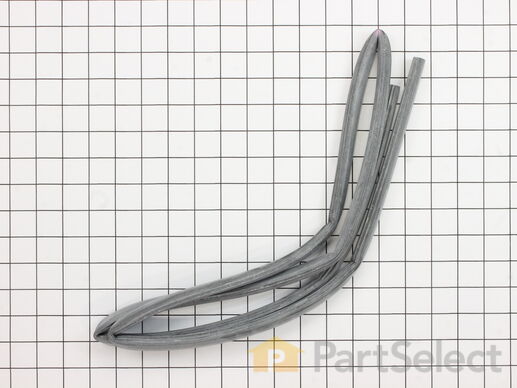
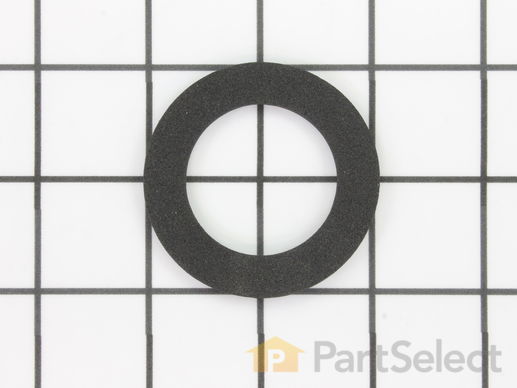
This grey OEM dishwasher tub gasket is a 73" grey rubber part that creates a seal around the dishwasher to prevent any water leakage during a cycle. If it's damaged or broken, you'll start seeing water leaking out. If broken, it should be replaced. Refer to your model number and user manual to ensure this part is right for you. When making this repair, open the dishwasher door and take out the lower dish tray for better access. Pull out the old gasket, and clean the channel with a rag. Push the new gasket into place into the notch on the door, which you should see upon close inspection, using a flat-head screwdriver for assistance if necessary. We do not recommend cutting any additional length off on the tub gasket if any is present during your repair.

$ 32.38
  In Stock
PartSelect Number PS8260227
Manufacturer Part Number 154827601

Replacing your Frigidaire Dishwasher Dishwasher Tub Gasket - Gray

Replacing your Dishwasher Tub Gasket - Gray

Customer Repair Stories

Dishwasher was leaking at the lower left side of the door.

Probably the easiest repair job that you could encounter. I removed the old gasket from the door frame. Cut the new gasket to length and pushed it into the door frame.

Water leak solved...
  • John from Hummelstown, PA
  • Difficulty Level:
    Really Easy
  • Total Repair Time:
    Less than 15 mins
21 of 24 people found this instruction helpful.
Was this instruction helpful to you?
Thank you for voting!

dishwasher was leaking water

I removed old tub gasket, which the door presses against to make a seal, and put the new one in. Flat tip screwdriver was used to gently press gasket in.
  • Charles from Milton, FL
  • Difficulty Level:
    Really Easy
  • Total Repair Time:
    Less than 15 mins
  • Tools:
    Screw drivers
175 of 201 people found this instruction helpful.
Was this instruction helpful to you?
Thank you for voting!
Fixes Symptom 14% of time
★★★★★
★★★★★
43 Reviews

Rated by 29 customers 


Easy 

15 - 30 mins 

Ratings submitted by customers like you who bought this part.   

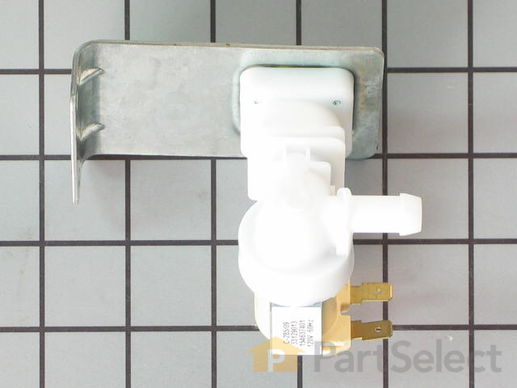
This water inlet valve is usually located behind the lower kickplate panel in either the right or left corner of the dishwasher. The attaching solenoids on the valve open and close according to the desired amount of water needed. The water inlet valve on your dishwasher supplies water to the dishwasher. If your dishwasher is leaking because it has overflowed, the water inlet valve may be the cause. If your dishwasher continues to fill above the heating element, try opening the door latch to see if it stops filling. If it continues to fill, you have a defective inlet valve that will need to be replaced.

$ 57.03
  In Stock
PartSelect Number PS1990907
Manufacturer Part Number 154637401

Replacing your Frigidaire Dishwasher Water Inlet Valve - 120V 60Hz

Replacing your Water Inlet Valve - 120V 60Hz

Customer Repair Stories

No water to dishwasher on any cycle

Unplugged dishwasher, pulled it out. Unclamped hose and unscrewed water source to inlet valve, removed wiring harness, unscrewed bracket and reinstalled new valve. Now have a functioning dishwasher.
  • David from Las Cruces, NM
  • Difficulty Level:
    Really Easy
  • Total Repair Time:
    Less than 15 mins
  • Tools:
    Pliers, Screw drivers, Wrench (Adjustable)
41 of 48 people found this instruction helpful.
Was this instruction helpful to you?
Thank you for voting!

Leak in the water inlet valve/solinoid

1. Shut off water supply.
2. Removed inlet water hose where it connects to the vavle assembly.
3. Removed the two bracket screws holding the assembly to the frame, and detached the electrical connection from the solinoid.
4. Removed the inlet hose adapter connection from old valve and installed into new valve.
5. Attached electrical connection to new valve solinoid.
6. Remounted assembly to the frame.
7. Re-attached the inlet water hose to the hose adapter connection on the valve.
8. Turned on the water, washed some dishes.
  • Mickey from Ooltewah, TN
  • Difficulty Level:
    Easy
  • Total Repair Time:
    15 - 30 mins
  • Tools:
    Pliers, Screw drivers, Wrench set
154 of 169 people found this instruction helpful.
Was this instruction helpful to you?
Thank you for voting!
Fixes Symptom 3% of time
★★★★★
★★★★★
20 Reviews

Rated by 3 customers 


Really Easy 

15 - 30 mins 

Ratings submitted by customers like you who bought this part.   

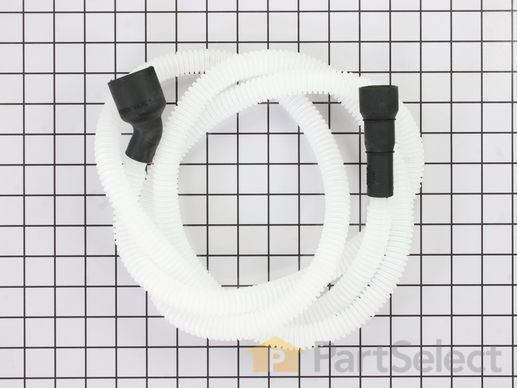
If your dishwasher is leaking or not draining properly, you may need to replace the drain hose. The drain hose connects to the pump located below the lower spray arm and aids in proper dishwasher drainage. This white and black plastic hose is 7.5 feet long. For this repair, you will need either a 1/4-inch or 5/16-inch nut driver, depending on your model. You will need to remove the lower access panel on your dishwasher to complete this repair; it is often easier to remove the dishwasher from the cabinet to do so. Be sure to disconnect the dishwasher from both the power and water supply before completing this repair.

$ 26.63
  In Stock
PartSelect Number PS9494138
Manufacturer Part Number 807117001

Replacing your Frigidaire Dishwasher Dishwasher Drain Hose

Replacing your Dishwasher Drain Hose

Customer Repair Stories

A hole in the dishwasher dicharge hose.

I had to remove the dishwasher from under the counter, flip it on it's side to gain access to the discharge hose attachment point, removeit, remove the other end of the hose from the sink-side and replace the hose. The sink-end of the hose has a 'collar' that must be cut to fit the fitting on the sink.
  • Lee from Columbus, OH
  • Difficulty Level:
    Easy
  • Total Repair Time:
    15 - 30 mins
  • Tools:
    Nutdriver, Screw drivers
22 of 47 people found this instruction helpful.
Was this instruction helpful to you?
Thank you for voting!

Drain hose was missing

My friend bought a used dishwasher at a garage sale, the previous owner had thrown away the drain hose because it was "nasty" they said....remember it could have been cleaned. When I went to install it, I removed the old washer, and discovered that the old hose would not fit on the replacement dishwasher. I went to the local repair shop, armed with the model and serial #'s. they searched and searched their books and could not find the hose part number. they said "good luck" when I left...I went home and looked up the model on your web site, ordered the hose, and in 3 days had the dishwasher installed and running in about 30 minutes...thanks for prompt shipping.. I couldn't believe it arrived so soon...Mowerman
  • John from Carthage, MO
  • Difficulty Level:
    Really Easy
  • Total Repair Time:
    15 - 30 mins
  • Tools:
    Screw drivers, Wrench set
40 of 46 people found this instruction helpful.
Was this instruction helpful to you?
Thank you for voting!
Fixes Symptom 2% of time
★★★★★
★★★★★
123 Reviews

Rated by 52 customers 


Really Easy 

Less than 15 mins 

Ratings submitted by customers like you who bought this part.   

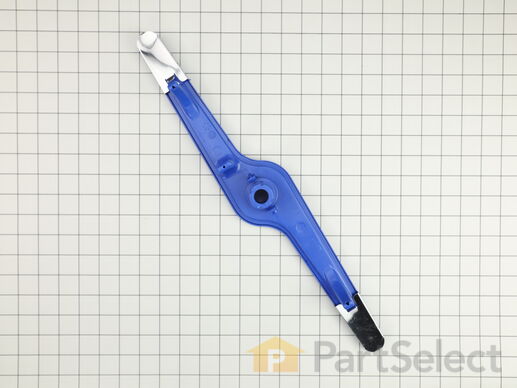
The Lower Spray Arm is used in your dishwasher to spray water and clean your dishes. If broken there will be visible damage or your dishes may no longer be cleaned properly. If your spray arm is broken (due to general wear or high heat), it should be replaced. Your lower spray arm will be located at the bottom of your dishwasher tub. Check your user manual and model number to ensure this model is right for you. This version is plastic and metal and comes in gray/blue. We recommend you wear work gloves to keep your hands safe when installing and disconnect power to the appliance. You will also want to make sure that you turn off the water supply to your dishwasher. From here, you will want to open the dishwasher, pull out the lower rack and set it aside. Remove the lower wash arm. On each side of the bottom of the spray arm, there are small locking tabs that can be pushed aside using a flathead screwdriver. Once released, the spray arm can easily be pulled off the dishwasher. Put the new lower wash arm in place and push it down to lock it in. Ensure it is spinning freely and does not hit the heating element. Return the lower dish rack into place and then close the dishwasher door.

$ 35.37
  In Stock
PartSelect Number PS12585623
Manufacturer Part Number 5304517203

Replacing your Frigidaire Dishwasher Lower Spray Arm

Replacing your Lower Spray Arm

Customer Repair Stories

Spray arm fell over and melted on the heating element.

It required no tools. It took less than one minute to connect the spray arm to the bottom of the unit. Our dishwasher is working perfectly now.
  • Inge from Hernando, FL
  • Difficulty Level:
    Really Easy
  • Total Repair Time:
    Less than 15 mins
81 of 94 people found this instruction helpful.
Was this instruction helpful to you?
Thank you for voting!

spray arm keeps melting

I have had to keep replacing the spray arm on the bottom of my dishwasher which takes like 2 seconds to do.. First you open the dishwasher and than pull the bottom basked forward and reach down and pull the spray arm up and pop the bottom of the spray arm off and put it on the new spray arm and slip it back into the dishwasher over the thing that makes it spin around.. but the tricky part is and I didn't know this and this is why my dishwasher spray arm kept falling over and melting on the heating element.. you have to turn it till it clicks in.. and your done..
  • Donna from Madison, OH
  • Difficulty Level:
    Really Easy
  • Total Repair Time:
    Less than 15 mins
270 of 281 people found this instruction helpful.
Was this instruction helpful to you?
Thank you for voting!
Fixes Symptom 2% of time
★★★★★
★★★★★
3 Reviews

Rated by 7 customers 


A Bit Difficult 

1- 2 hours 

Ratings submitted by customers like you who bought this part.   

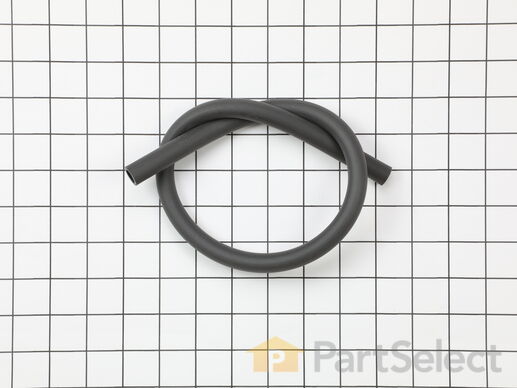
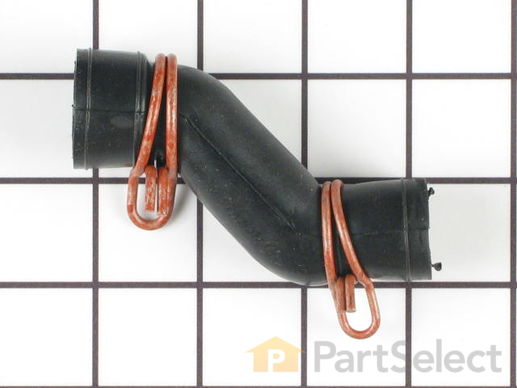
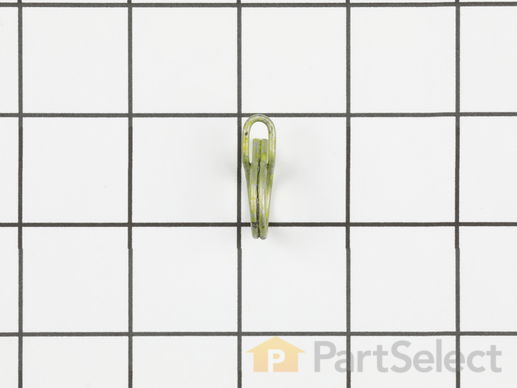
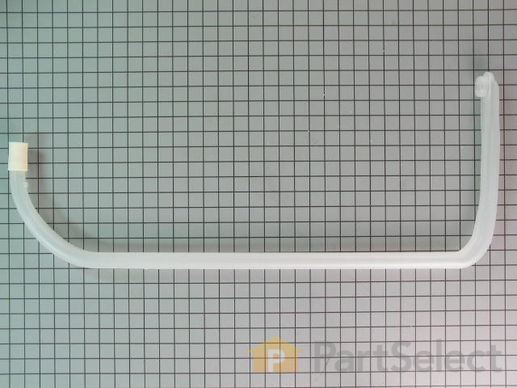
The tubing carries water from the water inlet valve to the tub.

$ 20.34
  In Stock
PartSelect Number PS12746654
Manufacturer Part Number 5304523457

Replacing your Frigidaire Dishwasher Dishwasher Water Inlet Tubing

Replacing your Dishwasher Water Inlet Tubing

Customer Repair Stories

Water fill hose leaked.

It is rather easy to repair. After you remove the screws that secure the top of the dishwasher to the countertop you can slide the disherwasher out far enough to gain access to the hose. The hose pulls off after you slide the spring clips down the hose far enough so they no longer grab. Then simply reverse the order and you're done. Less than 30 minutes and you should no longer have to hand wash your dishes!
  • Thomas from Wheaton, IL
  • Difficulty Level:
    Easy
  • Total Repair Time:
    15 - 30 mins
  • Tools:
    Pliers, Screw drivers
7 of 8 people found this instruction helpful.
Was this instruction helpful to you?
Thank you for voting!

Old hose was split

The Parts finder was the big help. After that all that was needed was to loosen the clamps and replace the old hose with the new one A piece of cake. Slide the washer back into place and replace the screws that hold it to the counter. Out and back in, 30min. top end to complet the job
  • Sandra R. from Groveland, FL
  • Difficulty Level:
    Really Easy
  • Total Repair Time:
    15 - 30 mins
  • Tools:
    Pliers, Screw drivers
15 of 19 people found this instruction helpful.
Was this instruction helpful to you?
Thank you for voting!
Fixes Symptom 1% of time

Rated by 4 customers 


Easy 

1- 2 hours 

Ratings submitted by customers like you who bought this part.   

$ 44.91
  In Stock
PartSelect Number PS420467
Manufacturer Part Number 154247001

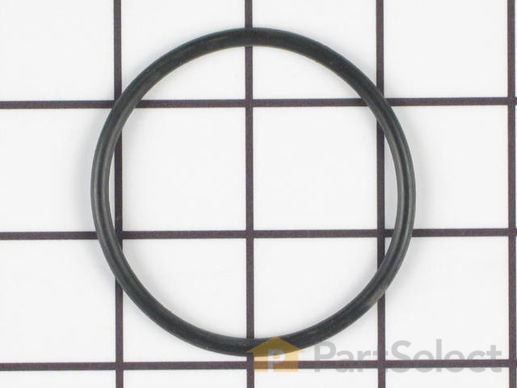
Replacing your Frigidaire Dishwasher O-Ring - Front

Replacing your O-Ring - Front
Fixes Symptom 1% of time

Rated by 3 customers 


Easy 

1- 2 hours 

Ratings submitted by customers like you who bought this part.   

$ 44.91
  In Stock
PartSelect Number PS420466
Manufacturer Part Number 154246901

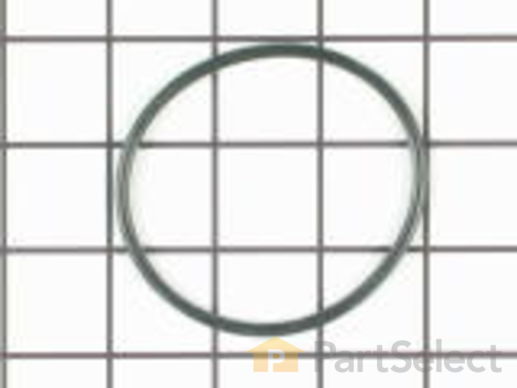
Replacing your Frigidaire Dishwasher O-Ring - Rear

Replacing your O-Ring - Rear
Fixes Symptom 1% of time
★★★★★
★★★★★
1 Review

Rated by 6 customers 


Really Easy 

15 - 30 mins 

Ratings submitted by customers like you who bought this part.   

Sold individually.

$ 10.59
  In Stock
PartSelect Number PS421211
Manufacturer Part Number 154406401

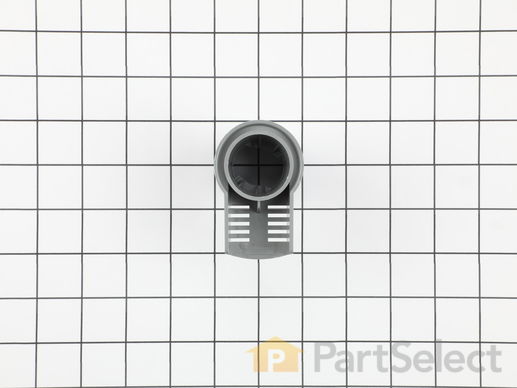
Replacing your Frigidaire Dishwasher Delivery Tube Gasket

Replacing your Delivery Tube Gasket

Customer Repair Stories

Spinner fell off of delivery tube.

Wrap your pliers in some kind of padding so you don't damage the plastic. Spin the base ( not the spinner itself) which is left-threaded(normal). If the gasket doesn't fall out (mine did) pull it out gently. Clean the gasket socket with a rough cloth or scotch-brite pad and install the new one. Put it all back together and wash dishes, man.
  • Jeffrey from Rougemont, NC
  • Difficulty Level:
    Really Easy
  • Total Repair Time:
    Less than 15 mins
  • Tools:
    Pliers
Was this instruction helpful to you?
Thank you for voting!

Dishwasher Leakibng

Removed the bottom covering on dishwasher and then ran it to figure out where the leak was coming from. Noticed it was dripping off hose, but not actually leaking from hose.

Unplugged dishwasher and slid it out from cabinet area (be sure to turn off and disconnect water supply)

Followed delivery tube up side of dishwasher to top of tub and noticed reminents of where water ran down side of tub.

Loosened delivery tube by plastic nut inside of tube and removed. Noticed gasket was partially depleted.

Ordered new gasket, replaced and put everything back together. (Be sure to use teflon tape on water source fitting and tighten firmly). No leaks
  • Eric from Benton, KY
  • Difficulty Level:
    Easy
  • Total Repair Time:
    30 - 60 mins
  • Tools:
    Pliers, Wrench (Adjustable)
10 of 12 people found this instruction helpful.
Was this instruction helpful to you?
Thank you for voting!
10 Hose
Fixes Symptom less than 1% of time

Rated by 3 customers 


Easy 

30 - 60 mins 

Ratings submitted by customers like you who bought this part.   

This hose is use to connect the drain pump to main pump housing hose.

$ 53.31
  In Stock
PartSelect Number PS420361
Manufacturer Part Number 154234401
Fixes Symptom less than 1% of time
★★★★★
★★★★★
4 Reviews

Rated by 6 customers 


Easy 

30 - 60 mins 

Ratings submitted by customers like you who bought this part.   

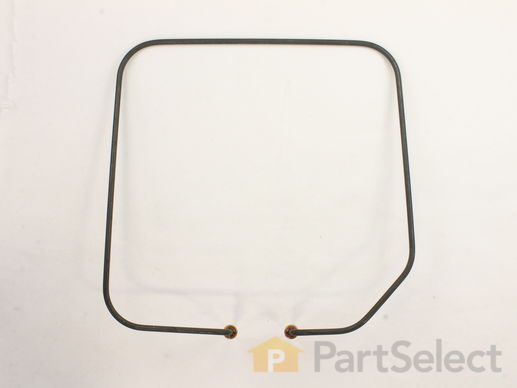
This part is not designed to heat the water that enters it, but is designed to maintain the heat of the water that enters the dishwasher and is located on the bottom of the dishwasher. Grommets are included with this part.

$ 60.15
  In Stock
PartSelect Number PS2355742
Manufacturer Part Number 154665201

Replacing your Frigidaire Dishwasher Heating Element

Replacing your Heating Element

Customer Repair Stories

Heating coil went bad

I had to remove the dishwasher from under the counter. I then had to unscrew (from the bottom) the bolts that held the heater in place. After that I ran into a problem of disconnecting the wires that ran to the heater. I did not want to "force" the wires off and I was unsure how exactly to remove them. I figured out that they are really hard to pull off but there are no clips holding them on, so you won't break anything off. Once I got the wires off, I was able to screw the nuts onto the new heater and put it back into place.
  • Ryan from Alton, IL
  • Difficulty Level:
    A Bit Difficult
  • Total Repair Time:
    30 - 60 mins
  • Tools:
    Screw drivers, Wrench set
15 of 17 people found this instruction helpful.
Was this instruction helpful to you?
Thank you for voting!

leak at heater element

The tub perforations at the heater leaked and water dripped onto the fastening nuts and the electrical connections. I ordered a new heater element and it did not have the necessary nuts to fasten it to the tub. I had to go back and order them separately. The original nuts are very unique and cannot be substituted for.The manufacturer should send them with every heater element because this leaking problem is very prevalent on these machines.
  • jr from hollywood, FL
  • Difficulty Level:
    A Bit Difficult
  • Total Repair Time:
    More than 2 hours
  • Tools:
    Pliers
102 of 109 people found this instruction helpful.
Was this instruction helpful to you?
Thank you for voting!
Fixes Symptom less than 1% of time
★★★★★
★★★★★
13 Reviews

Rated by 7 customers 


Really Easy 

15 - 30 mins 

Ratings submitted by customers like you who bought this part.   

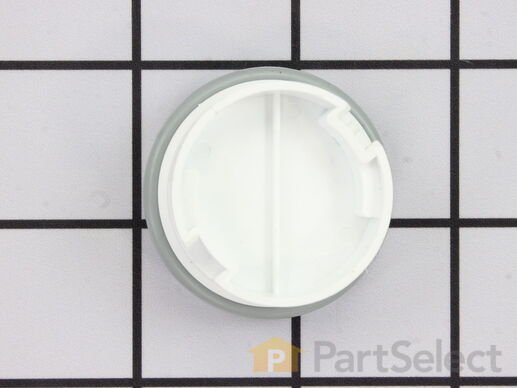
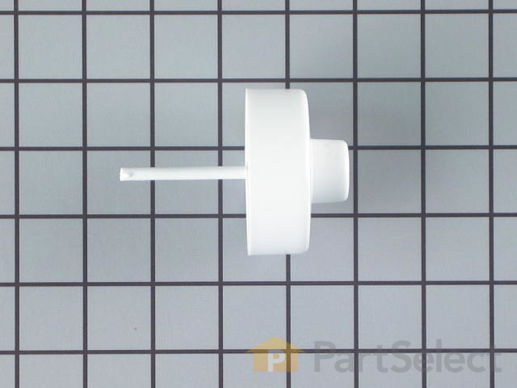
This is a replacement cap for the detergent/rinse aid dispenser. If the rinse aid cap is damaged or missing, you may notice too much rinse aid in the dishwasher. The cap simply screws into the dispenser, so if your cap is damaged you can simply screw it out, then screw in the new one. The rinse aid cap is approximately 2 inches in diameter and is sold individually. This is an OEM part, directly from the manufacturer.

$ 19.93
  In Stock
PartSelect Number PS421128
Manufacturer Part Number 154388801

Replacing your Frigidaire Dishwasher Rinse Aid Cap

Replacing your Rinse Aid Cap

Customer Repair Stories

The rinse cap was mutilated, the rinse agent leaked.

Simply unscrewed the old. Replaced with the new.
  • Rose from Summerville, SC
  • Difficulty Level:
    Very Easy
  • Total Repair Time:
    Less than 15 mins
2 of 2 people found this instruction helpful.
Was this instruction helpful to you?
Thank you for voting!

The rinse aid cap fell off during the drying session and was warped as a result.

I just had to buy a new cap and screw it in.
  • Jan from DENVER, CO
  • Difficulty Level:
    Really Easy
  • Total Repair Time:
    Less than 15 mins
2 of 2 people found this instruction helpful.
Was this instruction helpful to you?
Thank you for voting!
Fixes Symptom less than 1% of time
★★★★★
★★★★★
3 Reviews

Rated by 10 customers 


Easy 

30 - 60 mins 

Ratings submitted by customers like you who bought this part.   

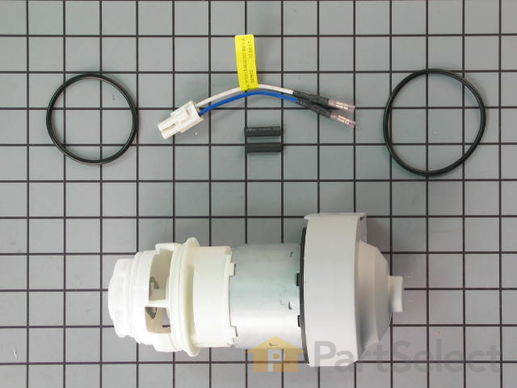
This part has been redesigned by the manufacturer and may appear different, but will function the same. This kit helps propel the water through the spray arms.

$ 179.74
  In Stock
PartSelect Number PS3501031
Manufacturer Part Number 154859101

Replacing your Frigidaire Dishwasher Dishwasher Circulation Motor & Pump Kit with Harness

Replacing your Dishwasher Circulation Motor & Pump Kit with Harness

Customer Repair Stories

Frigidaire dishwasher main pump failed

10 year old stainless steel faced Frigidaire dishwasher. The motor assembly part fixed my problem. This was the second part required to fix the dishwasher. A week prior I replaced the inlet water solenoid switch to correct the "no water filling issue". I think that the main motor assembly pump ran dry and caused it to fail, so it is critical NEVER to run this part dry. The repair was relatively easy, I will say it would be great to have some instructions with the parts, however the kit came with everything. you essentially slide the dishwasher out disconnecting power and water ( i left the discharge connected since the service loop was long). you disconnect all the main pump electrical and water connections, labeling made it easy. you take the motor assembly out thru the inside tub. Once the internal sump assembly is out you can clean the sump and remove the old pump. Pull it out straight and dont wiggle it. The kit comes with new O rings that i put a light smear of vaseline on for a good seal. You reinstall the sump and make connections. Since my dishwasher is old, the original Molex power connector to the motor is different on the new motor. The kit comes with a new style connector, what you have to do is snip off your old connector and the kit comes with a new connector with crimps on the ends, you slide the provided heat shrink over each wire and then crimp your dishwashers wires to the new connector. I then used a butane lighter to shrink the heat shrink. The heat shrink is not absolutely necessary since the crimps are insulated, but since the kit came with two perfectly cut pieces of heat shrink I felt obligated to use it. This sounds all complicated but it really wasn't and much cheaper than a new dishwasher! Interestingly and this only maybe in my case but the dishwasher seems to clean better than it ever did.. for now we are not pre-rinsing!
  • jeff from Orlando, FL
  • Difficulty Level:
    A Bit Difficult
  • Total Repair Time:
    30 - 60 mins
  • Tools:
    Nutdriver, Screw drivers, Wrench (Adjustable), Wrench set
23 of 26 people found this instruction helpful.
Was this instruction helpful to you?
Thank you for voting!

The dishwasher would not spray to middle or top rack and detergent would not dissolve.

I pulled off the cover inside the sump area. Then pulled the washer out from the counter and turned it on it's side. I took the old pump out and crimped a new wire harness on. It was a simple repair for a DIYer.

Before pushing the dishwasher back, I tested the dishwasher with it pulled out from the counter. It was easy to see water was flowing forcefully through the upper tubing now. Success.

Troubleshooting this faulty pump was harder because it was functioning, but it did not have enough force to push the water up to the top rack. I convinced myself that the pump was the problem by plugging the lower rack with a cork. The spray was still too weak to rotate the upper spray arm. I also ruled out the timer with a stop watch. This unit alternates upper and lower racks by pausing either 0.6 seconds or 3 seconds. This controlls a ball that diverts water to the upper or lower rack.
  • Kurt from Corrales, NM
  • Difficulty Level:
    Easy
  • Total Repair Time:
    30 - 60 mins
  • Tools:
    Screw drivers
50 of 55 people found this instruction helpful.
Was this instruction helpful to you?
Thank you for voting!
Fixes Symptom less than 1% of time

Rated by 1 customer 


A Bit Difficult 

30 - 60 mins 

Ratings submitted by customers like you who bought this part.   

Sold individually.

$ 2.38
  In Stock
PartSelect Number PS466832
Manufacturer Part Number 5303318539
Fixes Symptom less than 1% of time
★★★★★
★★★★★
2 Reviews

Rated by 1 customer 


Really Easy 

15 - 30 mins 

Ratings submitted by customers like you who bought this part.   

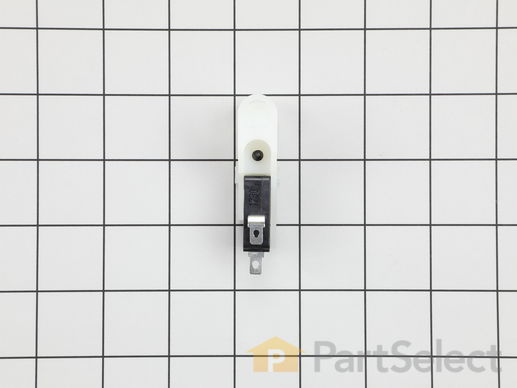
Water that fills your dishwasher lifts the float. When it reaches a certain level, the float triggers the float switch to shut off, thereby shutting off the flow of water into the dishwasher.

$ 64.00
  In Stock
PartSelect Number PS3492842
Manufacturer Part Number 154773201

Replacing your Frigidaire Dishwasher Float Switch

Replacing your Float Switch

Customer Repair Stories

machine was not filling

First, I unplugged the dishwasher. After removing the under counter mounting screws, I pulled the dishwasher out from the cabinets. Because the switch is hard to reach, I put the dishwasher on its side (very carefully). Make sure to drain the dishwasher first, or it will leak all over your kitchen. To remove the switch, I unscrewed the single black screw in the middle of the switch and unplugged the electrical wires. I put the new switch in its place, screwed in the screw, and plugged in the electrical connection. I set the dishwasher upright, and ran it through a cycle before reinstalling it into the cabinet. I had previously tried replacing the water inlet valve, but that was not the problem.
  • jon from northampton, MA
  • Difficulty Level:
    A Bit Difficult
  • Total Repair Time:
    15 - 30 mins
  • Tools:
    Pliers, Screw drivers
Was this instruction helpful to you?
Thank you for voting!

No water to dish washer

After figuring out the problem wasn't the water inlet switch, I replaced the switch assembly for the water level float. Cut off supply water to dishwasher, removed the 2 screws holding switch assembly, and installed new switch. 15 minutes, very easy job.
  • steve from virginia beach, VA
  • Difficulty Level:
    Really Easy
  • Total Repair Time:
    15 - 30 mins
  • Tools:
    Screw drivers
35 of 64 people found this instruction helpful.
Was this instruction helpful to you?
Thank you for voting!
Fixes Symptom less than 1% of time

This support is located at the bottom of the dishwasher door.

  No Longer Available
PartSelect Number PS420209
Manufacturer Part Number 154211401
Fixes Symptom less than 1% of time

  No Longer Available
PartSelect Number PS421213
Manufacturer Part Number 154406601

Replacing your Frigidaire Dishwasher Upper Spray Feed Tube

Replacing your Upper Spray Feed Tube
Fixes Symptom less than 1% of time
★★★★★
★★★★★
13 Reviews

Rated by 22 customers 


Easy 

30 - 60 mins 

Ratings submitted by customers like you who bought this part.   

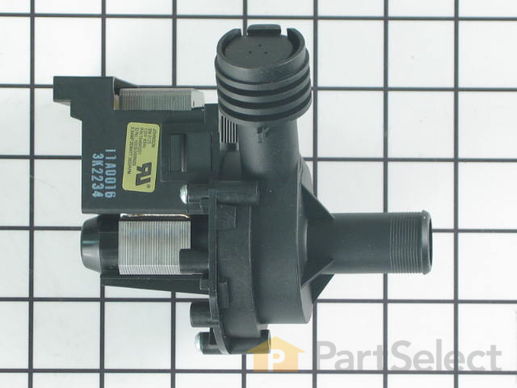
The pump ejects the water from the dishwasher.

$ 87.85
  In Stock
PartSelect Number PS8689825
Manufacturer Part Number A00126501

Replacing your Frigidaire Dishwasher Drain Pump

Replacing your Drain Pump

Customer Repair Stories

Diswasher would not drain with a staticky sound.

Pulled the dishwasher out and laid it on its back. From under the dishwasher I unscrewed three screws and freed the drain pump from some sort of frame. Then with the pliers loosed the orange clamp that held the black hose to it. Then unscrewed the clamp that held the white hose to it. Then pulled out the purple and white fuse wires. These wires were very tight I used pliers to get them off. The pump was free. Be sure to have a bowl to catch all the water. There wasn't a lot but it stinks. Then put it all together the way I took it apart. The dishwasher works perfectly now.
  • Brenda from Orem, UT
  • Difficulty Level:
    Easy
  • Total Repair Time:
    30 - 60 mins
  • Tools:
    Nutdriver, Pliers, Screw drivers
16 of 18 people found this instruction helpful.
Was this instruction helpful to you?
Thank you for voting!

Dishwasher would not drain

**** A stubby Philips screw driver will save you a lot of headache taking the two retaining screws out that hold the drain pump assembly to the hanging bracket *** An inspection mirror was also helpful trying to locate these screws.

I thought the pump impeller vane was possibly broken because the pump would not drain the dishwasher but it would energize and make a loud clicking/rumbling noise.

1) Drain water from the dishwasher. I used a piece of tubing and siphoned the water out. Remove front cover plate.

2) Turn off breaker and dsconnect two wires going into pump.

3) Remove the pump inlet. I kept the 4" rubber jumper piece attached when I took the pump out.

4) I had to disconnect the wash water feed line to be able to reach the hose clamp on the pump outlet.

5) Loosen hose clamp on the pump outlet if you can reach it, otherwise remove the two screws that hold the drain pump assembly in. There is one screw on each side of the pump. I used an inspection mirror to see the screws. I had to use a stubby Philips head screw driver to take the screws out.

6) Wrangle the drain section out and finish taking off the pump outlet hose clamp. Install new pump and work backwards to put it together.

When I pulled the pump out I found the impeller to be complete (not broken as I had thought) and I saw it had two small steel balls that sat in grooves. I think the two balls and groove act as a safety detent and disengage the pump if something big gets sucked in. I pushed down on the impeller and everything snapped together nicely. Since I already ordered a new pump and I had everything taken apart already I installed the new one but I think I could have just used the old one.

Hope this is helpful to someone else. Washer has worked fine since.
  • John from Alexandria, VA
  • Difficulty Level:
    Easy
  • Total Repair Time:
    1- 2 hours
  • Tools:
    Nutdriver, Pliers, Screw drivers
82 of 90 people found this instruction helpful.
Was this instruction helpful to you?
Thank you for voting!
Fixes Symptom less than 1% of time
★★★★★
★★★★★
16 Reviews

Rated by 8 customers 


Really Easy 

15 - 30 mins 

Ratings submitted by customers like you who bought this part.   

This lower spray arm is a genuine OEM part for various makes and models of dishwasher and is sold as an individual part. This part attaches to the lower spray assembly of your dishwasher and the lower spray arm itself clips into this part to facilitate its spinning movement during the washing cycle. To replace it, remove the spray arm by pulling it out, remove the surrounding circular clip and then twist to remove this bit. Made completely of plastic, this part measures approximately 3-inches deep, 2-inches wide, and 3.125-inches tall.

$ 11.25
  In Stock
PartSelect Number PS12712289
Manufacturer Part Number 5304518968

Replacing your Frigidaire Dishwasher Lower Spray Arm Support

Replacing your Lower Spray Arm Support

Customer Repair Stories

missing bottom spray arm

I used the PartSelect repair video online to show me how to fix the dishwasher. I needed a spray arm and support. Excellent video made the repair quick and easy.
  • Ashley from Normal, IL
  • Difficulty Level:
    Really Easy
  • Total Repair Time:
    Less than 15 mins
1 person found this instruction helpful.
Was this instruction helpful to you?
Thank you for voting!

spray arm fell off and melted on element

The Spray arm and the support had come off during operation and subsequently melted on the heating element. This was our fault, as a knife had slipped through the lower dish-rack and acted as a ramp to launch the spray arm as it came around. The support was a simple 1/4 turn counter-clockwise until it clicked into place, drop the strainer basket into position around the support, them push the spray arm into place until the catches snap over the retaining ring molded into the support. All told, about 10 minutes, max.
  • Dale from Worley, ID
  • Difficulty Level:
    Really Easy
  • Total Repair Time:
    Less than 15 mins
34 of 38 people found this instruction helpful.
Was this instruction helpful to you?
Thank you for voting!
Fixes Symptom less than 1% of time

Rated by 2 customers 


A Bit Difficult 

1- 2 hours 

Ratings submitted by customers like you who bought this part.   

$ 60.48
  In Stock
PartSelect Number PS420465
Manufacturer Part Number 154246801

Customer Repair Stories

Dishwasher leaks

First point of leakage was the door. Turns out that a gasket at the bottom of the door functions as a wave trap. As the bottom sprayer spins it sprays against the door and creates a small wave of water this gasket was starting to disintegrate, it was letting water surge over the small tray at the doors bottom. Easy to replace just pull down and remove press fit on inside door bottom. Only when this was replaced did I find the real leak but not until I guessed at the tub seal as the leak. Very hard to see where the water really comes from! Turns out it was not the tub seal but a clip that holds the heater element got smashed down from a dropped dish rack at some earlier time and this caused the heat to increase at the clip and eventually heat the clip to extent it melted the tub directly under it. JB Weld to the rescue and we have a waterproof tub again. Well almost! The tub gasket resisted my best efforts to seat correctly and thus required a new tub gasket, still hard to seat but after 2-3 attempts we have a winner. Total cost about 50 bucks vs. 6-700 for a new unit. Wife is happy!!
  • Gardner from Old Saybrook, CT
  • Difficulty Level:
    Difficult
  • Total Repair Time:
    More than 2 hours
  • Tools:
    Nutdriver, Screw drivers, Socket set
8 of 16 people found this instruction helpful.
Was this instruction helpful to you?
Thank you for voting!
21 FLOAT
Fixes Symptom less than 1% of time

Rated by 1 customer 


Really Easy 

Less than 15 mins 

Ratings submitted by customers like you who bought this part.   

As water is filling your dishwasher, a float rises along with it. When the float reaches a predetermined level, it shuts off the flow of water, thereby preventing a leak.

$ 23.56
  In Stock
PartSelect Number PS11770486
Manufacturer Part Number 5304506520

Replacing your Frigidaire Dishwasher FLOAT

Replacing your FLOAT

Customer Repair Stories

was brocken

just replace
  • Aleksandr from West Palm Beach, FL
  • Difficulty Level:
    Really Easy
  • Total Repair Time:
    Less than 15 mins
  • Tools:
    Screw drivers
8 of 32 people found this instruction helpful.
Was this instruction helpful to you?
Thank you for voting!
22 SHIELD
Fixes Symptom less than 1% of time

Rated by 1 customer 


Easy 

15 - 30 mins 

Ratings submitted by customers like you who bought this part.   

  No Longer Available
PartSelect Number PS420568
Manufacturer Part Number 154289801
Fixes Symptom less than 1% of time
★★★★★
★★★★★
2 Reviews

Rated by 1 customer 


Easy 

30 - 60 mins 

Ratings submitted by customers like you who bought this part.   

$ 58.54
  In Stock
PartSelect Number PS12365372
Manufacturer Part Number 5304513274

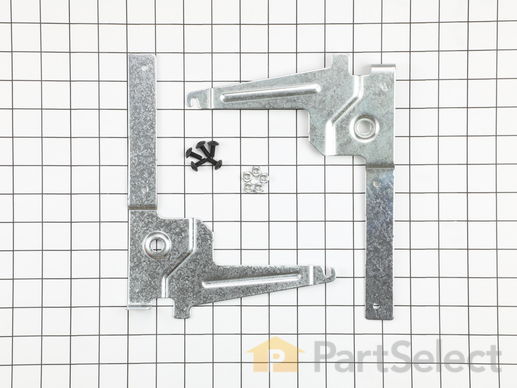
Replacing your Frigidaire Dishwasher Door Hinge Kit

Replacing your Door Hinge Kit
Fixes Symptom less than 1% of time
★★★★★
★★★★★
30 Reviews

Rated by 14 customers 


Really Easy 

Less than 15 mins 

Ratings submitted by customers like you who bought this part.   

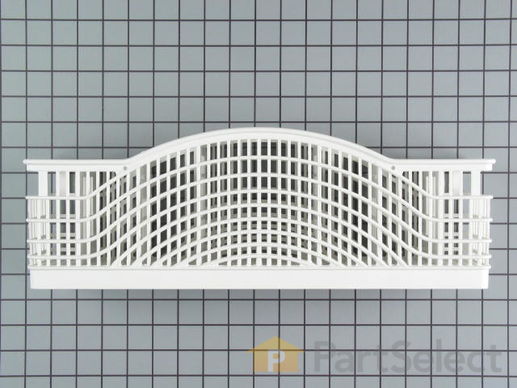
The silverware basket, used for dishwashers, is in the bottom dishrack. The lower dishrack basket is used to hold eating utensils such as spoons, forks, and knives, and other small tools. If the basket in the dishwasher is worn out or the basket is broken, replacing it can be a solution. No tools for this replacement are required, as it is an easy process. If you need further guidance refer to the instructions provided by the manufacturer. For safety precautions make sure to unplug the dishwasher and wear gloves.

$ 36.52
  In Stock
PartSelect Number PS17219661
Manufacturer Part Number 5304535382

Replacing your Frigidaire Dishwasher Silverware Basket

Replacing your Silverware Basket

Customer Repair Stories

silverware basket skunked

tossed the old one a replaced with a new.Hardest 10 second repair ever....It took 10 seconds had to open and close the door.
  • Alan from Holley, NY
  • Difficulty Level:
    Really Easy
  • Total Repair Time:
    Less than 15 mins
13 of 14 people found this instruction helpful.
Was this instruction helpful to you?
Thank you for voting!

large holes in the bottom of the basket where pieces of plastic kept breaking off

I replaced the basket. No tools necessary. New basket seems sturdier than original. Very satisfied with my purchase.
  • Lauren from Peabody, MA
  • Difficulty Level:
    Really Easy
  • Total Repair Time:
    Less than 15 mins
18 of 21 people found this instruction helpful.
Was this instruction helpful to you?
Thank you for voting!
Fixes Symptom less than 1% of time

Rated by 1 customer 


Really Easy 

Less than 15 mins 

Ratings submitted by customers like you who bought this part.   

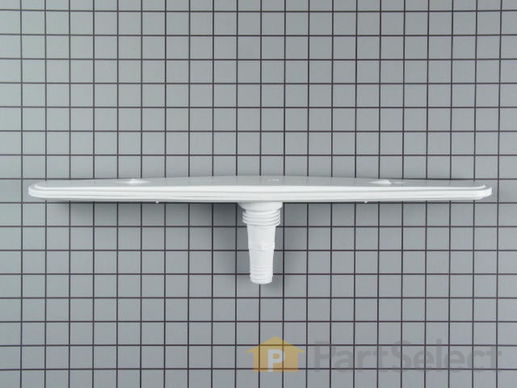
Depending on your model number, this spray arm is either the upper arm or center arm.

$ 35.35
  In Stock
PartSelect Number PS420713
Manufacturer Part Number 154313601

Replacing your Frigidaire Dishwasher Spray Arm

Replacing your Spray Arm

Customer Repair Stories

spray arm came apart

took the old one off, replaced with new one put arm back on machine. Very, very simple.
  • Lois from Glendale, AZ
  • Difficulty Level:
    Really Easy
  • Total Repair Time:
    Less than 15 mins
Was this instruction helpful to you?
Thank you for voting!

things not getting clean

took nut off end. put new arm in..put funnel back in place,worked like a charm. Thanks for your quick and great service! A++++++++++++++++++++
  • Judith from Hamilton, OH
  • Difficulty Level:
    Really Easy
  • Total Repair Time:
    Less than 15 mins
  • Tools:
    Pliers
Was this instruction helpful to you?
Thank you for voting!