


Models
>
WW2780B-C
WW2780B-C Jenn-Air Wall Oven - Overview
Sections of the WW2780B-C
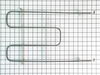
[Viewing 7 of 7] Diagram and Parts List for Jenn-Air Wall Oven")
 Diagram and Parts List for Jenn-Air Wall Oven")


Keep searches simple, eg. "belt" or "pump".

Light Bulb - 40W
PartSelect #: PS884734
Manufacturer #: 8009
This an authentic OEM 40-Watt replacement light bulb, used in a number of household appliances. It is specially designed to withstand extreme temperatures, which is why these replacement bulbs are mos...
$11.73
In Stock

Long Oven Sensor
PartSelect #: PS1570174
Manufacturer #: 12001656
This long oven sensor is also commonly known as a temperature sensor. It is designed for use with ovens and ranges. It is similar to a thermostat; it measures and regulates the internal temperature of...
$34.75
In Stock

Screw, 8/18 x 3/8
PartSelect #: PS11746840
Manufacturer #: WP90767
This screw is sold individually.
$5.42
In Stock

Screw
PartSelect #: PS12349731
Manufacturer #: W11233072
This is a multi-use and multi-appliance screw. It can be used on a microwave, refrigerator, range/oven, air conditioner, dehumidifier, washer, or dryer. The measurements of this screw are 8 x 1/2 inch...
$20.79
In Stock

2 Piece Broiler Pan
PartSelect #: PS971245
Manufacturer #: 4396923
This is cookware designed for use in your range or oven. It is a two-piece dish that is used to grill or cook food while the broil function is on, meaning it can withstand high temperatures. This set ...
$37.51
In Stock

Bake Element
PartSelect #: PS11757476
Manufacturer #: WPY04100020
This bake element is 17 inches wide. It has a terminal depth of three inches, and a total element length of ninteen inches. This element is intended for use with some electric ovens.
$100.11
In Stock

Oven Rack
PartSelect #: PS2201584
Manufacturer #: Y704660
This is an oven rack for various models of ranges and ovens and is sold individually. This oven rack allows you to lay different kitchen items on it to cook or bake within your range, and over time th...
No Longer Available

Oven Door Seal
PartSelect #: PS11757564
Manufacturer #: WPY702338
This oven door seal prevents heat from escaping the oven cavity when in use.
$127.07
In Stock

Temperature Probe
PartSelect #: PS11743863
Manufacturer #: WP71001870
This temperature probe consists of two ends joined together by an insulated wire. The small end is almost four inches long, whereas the longer end is almost seven inches long. The small end, the jack,...
$166.54
In Stock

Clock Knob - black
PartSelect #: PS11744674
Manufacturer #: WP7711P492-60
The clock knob attaches to the center of the oven control panel and is used to adjust the built-in clock. This clock knob is less than an inch in diameter. It is all black in color and is made of plas...
$20.95
In Stock


Frame Screw
PartSelect #: PS11743908
Manufacturer #: WP7101P126-60
Sold Individually.
$7.76
In Stock
Questions And Answers for WW2780B-C
We're sorry, but our Q&A experts are temporarily unavailable.
Please check back later if you still haven't found the answer you need.
Common Symptoms of the WW2780B-C
[Viewing 9 of 9]Little to no heat when baking
Fixed by
these parts
these parts


Show All
Oven is too hot
Fixed by
these parts
these parts
Show All
Oven not heating evenly
Fixed by
these parts
these parts
Show All
Will Not Start
Fixed by
these parts
these parts
Show All
Element will not heat
Fixed by
these parts
these parts
Show All
Touchpad does not respond
Fixed by
these parts
these parts
Show All
Little to no heat when broiling
Fixed by
these parts
these parts
Show All
Will not program
Fixed by
these parts
these parts
Show All
Door won’t open after self cleaning cycle
Fixed by
these parts
these parts
Show All


Keep searches simple. Use keywords, e.g. "leaking", "pump", "broken" or "fit".
Oven not holding 350 F, when cooling the coils did not reheat
Removed the oven door by opening slightly, then pic door up to remove. Remove 2 screws holding oven sensor in place, gently pull on sensor to remove, had to remove about 8 inches to get at plastic connector. Unplug connector, had to use an adapter cable supplied with the PartSelect kit to install new sensor, push cable back into opening,
... Read more
reinstall 2 screws. The oven works fine! Note that due to thermal lag the temperature overshoots to 370 degrees and undershoots to 340 degrees, this appears to be normal oven operation. Putting door back in place was easy.
Read less
Parts Used:

-
David from Westford, MA
-
Difficulty Level:Really Easy
-
Total Repair Time:15 - 30 mins
-
Tools:Screw drivers
156 of 196 people
found this instruction helpful.
Was this instruction helpful to you?
Thank you for voting!
The oven door seal was ripped and was leaking.
The oven seal replacement was very straight forward. Two screws held the door to the arms coming from the oven. I slid the door up off the arm and moved it to a workbench. This whole process should take about 15 minutes, a little longer if your unit is older and you want to clean as you go. Mine was fairly dirty and I gave it a cleani
... Read more
ng as I removed parts. Unscrew all screws on the outer frame of the door, including two small ones on the side. Remove the outer frame and then the glass front and set them aside. A few more screws to remove the glass from the inner door, and even more on the remaining part of the door. You should also remove the screws holding the tiny brackets as well to release the portion that holds the oven seal in place. This is very straightforward, just keep pulling screws out until you can remove the old seal.
Once the old seal is out, insert the new one using the wire embedded in the seal as your guide...the gap in the seal goes to the bottom. Put everything back together and re-install the door. My door hinges were spring loaded and took a little effort to move them down so the door can be slipped on. This is a two person job since the hinges do not lock in place, they spring right back up flush with the oven and you cannot install the door. Re-install the two set screws holding the door to the hinges and you are done!
With the new seal in place, it felt a little puffy and the door did not seem to close as flush as it used to. This makes sense since the seal is new. I kept the door locked (like you would to use the oven cleaning cycle). I even kept it partially locked during cooking.
Frankly, the hardest part was the cleanup of nasty grease and dirt that built up over the past decade or so.
Best of luck!
Read less
Parts Used:

-
Paul from Mickleton, NJ
-
Difficulty Level:Easy
-
Total Repair Time:15 - 30 mins
-
Tools:Screw drivers
90 of 95 people
found this instruction helpful.
Was this instruction helpful to you?
Thank you for voting!
F1-1 code
First I removed the two screws that hold the element in place. I then pulled the sensor out about 3 inches and disconnected the two wires. Next, I connected new sensor and screwed the new sensor back in place. One area for caution. Make sure that the electrical connection is pushed in past the insulation on the back side of the oven. Fa
... Read more
ilure to do so will cause the plastic plug connector to melt from oven heat.
Read less
Parts Used:
-
charles from marstons mills, MA
-
Difficulty Level:Really Easy
-
Total Repair Time:Less than 15 mins
-
Tools:Screw drivers
74 of 99 people
found this instruction helpful.
Was this instruction helpful to you?
Thank you for voting!