This light bulb is a 40 watt, 130-volt clear appliance light bulb that is manufactured to fit microwaves with small-base light bulb sockets. The light bulb illuminates the inside of the microwave whil...
$22.00
In Stock
Order within the next 5 hrs and your part ships today!
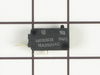
This ceramic microwave fuse is just over an inch in length. It is white in the center, and metal on both ends. This is a 20-amp fuse, and is used to power your microwave. If the touch pad on the micro...
$10.58
In Stock
Order within the next 5 hrs and your part ships today!
This light bulb socket that is used in microwaves. The socket is meant to fit small-base light bulbs. * Please note: The light bulb is not included with this part and is sold separately. If the follow...
$23.29
In Stock
Order within the next 5 hrs and your part ships today!
This is a microwave turntable drive motor. This is a genuine OEM replacement part. It accepts a D-shaped drive shaft. The drive motor is located under the glass microwave turntable, and allows the tur...
$72.87
In Stock
Order within the next 5 hrs and your part ships today!
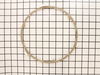
This is a cooking tray and it is a common component in any microwave. This piece is transparent and is made of glass. The diameter of this part measures to be roughly 12.5 inches. Although you may fin...
$115.25
In Stock
Order within the next 5 hrs and your part ships today!
The secondary door switch is a simple on/off mechanism that stops the microwave from operating when the door is open (normally opened). The switch monitors the door latch position, and communicates w...
$45.34
In Stock
Order within the next 5 hrs and your part ships today!
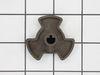
This turntable motor coupler connects the turntable motor to the turntable tray to activate the tray. If your tray does not consistently turn or does not turn at all, replace this part. This part meas...
$11.65
In Stock
Order within the next 5 hrs and your part ships today!
Unplug your microwave before attempting this repair. You will need to remove the grill, which is held into place by two screws at the top of the grill (open your microwave door before doing this). Rem...
$37.02
In Stock
Order within the next 5 hrs and your part ships today!
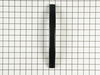
This part is the replacement flat cab mounting bolt for your microwave. The bolt is approximately 4 inches long. It is designed to hold the microwave in place in your cabinet. The main reason to repla...
$14.29
In Stock
Order within the next 5 hrs and your part ships today!
This grille does NOT come with screws. This vent grille mounts on the top of the microwave above the door.
$138.07
In Stock
Order within the next 5 hrs and your part ships today!
Questions And Answers for RVM1435BD002
We're sorry, but our Q&A experts are temporarily unavailable.
Please check back later if you still haven't found the answer you need.
2 questions answered by our experts.
Sort by:
< Prev
1
Next >
Search filter:
Clear Filter
Your search term must have 3 or more characters.
Keep searches simple. Use keywords, e.g. "leaking", "pump", "broken" or "fit".
Sorry, we couldn't find any existing answers that matched.Try using some different or simpler keywords, or submit your new question by using the "Ask a Question" button above!
Shelli
January 28, 2020
Would like to know how to take plastic door frame off it is broke and is i could get it off i could fix it
For model number RVM1435BD002
Hello and thank you for writing.
You would have to take the entire door of your microwave first, pry on the inside edge with a putty knife or small flat screwdriver. Go a little at a time around the edge. Keep going around the outer edge gaining 1/4 inch at a time. Once you get the inner frame off, you can pry the door body out of the outer frame. Be careful of the outer glass when you remove the door body, it is loose and can fall. Remove the screws that hold the handle on and remove the handle. Reverse this procedure to install the new out frame. We hope this helps. Please contact us anytime if you require further assistance.
1 person found this helpful.
Was this helpful?
Thank you for voting!
Wayne
October 31, 2022
The plastic piece that twists off upper part of microwave caught fire and melted. I need to replace it.
For model number RVM1435BD002
Hello Wayne, thank you for reaching out. The part you are looking for is the turntable coupler, part number PS651211. If you need help placing an order, customer service is open 7 days a week. Thanks again for your great question.
Turned out the issue was easily solved by replacing a single, inexpensive fuse.
First off, UNPLUG THE MICROWAVE.
The fuse is located under the plastic grill at the top of the microwave. It's held on by two screws. Once you've removed the screws and taken off the plastic grill, you go to the right side of the mic
... Read morerowave and remove another screw that holds a small metal grill in place. Removing the small metal grill is probably the toughest part of this repair. You kind of have to rock it back and forth a bit to get it to release. Once that's off, you can get to the fuse. I removed the burnt out one with a pair of needle nose pliers. I also put a small piece of cardboard under the fuse when I did this so I didn't accidentally drop it into the innards of the microwave. I did the same thing when I replaced the new fuse. I then plugged the appliance back in and made sure it worked. Once that was confirmed, I replaced both grills.
The unbelievable happened. Our glass carousel cooking tray developed a crack. Each day the crack got longer. I ordered a new one on Tuesday and it arrived the next morning just before the cracked one completely cracked. I have never experienced such fast service. I highly recommend PartSelect and their helpful service.