This an authentic OEM 40-Watt replacement light bulb, used in a number of household appliances. It is specially designed to withstand extreme temperatures, which is why these replacement bulbs are mos...
The shelf retainer bar end cap is used to keep the retainer bar in place, and can be used on either the right or left hand side of the bar. This white, OEM end cap is approximately 2 inches long, and ...
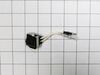
This condenser fan motor kit is designed for use with refrigerators. This fan draws air through the condenser coils and over the compressor. It does this with the goal of cooling the warm refrigerant ...
This refrigerator door shelf trim is approximately 28 inches long. It is all white in color, and it is made entirely of metal. NOTE: The image may not be of the exact product but will function properly.
This is a multi-use and multi-appliance screw. It can be used on a microwave, refrigerator, range/oven, air conditioner, dehumidifier, washer, or dryer. The measurements of this screw are 8 x 1/2 inch...
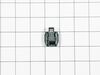
This part helps the compressor kick on and off while maintaining a constant temperature to keep things frozen in your freezer. If you are noticing temperature issues with your refrigerator or freezer,...
This defrost timer will cycle for twenty-one minutes after every ten hours of run time.
The defrost timer acts like a clock. It continually advances and alternates between activating the cooling cy...
This hinge can be used for washers and refrigerators. The hinge is used to easily open and close your appliance door. If you put too much pressure or weight on the door, it can break the hinge or the ...
This clear fresh food control knob is almost three inches in diameter. There is blue numbering around the perimeter of the knob denoting the level of coldness inside the refrigerator.
$54.09
In Stock
Questions And Answers for CTL1511BEW
Ask our experts a question about this model and we'll get back to you as soon as possible!
1 question answered by our experts.
Sort by:
< Prev
1
Next >
Search filter:
Clear Filter
Your search term must have 3 or more characters.
Keep searches simple. Use keywords, e.g. "leaking", "pump", "broken" or "fit".
Sorry, we couldn't find any existing answers that matched.Try using some different or simpler keywords, or submit your new question by using the "Ask a Question" button above!
Gordon
January 14, 2020
How many cubic ft did this model have?
For model number CTL1511BEW
Hello and thank you for writing.
This Magic Chef has a 10.1 cu. ft. capacity. We hope this helps. Please contact us anytime if you require further assistance.
3 people found this helpful.
Was this helpful?
Thank you for voting!
< Prev
1
Next >
✖
Ask a Question
Ask our experts a question on this model and we'll respond as soon as we can.
Unplug the appliance. Removed the screws holding the back panel. Removed the fan blade. removed 3 screws holding the condenser fan. Remove the 3 metal brackets attached to the fan. (First note which studs the brackets are attached to. Attach the 3 metal brackets to the new fan. (New screws were supplied) Cut
... Read moreand strip the wire about two inches from the fan. Cut and strip the new wire. I cut the new wire in half (about 6 inches.) Connect the two wires, twist and used 2 wire nuts. Tie wrap the wire to the wire harness. Mount the new fan (three screws) Screw the back panel back on. Mount the new
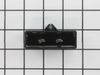
I used a flat-head screwdriver to pop out the old light rocker switch. Then, I unplugged the wires, plugged them into the new light rocker switch, and then popped the new switch into the hole. That's it! Lights began working again.
Unplug the refrigerator. Remove face plate located in the upper back of the refrigerator compartment. Remove face place bracket on the right using nut driver. Removing these screws also frees the metal case enclosing the Defrost Timer. Pull the case away from the back of the refrigerator exposing the Defrost timer. Remove the electri
... Read morecal plug from the Defrost Timer. Then remove the Defrost Timer from the case by removing the two screws securing it. Reverse the procedure to install the new Defrost Timer.