


Models
>
CCR467B
CCR467B Jenn-Air Cooktop - Overview
Models starting with CCR467B
Click on the best match to narrow your results.
Keep searches simple, eg. "belt" or "pump".

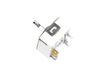
Surface Burner Switch - 240V
PartSelect #: PS12347301
Manufacturer #: W11120791
This surface burner switch, also known as an infinite switch, controls and regulates the heat output of the burners on a stovetop. The user simply adjusts the knob on the user interface panel, which i...
$90.92
In Stock

Surface Burner Switch
PartSelect #: PS12070671
Manufacturer #: W11088181
This is the replacement surface burner switch for your range. It measures approximately 1.5 inches by 1.5 inches, with a shaft that is approximately 1 inch long. The surface burner switch turns the su...
$83.91
In Stock

Infinite Knob
PartSelect #: PS11757486
Manufacturer #: WPY04100366
This infinite knob is black in color and is two inches in diameter. It is only an inch high and it has a gray indicator dot.
$26.29
In Stock

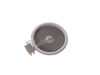
6 Inch Element with Limiter
PartSelect #: PS11764912
Manufacturer #: W10823704
This element can be used for the left front or right rear.
$268.43
In Stock


Screw - 6-32 x 5/16
PartSelect #: PS11744050
Manufacturer #: WP74004005
This screw is well under an inch long, and is made of metal.
$5.36
Special Order


Radiant Surface Element - 9"
PartSelect #: PS11744154
Manufacturer #: WP74007133
No Longer Available

Infinite Knob
PartSelect #: PS2195338
Manufacturer #: Y04100412
Sold Individually. This knob takes a double-flat shaft.
No Longer Available
Common Symptoms of models starting with CCR467B
[Viewing 3 of 3]Element will not heat
Fixed by
these parts
these parts

Show All
Will Not Start
Fixed by
these parts
these parts
Show All
Oven is too hot
Fixed by
these parts
these parts
Show All
Keep searches simple. Use keywords, e.g. "leaking", "pump", "broken" or "fit".
Burner had one temperature--hot, regardless of setting
1. Killed power and removed the regulator's knob, noted the position of the old control.
2. Took off the cover for the center vent and loosened the two screw holding the housing in place--the screws didn't have to come out completely as it is a U-shaped friction hold.
3. Unscrewed the two screws holding the old control switch in ... Read more place--lifted the housing enough to get at the old switch and carefully pulled it loose--it was a front burner so the control switch was about as far back as it could be but still wasn't that hard to get at.
4. Turned the new switch to orient the wire connectors, then, using a needle-nose pliers, removed each friction connector, one at a time, and fitted them on the new switch (note: one of the wires fitted best if it went under as opposed to around the base of the new switch).
5. Replaced the control back through the housing and screwed it in place, making sure the orientation of the control matched the way it looked originally.
6. Slide the housing back over the two screws and tightened, replace vent.
7. Replaced the knob and turned on the power.
(The above took me about twice as long to write as it did to make the repair and I write professionally but am not a professional electrician.)
Also, I bought a second control switch because, given the age of the unit, I'm sure another one will go. The second one will assure that it won't happen :-).
Read less
Parts Used:

-
James H from Oxford, NY
-
Difficulty Level:Really Easy
-
Total Repair Time:Less than 15 mins
-
Tools:Pliers, Screw drivers
105 of 119 people
found this instruction helpful.
Was this instruction helpful to you?
Thank you for voting!
old switch had shorted and burned out
This was a range top. i removed the 12 hex machine scews holding on the top, then removed the two star screws holding the old switch. there were fore wire that had fitted on tabs. Hooked them to the new swtch and reassembeld. Easy repair since i could lift the unit out without disconnecting main cables. Replacement range would have
... Read more
been oveer $1000. Psrt was under $40 and delivered in a matter of days.
Read less
Parts Used:

-
Larry from Hampton Cove, AL
-
Difficulty Level:Really Easy
-
Total Repair Time:15 - 30 mins
-
Tools:Nutdriver
37 of 50 people
found this instruction helpful.
Was this instruction helpful to you?
Thank you for voting!
replaced heating element on flat surface stove top
I removed 4 screws and then lifted up the top it gave me access to the element I followed the direction that came with the element (very clear to follow) removed and installed the new element and it worked fine. Remember to unplug the stove if it is electric this is not in the instructions.
Parts Used:

-
dennis from assonet, MA
-
Difficulty Level:Really Easy
-
Total Repair Time:15 - 30 mins
-
Tools:Nutdriver
34 of 47 people
found this instruction helpful.
Was this instruction helpful to you?
Thank you for voting!