This an authentic OEM 40-Watt replacement light bulb, used in a number of household appliances. It is specially designed to withstand extreme temperatures, which is why these replacement bulbs are mos...
This is a multi-use and multi-appliance screw. It can be used on a microwave, refrigerator, range/oven, air conditioner, dehumidifier, washer, or dryer. The measurements of this screw are 8 x 1/2 inch...
Sold individually. Lock washers are used with screws when vibration from an appliance may cause the screw to loosen. Lock washers are also used in the electrical components of an appliance to ensure ...
This is cookware designed for use in your range or oven. It is a two-piece dish that is used to grill or cook food while the broil function is on, meaning it can withstand high temperatures. This set ...
The clock knob attaches to the center of the oven control panel and is used to adjust the built-in clock. This clock knob is less than an inch in diameter. It is all black in color and is made of plas...
This rivet is an inch and a half long. It is used for many washing machines, microwaves, refrigerators, dryers, and ranges. Use of this rivet requires a rivet tool.
$14.09
On Order
Questions And Answers for 62921138
Be the first to ask our experts a question about this model!
✖
Ask a Question
Ask our experts a question on this model and we'll respond as soon as we can.
Unscrewed and pulled the door off and then took the three layers of the door apart in order to clean off the burned-on goop and remove the old and insert the new seal. The last screw was rusted in and the drill stripped it so that it was impossible to remove. I levered the remaining two layers apart, holding them open with screw drive
... Read morers, and inserted the new seal. Had to be careful with the shaping of the metal core of the seal and the distribution of the sealing fabric. Phew! I saved the screws from each layer separately by taping them to the counter in the order of removal. This made reassembly easier. Getting the door back on was a bit difficult and I needed another pair of hands to help me.
1.remove the trim around the door (8 screws) 2.remove over glass panel (part with the handle) Caution; the springs on the door are exactly set for the weight of the door. When we removed the outer glass panel, I almost killed my wife when the door slammed shut. 3.Remove inner metal cover (6-8 screws).some of these screws
... Read morewere baked pretty tight so I used vise grips on their little heads to convince them to get turning. 4. To get the door window out you must also remove the inner enamel baked cover, held on by 5-6 screws from the back. This is also the pieces which holds the door seal in place, so it is a good time to change that as well. 5. After cleaning up all the broken glass from the old window, the new window slides right in - perfect fit! Reverse the steps to put it all back together.
From the time the glass broke until it was completely repaired took only six days! Pretty amazing for a twenty year old oven.
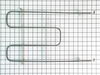
Older model oven with model number worn off. Photo with the 1" grid made it possible for me to find the right size part.
You only need a phillips head screwdriver to install this seal, but it is a bit tricky to line up the new seal and the fiberglass insulation inside the door, so take your time and make sure everything lines
... Read moreup and is tucked in before tightening the screws. Probably easier to do with 2 people (especially getting the door back on the spring loaded hinges) but I was able to do it solo without too much difficulty.