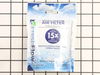
This Refrigerator Air Filter is a white 1.8x3.2" plastic filter which neutralizes odor and bacteria in the air. It should be replaced every six months at a minimum. Refer to your user manual and model number to see if this filter is right for your fridge. Location for storage of the air filter may vary from model to model, but generally, ...Read moreyou will find a small cover on the back-middle-top of your fridge, which can be popped off to reveal the air filter, which can be easily changed out from there. This part does not come sold with the indicator; it is the filter only. Sold individually.
This water filter is a genuine replacement for bottom-freezer refrigerators that accept a Filter 2. it is certified to remove up to 24 different contaminants which include pharmaceuticals, waterborne parasites, lead, and pesticides. The filter should be replaced every six months, or when 200 gallons of water have passed through, to ensure...Read more optimum contaminant reduction. The filter is found in the top right corner of your fridge, and replacing it is easy. Simply pop out the old one (keep a bucket underneath to catch any water) and slide in the new one. You will hear a click once it has locked into place. You should run water through the filter for a couple minutes prior to use. This filter measures approximately two inches wide, two inches deep, and 7.5 inches long.
This light switch may also be known as a refrigerator door switch or a light switch kit, and is compatible with your refrigerator. The function of the refrigerator door switch is to turn on the light when your fridge door is open, and to make sure it is off when your refrigerator door is closed. The reason you would need to replace this p...Read moreart is if your light is not turning on when your door is open. For this repair, you will need a putty knife, and a small flat-blade screwdriver.
Fresh Flow Produce Preserver is made for your refrigerator to help keep produce fresh for longer by absorbing the chemical, ethylene, that causes your fruits and vegetables to ripen quicker. Your produce could be fresh for up to 4 days longer. It includes 2 packs of preserver and a status indicator strip. Replace every 6 months.
This genuine OEM replacement part is a water filter for your fridge or freestanding ice maker. The filter is used to remove contaminants and particles from the water, to ensure a clean and fresh taste. The filter should be replaced every six to nine months, or after 2000 gallons of water have passed through, whichever occurs first.
This mounting screw is a genuine OEM replacement part for the door handle in your refrigerator. If you are having trouble shutting the refrigerator door, or opening it, replacing this screw can help solve the issue. Replacing this part is easy and requires minimal disassembly of the refrigerator end cap handle. Your will need a screwdriver to complete this repair.
This touch-up paint can be used on a wide variety of household appliances. It is most often used on washers, dryer, refrigerators, dishwashers, ranges, freezers, trash compactors, or microwaves. It is an 18 ml, or.6 fluid ounces, bottle of touch-up paint. It also features a brush for easy application. This quick-drying, long-lasting paint...Read more is perfect for fixing any nicks, scratches, or chips on the exterior of your appliance. This paint is white in color, and provides a durable finish.
This part is a replacement refrigerator drive shaft seal for your refrigerator. The drive shaft seal protects the auger motor from water and condensation that may leak down the drive shaft from the ice bucket. If the seal is broken, water and condensation can get in, causing the ice maker to fail. To replace the seal, first remove the ice...Read more bucket from your freezer. Then remove the two screws on the drive shaft holder, and use a pair of pliers to remove the drive shaft. At this point you can remove the seal from the drive shaft. Be sure to clean the area that the seal sits in before you reinstall the drive shaft. This part is white in color and is about an inch in diameter. The seal is sold individually.
This ice container is the part of your freezer where freshly made ice is collected and stored, making it easy to grab cubes or crushed ice whenever you need it. It features a sturdy white base connected to a clear plastic bin, so you can see how much ice you have at a glance. Inside, there’s a metal rod called an auger that helps move the...Read more ice toward the dispenser. The container keeps ice neatly contained, preventing it from scattering around the freezer. If you’re dealing with leaks, trouble dispensing ice, or clumps of ice forming into large chunks, it’s probably time for a replacement. Swapping it out is simple—just remove the old bin and slide the new one into place. Be sure to check your refrigerator’s manual to make sure it’s the right fit.
This OEM, 120V, 60 HZ water inlet valve is specially designed for refrigerators. It is responsible for regulating the flow of water into the water dispenser and ice maker of the fridge. If your refrigerator is leaking or it is unable to dispense water, the water inlet valve may be damaged or experiencing electrical failure. It will need t...Read moreo be replaced to restore the functionality of the appliance. You can find the valve at the back of the refrigerator where it is connected to the water supply line.
Ask our experts a question about this model and we'll get back to you as soon as possible!
We may have answered a similar question already! Search questions and answers left by others using simple keywords like "fit", "broken", "easy", or "quality" to find questions that match.
Search filter:
Clear Filter
Your search term must have 3 or more characters.
Sort by:
Prev
1
2
Next
Sorry, we couldn't find any existing answers that matched.Try using some different or simpler keywords, or submit your new question by using the "Ask a Question" button above!
Muhammad - For model number KFIS29PBMS02
January 4, 2020
My freezer gets jammed every 2/3 months as ice sheet builds up below freezer drawer and we can not ope it until it is shut down for at least three days. Ice melts and then drawer can be opened. Probabaly some thing is preventing the defrost water from raining to eveporating area. What should i do
Hello Muhammad, thank you for your question. We would recommend checking the drain tube in the unit. The drain tube may be clogged which is allowing water to come down into the freezer and freeze. If the drain tube is not clogged, the issue could be with the defrost cycle parts like the heater, thermostat, sensor, or evaporator fan motor. I hope this helps.
2 peoplefound this instruction helpful.
Was this helpful?
Thank you for voting!
Wojtek - For model number KFIS29PBMS02
February 15, 2020
Issue with led lights. Only the top left led and the bottom drawer led lights are working, the rest of them are really dimmed, barely visible. Looks like there is a short and they are not getting full power. How can i trouble shoot that?
Hello and thank you for writing.
It certainly sounds like it could be a faulty led module PS12349180 and/or possibly a malfunctioning led control board PS11738093 you should check the part(s) for signs of damage or test with a multimeter, and replace the part(s) as needed. We hope this helps. Please contact us anytime if you require further assistance.
The freezer is not cold - icemaker is not cold - refrigerator is cold - no fault display . How can i diagnose it ? Thanks
Hello, Thank you for your question. The best way to do this is to remove the thermostat from the refrigerator so you can control the temperature of the sensor. You can let the sensor warm up to room temperature. With the sensor warmed up to room temperature the sensor should read approximately 6.2K Ohms at 68°F. With the thermistor submerged is a glass full of ice water, the sensor should be very close to 32°F which should read approximately 16.3K Ohms. If the values that you are getting are far off from these readings, then the sensor is bad and should be replaced. We hope this helps.
Was this helpful?
Thank you for voting!
Mike - For model number KFIS29PBMS02
January 13, 2023
The question I have is my fridge one morning was flashing PO after opening it I noticed the food in fridge not cool the items in freezer were sweating the smell of Burt wire or components and noticed it was the deli pantry board I removed the board powered the fridge back on and would not cool or freeze after further investigation at the main control board looked like a burnt leg on a capacitor I replaced the capacitor still same result I replaced the main control board with same results called a service tech he looked at it and noticed the evaporator in the fridge would only get cold and frost up partial and you could see the coil loose it’s frost the exact same issue at the freezer when it cycled to the freezer he replaced the compressor and inverter being the unit is near 7 to 10 years old and still the same result the compressor is controlled by a inverter and with an amp meter you can see it read about 1.5 to 2.0 amps than drops off to .38 amp also the feed back voltage from the thermistors are about 1.3 volt and not the 1.5 volt like they should be not sure if this makes a difference I put the fridge through its on board diagnostics and all pass-could it still be a main control board issue even after replacing it ??
Any help would be great
Hello Mike, Thank you for your inquiry. The PO error code indicates that the power supply to the refrigerator was interrupted and the freezer temperature had risen to 18 degrees F or higher. It could have caused an issue with the wiring harness or one of the other control boards, this model has two in the back, part# PS11754973 and the main board-part# PS11756599. You actually want to test the evaporator fans, condenser fans and sensors with a multimeter for continuity. Good luck with your repair.
Ice maker not working test 56 results in E0 error
Have replaced main control board and defrost boards
What board do i need to replace?
Hello Robert, thank you for your inquiry. According to our research, the E0 on service test 56 indicates no error. If the ice maker is not working, we would recommend checking the wiring of the ice maker. If it is fine, then the issue is most probably with the ice maker, part number PS16730626. You may need to replace it to fix the issue. We hope this solves your problem!
See how others fixed this model. Time, tools, difficulty, and steps that lead to victory!View More
Search repair tips from other customers using simple keywords like "replace", "fit", "remove", "inspect". DIY doesn't mean you have to do it alone!
Search filter:
Clear Filter
Your search term must have 3 or more characters.
Lights inside refrigerator not working
137 of 257 peoplefound this instruction helpful.
Clint from Rayville, MO
Really Easy
Less than 15 mins
Screw drivers
I used a flat-head screwdriver to pop out the old light rocker switch. Then, I unplugged the wires, plugged them into the new light rocker switch, and then popped the new switch into the hole. That's it! Lights began working again.
Was this helpful?
Thank you for voting!
Ice dispenser motor burnt out, water got inside.
86 of 129 peoplefound this instruction helpful.
Blye from Victoria, VA
Really Easy
1- 2 hours
Nutdriver, Screw drivers
Purchased new motor from Partselect.com. When it arrived it came with a new rubber washer that fitted on top of new motor that was not on old motor, that how water got into old motor. However, the instruction sheet did not give info on how to access the proper way to the motor that is the door. Not wanting to damage the freezer door assy.
... Read more called in a tech who made it look easy, but even he had a little problem locating access panel that was directly under the motor in the freezer side of the door. After that it was a piece of cake.
Read less
Was this helpful?
Thank you for voting!
while closing the door, the light switch fouled, resulting in the switch breaking
66 of 118 peoplefound this instruction helpful.
Kevin from Beckley, WV
Really Easy
Less than 15 mins
Screw drivers
I used a flat screwdriver and released the lock tab on the bottom of the light switch, and pried the switch out, being careful to not damage the plastic around the mounting place of the switch, unplugged wiring from old switch, plugged in the new one and pushed the new switch into place. Job finished light switch now working.



 My Orders