















79092583510 Kenmore Range - Instructions
Keep searches simple. Use keywords, e.g. "leaking", "pump", "broken" or "fit".
Cord was not tightened enough by delivery crew.
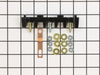
PF alarm appeared on display. Noticed clicking when cord was moved. Had arced for some time and melted original block. New part slightly different. Only has 3 lugs, old one had six. Stack using washers provided. Take note of colors before disassembly. Use caution while working through access opening. The edges are sharp. Only tools needed are phillips screwdriver, deep socket for lug nuts. Nut driver optional. Hope this is helpful.
Parts Used:
-
Timothy from Spring Valley, AL
-
Difficulty Level:Really Easy
-
Total Repair Time:15 - 30 mins
-
Tools:Screw drivers, Socket set
109 of 174 people
found this instruction helpful.
Was this instruction helpful to you?
Thank you for voting!
burned out burner
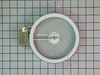
First we removed two screws under the rim of the range top to open the lid. Lifted the lid and removed the screws from the bracket that holds the elements, Be careful with the clips that hold the element in, if you break them or bend them there aren't any more! Also note which holes they were in, they are marked according to the different sizes of elements. Disconnected the wires, needed needlenose pliers to grip them...connected new element, popped it back in place, replaced bracket, closed top ...Easy peasy!!!
Parts Used:
-
Lori from Winter Haven, FL
-
Difficulty Level:Easy
-
Total Repair Time:Less than 15 mins
-
Tools:Pliers, Screw drivers
70 of 99 people
found this instruction helpful.
Was this instruction helpful to you?
Thank you for voting!
Switch Was Making A Arcing Sound When Burner Was On
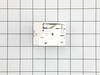
Removed the back cover of the range. Removed the knob from the front of the switch. Removed 2 screws holding switch to range. Removed wires one at a time and connected to proper poles on replacement switch and reinstalled new switch on range
Parts Used:
-
Gerald from Paris, TN
-
Difficulty Level:Easy
-
Total Repair Time:15 - 30 mins
-
Tools:Screw drivers
59 of 83 people
found this instruction helpful.
Was this instruction helpful to you?
Thank you for voting!
new switch was not wired like old one
i first replaced element after old smoked & quit. replaced switch but i noticed when i started to replace the wires one at a time something didn't seem right. after checking the #s on the old one, they didn't match up with the new one.luckily i had the stove diagram from a packet on the back of the stove. i traced each wire according to the diagram and everything worked out fine. i'm just glad i didn't replace each wire to wire.the #'s were on the switch where each wire went which was different than the org. even though they looked the same.
Parts Used:
-
PERRY from LECANTO, FL
-
Difficulty Level:A Bit Difficult
-
Total Repair Time:30 - 60 mins
-
Tools:Screw drivers
20 of 33 people
found this instruction helpful.
Was this instruction helpful to you?
Thank you for voting!
replacing the fan on a convection oven (fan was making a vibration noise)
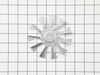
This was the first time replacing the fan. It is a lot easier to work in the oven compartment with the oven door removed, only two screws on the door and the hinges were released. I found that a couple of the screws were either rusted or stripped so I used a pair of pliers to remove the screws that were holding the diffuser in place. Once there was access to the fan I found that the fan was warped and that the blades were scraping against the back wall of the oven. The next challenge was to remove the retaining nut. I used a sheet metal screw to secure the warped fan to keep it from spinning. once I figured out that you have to turn the retaining nut to the right to loosen, it came off easily. 1/2" socket with extension. When I replace the fan I used two washers for spacers to make sure that the fan would not scrape the wall of the oven. Its been tested many times and the oven does not make that horrible sound anymore.
Parts Used:
-
John from Stevensville, MD
-
Difficulty Level:A Bit Difficult
-
Total Repair Time:30 - 60 mins
-
Tools:Pliers, Screw drivers, Socket set
17 of 26 people
found this instruction helpful.
Was this instruction helpful to you?
Thank you for voting!
2 elements stopped working.
My husband followed the video instructions and it was easy to fix.
Parts Used:
-
Ruth from MORGANTOWN, WV
-
Difficulty Level:Really Easy
-
Total Repair Time:30 - 60 mins
-
Tools:Nutdriver
9 of 14 people
found this instruction helpful.
Was this instruction helpful to you?
Thank you for voting!
Burner indicator light lense broke off
The light apparatus was loose behind the panel. Remove the remaining part of the lens. Install the new lens from the outside of the panel and hold it in position, protruding into the inside of the panel. Slide the light apparatus onto the lens from the inside, allowing the bracket to hold it in place - it will be spring loaded, which will hold it in place.
Parts Used:
-
Kathy from NEW BERN, NC
-
Difficulty Level:Really Easy
-
Total Repair Time:Less than 15 mins
-
Tools:Nutdriver
5 of 5 people
found this instruction helpful.
Was this instruction helpful to you?
Thank you for voting!
old element coil burned apart breaking the circuit.
removed the old burner and put the new one in it's place.
Parts Used:
-
James from WARRENTON, MO
-
Difficulty Level:A Bit Difficult
-
Total Repair Time:15 - 30 mins
-
Tools:Nutdriver, Screw drivers
6 of 8 people
found this instruction helpful.
Was this instruction helpful to you?
Thank you for voting!
The elements were not heating up
It was really easy just unplugged it took off the back cover changed the part out put back cover on plugged it in and the elements were working great!
Parts Used:
-
Tanya from KALISPELL, MT
-
Difficulty Level:Really Easy
-
Total Repair Time:15 - 30 mins
-
Tools:Screw drivers
6 of 8 people
found this instruction helpful.
Was this instruction helpful to you?
Thank you for voting!
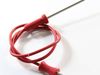
Original Meat Probe insulation separated on the probe end
I searched the web for a replacement and Parts Select had a picture and part number for the exact same probe. I ordered the probe and it arrived very quickly. The problem was that the probe I received didn't match the picture as shown on the web site. Instead I received a probe that was a different color and the actual probe was about 2" shorter than the one I was replacing. I called customer service and was told that the probe I received was the new version that the older version was discontinued. If they had updated their pictures on the web site I would not have ordered the probe. Parts Select customer service did apologize for the issue and offered to have me return for a refund.
I will order from Parts Select but I will call first to verify that the item pictured is the actual item being shipped. Parts Select please update the part pictures to show the actual items being sold.
I will order from Parts Select but I will call first to verify that the item pictured is the actual item being shipped. Parts Select please update the part pictures to show the actual items being sold.
Parts Used:
-
john from PITTSFIELD, MA
-
Difficulty Level:Really Easy
-
Total Repair Time:Less than 15 mins
5 of 6 people
found this instruction helpful.
Was this instruction helpful to you?
Thank you for voting!
Right rear burner not working properly
After a brief discussion with CS about the electric stove part was shipped it arrived and I proceeded to install I found it needed to be installed sideways not up & down like the old one. The terminals did not line up so I put the black lead first and the purple lead last in doing that I burned out the switch??? was not easy to install as the video showed his switch matched each wire? My installation was sideways??
Parts Used:
-
Dante from SOUTHOLD, NY
-
Difficulty Level:Difficult
-
Total Repair Time:30 - 60 mins
-
Tools:Nutdriver, Pliers, Screw drivers
3 of 3 people
found this instruction helpful.
Was this instruction helpful to you?
Thank you for voting!
Oven wires arced and caused the terminal block to melt and become detached from the back of the range
Removed the wires that I could, then terminal block. Installing the new terminal block was very easy; however the wires that arced were fused to the terminal bock screws and needed to be cut and new connectors had to be put on the wires to allow them to be reattached to the block safely.
Once all was replaced and reinstalled the oven has worked great. The length of the repair was increased because of the melted parts and having to run to the store to get the new wire connectors big enough to fit on the wires. If we were simply replacing the block and had not encountered the melted ends, it would have been a very quick and easy repair.
Once all was replaced and reinstalled the oven has worked great. The length of the repair was increased because of the melted parts and having to run to the store to get the new wire connectors big enough to fit on the wires. If we were simply replacing the block and had not encountered the melted ends, it would have been a very quick and easy repair.
Parts Used:
-
Daniel from Falmouth, MA
-
Difficulty Level:A Bit Difficult
-
Total Repair Time:30 - 60 mins
-
Tools:Nutdriver, Pliers, Screw drivers, Wrench set
3 of 3 people
found this instruction helpful.
Was this instruction helpful to you?
Thank you for voting!
Burner switch work sometime.
-
junius from WICOMICO, VA
-
Difficulty Level:Really Easy
-
Total Repair Time:1- 2 hours
-
Tools:Nutdriver
3 of 4 people
found this instruction helpful.
Was this instruction helpful to you?
Thank you for voting!
Old part was replaced by mfg’r. Wiring different. No drawings or any info was included to show wiring.
I was forced to call in a pro repairman. Will cost me at least $150 for part and repairman. I could have done job if instructions on how to rewire had been included.
Parts Used:
-
Nelson from FRUITHURST, AL
-
Difficulty Level:Difficult
-
Total Repair Time:30 - 60 mins
-
Tools:Nutdriver, Screw drivers, Socket set
2 of 2 people
found this instruction helpful.
Was this instruction helpful to you?
Thank you for voting!
wrong part
my original part arrived and it did not fit. When I called to explain the problem I was told it was the wrong part. The big problem is... Frigidaire calls the receptacle a terminal block kit as well as a terminal block kit which is a totally different part. I tried to explain that to several different folks I spoke to at your company as well as Frigidaire but I'm not sure if I got that point across. Take a look at part # 530 393 5058 and part # 530 440 9888 and you will see that they both mention terminal block kit. Hopefully the part I am getting from Frigidaire is an OEM part and will fit.
Parts Used:
-
Barbara from WICKENBURG, AZ
-
Difficulty Level:Very Difficult
-
Total Repair Time:30 - 60 mins
2 of 4 people
found this instruction helpful.
Was this instruction helpful to you?
Thank you for voting!