




EasyApplianceParts is now PartSelect! We've merged our sites to provide a better shopping experience for you.   Full Details
✖

Find Parts

Parts Departments

Top Model Types

Top Brands

Repair Help

Expert Repair Videos

Keep typing for more specific results...

Main Terminal Block Kit 5304409888

Official part for Frigidaire, Kenmore, Tappan, Electrolux

Bestseller
Install video
Part Location Diagram of 5304409888 Frigidaire Main Terminal Block Kit
See part 22 in the diagram
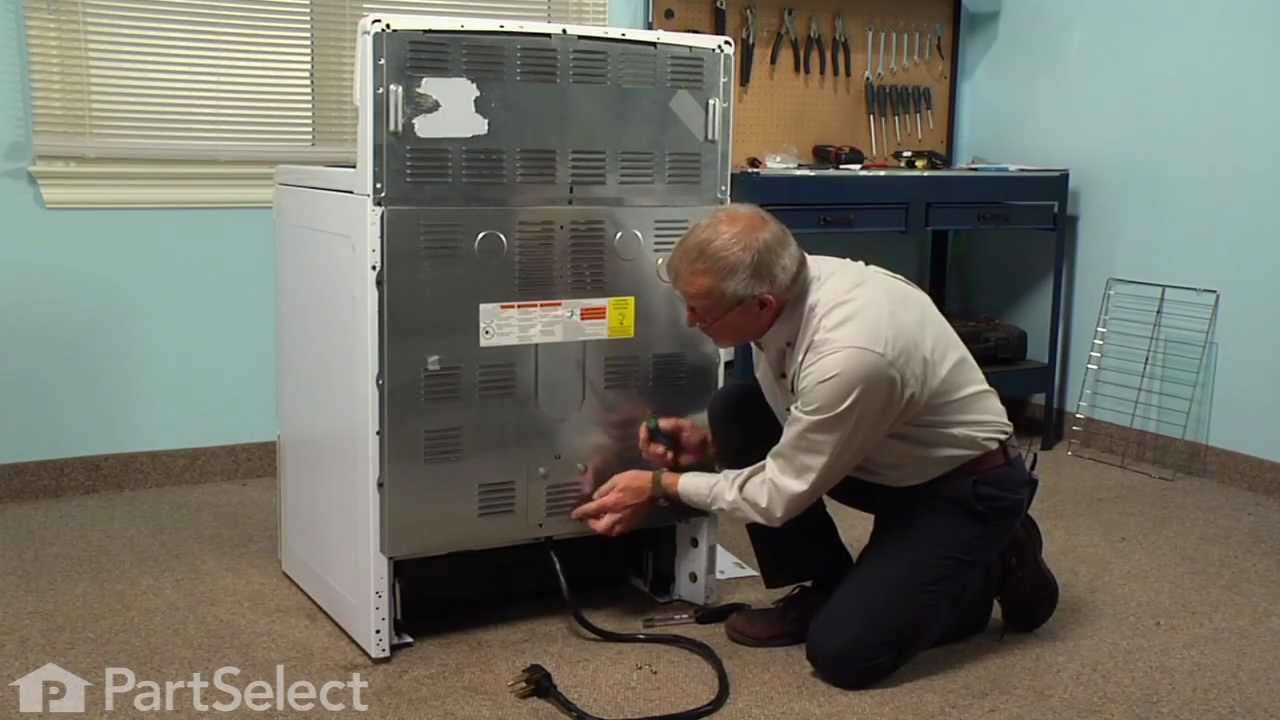
Replacing your Frigidaire Range Main Terminal Block Kit
( Grid squares measure 1x1 inch )
Price Match
$40.60
In Stock
Order now and your part arrives by Oct 30
 Fits your CFEF2425LSB!

About This Part

What it does. Why it matters. Everything you need to know for an easy fix.

Main Terminal Block Kit Specifications

Terminal block kits are also known as terminal boards, or terminal strips, and they are found in a wide variety of household appliances. Most often in ranges, wall ovens, and dryers. This kit attaches the power cord to the inner wiring of your appliance. If the terminal block is faulty, your appliance will not get the power it needs to operate properly. When removing the old block pay close attention to the wire placement, this will make installing your new part much easier. If you notice any of the wires or wire terminals are corroded or damaged they will also need to be replaced.
Part #5304409888
Manufactured by Frigidaire for Frigidaire, Kenmore, Tappan, Electrolux

You May Also Need

Genuine OEM: Original Parts. Lasting Repairs.

Because quality isn't optional.

OEM stands for Original Equipment Manufacturer. This means that the company who made your appliance is also supplying the replacement part.

How Buying OEM Parts Can Save You Time and Money
Features OEM Generic
Genuine brand name
Guaranteed to fit
Superior Quality
Long term value

Part Videos

Watch our pros, then fix it yourself.

Replacing your Frigidaire Range Main Terminal Block Kit

Replacing your Frigidaire Range Main Terminal Block Kit

About this fix

Common problems and models this part fixes.

Easy 

30 - 60 mins 

What this part fixes:
  • Little to no heat when baking
  • Will Not Start
  • Element will not heat
  • Oven not heating evenly
  • Little to no heat when broiling
Works with the following products:
  • Range
  • Wall Oven
  • Dryer
  • Cooktop
  • Microwave Oven Combo
  • Microwave
  • Washer Dryer Combo
  • Range Hood
Part# 5304409888 replaces these:
AP2584987, 726, 05426990, 05429173, 06563359, 08001566, 08003145, 08010480, 08010581, 08011432, 2102951010, 3007930, 3051022, 3051098, 3051560, 3051607, 3051695, 316056000, 3161116, 355T586S01 , 5300134264, 5303051098, 5303161116, 5303310518, 5303935061, 5304409888, 5306563359, 5426990, 5429173, 6563359, 709L003P01, 709T021P01, 709T021P02, 709T031P01, 7316056000, 75303935061, 75304409888, 7642, 8001566, 8003145, 8010480, 8010581, 8011432, 85-224-5, A1505239, AE042022, AP042022, F000073334, F073334-000, F073334000, F10-2002, F73334, FL00073334, G54425, G55268, K1025649, K1035600, K1036288, K1189189, K1189558, K1189588, P042022, Q000007541, Q000007548, Q000061341, Q000066783, Q000134264, Q134264, WQ134264, WQ66783 Show less

Customer Reviews

Real ratings from other people who bought this part.

Average Rating:

★★★★★
★★★★★
14 Reviews
4.6

Out of 5

  • 5 Stars
    11
  • 4 Stars
    2
  • 3 Stars
    0
  • 2 Stars
    0
  • 1 Star
    1
Sort by:
  • 1
  • 2
Sorry, we couldn't find any existing reviews that matched. Try using some different or simpler keywords.
  • 1
  • 2

Repair Tips

See how others fixed this model. Time, tools, difficulty, and steps that lead to victory!

Easy 

30 - 60 mins 

Average repair rating from 8 real customers like you

Sort by:
  • 1
Sorry, we couldn't find any existing installation instruction that matched.
Old terminal block was melted
1 person found this instruction helpful.
  • Anthony from LEWES, DE
  • Easy
  • 30 - 60 mins
  • Nutdriver, Screw drivers
removed back panel on range, removed old terminal block installed new terminal block, replaced back panel cover.
Was this helpful?
Thank you for voting!
Oven wires arced and caused the terminal block to melt and become detached from the back of the range
3 of 3 people found this instruction helpful.
  • Daniel from Falmouth, MA
  • A Bit Difficult
  • 30 - 60 mins
  • Nutdriver, Pliers, Screw drivers, Wrench set
Removed the wires that I could, then terminal block. Installing the new terminal block was very easy; however the wires that arced were fused to the terminal bock screws and needed to be cut and new connectors had to be put on the wires to allow them to be reattached to the block safely.
Once all was replaced and reinstalled the oven has worked great. The length of the repair was increased because of the melted parts and having to run to the store to get the new wire connectors big enough to fit on the wires. If we were simply replacing the block and had not encountered the melted ends, it would have been a very quick and easy repair.
Was this helpful?
Thank you for voting!
wrong part
2 of 4 people found this instruction helpful.
  • Barbara from WICKENBURG, AZ
  • Very Difficult
  • 30 - 60 mins
my original part arrived and it did not fit. When I called to explain the problem I was told it was the wrong part. The big problem is... Frigidaire calls the receptacle a terminal block kit as well as a terminal block kit which is a totally different part. I tried to explain that to several different folks I spoke to at your company as well as Frigidaire but I'm not sure if I got that point across. Take a look at part # 530 393 5058 and part # 530 440 9888 and you will see that they both mention terminal block kit. Hopefully the part I am getting from Frigidaire is an OEM part and will fit.
Was this helpful?
Thank you for voting!
The elements were not heating up
6 of 8 people found this instruction helpful.
  • Tanya from KALISPELL, MT
  • Really Easy
  • 15 - 30 mins
  • Screw drivers
It was really easy just unplugged it took off the back cover changed the part out put back cover on plugged it in and the elements were working great!
Was this helpful?
Thank you for voting!
No Power to the Oven
1 of 3 people found this instruction helpful.
  • Tony from Hartford, CT
  • Really Easy
  • Less than 15 mins
  • Screw drivers
Watching the video showed an easy, unscrew and screw back on process while connecting the wires back. It was really that simple. Once it was complete (not even 10mins), plugged it back in, and its been working great since.
Was this helpful?
Thank you for voting!
Control will not work - only clock blinks
0 of 4 people found this instruction helpful.
  • Sue from Lampasas, TX
  • Really Easy
  • 15 - 30 mins
  • Nutdriver, Pliers, Screw drivers
Took 3 panels off to get to the electric block. Replaced electrical block and put it back together. Still no change.
Was this helpful?
Thank you for voting!
Oven would not heat after running self clean
3 of 3 people found this instruction helpful.
  • Michael from Owasso, OK
  • A Bit Difficult
  • 30 - 60 mins
  • Screw drivers
Googled the problem and found Oven Temperature Sensor and Main Terminal Block to be the most likely problems. Turned out to be neither. No parts were needed. Oven has a thermal overload switch on the rear upper left. Thermal overload needed re-set. To do so you have to remove the oven, remove the back and press the red button on thermal overload. Biggest challenge was figuring out how to remove the oven. Even with the installation manual it was not easy to fgure out. The instructions are misleading. You need a special tool. I used two hacksaw blades as a substitute, and slid them in to release the clips. Once you figure out how to get the oven out the rest is simple.
Was this helpful?
Thank you for voting!
Cord was not tightened enough by delivery crew.
109 of 174 people found this instruction helpful.
  • Timothy from Spring Valley, AL
  • Really Easy
  • 15 - 30 mins
  • Screw drivers, Socket set
PF alarm appeared on display. Noticed clicking when cord was moved. Had arced for some time and melted original block. New part slightly different. Only has 3 lugs, old one had six. Stack using washers provided. Take note of colors before disassembly. Use caution while working through access opening. The edges are sharp. Only tools needed are phillips screwdriver, deep socket for lug nuts. Nut driver optional. Hope this is helpful.
Was this helpful?
Thank you for voting!
  • 1

DIY Questions and Expert Answers

59 questions answered by our Repair Experts.

Ask our experts a question about this part and we'll get back to you as soon as possible!

Sort by:
  • 1
  • 2
  • 3
Sorry, we couldn't find any existing answers that matched.Try using some different or simpler keywords, or submit your new question by using the "Ask a Question" button above!
Andrea - For model number FEF368GQA
October 17, 2017
I was wondering, I cant get my oven working, I push bake and the temp I need and it makes a clicking sound like its working but the element wont heat. So I replaced that and now it comes on but only if I push time cook and then it will heat up for a couple minutes then shut off. I am confused on whats wrong with it now.Can you help? I don't know how to get it working right.
Chris Boyle Profile
Hi Andrea, Thank you for the question. It sounds like when the element burnt out it may have shorted the Electronic Clock/Timer,PartSelect Number PS2581862.This part controls certain functions of your appliance such as bake, broil and the time.Hope this helps!
$164.20
In Stock
Oven Electronic Control Board
16 people found this instruction helpful.
Was this helpful?
Thank you for voting!
Joe - For model number PLEFZ398ECF
October 8, 2017
The range top and the oven will not heat. Control board is not displaying error code.
Chris Boyle Profile
Hi Joe, Thank you for your inquiry. There are some parts that you will need to check to see which one is causing the issue. You will need to check the oven temperature probe, the main terminal block and the bake element. I hope this helps. Thank you and have a great day!
15 people found this instruction helpful.
Was this helpful?
Thank you for voting!
Randy - For model number PLES389ECE
January 7, 2018
My oven element will not heat. Broiler works just fine. Tested the temp sensor and it reads good. Replaced the oven element and same issue. Any suggestions from here?
Chris Boyle Profile
Hello Randy, Thank you for your inquiry. I would check the terminal block, the thermostats, the wiring harness that connects the element and the main control board. Hope this helps!
7 people found this instruction helpful.
Was this helpful?
Thank you for voting!
Kim - For model number FEB24S5AQC wall oven
January 9, 2018
Both elements stopped functioning: Control panel works but elements are either not being energized or are faulty. Examined the terminal block which looks brand new. Oven is not very old and has been working perfectly until now. Breaker reset has not corrected it.Other possible culprits: Thermostat? Oven is second unit: Ie lightly used since new. Seems odd both elements fail at once however. Thanks. Kim
Chris Boyle Profile
Hi Kim, Thank you for your question. If both elements in the oven are not working, it is likely the temperature sensor, but you will also need to check the electronic control board and the wiring between the electronic control board and the sensor. I hope this helps. Thank you and have a great day!
7 people found this instruction helpful.
Was this helpful?
Thank you for voting!
Hank - For model number FFEW3025PSB
May 1, 2018
Turn bake on set oven temperature to 400. It takes an hour to preheat. Preheat light goes out and beep sounds. I placed an additional thermostat inside oven. Temperature only reaches 350. Then the temperature starts to drop in one hour after pre-heat light goes off temperature drops to 175.
Chris Boyle Profile
Hello Hank, thank you for your question. It sounds like the temperature sensor is gone in your appliance. The sensor measures the temperature in the oven and relays it to the board. You will want to replace the Temperature Sensor Part Number 5304504897. Good luck with your repair!
4 people found this instruction helpful.
Was this helpful?
Thank you for voting!
Joseph - For model number GLEB30S8CSA
August 6, 2018
How do i install the main terminal block kit?
Chris Boyle Profile
Hi Joseph, Thank you for your question. There is a video listed with the part on our website that you referenced in your question to us that you may view on how to install it. You will find it listed under the photo on the webpage for the terminal block. I hope this helps. Thank you and have a great day!
3 people found this instruction helpful.
Was this helpful?
Thank you for voting!
Lynn - For model number FEB 27S5 ABB
January 24, 2019
Hi, broil element will not heat; multi meter reading seems to be ok (about 17-19). No codes on display, bake element seems to be fine. Can you give me any direction? Thank you.
Chris Boyle Profile
Hello Lynn, thank you for your question. If your element is reading between 0 - 50 ohms, then your broil element has continuity and has not failed. We would recommend testing the sensor, part number PartSelect Number: PS820208. Testing the temperature sensor probe on your oven is easy. With the sensor at room temperature, measure the resistance between the two prongs at the end of the sensor connector. The resistance of the sensor should read approximately 1080 – 1090 ohms at room temperature. If this test passes, the issue is the electronic control board Part Number: PS440928, which has been discontinued by the manufacturer and is no longer available. I hope this helps!
3 people found this instruction helpful.
Was this helpful?
Thank you for voting!
Rick - For model number PLES389ECD
January 14, 2019
Curious as to what part I should check first, oven, cooktop, front panel all stopped working completely. It has power, but nothing works.Thanks much
Chris Boyle Profile
Hello Rick, Thank you for the question. If there is power getting to the appliance but it is not powering on, you may need to replace the board, Part Number: PS1149757. Before replacing the board you can check the wire harness plugged into the board and the wiring from the terminal block. Hope this helps, good luck with this repair!
No Longer Available
Electronic Clock/Timer
2 people found this instruction helpful.
Was this helpful?
Thank you for voting!
Sonny - For model number FeF332BAWG
August 3, 2018
Oven overheats and didnt turn off whencontrol was turned to off position.
Chris Boyle Profile
Hello Sonny, thank you for your question. If the control knob was turned to the off position and the oven didn't turn off you will want to replace the oven thermostat and sensor, part number PS437311. This will also fix the issue with the oven getting too hot. I hope this helps!
2 people found this instruction helpful.
Was this helpful?
Thank you for voting!
Peter - For model number FEF377CFTD
July 16, 2019
All touch operations work the top range works ,the lights. And the auto-clean function works,however the oven does not come on to preheat.
Chris Boyle Profile
Hello Peter, thank you for writing. For this symptom you will want to consider either the Oven Probe part PS10057397 or this Main Terminal Block part PS471605 for your model. We hope this helps.
2 people found this instruction helpful.
Was this helpful?
Thank you for voting!
  • 1
  • 2
  • 3

This Part Also Fits These Models

Don't see your model? Use our Fit Checker to confirm!

Check Part Fit
Part #5304409888
Brand
Model Number
Description
Frigidaire
10462038A
Range - Range
Frigidaire
10540531
Cooktop
Tappan
11-1159-00-01
Wall Oven - Built-in, Electric, Wall
Tappan
11-1159-00-02
Wall Oven - Built-in, Electric, Wall
Tappan
11-1159-00-03
Wall Oven - Built-in, Electric, Wall
Tappan
11-1159-00-04
Wall Oven - Built-in, Electric, Wall
Tappan
11-1159-00-05
Wall Oven - Built-in, Electric, Wall
Frigidaire
11-1159-10
Range - Frigidaire Range/Stove/Oven Model 11-1159-10/02 (11115910/02, 11 1159 10/02) Parts
Frigidaire
11-1159-23
Range - Frigidaire Range/Stove/Oven Model 11-1159-23/02 (11115923/02, 11 1159 23/02) Parts
Tappan
11-1559-00-01
Wall Oven - Built-in, Electric, Wall
Tappan
11-1559-00-02
Wall Oven - Built-in, Electric, Wall
Tappan
11-1559-00-03
Wall Oven - Built-in, Electric, Wall
Tappan
11-1559-00-04
Wall Oven - Built-in, Electric, Wall
Tappan
11-1559-00-05
Wall Oven - Built-in, Electric, Wall
Tappan
11-1969-00-01
Wall Oven - Built-in, Electric, Wall
Tappan
11-1969-00-02
Wall Oven - Built-in, Electric, Wall
Tappan
11-1969-00-03
Wall Oven - Built-in, Electric, Wall
Tappan
11-1969-00-04
Wall Oven - Built-in, Electric, Wall
Tappan
11-1969-00-05
Wall Oven - Built-in, Electric, Wall
Tappan
11-2439-00-01
Wall Oven - Built-in, Electric, Wall
Tappan
11-2439-00-02
Wall Oven - Built-in, Electric, Wall
Tappan
11-2439-00-03
Wall Oven - Built-in, Electric, Wall
Tappan
11-2439-00-04
Wall Oven - Built-in, Electric, Wall
Tappan
11-2439-00-05
Wall Oven - Built-in, Electric, Wall
Tappan
11-2969-00-01
Wall Oven - Built-in, Electric, Wall
Tappan
11-2969-00-02
Wall Oven - Built-in, Electric, Wall
Tappan
11-2969-00-03
Wall Oven - Built-in, Electric, Wall
Tappan
11-2969-00-04
Wall Oven - Built-in, Electric, Wall
Tappan
11-2969-00-05
Wall Oven - Built-in, Electric, Wall
Tappan
11-4369-00-01
Wall Oven - Built-in, Electric, Wall