What it does. Why it matters. Everything you need to know for an easy fix.
Infinite Burner Switch - Large Element Specifications
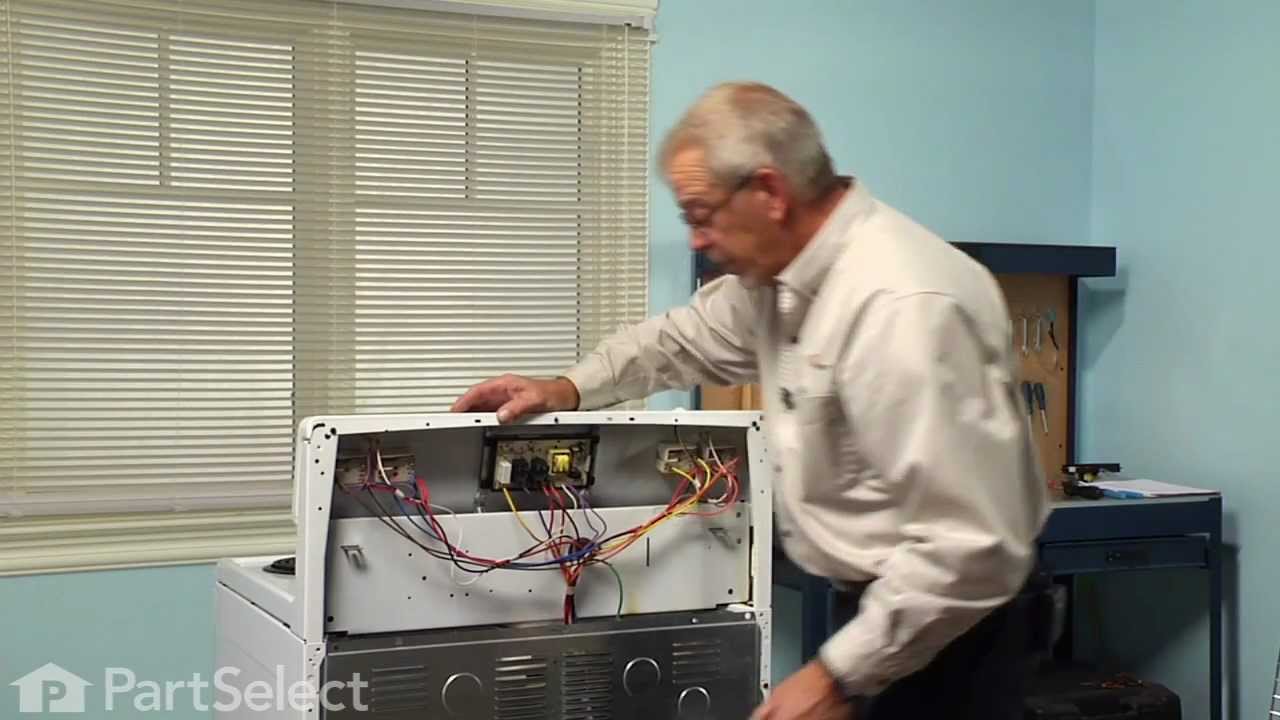
The infinite burner switch controls the stove top eight-inch surface burner, which is the large surface element. If your surface element is not warming up, the element can be tested to determine whether or not it is defective. If your element is not defective, then it is more than likely that the infinite burner switch is the issue. Before you install the infinite burner switch you will need to unplug your range from the power supply, or shut off the home circuit breaker. The tools you will need to do this repair include a number one square head screwdriver and a pair of needle nose pliers.
Part #316436001
Manufactured by
Frigidaire
for Frigidaire, Kenmore, Tappan, Crosley
Real ratings from other people who bought this part.
Average Rating:
★★★★★
★★★★★
87 Reviews
4.9
Out of 5
5 Stars
79
4 Stars
5
3 Stars
2
2 Stars
1
1 Star
0
Search reviews left by others. DIY doesn't mean you have to do it alone. Use simple keywords like "fit", "broken", "easy", or "quality" to find reviews that match!
Search filter:
Clear Filter
Your search term must have 3 or more characters.
Sort by:
Prev
1
2
3
Next
Sorry, we couldn't find any existing reviews that matched. Try using some different or simpler keywords.
★★★★★
★★★★★
Guy L - March 16, 2018
Verified Purchase
Easy repair. Nice part. Good video.
Was not the same part number as the original but was fitting well!
★★★★★
★★★★★
Walt R - October 29, 2018
Verified Purchase
Correct part installed in minutes
Burner is back in operation
★★★★★
★★★★★
Anthony P - March 19, 2018
Verified Purchase
Easy repair
Works like a charm
★★★★★
★★★★★
Gerald A - December 2, 2019
Verified Purchase
range top
worked well thank you
★★★★★
★★★★★
Randy M - April 3, 2018
Verified Purchase
It worked great!
Beautiful thing, I don’t need to buy a new stove anymore! Thank you.
★★★★★
★★★★★
Pam S - March 31, 2020
Verified Purchase
Easy Repair, worked as expected.
The part arrived fast, now have the burner on my stove working again. Thank you.
★★★★★
★★★★★
Cheryl V - August 15, 2018
Verified Purchase
Work's great
Part arrived fast and everything is working great.
★★★★★
★★★★★
George M - December 11, 2019
Verified Purchase
replace controls on kenmore stove
I replaced all 4 burner controls on the stove and all is working fine...... I had a problem on the one side but that was because a wire came loose (which caused the problem to begin with so I had to replace them a second time cause they blew out but that was my fault no fault of the parts..................george miller
★★★★★
★★★★★
Jerry B - May 16, 2018
Verified Purchase
Stovetop burner switch
Fast delivery. Easy to change out and works as new. Much cheaper price than calling a repairman. Only took a few minutes to replace and back in business.
★★★★★
★★★★★
Joshua K - March 16, 2023
Verified Purchase
Exactly what I needed
I orders 2 infinite switches and fixed my 2 burners within 15 minutes. Parts came quick and were easy to install. Would highly recommend Parts Select to anyone.
Prev
1
2
3
Next
Repair Tips
See how others fixed this model. Time, tools, difficulty, and steps that lead to victory!
Really Easy
15 - 30 mins
Average repair rating from 35 real customers like you
Sort by:
Prev
1
2
3
Next
Search repair tips from other customers using simple keywords like "replace", "fit", "remove", "inspect". DIY doesn't mean you have to do it alone!
Search filter:
Clear Filter
Your search term must have 3 or more characters.
Sorry, we couldn't find any existing installation instruction that matched.
Large front burner was not heating.
1 personfound this instruction helpful.
Franklin from Lake Worth, FL
Really Easy
30 - 60 mins
Nutdriver, Screw drivers
Test for continuity with a volt ohm meter. It was pretty obvious that the infinite burner switch was the problem as it was visibly burnt and chard. Replace the switch simply by removing the wires from the old switch and connecting them to the new switch.
Was this helpful?
Thank you for voting!
My oven door seal was worn and did not seat properly. It leaked heat.The infinite burner was not warming in the low heat positions
1 of 4 peoplefound this instruction helpful.
Frank from PALM COAST, FL
A Bit Difficult
1- 2 hours
Nutdriver, Screw drivers
I followed two very good videos on how to do the repairs. It took longer to clean all the disassembled parts and the glass than it did to actually do the repair. A word of caution: Be sure to lock the door hinges in the open position before you lift out the door. They must be locked open to put the door back on. It's difficult to loc
... Read morek them open once the door is removed. Also when you replace the screws get them all aligned in the holes before you lock everything down. The infinite burner switch was pretty easy to replace but watch out for sheet metal cuts when you are removing the back of the stove. I recommend gloves. My stove has a 12 inch infinite burner, but the parts list only mentions a 10 inch burner. Before I ordered it, I had to call the company to verify that it could be used for the 12 inch burner as well.
Both front burners began heating too fast and too high. One damaged the finish on the splash pan.
7 of 12 peoplefound this instruction helpful.
Larry from WILMINGTON, DE
Easy
30 - 60 mins
Nutdriver, Screw drivers
At the Frigidaire parts website, I found the parts and saw that there are videos that show how to replace the burner controls. In brief: 1) Slide the range/oven out so you can get to the back of the control hood. 2) There are three screws that hold the cover in place (the video showed four). 2a) The video also suggests usin
... Read moreg a #1 square bit. I found that there was indeed a square hole in the caps of the screws, but they also had a hex head that a 1/4" hex nut driver fits. So I used that. 2b) Be careful taking out the last (top center) screw. When it comes free, the cover can drop and bruise or cut your foot or the floor. Having a helper is worth it! 3) The switch for the larger elements has a red dot on front and back. Match it with the one in place that has a red dot. The switch for the small element doesn't have a dot. 3a) Holding a new switch in your hand, remove one wire at a time from the switch in the control hood and put it in the same place on the new switch. I found that for my stove, there was a fixture holding two wires and another holding three wires. This made it impossible to put the wires on wrong. 3b) When all wires have been transferred, pull off the control knob in front and unscrew the two screws that hold the old switch in place. Take out the old switch and replace it with the new switch. 3c) Use the two screws to attach the new switch in its place and replace the control knob. 4) Repeat for as many switches as you purchased. I did all four. 5) Replace the cover. 6) Slide the range back into place.
I found black deposits on all the switches, that must have come from a contactor inside, so I was glad I replaced them all.
Another tip: while the unit is out, clean off the sides and back that you couldn't get to while it was in place. For us, this took as long or longer than the steps above for replacing the switches.
my burners would just heat up solid red even when i had controls turned down to 2 or 3. i would have to turn controls off and back on, then they still would just go back to glowing red
3 of 3 peoplefound this instruction helpful.
Leota from AUXVASSE, MO
Really Easy
30 - 60 mins
Nutdriver, Pliers, Screw drivers
This was my first time ever working with electrical issues. My husband is not physically able to do repairs now. Very easy fix. Just viewed video repair instructions and it went exactly as instructed. Within 45 minutes, I had my stove repaired and cleaned and back in working order!! Great results. My range is working perfectly again and M
... Read moreama is happy!!
Burners constantly overheating, and inconsistent heating.
1 personfound this instruction helpful.
David from MOUNT VERNON, ME
Very Easy
Less than 15 mins
Pliers
With the stove pulled out and unplugged, There are 4 square head screws to pull a metal plate off the back of the range. Once that is off, the infinite switches are in line and can be removed with a philips head screw driver/bit. I placed each wire onto the new switch as I removed them from the old, to avoid any confusion. The entire repa
... Read moreir took less than 10 minutes. Incredibly easy.
Read less
Was this helpful?
Thank you for voting!
Electric element would intermitantly go on high, even on low settings.
1 personfound this instruction helpful.
Sean from ASTORIA, OR
Really Easy
15 - 30 mins
Screw drivers
Slid stove out, disconnect power plug, removed top control panel with 4 screws. Unplugged two electrical connectors. removed knob and nut removing switch. Re-assembled in reverse order and test all functions.
Was this helpful?
Thank you for voting!
The element gets very even the control is at minimum
1 personfound this instruction helpful.
adolfo from new york, NY
Really Easy
30 - 60 mins
Screw drivers
Removed the defective part. Install the new part, insert the connectors. Now its working
Was this helpful?
Thank you for voting!
Surface element would stay on high no matter the position of selector knob
1 personfound this instruction helpful.
Dale from VERMONTVILLE, NY
Easy
15 - 30 mins
Screw drivers
First, make sure power is off to range. Removed backing cover, pulled one wire off infinite switch at a time to put in right place on new switch. Easy fix.
Was this helpful?
Thank you for voting!
The switch wasn't working on all the different settings.
2 of 3 peoplefound this instruction helpful.
James from NEW HYDE PARK, NY
Very Easy
15 - 30 mins
Screw drivers
first thing was to turn the breakers off. then pull the range away from the wall. used an 1/8 th inch socket to take off the back panel to get access to the switch.used a Phillips screwdriver to disconnect the switch under the knob in the front. took off the wire terminals one at a time and matched it to the numbers on the old switch.repl
... Read moreaced the knob, screwed it on to the range. turned the breakers on and tested the switch.worked fine, replaced the back cover and pushed it back into place.
Read less
Was this helpful?
Thank you for voting!
Prev
1
2
3
Next
DIY Questions and Expert Answers
40 questions answered by our Repair Experts.
Ask our experts a question about this part and we'll get back to you as soon as possible!
We may have answered a similar question already! Search questions and answers left by others using simple keywords like "fit", "broken", "easy", or "quality" to find questions that match.
Search filter:
Clear Filter
Your search term must have 3 or more characters.
Sort by:
Prev
1
2
3
Next
Sorry, we couldn't find any existing answers that matched.Try using some different or simpler keywords, or submit your new question by using the "Ask a Question" button above!
Anthony - For model number FEF366ESH
October 4, 2017
This part says it fixes a burner that wont heat or start, what if the burner overheats will this part help fix this problem?
Hi Anthony,
Thank you for your question. It could be your switch, however you should also check the wiring between the switch and the burner, and your should also check your burner as well. It could be either of these parts that are causing your issue. Though more likely your switch or burner itself. Good luck with your repair.
26 peoplefound this instruction helpful.
Was this helpful?
Thank you for voting!
Frank - For model number FEF368GBD
January 21, 2018
The front left element gets hot then turns off then back on...?
Hi Frank,
Thank you for your question. This particular problem could be either your switch or your element. You will have to test both with a multi meter to see which one is malfunctioning. Remove both parts from the appliance to test them. Make sure to turn your switch to an on position while you are testing. If your meter shows no change that means the switch is bad and needs to be replaced. Your burner should read anywhere between 0 - 120 ohms of resistance. Good luck with your repair.
15 peoplefound this instruction helpful.
Was this helpful?
Thank you for voting!
Nick - For model number TEF361ESD
November 17, 2017
The 8" burner would glow really hot and would not turn off or change temperature. Found that it was most likely the infinite burner switch. Ordered one and replaced but the burner is still getting way to hot. What else could i do to fix this problem?
Hi Nick,
Thank you for your question. There are really only two other parts that you could look at. You should take a look at the wiring between the burner and the switch. See if there is any damage. If there is not, then you will likely have the change your burner. I hope that helps. Good luck with your repair.
10 peoplefound this instruction helpful.
Was this helpful?
Thank you for voting!
Mike
November 9, 2019
Large rear burner (left rear) switch has failed. Electrical arc sounds and the smell of electrical fire. Other burners work fine with no issues. Need replacement part number.
Hi Mike, the switch is part number PS1145040. Thank you for your question and good luck with your repair!
8 peoplefound this instruction helpful.
Was this helpful?
Thank you for voting!
Juan
January 3, 2020
The replacement part has 5 plug ins the old one has only four. How do you replace it?
Hi Juan,
Thank you for your question. There is a video listed with the part on our website that you may reference on how to install it. If it does not provide you with the information that you need, you will need to contact the manufacturer. We hope this helps. Thank you and have a great day!
7 peoplefound this instruction helpful.
Was this helpful?
Thank you for voting!
Doug - For model number LFEF3048QF
October 28, 2019
Burner works, but light stays on even after burner has cooled.
Hello Doug, thank you for writing. This is likely due to a faulty Infinite Burner Switch. This part number PS1145040 for the large burners, and part number PS1145039 for the smaller burners on your model range. You may also want to consider the Electronic Control Board, part number PS12114577 as the cause. Good luck with your repair!
7 peoplefound this instruction helpful.
Was this helpful?
Thank you for voting!
Tony - For model number 880652325r2
January 22, 2020
When turning element on it stays hot even when turned down on low
Hello and thank you for writing.
It certainly sounds like it could be a faulty oven sensor PS11749737 and/or possibly a faulty switch PS12349727, you should check the part(s) for signs of damage, and replace as necessary. We hope this helps. Please contact us anytime if you require further assistance.
Please explain the difference between part number# ps- 1145040 vs 1145039 are they the same part?
Hi RJ,
Thank you for your question. The switches are for different burners on your appliance. The diagram underneath your model information does outline which switch would go where on your appliance. I hope this helps.
6 peoplefound this instruction helpful.
Was this helpful?
Thank you for voting!
Bill - For model number FEFL79GSA
April 3, 2018
When I turn the switch on sparks fly out of it and before that happened the burner would stay on
Hi Bill, Thank you for the question. I suggest having the switch replaced. I also suggest checking the wiring. Hope this helps!
5 peoplefound this instruction helpful.
Was this helpful?
Thank you for voting!
Patricia
January 10, 2019
Big problem the infinite switch was replaced years ago on a premier electric stove with another switch that does not match premier. The shaft is square measuring 1.25 x 1.25. I need a knob. Any help?
Hello Patricia, thank you for contacting us, In order for us to locate the correct parts and repair information we will require the model number of the unit. Once you have located the model number please feel free to resubmit the question and we will be happy to help you. Look forward to hearing from you!
5 peoplefound this instruction helpful.
Was this helpful?
Thank you for voting!
Prev
1
2
3
Next
✖
Ask a Question
Ask our experts a question on this part and we'll respond as soon as we can.


 My Orders