















WWSS2601KW1 Crosley Refrigerator - Instructions
Keep searches simple. Use keywords, e.g. "leaking", "pump", "broken" or "fit".
Aged parts broken
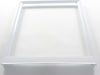
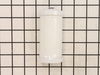
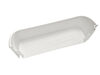
After sitting in a cold refrigerator for year after year, plastic becomes brittle and breaks. This is what started happening to my shelves and door bins. The problem a lot of times is getting the right part since some of the parts do not have numbers.
This website gives a accurate description and best of all photos on an inch grid, so I can measure what I have and find what I need. This time everything was perfect and fit easily. took no time and just like that I have almost double the space again. Funny how that works. Once before I didn't get the right piece so just pay attention to the dimensions.
This website gives a accurate description and best of all photos on an inch grid, so I can measure what I have and find what I need. This time everything was perfect and fit easily. took no time and just like that I have almost double the space again. Funny how that works. Once before I didn't get the right piece so just pay attention to the dimensions.
Parts Used:
-
Erik from Evans, GA
-
Difficulty Level:Really Easy
-
Total Repair Time:Less than 15 mins
716 of 756 people
found this instruction helpful.
Was this instruction helpful to you?
Thank you for voting!
water leaking out of refrigerator
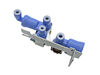
In my specific appliance the water valve is located in the bottom right hand corner looking at it from the back. To get to it I remove the thin layer of cardboard the covers the back of the fridge. I then proceeded to disconnect the 1/4" copper tubing which is the water feed coming out of the wall. Then I removed the screws that hold the valve assembly in place. I took the water valve out and removed the electrical connections as well as the plastic tubing which feed the water dispenser and the ice maker. To install the new water valve it was just a matter of reversing steps.
Parts Used:
-
Jose from Alexandria, VA
-
Difficulty Level:Easy
-
Total Repair Time:15 - 30 mins
-
Tools:Nutdriver, Pliers, Wrench (Adjustable)
608 of 721 people
found this instruction helpful.
Was this instruction helpful to you?
Thank you for voting!
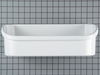
cracked, broken door bins
The new bins and I installed them in the door. Nice to have door space again.
Parts Used:
-
Beverly from Jackso, MI
-
Difficulty Level:Really Easy
-
Total Repair Time:Less than 15 mins
525 of 554 people
found this instruction helpful.
Was this instruction helpful to you?
Thank you for voting!
Water in Frig was tasting bad.
I turned the cap for the old filter and pulled it out . Then I put in the new one in and turned the cap to secure it in frig.
Parts Used:
-
Patricia from Fulton, MO
-
Difficulty Level:Really Easy
-
Total Repair Time:Less than 15 mins
499 of 504 people
found this instruction helpful.
Was this instruction helpful to you?
Thank you for voting!
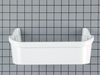
freezer shelf broke
-
MONICA from LANCASTER, CA
-
Difficulty Level:Really Easy
-
Total Repair Time:Less than 15 mins
506 of 529 people
found this instruction helpful.
Was this instruction helpful to you?
Thank you for voting!
Shelf Cracked Because Excessive Weight Put On It
-
GEORGE from GARDEN GROVE, CA
-
Difficulty Level:Really Easy
-
Total Repair Time:Less than 15 mins
449 of 530 people
found this instruction helpful.
Was this instruction helpful to you?
Thank you for voting!
water from refigerator dispenser started tasting bad
I removed the top shelf in the fridge. I then unscrewed the cover to the water filter and pulled the filter cartridge down into the cover. Keep the cover upright as there may be some water in it. I carried it to the sink. I took the new cartridge and ran water through it from the sink, then set it in the cover and took it to the fridge. I pushed the cartridge up into the space that I removed the old one from and screwed the cover back on. Then I took an empty pitcher and filled it from the water dispenser in the fridge door. I did this three times to charge the filter and remove charcoal dust. Water tastes great now. I ordered two filters so I would ony have to buy once a year. Great site to order the filters from. Cheaper than other sources and delivery was quick.
Parts Used:
-
Anthony from Springfield, VA
-
Difficulty Level:Easy
-
Total Repair Time:Less than 15 mins
367 of 368 people
found this instruction helpful.
Was this instruction helpful to you?
Thank you for voting!
icemaker stopped making ice
Even though my wife said that our icemaker broke, there was actually nothing wrong with it. It was the valve that let water flow in during the 'harvest' cycle.
A real easy way to test the icemaker without voltage and current measurements, is to fill the tray by hand with a little cup of water; wait till the water freezes and see if the maker dumped the ice into the bin.
A real easy way to test the icemaker without voltage and current measurements, is to fill the tray by hand with a little cup of water; wait till the water freezes and see if the maker dumped the ice into the bin.
Parts Used:
-
David from New Bern, NC
-
Difficulty Level:Really Easy
-
Total Repair Time:15 - 30 mins
-
Tools:Nutdriver, Screw drivers
355 of 423 people
found this instruction helpful.
Was this instruction helpful to you?
Thank you for voting!
Support studs were broken
Used pliers to remove the residual broken stud that was still attached to the wall of the refrigerator, and then just pushed the new part in place. The longest time was spent in removing the food and crisper drawers.
Parts Used:
-
Peter from Amherst, NY
-
Difficulty Level:Really Easy
-
Total Repair Time:Less than 15 mins
-
Tools:Pliers, Screw drivers
337 of 379 people
found this instruction helpful.
Was this instruction helpful to you?
Thank you for voting!
Running but not cooling off and frost in the back of the freezer
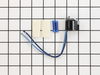
Unplugged the refrigerator. Removed the 4 hex head screws on the lower back panel at the back of the freezer. Used a blow dryer to defrost the pipes and area surrounding the thermostat. Unplug the connection from the back of the freezer, unplug the 2 wires, one that goes to the heater, one that comes from power. Unclip the thermostat from the pipe and note which pipe you unclipped it from. Cut the wires on the old thermostat midway between the plugs and the sensor. Using the supplied butt connectors, strip the wire ends on color matched wires (should be a dark blue or black) and crimp them together. Repeat with the other wire. Discard the white shrink wrapping. I wasn't able to get it small enough with a hair dryer or lighter. Plug the thermostat back into it's respective plugs. Clip the thermostat back onto the pipe you removed it from. Replace the back panel with the four screws. Ensure the bottom of the panel is set inside of the drip tray. Replace any shelving you removed. Plug the refrigerator back into the wall. Your done!
Parts Used:
-
Leo from Bentonville, AR
-
Difficulty Level:Easy
-
Total Repair Time:15 - 30 mins
-
Tools:Nutdriver, Pliers
272 of 325 people
found this instruction helpful.
Was this instruction helpful to you?
Thank you for voting!
Broken ice maker
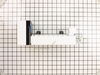
Unplugged faulty ice maker, removed two screws holding it to the refrigerator and took it out. Reversed the operation with the new ice maker and after a few minutes presto, we have ice.
Parts Used:
-
Juan from Miami, FL
-
Difficulty Level:Really Easy
-
Total Repair Time:15 - 30 mins
-
Tools:Socket set
255 of 343 people
found this instruction helpful.
Was this instruction helpful to you?
Thank you for voting!
Water Dripping from through the door water outlet and Ice Maker doesn't make ice.
I had two problems, the first was that water was dripping from the through the door outlet and the second problem is that the ice maker wasn't making ice.
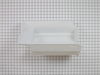
Replacing the water valve was a simple process:
1. Turn off the water to the fridge at the household shutoff valve.
2. Move the fridge away from the wall.
3. Unplug the mains power (AC) plug from the wall power outlet.
4. Remove the 5 screws with a nut driver that hold the cardboard backing off the refrigerator.
5. (This is a great time to vacuum off the coils and underside of the fridge.) Disconnect the water supply from household plumbing with a box end wrench or channel lock pliers. I kept a large plastic cup and rag handy for the left over water in these hoses.
6. Remove the two screws from the water valve bracket on the right hand side and pull the water valve straight back from the fridge and line up the new valve in the same orientation.
7. Remove all the color coded electrical connectors (3 of them) and attach them to the new water valve.
8. Remove the remaining water hoses and attach them to the corresponding connectors on the new valve.
9. Dispose of the old valve and reinstall the new valve in reverse order.
The problem with the ice maker not making ice was because water was flowing so slowly from the valve that it was stopping in the fill tube at the back of the freezer and freezing stopping all water flow into the ice maker. I pulled the fill tube out of the back of the freezer from behind by rotating it 45 degrees counter clockwise and pulling straight out removing the ice blockage and drying the fill tube before I reinstalled.
Since I replaced the valve I had to take the cover off of the icemaker and set the water fill level down (screw toward the minus sign) and then adjusted it by checking the ice after each time it dropped and increasing the fill amount by 1 full turn (roughly 0.7 ounces) until it was just enough to make fully formed ice cubes.
Replacing the water valve was a simple process:
1. Turn off the water to the fridge at the household shutoff valve.
2. Move the fridge away from the wall.
3. Unplug the mains power (AC) plug from the wall power outlet.
4. Remove the 5 screws with a nut driver that hold the cardboard backing off the refrigerator.
5. (This is a great time to vacuum off the coils and underside of the fridge.) Disconnect the water supply from household plumbing with a box end wrench or channel lock pliers. I kept a large plastic cup and rag handy for the left over water in these hoses.
6. Remove the two screws from the water valve bracket on the right hand side and pull the water valve straight back from the fridge and line up the new valve in the same orientation.
7. Remove all the color coded electrical connectors (3 of them) and attach them to the new water valve.
8. Remove the remaining water hoses and attach them to the corresponding connectors on the new valve.
9. Dispose of the old valve and reinstall the new valve in reverse order.
The problem with the ice maker not making ice was because water was flowing so slowly from the valve that it was stopping in the fill tube at the back of the freezer and freezing stopping all water flow into the ice maker. I pulled the fill tube out of the back of the freezer from behind by rotating it 45 degrees counter clockwise and pulling straight out removing the ice blockage and drying the fill tube before I reinstalled.
Since I replaced the valve I had to take the cover off of the icemaker and set the water fill level down (screw toward the minus sign) and then adjusted it by checking the ice after each time it dropped and increasing the fill amount by 1 full turn (roughly 0.7 ounces) until it was just enough to make fully formed ice cubes.
Parts Used:

-
Cory from Lincoln, NE
-
Difficulty Level:Easy
-
Total Repair Time:30 - 60 mins
-
Tools:Nutdriver, Pliers
175 of 219 people
found this instruction helpful.
Was this instruction helpful to you?
Thank you for voting!
Needed to replace water filter
It was really easy. All you have to do is twist the old filter out, stick in the new one and twist!
Parts Used:
-
Karen from Lowell, NC
-
Difficulty Level:Really Easy
-
Total Repair Time:Less than 15 mins
162 of 184 people
found this instruction helpful.
Was this instruction helpful to you?
Thank you for voting!
Refrigerator door bins cracked and glass shelf broke
Remove cracked bins, inserted new bins and replaced broken glass shelf. less than 10 minutes....parts came in 3 days.....website showed actual part pics which helped choose the correct replacement.......it was great!!
Parts Used:

-
Michelle from Elkridge, MD
-
Difficulty Level:Really Easy
-
Total Repair Time:Less than 15 mins
-
Tools:Pliers
193 of 292 people
found this instruction helpful.
Was this instruction helpful to you?
Thank you for voting!
had broken sheves on the doors and the crisper drawers weren't suported
The only difficult aspect of the job was getting the old shelf support stud removed from the refrigerator wall - the support was broken off too short to allow vise grips to hold it. I had to use two screwdrivers to get under and then pop out the stud to the point I could get the pliers to hold. Everything eles pretty much just "fell together" very easily.
Parts Used:
-
Fred from Plano, TX
-
Difficulty Level:A Bit Difficult
-
Total Repair Time:15 - 30 mins
-
Tools:Pliers, Screw drivers
214 of 398 people
found this instruction helpful.
Was this instruction helpful to you?
Thank you for voting!