















PGB950SEF1SS General Electric Range - Instructions
Keep searches simple. Use keywords, e.g. "leaking", "pump", "broken" or "fit".
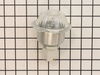
Oven Lamp Holder Burned
removed two phillips screws. Unplugged electrical connections replaced unit from PartSelect. They sent holder cover and new bulb (surprise). Great store with great directions.
Parts Used:
-
Jack from Okmulgee, OK
-
Difficulty Level:Really Easy
-
Total Repair Time:Less than 15 mins
-
Tools:Screw drivers
24 of 32 people
found this instruction helpful.
Was this instruction helpful to you?
Thank you for voting!
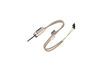
Bottom oven wouldn't warm up
Remove the door for easier access. Remove the fan cover from the back of the oven (about 6 Phillips head screws). Remove the bottom cover (2 5/16" screws). Lift the cover from the back and slide out. Remove the old igniter (2 5/16" screws). Pull the oven away from the wall. Remove back cover (3 5/16" screws). Unplug igniter, feed wiring through the oven. Install new igniter.
Parts Used:
-
Mike from SAYREVILLE, NJ
-
Difficulty Level:Easy
-
Total Repair Time:30 - 60 mins
-
Tools:Nutdriver, Screw drivers
17 of 22 people
found this instruction helpful.
Was this instruction helpful to you?
Thank you for voting!
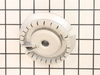
burner would not light properly and flame uneven around the burner
determined that the top of the burner was melted and malformed. Repair was simple: lifted off the damaged burner and slipped the new one in place.
Parts Used:
-
Bret from South Haven, MI
-
Difficulty Level:Really Easy
-
Total Repair Time:Less than 15 mins
9 of 10 people
found this instruction helpful.
Was this instruction helpful to you?
Thank you for voting!
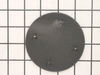
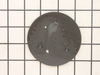
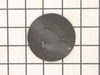
Our burner caps had started chipping.
Was able to see the exact part with easy to read schematic so I knew I was ordering the right part. Then just switched out the old for the new. Looks like a new cooktop except for the scratches in the stainless, but we are working on that! Thanks!
Parts Used:
-
Kim from Santa Rosa, CA
-
Difficulty Level:Really Easy
-
Total Repair Time:Less than 15 mins
12 of 20 people
found this instruction helpful.
Was this instruction helpful to you?
Thank you for voting!
Oven light did not work
Turned off power to the oven, Removed the oven light housing, installed new housing, turned power on and walla.
Parts Used:
-
Howard from Rio Vista, CA
-
Difficulty Level:Really Easy
-
Total Repair Time:Less than 15 mins
-
Tools:Nutdriver
9 of 16 people
found this instruction helpful.
Was this instruction helpful to you?
Thank you for voting!
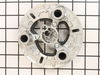
Warped burner

-
Ray from LEESVILLE, SC
-
Difficulty Level:Very Easy
-
Total Repair Time:Less than 15 mins
5 of 5 people
found this instruction helpful.
Was this instruction helpful to you?
Thank you for voting!
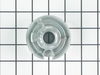
Needed To Replace Burner
-
Robert K from York, PA
-
Difficulty Level:Really Easy
-
Total Repair Time:Less than 15 mins
5 of 6 people
found this instruction helpful.
Was this instruction helpful to you?
Thank you for voting!
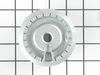
Burnt burner
Just put it on. Quite proud of myself for figuring out what and how to get the part however! The website was very helpful.
Parts Used:
-
Janine from Wind Gap, PA
-
Difficulty Level:Really Easy
-
Total Repair Time:Less than 15 mins
7 of 12 people
found this instruction helpful.
Was this instruction helpful to you?
Thank you for voting!
temperture
-
mel from LOGAN, UT
-
Difficulty Level:Really Easy
-
Total Repair Time:30 - 60 mins
-
Tools:Nutdriver
5 of 6 people
found this instruction helpful.
Was this instruction helpful to you?
Thank you for voting!
Lower oven igniter tip burned open.
This is the 2nd igniter I purchased from your company. The first igniter I purchased from your company only lasted for 4 months. The parts your company sell have GE genuine parts on the packing box. Why would a new igniter only last for 4 months?
Parts Used:
-
Daryl K. Pesce from MILLSBORO, DE
-
Difficulty Level:Really Easy
-
Total Repair Time:30 - 60 mins
4 of 4 people
found this instruction helpful.
Was this instruction helpful to you?
Thank you for voting!
wire connection to socket was bad
Disconnected the old socket ( 2 srews ) removed the two wires from the old socket, reconnected them to the new socket and reinstalled the lamp.
Parts Used:
-
David from Gansevoort, NY
-
Difficulty Level:A Bit Difficult
-
Total Repair Time:15 - 30 mins
-
Tools:Pliers, Screw drivers
6 of 10 people
found this instruction helpful.
Was this instruction helpful to you?
Thank you for voting!
Light not working tried to Remove light assembly not knowing glass could screw out. Without thinking grounded exposed hot wire to burner bracket melting light socket connector. Had to replace socket.
First and most important trun off curcit breaker. Use 1/4 inch but driver to remove socket (2) screws. Remove ground and hot wire clips from old socket, replace on new socket. Screw back into oven ceiling and turn on power. Reset clock and your are done. Very simple.
Parts Used:
-
Richard from CUMMING, GA
-
Difficulty Level:Really Easy
-
Total Repair Time:15 - 30 mins
-
Tools:Socket set
4 of 4 people
found this instruction helpful.
Was this instruction helpful to you?
Thank you for voting!
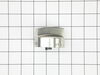
Stove knob stripped out
-
Patricia L from HURRICANE, WV
-
Difficulty Level:Very Easy
-
Total Repair Time:Less than 15 mins
3 of 3 people
found this instruction helpful.
Was this instruction helpful to you?
Thank you for voting!
Burner on stove not working correctly
Order parts and installed - no tools needed - completed repairs less than 1 minute
Parts Used:
-
Trevor from Eldersburg, MD
-
Difficulty Level:Really Easy
-
Total Repair Time:Less than 15 mins
4 of 6 people
found this instruction helpful.
Was this instruction helpful to you?
Thank you for voting!
THE OLD BURNER HEAD WAS NOT TURNING ON PROPERLY AND THE GAS CAME OUT UNEVEN.
I JUST EXCHANGED THE BURNER AND BURNER CAP.
Parts Used:
-
Astrid from MORAGA, CA
-
Difficulty Level:Really Easy
-
Total Repair Time:Less than 15 mins
3 of 3 people
found this instruction helpful.
Was this instruction helpful to you?
Thank you for voting!