















KECC568GBT0 KitchenAid Cooktop - Instructions
Keep searches simple. Use keywords, e.g. "leaking", "pump", "broken" or "fit".
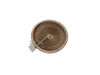
Radiant element, 2400 watt, under Ceran glass cok top needed replacement.
turned off power
removed ceran top from cabinet
removed element
installed new element
replaced top
powered up and was done
removed ceran top from cabinet
removed element
installed new element
replaced top
powered up and was done
Parts Used:
-
GEORGE from NEWNAN, GA
-
Difficulty Level:Easy
-
Total Repair Time:15 - 30 mins
-
Tools:Pliers, Screw drivers
169 of 258 people
found this instruction helpful.
Was this instruction helpful to you?
Thank you for voting!
Bad Element
Bought new element and installed. Very simple. Used phillips
screw driver.
screw driver.
Parts Used:
-
Michael from Howell, MI
-
Difficulty Level:Easy
-
Total Repair Time:15 - 30 mins
-
Tools:Screw drivers
77 of 123 people
found this instruction helpful.
Was this instruction helpful to you?
Thank you for voting!
double coil which center coil had burned out on glass top range
Unplug range and remove back panel (4 screws) unplug top burner plugs (2). Open oven door and remove 2 screws from under front of top. Pull top out and up to unhook from back. Remove top and lay cardboard on top of range. Flip over the ranges glass top unit and lay on cardboard. Remove screws from steel bottom and remove from top. Flip over steel bottom with burners attached. Remove attaching clips for burner and unscrew them from the burner then reinstall in new burner in the same place as old burner. Lay new burner on top of old burner and remove one wire at a time, transfering it to the matching plug on the new burner. When wiring is done remove old burner and attach 2 clips to steel backing plate. Vacuum off the glass top and reinstall the steel bottom to the glass top. Flip over the top, remove cardboard and slide top into back of range top and lower into place. Attach 2 screws under front. Reattach the tops plugs at the rear and reattach the back panel. Plug in range and slide back into place. Test units and all other burners. Done...
Parts Used:
-
Frank from Owls Head, ME
-
Difficulty Level:A Bit Difficult
-
Total Repair Time:15 - 30 mins
-
Tools:Nutdriver, Screw drivers
51 of 57 people
found this instruction helpful.
Was this instruction helpful to you?
Thank you for voting!
Center coil of dual element failed
Easy repair with Phillips screw driver and needle nose pliers. 1. Turn off Breakers or unplug range, Open oven door and remove the two screws holding the glass top to the oven frame. 2. Slide glass top forward and remove the two electrical connectors at the rear of the glass top, one on each side. 3. Remove the Phillips screw holding the ground wire from the rear top flange of the glass top. 4. Glass top can now be removed and placed glass side down on a padded flat table top. 5. Take a few pictures of the wiring and brackets for reassembly reference. 6. Remove the 4 wires from the defective heating element with needle nose pliers (note locations for reassembly to the new element) 7. Remove the Phillips screw on the rear side of the bracket holding the defective element. Carefully lift off the bracket. 8. Heating element can now be removed. 9. Remove the locating flanges from the defective element and install on the new element in the same locations. Clean glass if necessary and place new element on glass. 10. Carefully locate the flange tangs into the same holes on the bracket, reference photos or other side for locations. Ensure small element bracket was replaced in mounting slot of large bracket and reattach bracket screw. 11. Replace wires to same locations, remove and lightly pinch connectors if they appear loose, then reassemble. 12. Replace glass top on range, reconnect the two electrical connectors and ground wire, slide forward and replace the two mounting screws. 13. Restore power and check new element for function. Extension wires which came with the new element were not needed in this application. Total repair time about 20 min.
Parts Used:
-
Gary from ELVERSON, PA
-
Difficulty Level:Easy
-
Total Repair Time:15 - 30 mins
-
Tools:Pliers, Screw drivers
11 of 13 people
found this instruction helpful.
Was this instruction helpful to you?
Thank you for voting!
Baked on sauce
Used cooktop creme, oven cleaner and Mr. Clean sponges. After many days of working on the surface, we were able to remove 99% of the sauce.
Parts Used:
-
Julie from Newnan, GA
-
Difficulty Level:A Bit Difficult
-
Total Repair Time:More than 2 hours
11 of 15 people
found this instruction helpful.
Was this instruction helpful to you?
Thank you for voting!
Range element shorted out
I priced a new two-burner unit and it was going to cost $300. I took the broken unit apart, saw that it was an element that had suffered catastophic failure and found partselect on the internet. $60 and three days later I had the part in hand. The repair was "a piece of cake." Thanks for saving me a lot of money.
Parts Used:

-
Dennis from Seattle, WA
-
Difficulty Level:Really Easy
-
Total Repair Time:Less than 15 mins
-
Tools:Nutdriver
13 of 28 people
found this instruction helpful.
Was this instruction helpful to you?
Thank you for voting!
large element failed
Easy removal (lift and pull) of the the two element unit from the Jenn-air stove top. Placed unit right side up on a work surface. used a nut driver to remove 12 screws from the unit. removed the glass cook-top, revealing the two elements. Un-hooked two wires off the old damaged element, placed wires (plug and play) onto the new unit, then replaced the glass cook-top, used the nut driver to replace the 12 screws. Pluged the unit back into the Jenn-air stove top.
Parts Used:
-
Charles from Mamaroneck, NY
-
Difficulty Level:Really Easy
-
Total Repair Time:Less than 15 mins
-
Tools:Nutdriver
13 of 28 people
found this instruction helpful.
Was this instruction helpful to you?
Thank you for voting!
Electric coil burned
The repair was easy but the replacement coil had 4 connections while the old one had only two. After calling the distributor with no explanation of how to solve the problem I was given a telephone number of Jenn Air. They explained that my unit was too old and they no longer provided the part I needed.
I then decided to do the following. Of the 4 connections on the replacement coil, two are larger and two are smaller. I then decided to connect the wires to the two larger connections leaving the small ones free. I replaced the cooktop and WOW it worked. Not sure what the smaller connectors are used for but with old cooktops it seems they are not needed.
I can submit a photo but have no means to do it here
I then decided to do the following. Of the 4 connections on the replacement coil, two are larger and two are smaller. I then decided to connect the wires to the two larger connections leaving the small ones free. I replaced the cooktop and WOW it worked. Not sure what the smaller connectors are used for but with old cooktops it seems they are not needed.
I can submit a photo but have no means to do it here
Parts Used:
-
George from LEXINGTON, MA
-
Difficulty Level:Really Easy
-
Total Repair Time:30 - 60 mins
-
Tools:Nutdriver, Pliers
5 of 5 people
found this instruction helpful.
Was this instruction helpful to you?
Thank you for voting!
Element burned up
This is a two module cook top That I have, 2 burners in each module. I took it apart take the damaged one out and replaced with the new one, put it back together and turn it on. Heeeyyyy it works. Thanks.(and I'm not an electrician)
Parts Used:
-
Walter from LEWISVILLE, TX
-
Difficulty Level:Really Easy
-
Total Repair Time:30 - 60 mins
-
Tools:Pliers, Screw drivers, Socket set
3 of 3 people
found this instruction helpful.
Was this instruction helpful to you?
Thank you for voting!
Heating element not working on one burner
-
James from FLORISSANT, MO
-
Difficulty Level:Very Easy
-
Total Repair Time:Less than 15 mins
-
Tools:Nutdriver
3 of 3 people
found this instruction helpful.
Was this instruction helpful to you?
Thank you for voting!
small inner burnner out
looked on internet on how to remove top. an easy fix after watching video
Parts Used:
-
phillip from RUTH, NV
-
Difficulty Level:Easy
-
Total Repair Time:15 - 30 mins
-
Tools:Pliers, Screw drivers
2 of 2 people
found this instruction helpful.
Was this instruction helpful to you?
Thank you for voting!
Old dual burner lost one half. It appeared the metal strip that wound into and around the circle, broke right where it came into the inside of the entrance, and I wasn't about to try and break everything open to try and fix it, as it didn't look like soldering would be easy, or that it would fix it.
Verified via ohmmeter that one of the two burners was open and not working. I also tested the switch and that appeared to be working okay. I then took out the old unit and compared it to the new one, and found that they upgraded the new unit. I followed the instructions to match the labeled parts and move the wire to the newer location of that. i.e the old one had 2B and 2A at the top and 1B and 1A at the bottom. The new one had 2B and 1B at the top and 2A and 1A at the bottom. It did come with wire extenders and insulated tubes on top of them, and extra to cover additional. After a couple of tries, I decided which wire I needed to use on which (small connectors to match small, and large to match large.) In a second try I decided to flip it over to have it face up instead of down. Overall, it worked out very well, and I was very pleased when I did the power up test and everything worked as desired.
Parts Used:
-
Chris from WHEATON, IL
-
Difficulty Level:Easy
-
Total Repair Time:30 - 60 mins
-
Tools:Nutdriver, Screw drivers
2 of 2 people
found this instruction helpful.
Was this instruction helpful to you?
Thank you for voting!
Dual inner element stopped working. The ceramic portion had a crack most likely from thermal stress over the years.
First I found a YouTube video for Maytag Range Repair – How to replace the Surface Element with Limiter - 6" - 1200W
The steps are very easy-
1. Open oven door and locate and remove 2 screws holding top cook surface. These are located near the top inside edge
2. Lift surface cook top and then remove 4 screws holding this section to the cook top. This may require 2 people but I was able to hold the cook top and loosen the 4 screws myself. Then put the cook top aside.
3. Take a photo of the element being replaced for wiring connections.
4. Removing the wiring and element holding clips was very easy. I used needle nose pliers for both
5. The clips have to be removed from the old element and put on the new one. Place them in the same locations
6. Make sure to reconnect the wires to the same pin locations. The replacement element I had the red (hot) wire pin 2b was in
A different location so I had to use the extension wire supplied with the new replacement element
7. Put everything back together in reverse order.
Easy peasy, took me about 40 minutes to complete the entire replacement and have it back in place working.
The steps are very easy-
1. Open oven door and locate and remove 2 screws holding top cook surface. These are located near the top inside edge
2. Lift surface cook top and then remove 4 screws holding this section to the cook top. This may require 2 people but I was able to hold the cook top and loosen the 4 screws myself. Then put the cook top aside.
3. Take a photo of the element being replaced for wiring connections.
4. Removing the wiring and element holding clips was very easy. I used needle nose pliers for both
5. The clips have to be removed from the old element and put on the new one. Place them in the same locations
6. Make sure to reconnect the wires to the same pin locations. The replacement element I had the red (hot) wire pin 2b was in
A different location so I had to use the extension wire supplied with the new replacement element
7. Put everything back together in reverse order.
Easy peasy, took me about 40 minutes to complete the entire replacement and have it back in place working.
Parts Used:
-
Dominique from ASHLAND, MA
-
Difficulty Level:Very Easy
-
Total Repair Time:30 - 60 mins
-
Tools:Pliers, Screw drivers
2 of 2 people
found this instruction helpful.
Was this instruction helpful to you?
Thank you for voting!
bad burner
My dual zone burner would trip my breaker anytime i tried to turn it on. All the other burners would work fine. I searched online and found a way to test my burner, which was shorted or grounded out. I purchased a new burner from the site...It was as cheap or cheaper than other sites. It showed up a few days quicker than i was expecting..I also replaced the switch to the burner, just as a precaution and to save time since i already had the top glass off of my burners....EASY JOB!
Parts Used:
-
Krystal from Centralia, IL
-
Difficulty Level:Really Easy
-
Total Repair Time:30 - 60 mins
-
Tools:Screw drivers
1 person
found this instruction helpful.
Was this instruction helpful to you?
Thank you for voting!
Replace old Element
The new element wiring placements were totally different from the old element. Lucky for me the lettering printed on the terminals for each pole was the same as on the old one. It was just a matter of matching up each terminal pole lettering. The instructions that came with the new element were of no help at all. Youtube was my best helper.
Parts Used:
-
Patricia Josephine from N RICHLND HLS, TX
-
Difficulty Level:A Bit Difficult
-
Total Repair Time:30 - 60 mins
-
Tools:Pliers, Screw drivers
1 person
found this instruction helpful.
Was this instruction helpful to you?
Thank you for voting!