















KECC567RBL06 KitchenAid Cooktop - Instructions
Keep searches simple. Use keywords, e.g. "leaking", "pump", "broken" or "fit".
Right rear burner went bad
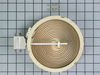
Turned the breaker off, I removed 2 screws securing the range top to the range, opened the top and secured it in the up position, Removed the 2 screws securing the element ,one at a time I swapped the quick connectors from the old element to the new and repeated the process in reverse. I save over $100.00 in labor, plus most companies get you for a trip charge. It was easy!!
Parts Used:
-
Mark from Loxahatchee, FL
-
Difficulty Level:Really Easy
-
Total Repair Time:15 - 30 mins
-
Tools:Nutdriver, Screw drivers
153 of 182 people
found this instruction helpful.
Was this instruction helpful to you?
Thank you for voting!
Hot Burner Light always on
Thermal switch is integral to element and can not be changed, must replace entire element.
Turn off power. Removed front two screws above oven door jamb and lifted the top. Removed the bracket that holds the element against the glass top and removed the element. Moved brackets from old element to new one, aligning to same numerical position and then moved wiring to new element. Slide new element under bracket and reinstalled single screw. Replaced top and screwed down. Turn on power and test .
Turn off power. Removed front two screws above oven door jamb and lifted the top. Removed the bracket that holds the element against the glass top and removed the element. Moved brackets from old element to new one, aligning to same numerical position and then moved wiring to new element. Slide new element under bracket and reinstalled single screw. Replaced top and screwed down. Turn on power and test .
Parts Used:
-
Gregory from Cary, NC
-
Difficulty Level:Really Easy
-
Total Repair Time:15 - 30 mins
-
Tools:Screw drivers
109 of 159 people
found this instruction helpful.
Was this instruction helpful to you?
Thank you for voting!
Burned terminal block and filter board
Removed and replaced above named parts, rewired.Be sure to tighten all nuts that secure wires. I believe this is what caused the problem.
Parts Used:

-
Joseph from Decatur, GA
-
Difficulty Level:Easy
-
Total Repair Time:30 - 60 mins
-
Tools:Nutdriver, Screw drivers, Socket set, Wrench set
95 of 205 people
found this instruction helpful.
Was this instruction helpful to you?
Thank you for voting!
glass cooktop element stopped working
3 months after my 5 year warranty ran out, one of the elements on my wife's maytag cooktop "popped". I was curious to see if I could fix it myself and ran across partselect.com via google. Their step by step instructions for determining the source of the problem (i.e. either the element or the control was bad) led me to realize that the element was bad. I ordered a new one -- which arrived in 3 days! It was very easy to replace the element, since I had already taken the glass cooktop off of the range during the testing phase. Thanks partselect.com!
Parts Used:
-
Mark from mckinney, TX
-
Difficulty Level:Really Easy
-
Total Repair Time:Less than 15 mins
-
Tools:Screw drivers, Socket set
33 of 39 people
found this instruction helpful.
Was this instruction helpful to you?
Thank you for voting!
right rear burner was inop for last 4 years
1. tripped circuit breaker for stovetop
2. pulled the stove top out of its cabinet.
3. turned in over carefully due to the glass cooking surface.
4. used 1/4 inch nutdriver on cordless drill to remove all the screws holding the lower cover in place. lifted cover off without removing completely as power wires still attached.
5. did continuity test on burner and found it open circuit while all the other 3 burners had continuity.
6. removed defective burner by removing two more screws and saw element was fried on the cooking side.
7. wrote down all part numbers and put it all back together.
8. changed the burner out when new one arrived by repeating steps 1 thru 6. Pay attention to the correct wiring setup. Do one wire at a time to make sure you don't mess up. MAKE SURE THE CIRCUIT BREAKER IS TRIPPED BEFORE YOU KILL YOUR SELF.
Have a tall one to celebrate the savings of two repair man call out fee's of minimum $60 each time and paying list price for the element. You probably just saved yourself $150.
Tom in Steinhatchee
2. pulled the stove top out of its cabinet.
3. turned in over carefully due to the glass cooking surface.
4. used 1/4 inch nutdriver on cordless drill to remove all the screws holding the lower cover in place. lifted cover off without removing completely as power wires still attached.
5. did continuity test on burner and found it open circuit while all the other 3 burners had continuity.
6. removed defective burner by removing two more screws and saw element was fried on the cooking side.
7. wrote down all part numbers and put it all back together.
8. changed the burner out when new one arrived by repeating steps 1 thru 6. Pay attention to the correct wiring setup. Do one wire at a time to make sure you don't mess up. MAKE SURE THE CIRCUIT BREAKER IS TRIPPED BEFORE YOU KILL YOUR SELF.
Have a tall one to celebrate the savings of two repair man call out fee's of minimum $60 each time and paying list price for the element. You probably just saved yourself $150.
Tom in Steinhatchee
Parts Used:
-
Thomas from Steinhatchee, FL
-
Difficulty Level:Easy
-
Total Repair Time:30 - 60 mins
-
Tools:Nutdriver
19 of 23 people
found this instruction helpful.
Was this instruction helpful to you?
Thank you for voting!
Glass top electric range element not working
Turned off the power . Removed two screws in front, lifted top, used a piece of wood to hold up,took off wires to bad element removed old element, replaced with the new one, put wires back on ,closed top,screws to front,on with power and cooked dinner!
Parts Used:
-
Gary from Stockton, CA
-
Difficulty Level:Really Easy
-
Total Repair Time:Less than 15 mins
-
Tools:Screw drivers
17 of 19 people
found this instruction helpful.
Was this instruction helpful to you?
Thank you for voting!
Tripple burner (left front) would not heat
This stove top is very easy to diagnose.. Just listen!! when you turn the control knob on... you will hear a faint "click" when the current is switched on the heating element. Making sure power source is off!! After removing the glass top (10 screws) from the base with an ohm meter measure for resistance on the burner coils.. If it is good you will get a resistance reading but be sure to measure all connectors (this was a tripple element).. The only other major part is the Infinite Switch..which has additional of 4 screws to remove - 2 for the switch and 2 for the switch housing mount. With this unit there are three different infinite switch parts... 2 single coils, 1 double coil, and 1 triple coil..
Parts Used:

-
Andrew from Baton Rouge, LA
-
Difficulty Level:Really Easy
-
Total Repair Time:Less than 15 mins
-
Tools:Screw drivers
13 of 17 people
found this instruction helpful.
Was this instruction helpful to you?
Thank you for voting!
Back heating element stopped working
I had some confusion about the correct series number associated with my stove and called Partselect. They confirmed the part I was looking at was correct in less than 5 minutes. I then completed the order online. Even with standard shipping my order was processed immediately and I received the heating element the next day.
Turned off the breaker. Removed the two screws in the front holding the range top down. Loosened the screws holding the element in place while balancing the range top with my shoulder. Removed the wires from the older element one at a time and attached them to the new element. Put the new element in place and screwed back in place. If I had a little help with the range top I think I could have completed it in 5 minutes but I was at home alone and the other stories of doing this repair made it seem easy enough and it was.
Turned off the breaker. Removed the two screws in the front holding the range top down. Loosened the screws holding the element in place while balancing the range top with my shoulder. Removed the wires from the older element one at a time and attached them to the new element. Put the new element in place and screwed back in place. If I had a little help with the range top I think I could have completed it in 5 minutes but I was at home alone and the other stories of doing this repair made it seem easy enough and it was.
Parts Used:
-
James from Peachtree City, GA
-
Difficulty Level:Really Easy
-
Total Repair Time:15 - 30 mins
-
Tools:Nutdriver
9 of 10 people
found this instruction helpful.
Was this instruction helpful to you?
Thank you for voting!
Element Burned out
looked for how to video on you tube. It saved me lots of money. Anyone could do it.
Parts Used:
-
Buford from Sun City Center, FL
-
Difficulty Level:Really Easy
-
Total Repair Time:15 - 30 mins
-
Tools:Nutdriver, Pliers, Screw drivers
9 of 13 people
found this instruction helpful.
Was this instruction helpful to you?
Thank you for voting!
The oven and ranges would not heat up and an F9 error was displaying on the Oven Screen.
So, the F9 error indicates a electrical power issue. First I pulled the oven out and verified I had 240 volts at my outlet.
Then I removed the fire panel over the terminal block and the issue was apparent. The nuts on the terminal block were corroded. This had cause the resistance in the connection to raise and burn up the wire to my oven plug at the terminal block.
I removed the whole back panel and everything else seemed OK visually.
1. I go new connectors for the oven plug, stripped the wires, and crimped on the new connectors.
2. The terminal block DOES NOT come with the nuts to connect the wire to the terminal block. Mine were so corroded they had to be replaced. So I went and purchased the correct ones and installed the terminal block and reconnected all the wires.
3. I applied some dielectric grease to the connections through out the process of reinstalling to prevent it from happening in the future.
Then I removed the fire panel over the terminal block and the issue was apparent. The nuts on the terminal block were corroded. This had cause the resistance in the connection to raise and burn up the wire to my oven plug at the terminal block.
I removed the whole back panel and everything else seemed OK visually.
1. I go new connectors for the oven plug, stripped the wires, and crimped on the new connectors.
2. The terminal block DOES NOT come with the nuts to connect the wire to the terminal block. Mine were so corroded they had to be replaced. So I went and purchased the correct ones and installed the terminal block and reconnected all the wires.
3. I applied some dielectric grease to the connections through out the process of reinstalling to prevent it from happening in the future.
Parts Used:
-
Jared from UNION GROVE, AL
-
Difficulty Level:Really Easy
-
Total Repair Time:30 - 60 mins
-
Tools:Pliers, Screw drivers, Socket set
7 of 7 people
found this instruction helpful.
Was this instruction helpful to you?
Thank you for voting!
Stove top wouldn't come on. Oven couldn't go higher than low heat
Had a technician from Home Advisor to check the problem out with my Whirlpool Double oven(1 1/2 old). Paid $60 to find the problem. According to the technician problem was control board and cost of labor and parts $465.00
Jumped on Part Select website, placed a question with my stove problem through the chat. Immediately they answered my question and told me the problem was the Terminal Block. Cost of part and shipping $25.00. Replaced it myself and everything works fine.
Thank you, Thank you Part Select for your help and honesty.
Sincerely
Peter from Maryland
Jumped on Part Select website, placed a question with my stove problem through the chat. Immediately they answered my question and told me the problem was the Terminal Block. Cost of part and shipping $25.00. Replaced it myself and everything works fine.
Thank you, Thank you Part Select for your help and honesty.
Sincerely
Peter from Maryland
Parts Used:
-
Peter from FREDERICK, MD
-
Difficulty Level:Really Easy
-
Total Repair Time:Less than 15 mins
-
Tools:Screw drivers, Socket set
7 of 9 people
found this instruction helpful.
Was this instruction helpful to you?
Thank you for voting!
Burnt out burner
Had this range for 6 years. My daughter turned on the burner and it went "pop". She was very upset. I found the best price at PartSelect, and ordered the same day.
the first burner arrived broken in the box. We contacted PartSelect, and they immediately sent another and rushed shipping. It arrived in excellent condition.
To replace the unit: First, I turned off the circuit breaker for the range. Then I removed the two Philips screws that held the cooktop down. Next I removed the nut screws holding the burner to the cooktop.
Then I placed the new burner next to the old one, and one by one swapped the wires (this way I was sure I had the right wire on the right connector). One of the wire connectors broke when removing it from the old burner. PartSelect had provided 4 repacement connector pieces (oddly, all of which were too small for the burner element). So I located a replacement connector at a local hardware store. Stripped the end of the wire and used pliers to fasten the new connector.
After all connectors were secured to the new burner, I screwed the burner to the cooktop, then closed the cooktop and secured it with the two screws.
Turned on the circuit breaker, and it works like new! Saved over $100 by doing it myself!
the first burner arrived broken in the box. We contacted PartSelect, and they immediately sent another and rushed shipping. It arrived in excellent condition.
To replace the unit: First, I turned off the circuit breaker for the range. Then I removed the two Philips screws that held the cooktop down. Next I removed the nut screws holding the burner to the cooktop.
Then I placed the new burner next to the old one, and one by one swapped the wires (this way I was sure I had the right wire on the right connector). One of the wire connectors broke when removing it from the old burner. PartSelect had provided 4 repacement connector pieces (oddly, all of which were too small for the burner element). So I located a replacement connector at a local hardware store. Stripped the end of the wire and used pliers to fasten the new connector.
After all connectors were secured to the new burner, I screwed the burner to the cooktop, then closed the cooktop and secured it with the two screws.
Turned on the circuit breaker, and it works like new! Saved over $100 by doing it myself!
Parts Used:
-
John from Clermont, FL
-
Difficulty Level:Easy
-
Total Repair Time:15 - 30 mins
-
Tools:Nutdriver, Pliers, Screw drivers
6 of 7 people
found this instruction helpful.
Was this instruction helpful to you?
Thank you for voting!
I turned off the range breaker and doubled checked to make sure the power was off . Using 1/4" ratchet wrench I removed 2 sheet metal screws and lifted the glass top up and held it in up with a small cardboard bow. I removed 2 more screws holding the element in place and installed new unit. I then
-
Howard from Citrus Springs, FL
-
Difficulty Level:Really Easy
-
Total Repair Time:Less than 15 mins
-
Tools:Wrench set
7 of 10 people
found this instruction helpful.
Was this instruction helpful to you?
Thank you for voting!
Burner Element Replaced
My grandson, age 15 did the replacement. Now, how easy is that!
Parts Used:
-
GLENA from CINCINNATI, OH
-
Difficulty Level:Really Easy
-
Total Repair Time:Less than 15 mins
-
Tools:Nutdriver, Screw drivers
4 of 5 people
found this instruction helpful.
Was this instruction helpful to you?
Thank you for voting!
Element quit working
Important to unplug the appliance first. There were two screws which were at the top opening of the oven. They were a bit obscure, but with a bit a searching, I was able to find them. After removing those two screws, the entire top lifted up. There were four screws from the bottom of that assembly which were easy to find, and once removed, the top lifted of easily. I found it easier to remove the two power lines with two easy disconnects, this made it easier to work on the assembly. The element itself was held down by two simple clamps which required no tools. There were four easy to remove wires, and the element came right off. Simply reversing the process put it right back together, plug it in, and back to cooking again.
Parts Used:
-
Daryl from Oak Creek, WI
-
Difficulty Level:Really Easy
-
Total Repair Time:15 - 30 mins
-
Tools:Screw drivers
5 of 8 people
found this instruction helpful.
Was this instruction helpful to you?
Thank you for voting!