















KECC560BWH1 KitchenAid Cooktop - Instructions
Keep searches simple. Use keywords, e.g. "leaking", "pump", "broken" or "fit".
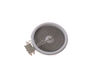
replaced heating element on flat surface stove top
I removed 4 screws and then lifted up the top it gave me access to the element I followed the direction that came with the element (very clear to follow) removed and installed the new element and it worked fine. Remember to unplug the stove if it is electric this is not in the instructions.
Parts Used:
-
dennis from assonet, MA
-
Difficulty Level:Really Easy
-
Total Repair Time:15 - 30 mins
-
Tools:Nutdriver
35 of 48 people
found this instruction helpful.
Was this instruction helpful to you?
Thank you for voting!
Burner would not heat
First i shut off the power since this is an electric cook top/range. I then removed the knob and the two screws that hold the burner switch in place. I removed the wires one at a time and connected each to the new switch. I then reattached the screws to the switch. The most difficult part to me was breaking off the switch stem at the right level. I got that done and finally selected the appropriate adapter for the stem/knob fit.
Parts Used:
-
Edward from Malvern, AR
-
Difficulty Level:A Bit Difficult
-
Total Repair Time:30 - 60 mins
-
Tools:Pliers, Screw drivers
27 of 35 people
found this instruction helpful.
Was this instruction helpful to you?
Thank you for voting!
2 burner control - "Large" = "Large", "Small" = "Large"
Well, I found the two screws that held the cook top in place and backed them out. Pulled the cook top out of the counter and took out a bazillion little sheet metal screws that held the cover in place. The controllers were grouped in a cluster of four, and the "Front Left" was easy to spot. I pulled the wires off one-by-one and noted the marking on the old controller, and noted the markings on the new controller, especially the translator table that came with the new controller - the old and new controllers are a bit different. Then screwed the new controller in and tested the cook top - worked fine. Then I changed the hard wiring to the power source (a bad job originally) to a three prong plug and socket arrangement. Put it all back together and was back in business - a "piece of cake" repair. A week later "somebody" dropped "something" onto the corner of the glass and chipped out a little chunk of glass. Oh well, fun to fix anyway!
Parts Used:
-
Scott from Huntsville, AL
-
Difficulty Level:Really Easy
-
Total Repair Time:30 - 60 mins
-
Tools:Screw drivers
18 of 22 people
found this instruction helpful.
Was this instruction helpful to you?
Thank you for voting!
Small Element On Counter Top Range Not Heating.
1. Turned off power to trouble shoot the counter top range elements. 2. Raised the counter top up to work on it and slid two evenly placed wooden slats under the bottom of the housfor stability so it would not fall backdown into the counter top cut-out. 3. With a 1/4" nut driver removed the 10 hex-head screw that were holding the black glass top in place, pulled off the 4 . Control knobs and carefully removed the glass cover and carefully seet it aside in a safe place. 5. A visual inspection of the non working element showed that it had a burn out spot causing it not to heat. 6. Got the model number of the appliance and checked the internet for parts suppliers, chose parts elect because they had the part in stock and could overnight it for reinstallation the next day, part did arrive the next morning. A visual inspection show that it was the correct part and it would be a like for like swap out. 7. Prior to replacing the element check to see that the electrical power was still off at the circuit breaker, made a quick sketch of the wiring and identified the wires so that they would be reterminated at the same points. 8. Using the needle nose pliers pulled off the 4 stake on terminations. 9. Lifted out the 6" from the body of the unit , removed the 4 phillips screws holding parts what were to be transfered onto the new element. 10. Transfered parts onto the new element, reinstalled the element into the body of the unit, reinstalled the 4-stake-on wires to there appropriate terminals and verified with previous wiring sketch. 11. Reinstalled the glass top, 10 screw holding it in place and the 4-control knobs. 12 . Turned main power to the unit back on and turned on the replaced element, it work correctly, also checked the other 3 elements to make sure that they were working correctly. 13. When the unit had cooled, removed the wooden slats and lowered the counter top back into its cut-out making sure not to damage the glasstop. Job complete.
Parts Used:
-
Brian E from Waldorf, MD
-
Difficulty Level:Easy
-
Total Repair Time:30 - 60 mins
-
Tools:Nutdriver, Screw drivers
17 of 20 people
found this instruction helpful.
Was this instruction helpful to you?
Thank you for voting!
Damaged knob
Had to remove drawer under range to get id number with flashlight. Ordered the part from a very helpful employee and it arrived in timely fashion . I placed the knob on the rod on the stove top and Voila! Excellent service. Thanks.
Parts Used:

-
love from newnan, GA
-
Difficulty Level:Really Easy
-
Total Repair Time:Less than 15 mins
15 of 19 people
found this instruction helpful.
Was this instruction helpful to you?
Thank you for voting!
Burner not working
First thing- I cut off power to the range. I then removed two screws to allow the cook top to be lifted. I marked the wiring and replaced the burner. Reapplied power and started cooking!
Parts Used:
-
Warren C from Slidell, LA
-
Difficulty Level:Easy
-
Total Repair Time:15 - 30 mins
-
Tools:Nutdriver, Screw drivers
12 of 18 people
found this instruction helpful.
Was this instruction helpful to you?
Thank you for voting!
Baked on sauce
Used cooktop creme, oven cleaner and Mr. Clean sponges. After many days of working on the surface, we were able to remove 99% of the sauce.
Parts Used:
-
Julie from Newnan, GA
-
Difficulty Level:A Bit Difficult
-
Total Repair Time:More than 2 hours
11 of 15 people
found this instruction helpful.
Was this instruction helpful to you?
Thank you for voting!
burner quite heating discovered switch was the problem
lifted hood top unscrewed 4 small screws opening lid to switch housing took out 2 small screws that held the switch and then transfered wires to new switch replaced new switch with 2 new screws and back to working again walla! Time spent less than 30 minutes very simple as the instructions were very self explainatory.
Parts Used:
-
Ronald from McClelland, IA
-
Difficulty Level:Really Easy
-
Total Repair Time:15 - 30 mins
-
Tools:Pliers, Screw drivers
9 of 12 people
found this instruction helpful.
Was this instruction helpful to you?
Thank you for voting!
Element not heating
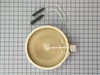
This was a countertop mounted cooktop. The hardest part of the repair was getting the cooktop out of the hole and separating the glass top from the burner box. It is highly recomended that you have two people to seperate the top from the burner box. Be sure you turn off the breaker to the cooktop first before you do any work. One time saver is once you have the top sperated from the box use 2- 10"-12" pieces of 1x2 or 2x4 to prop the top open. This will eleminate the need to disconnect the power leads (be sure the breaker is OFF). If you are not electrically inclined mark the color of the wires to the corrosponding terminals on the new element BEFORE you remove them from the old element. The element that I replaced was the dual heat element. I ended up having to change 2 of the terminal ends on the wiring harness becacuse they were too small for the new element. Carefully remove the wires from the old elenent using needle nose pliers and remove the old element by removing the 2 screws that hold the element to the hold down clips, then loosen the clip mounting screws & remove the element. Change terminals if needed & reassmble in reverse order. Once I got it reassembled with a couple of the top mounting screws in, I turned on the breaker and tested for proper operation. Breaker OFF, finish reassembly and remount. You may want to consider replacing foam gasket before remounting. Good luck... R. Moore
Parts Used:
-
Richard from Weatherford, TX
-
Difficulty Level:A Bit Difficult
-
Total Repair Time:1- 2 hours
-
Tools:Nutdriver, Pliers
8 of 9 people
found this instruction helpful.
Was this instruction helpful to you?
Thank you for voting!
Front left burner quit after bright flash under glass top
I ohmed out the burner element that wasnt working and found it was open. I ordered a new element thru PartSelect and installed it in the stove. I powered up the stove and turned on the burner but it didnt get hot. After a bit of testing I found that the new elements safety overtemp terminals werent in the same configuration as the original unit. I made some wiring adjustments and the burner was operating properly. Thanks PartSelect
Parts Used:
-
Brian L. from Wilkes-Barre, PA
-
Difficulty Level:A Bit Difficult
-
Total Repair Time:15 - 30 mins
-
Tools:Nutdriver, Screw drivers
11 of 19 people
found this instruction helpful.
Was this instruction helpful to you?
Thank you for voting!
Replaced defective switch
I removed the rangetop from the counter, Then I removed the knobs and about 12 screws and removed the glass top. I then removed the panel with the controls. I marked down the wire and terminal locations and removed the defective switch . I installed the new switch and connected the wires using the supplied wiring instructions.
I was glad to see that the new switch came with wire extenders and shrink tubing. I used one of them.
I replaced the glass top and installed it back into the counter ,Turned on the circuit breaker and everything worked perfect..
I was glad to see that the new switch came with wire extenders and shrink tubing. I used one of them.
I replaced the glass top and installed it back into the counter ,Turned on the circuit breaker and everything worked perfect..
Parts Used:
-
George J from Franklin, NJ
-
Difficulty Level:Easy
-
Total Repair Time:15 - 30 mins
-
Tools:Screw drivers
9 of 15 people
found this instruction helpful.
Was this instruction helpful to you?
Thank you for voting!
The switch had shorted
I reviewed the schematic. Removed the outer casing. Pulled out the existing wires and replaced them exactly on the new switch. Snipped out off the control stem to match the others. There was a small metal piece on the old stem which holds on the knob. I removed it from the old stem and put it on the new stem and Eureka.
Parts Used:
-
Stephen from COlleyville, TX
-
Difficulty Level:Really Easy
-
Total Repair Time:15 - 30 mins
-
Tools:Nutdriver, Pliers
8 of 12 people
found this instruction helpful.
Was this instruction helpful to you?
Thank you for voting!
the left front burner burned out & none of the lights to show if a burner was hot would come on.
FIrst we found the power source ( this took us awhile) and cut the power at the fuse box. then we unplugged the cooktop and started to take out screws. It turned out the screw removal had nothing to do with the stove top coming out. We took the taping knife & pried it under a corner and lifted. the cook top was just sitting on the counter.
The hardest part of the whole job was holding the cook top because we did not disconnect the downdraft fan other than to pull the tape off the vent & fan. Now we could undo the rachet screws that held the glass top to the cook top & remove it.
Theburner was simply a matter of pulling connections loose & placing them on to the new one. The clips that hold the burner in place were removed w/ a screwdriver & replaced on to the new burner. Watch for the numbers on the burner underside to know where to reattache the clips. the unit that lights up to show that a burner is hot would not come off, but we managed to remove
the plastic part even though the clip screw would not loosen, and since it only had to float near by we used the unused wire included in the new part to hold it in place. Putting the unit back together was not too hard, but it took us a little while to get it all lined up. Be carefull of what ever you work on, the downdraft fan scratched up the counter top that we were working on. we started with cardboard under it & should have continued, we did not want to try & remove the fan. Then we put it back in the counter opening & plugged everything back in & to our amazement ( we are not handy people) it worked! the lights that had refused to work when one unit was burned out now worked on all four units. thank you partselect, we were able to do the repair with what you sent.
The hardest part of the whole job was holding the cook top because we did not disconnect the downdraft fan other than to pull the tape off the vent & fan. Now we could undo the rachet screws that held the glass top to the cook top & remove it.
Theburner was simply a matter of pulling connections loose & placing them on to the new one. The clips that hold the burner in place were removed w/ a screwdriver & replaced on to the new burner. Watch for the numbers on the burner underside to know where to reattache the clips. the unit that lights up to show that a burner is hot would not come off, but we managed to remove
the plastic part even though the clip screw would not loosen, and since it only had to float near by we used the unused wire included in the new part to hold it in place. Putting the unit back together was not too hard, but it took us a little while to get it all lined up. Be carefull of what ever you work on, the downdraft fan scratched up the counter top that we were working on. we started with cardboard under it & should have continued, we did not want to try & remove the fan. Then we put it back in the counter opening & plugged everything back in & to our amazement ( we are not handy people) it worked! the lights that had refused to work when one unit was burned out now worked on all four units. thank you partselect, we were able to do the repair with what you sent.
Parts Used:
-
Richard from Fair oaks Ranch, TX
-
Difficulty Level:A Bit Difficult
-
Total Repair Time:30 - 60 mins
-
Tools:Screw drivers, Socket set
5 of 5 people
found this instruction helpful.
Was this instruction helpful to you?
Thank you for voting!
Left front burner went out.
Removed 8 screws of retainer holding glass top to box.. Pulled 5 knobs and glass top and set aside. Popped 2 retaining clips holding burner , removed them and transferred to new burner (#12 and #48 position). Used wide blade screwdriver to facilitate removing terminals from old burner and attached terminals to new burner.Popped retaining clips into crossbeam, put glass top on and 8 screws back into retainer. Works great.
Parts Used:
-
Donald from North Highlands, CA
-
Difficulty Level:Really Easy
-
Total Repair Time:15 - 30 mins
-
Tools:Nutdriver, Screw drivers
5 of 7 people
found this instruction helpful.
Was this instruction helpful to you?
Thank you for voting!
The 6" heating element stop working on the stove top.
First I reviewed a video on YouTube by this site. Even though the range on the video was not the same as mind, it gave me an idea on what to do. I proceeded to pull the rang out from the wall and disconnected the power plug. Next I removed two screws from the back located on the left and used a flat blade screw driver to depress two brackets on the front to release the glass top panel. I unplugged the wiring harness and disconnected the grounding wire and took the glass panel off and laid it upside down on the kitchen table. I removed the old heating element first by unplugging the wiring and removing the brackets that held it in place. Installed the new one, plugged in all wirings, brackets, screws and replace the top back on the stove.
Parts Used:
-
JULIUS from JACKSON, MI
-
Difficulty Level:Very Easy
-
Total Repair Time:15 - 30 mins
-
Tools:Nutdriver, Screw drivers
4 of 4 people
found this instruction helpful.
Was this instruction helpful to you?
Thank you for voting!