















KECC502BAL0 KitchenAid Cooktop - Instructions
Keep searches simple. Use keywords, e.g. "leaking", "pump", "broken" or "fit".
Burner would not heat
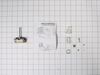
First i shut off the power since this is an electric cook top/range. I then removed the knob and the two screws that hold the burner switch in place. I removed the wires one at a time and connected each to the new switch. I then reattached the screws to the switch. The most difficult part to me was breaking off the switch stem at the right level. I got that done and finally selected the appropriate adapter for the stem/knob fit.
Parts Used:
-
Edward from Malvern, AR
-
Difficulty Level:A Bit Difficult
-
Total Repair Time:30 - 60 mins
-
Tools:Pliers, Screw drivers
27 of 35 people
found this instruction helpful.
Was this instruction helpful to you?
Thank you for voting!
2 burner control - "Large" = "Large", "Small" = "Large"
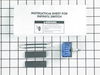
Well, I found the two screws that held the cook top in place and backed them out. Pulled the cook top out of the counter and took out a bazillion little sheet metal screws that held the cover in place. The controllers were grouped in a cluster of four, and the "Front Left" was easy to spot. I pulled the wires off one-by-one and noted the marking on the old controller, and noted the markings on the new controller, especially the translator table that came with the new controller - the old and new controllers are a bit different. Then screwed the new controller in and tested the cook top - worked fine. Then I changed the hard wiring to the power source (a bad job originally) to a three prong plug and socket arrangement. Put it all back together and was back in business - a "piece of cake" repair. A week later "somebody" dropped "something" onto the corner of the glass and chipped out a little chunk of glass. Oh well, fun to fix anyway!
Parts Used:
-
Scott from Huntsville, AL
-
Difficulty Level:Really Easy
-
Total Repair Time:30 - 60 mins
-
Tools:Screw drivers
18 of 22 people
found this instruction helpful.
Was this instruction helpful to you?
Thank you for voting!
Damaged knob
Had to remove drawer under range to get id number with flashlight. Ordered the part from a very helpful employee and it arrived in timely fashion . I placed the knob on the rod on the stove top and Voila! Excellent service. Thanks.
Parts Used:

-
love from newnan, GA
-
Difficulty Level:Really Easy
-
Total Repair Time:Less than 15 mins
15 of 19 people
found this instruction helpful.
Was this instruction helpful to you?
Thank you for voting!
Baked on sauce
Used cooktop creme, oven cleaner and Mr. Clean sponges. After many days of working on the surface, we were able to remove 99% of the sauce.
Parts Used:
-
Julie from Newnan, GA
-
Difficulty Level:A Bit Difficult
-
Total Repair Time:More than 2 hours
11 of 15 people
found this instruction helpful.
Was this instruction helpful to you?
Thank you for voting!
burner quite heating discovered switch was the problem
lifted hood top unscrewed 4 small screws opening lid to switch housing took out 2 small screws that held the switch and then transfered wires to new switch replaced new switch with 2 new screws and back to working again walla! Time spent less than 30 minutes very simple as the instructions were very self explainatory.
Parts Used:
-
Ronald from McClelland, IA
-
Difficulty Level:Really Easy
-
Total Repair Time:15 - 30 mins
-
Tools:Pliers, Screw drivers
9 of 12 people
found this instruction helpful.
Was this instruction helpful to you?
Thank you for voting!
Element not heating
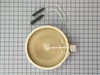
This was a countertop mounted cooktop. The hardest part of the repair was getting the cooktop out of the hole and separating the glass top from the burner box. It is highly recomended that you have two people to seperate the top from the burner box. Be sure you turn off the breaker to the cooktop first before you do any work. One time saver is once you have the top sperated from the box use 2- 10"-12" pieces of 1x2 or 2x4 to prop the top open. This will eleminate the need to disconnect the power leads (be sure the breaker is OFF). If you are not electrically inclined mark the color of the wires to the corrosponding terminals on the new element BEFORE you remove them from the old element. The element that I replaced was the dual heat element. I ended up having to change 2 of the terminal ends on the wiring harness becacuse they were too small for the new element. Carefully remove the wires from the old elenent using needle nose pliers and remove the old element by removing the 2 screws that hold the element to the hold down clips, then loosen the clip mounting screws & remove the element. Change terminals if needed & reassmble in reverse order. Once I got it reassembled with a couple of the top mounting screws in, I turned on the breaker and tested for proper operation. Breaker OFF, finish reassembly and remount. You may want to consider replacing foam gasket before remounting. Good luck... R. Moore
Parts Used:
-
Richard from Weatherford, TX
-
Difficulty Level:A Bit Difficult
-
Total Repair Time:1- 2 hours
-
Tools:Nutdriver, Pliers
8 of 9 people
found this instruction helpful.
Was this instruction helpful to you?
Thank you for voting!
Replaced defective switch
I removed the rangetop from the counter, Then I removed the knobs and about 12 screws and removed the glass top. I then removed the panel with the controls. I marked down the wire and terminal locations and removed the defective switch . I installed the new switch and connected the wires using the supplied wiring instructions.
I was glad to see that the new switch came with wire extenders and shrink tubing. I used one of them.
I replaced the glass top and installed it back into the counter ,Turned on the circuit breaker and everything worked perfect..
I was glad to see that the new switch came with wire extenders and shrink tubing. I used one of them.
I replaced the glass top and installed it back into the counter ,Turned on the circuit breaker and everything worked perfect..
Parts Used:
-
George J from Franklin, NJ
-
Difficulty Level:Easy
-
Total Repair Time:15 - 30 mins
-
Tools:Screw drivers
9 of 15 people
found this instruction helpful.
Was this instruction helpful to you?
Thank you for voting!
The switch had shorted
I reviewed the schematic. Removed the outer casing. Pulled out the existing wires and replaced them exactly on the new switch. Snipped out off the control stem to match the others. There was a small metal piece on the old stem which holds on the knob. I removed it from the old stem and put it on the new stem and Eureka.
Parts Used:
-
Stephen from COlleyville, TX
-
Difficulty Level:Really Easy
-
Total Repair Time:15 - 30 mins
-
Tools:Nutdriver, Pliers
8 of 12 people
found this instruction helpful.
Was this instruction helpful to you?
Thank you for voting!
Outer Element stopped working
Opened the Cooktop. Hardest part was removing the cooktop.
The heating element was broken, very hard to see.
Remove 2 clips and install in new element. Great oppurtunity to clean the unit.
The heating element was broken, very hard to see.
Remove 2 clips and install in new element. Great oppurtunity to clean the unit.
Parts Used:
-
Ashok from Los Altos Hills, CA
-
Difficulty Level:A Bit Difficult
-
Total Repair Time:30 - 60 mins
-
Tools:Nutdriver, Screw drivers
5 of 8 people
found this instruction helpful.
Was this instruction helpful to you?
Thank you for voting!
Switch on stove top would not work.
Got Model and SN, went on line and located correct part. Ordered part, arrived in 3 days. Started repair by turning off power to stovee top. Got putty knife and went around edge to loosen stove top to raise and het to underside to dismantle cover. Used battery drill to remove screws on cover. After accessing and removing top and bottom, removed 2 screws, changed one wire at a time and replaced on new switch, reassembled in reverse, turned on power and happily watched burner come to life with new switch.
Parts Used:
-
Terry from Pana, IL
-
Difficulty Level:Easy
-
Total Repair Time:15 - 30 mins
-
Tools:Pliers, Screw drivers
4 of 6 people
found this instruction helpful.
Was this instruction helpful to you?
Thank you for voting!
Infinite control switch not working
Turned the breaker off. Removed the glass cook top and removed the screws holding the cook glass to the metal burner case. Followed easy instructions removing one wire at a time and placing on the new switch. Put the glass top back on and installed screws. Placed back in the hole and turned the breaker on. Works like new.
Parts Used:
-
John from Kentwood, LA
-
Difficulty Level:Really Easy
-
Total Repair Time:15 - 30 mins
-
Tools:Pliers, Screw drivers
4 of 6 people
found this instruction helpful.
Was this instruction helpful to you?
Thank you for voting!
The inside coil on the dual burner was not working
This is a slide-in range, so I:
1. Turned off the circuit breaker for the range. The range is hard-wired, so can't just be unplugged. I determined the clock on the range went off.
2. Removed 4 screws holding the front control panel to the cooktop. Removed 2 screws from each side panel into the cooktop. Removed 4 screws from the rear panel holding the cooktop.
3. With my assistant (my wife) lifted the cooktop and tilted it so that I could access the underside.
4. Used an iPad to take photos from several angles of the wire connections from each burner control. Printed the one showing the connections on the dual burner control.
5. Removed the 4 screws holding the sheet metal support for the dual burner and one of the other burners. Released the spring steel retainers holding the dual burner. Removed the burner.
6. Used the iPad again to take photos of the connections to the dual burner, and printed it.
7. Removed all the wire connections to the burner. Checked continuity from the center (common) terminal to each of the other terminals. Determined that in fact the inside coil was open (burned out).
8. Removed the two screws holding the spring clip retainers on the old burner. Matched the old and new burners to determine where the spring clips should go. Drilled 2 small holes in the base of the new burner and screwed the clips from the old burner on the new one.
9. Now the tricky part: The new burner didn't have the exact same limiter and heat sensor probe as the old one. After several false starts, we were able to barely make out the terminal letter/number designations on the control and match them to the same letter/numbers on the new burner. It required a magnifier and a strong flashlight to read these engraved markings.
10. Made the connections on the burner. I used a pair of long-nosed pliers to carefully pull the connections off the spade terminals, and attch them on the new burner.
11. Mounted the burner to the sheet metal support using the spring clips previously installed.
12. Re-attached the 4 screws holding the burner support to the cooktop.
13. Carefully replaced the cooktop onto the range, paying special attention to not pinching any of the wires, and making sure all the wires, from all the burners were still connected.
14. Replaced all 12 screws holding the cooktop to the range.
15. Turned on the power, and checked all burners, including the new one, to see if they were opetating properly. YAY! They all worked!
It must be noted that we had to call a repairman to troubleshoot our installation the first time. We had reversed two of the wires to the new burner, because of the difference between the old and the new limiter connections. The engraved markings in the porcelain were very difficult to see. The instructions that came with the new burner never addressed this issue, and instead had very confusing (and worthless) instructions about replacing the limiter from the old burner to the new on. (This was not possible, anyway).
After the repairman left, we discovered the front burner that had been working, no longer was. With our newfound experience, we repeated the previous steps to take the range apart and discovered one of the wires had become disconnected from that burner. We re-connected it, re-attached the cooktop, and everything worked.
One telltale indicator that we had mixed up the connections on the burner, was the red "hot' warning light on the range top came on as soon as we restored power, even though no burners had been on. I should mention that the dual burner "worked" a couple of times even with the reversed connections, but then failed to work any more.
1. Turned off the circuit breaker for the range. The range is hard-wired, so can't just be unplugged. I determined the clock on the range went off.
2. Removed 4 screws holding the front control panel to the cooktop. Removed 2 screws from each side panel into the cooktop. Removed 4 screws from the rear panel holding the cooktop.
3. With my assistant (my wife) lifted the cooktop and tilted it so that I could access the underside.
4. Used an iPad to take photos from several angles of the wire connections from each burner control. Printed the one showing the connections on the dual burner control.
5. Removed the 4 screws holding the sheet metal support for the dual burner and one of the other burners. Released the spring steel retainers holding the dual burner. Removed the burner.
6. Used the iPad again to take photos of the connections to the dual burner, and printed it.
7. Removed all the wire connections to the burner. Checked continuity from the center (common) terminal to each of the other terminals. Determined that in fact the inside coil was open (burned out).
8. Removed the two screws holding the spring clip retainers on the old burner. Matched the old and new burners to determine where the spring clips should go. Drilled 2 small holes in the base of the new burner and screwed the clips from the old burner on the new one.
9. Now the tricky part: The new burner didn't have the exact same limiter and heat sensor probe as the old one. After several false starts, we were able to barely make out the terminal letter/number designations on the control and match them to the same letter/numbers on the new burner. It required a magnifier and a strong flashlight to read these engraved markings.
10. Made the connections on the burner. I used a pair of long-nosed pliers to carefully pull the connections off the spade terminals, and attch them on the new burner.
11. Mounted the burner to the sheet metal support using the spring clips previously installed.
12. Re-attached the 4 screws holding the burner support to the cooktop.
13. Carefully replaced the cooktop onto the range, paying special attention to not pinching any of the wires, and making sure all the wires, from all the burners were still connected.
14. Replaced all 12 screws holding the cooktop to the range.
15. Turned on the power, and checked all burners, including the new one, to see if they were opetating properly. YAY! They all worked!
It must be noted that we had to call a repairman to troubleshoot our installation the first time. We had reversed two of the wires to the new burner, because of the difference between the old and the new limiter connections. The engraved markings in the porcelain were very difficult to see. The instructions that came with the new burner never addressed this issue, and instead had very confusing (and worthless) instructions about replacing the limiter from the old burner to the new on. (This was not possible, anyway).
After the repairman left, we discovered the front burner that had been working, no longer was. With our newfound experience, we repeated the previous steps to take the range apart and discovered one of the wires had become disconnected from that burner. We re-connected it, re-attached the cooktop, and everything worked.
One telltale indicator that we had mixed up the connections on the burner, was the red "hot' warning light on the range top came on as soon as we restored power, even though no burners had been on. I should mention that the dual burner "worked" a couple of times even with the reversed connections, but then failed to work any more.
Parts Used:
-
Art from CINCINNATI, OH
-
Difficulty Level:A Bit Difficult
-
Total Repair Time:More than 2 hours
-
Tools:Nutdriver
3 of 3 people
found this instruction helpful.
Was this instruction helpful to you?
Thank you for voting!
Dual Burner would only heat if knob held down
Called an authorized Kitchenaid service technician after ordering part. This was the second time this switch has required replacement so we saved time and money by ordering the part in advance from PartSelect. The trickiest part of the repair was separating the ceramic top from the rest of the cooktop. Had we attempted to do this ourselves, we would have given up at that point. I would only recommend this as a do-it-yourself repair if you are intimately familiar with how these cooktops are put together. It is fairly easy to break the ceramic top if you're not.
Parts Used:
-
Bettye from Saint Francisville, LA
-
Difficulty Level:A Bit Difficult
-
Total Repair Time:30 - 60 mins
-
Tools:Screw drivers
5 of 10 people
found this instruction helpful.
Was this instruction helpful to you?
Thank you for voting!
faulty switch
I found the received switch (PS12070192) a poor replacement for the original, or even the earlier replaced part (PS11744446, in 2016) I was going to replace since the press/return feature seemed slow to return.
The male spade lugs on the received switch are so positioned that engagement is only possible if the lug is bent out at a large angle. The lug set-back from the body edge, and the raised ribs on the sides still prevent full engagement of the connections.
I did install the new switch but found that was the only switch that didn’t give a signal light when turned on.
I have reinstalled the earlier unit.
Is part# PS 11744446 no longer available?
James E Weimholt. jmwm4031@verizon.net
The male spade lugs on the received switch are so positioned that engagement is only possible if the lug is bent out at a large angle. The lug set-back from the body edge, and the raised ribs on the sides still prevent full engagement of the connections.
I did install the new switch but found that was the only switch that didn’t give a signal light when turned on.
I have reinstalled the earlier unit.
Is part# PS 11744446 no longer available?
James E Weimholt. jmwm4031@verizon.net
Parts Used:
-
James E from RIDGECREST, CA
-
Difficulty Level:Really Easy
-
Total Repair Time:30 - 60 mins
2 of 2 people
found this instruction helpful.
Was this instruction helpful to you?
Thank you for voting!
Old infinity switch on electric rangetop did not work correctly
Lifted range top, disconnected and labled wires from old switch, removed old switch, replaced wires on new switch, installed new switch.
NOTE: Local appliance store informed me that the electric cooktop was too old and that a replacement switch was not available and wanted to sell me a new cooktop for $795!
I found the switch on PartSelect and repaired the cooktop. Total cost... UNDER THIRTY DOLLARS!!
NOTE: Local appliance store informed me that the electric cooktop was too old and that a replacement switch was not available and wanted to sell me a new cooktop for $795!
I found the switch on PartSelect and repaired the cooktop. Total cost... UNDER THIRTY DOLLARS!!
Parts Used:
-
Decker from GREAT NECK, NY
-
Difficulty Level:Really Easy
-
Total Repair Time:30 - 60 mins
-
Tools:Pliers, Screw drivers
2 of 2 people
found this instruction helpful.
Was this instruction helpful to you?
Thank you for voting!