















KECC501GBT3 KitchenAid Cooktop - Instructions
Keep searches simple. Use keywords, e.g. "leaking", "pump", "broken" or "fit".
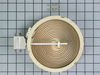
Right rear burner went bad
Turned the breaker off, I removed 2 screws securing the range top to the range, opened the top and secured it in the up position, Removed the 2 screws securing the element ,one at a time I swapped the quick connectors from the old element to the new and repeated the process in reverse. I save over $100.00 in labor, plus most companies get you for a trip charge. It was easy!!
Parts Used:
-
Mark from Loxahatchee, FL
-
Difficulty Level:Really Easy
-
Total Repair Time:15 - 30 mins
-
Tools:Nutdriver, Screw drivers
153 of 182 people
found this instruction helpful.
Was this instruction helpful to you?
Thank you for voting!
Hot Burner Light always on
Thermal switch is integral to element and can not be changed, must replace entire element.
Turn off power. Removed front two screws above oven door jamb and lifted the top. Removed the bracket that holds the element against the glass top and removed the element. Moved brackets from old element to new one, aligning to same numerical position and then moved wiring to new element. Slide new element under bracket and reinstalled single screw. Replaced top and screwed down. Turn on power and test .
Turn off power. Removed front two screws above oven door jamb and lifted the top. Removed the bracket that holds the element against the glass top and removed the element. Moved brackets from old element to new one, aligning to same numerical position and then moved wiring to new element. Slide new element under bracket and reinstalled single screw. Replaced top and screwed down. Turn on power and test .
Parts Used:
-
Gregory from Cary, NC
-
Difficulty Level:Really Easy
-
Total Repair Time:15 - 30 mins
-
Tools:Screw drivers
109 of 159 people
found this instruction helpful.
Was this instruction helpful to you?
Thank you for voting!
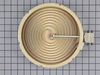
Right Front Surface Element would not heat
Turn off the power to the Electric Oven.
Remove the 2 screws to the oven top at the front of the stove. Lift the oven top up. Have someone hold it for you. Label the wires that go to the element you are going to replace. Disconnect the wires from the Element. Remove the screw from the bracket that holds the front and rear element in place. It is located at the back of the bracket behind the rear element and you will need small phillips head screw driver. Remove the bad element.. Unscrew the two pointed bracket holder pieces from the old element and screw them into the new element in the same location as the old. Put the new element back into the bracket and put the bracket mount screw back in. Attach the wires back to the new element. Close the oven top. Install the oven top screws at the front of the stove. Turn the power back on and test the element.
Remove the 2 screws to the oven top at the front of the stove. Lift the oven top up. Have someone hold it for you. Label the wires that go to the element you are going to replace. Disconnect the wires from the Element. Remove the screw from the bracket that holds the front and rear element in place. It is located at the back of the bracket behind the rear element and you will need small phillips head screw driver. Remove the bad element.. Unscrew the two pointed bracket holder pieces from the old element and screw them into the new element in the same location as the old. Put the new element back into the bracket and put the bracket mount screw back in. Attach the wires back to the new element. Close the oven top. Install the oven top screws at the front of the stove. Turn the power back on and test the element.
Parts Used:
-
Robert from Blackwood, NJ
-
Difficulty Level:Easy
-
Total Repair Time:30 - 60 mins
-
Tools:Screw drivers
83 of 101 people
found this instruction helpful.
Was this instruction helpful to you?
Thank you for voting!
glass cooktop element stopped working
3 months after my 5 year warranty ran out, one of the elements on my wife's maytag cooktop "popped". I was curious to see if I could fix it myself and ran across partselect.com via google. Their step by step instructions for determining the source of the problem (i.e. either the element or the control was bad) led me to realize that the element was bad. I ordered a new one -- which arrived in 3 days! It was very easy to replace the element, since I had already taken the glass cooktop off of the range during the testing phase. Thanks partselect.com!
Parts Used:
-
Mark from mckinney, TX
-
Difficulty Level:Really Easy
-
Total Repair Time:Less than 15 mins
-
Tools:Screw drivers, Socket set
33 of 39 people
found this instruction helpful.
Was this instruction helpful to you?
Thank you for voting!
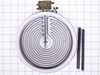
No heat on burner
Turned off electricity! Pulled stove out -lifted up glass top(carefully) simply removed burned out coil and replaced it with new one.
Parts Used:
-
paul from trumbull, CT
-
Difficulty Level:Really Easy
-
Total Repair Time:Less than 15 mins
-
Tools:Screw drivers, Socket set
35 of 51 people
found this instruction helpful.
Was this instruction helpful to you?
Thank you for voting!
Original element coil burned out
I looked how it came out pretty easy, check how your connections are on the unitase you unplug them. Ordered new part from patrs select. the new came in. Make sure you look at the location on the problem part of the tabs on back because it is important on the reinstall of the element ( it is easy it is numbered like a clock) plug in the wires and your ready to go.
Parts Used:
-
Mark from Americus, GA
-
Difficulty Level:Easy
-
Total Repair Time:15 - 30 mins
-
Tools:Screw drivers
24 of 27 people
found this instruction helpful.
Was this instruction helpful to you?
Thank you for voting!
the 2500 watts element-surf was opened (wasn't heating)
1 Turn the circuit breaker that feds power to the range/stove off
2 Opened the oven door and found two screws that hold the top part of the range. I removed the screws and disconnected the green cable (ground) so I could have access to the Element-surt
3 Disconnected the four wires that connects the Element and removed the braket that holds it.
4 Replaced the new element, connected the wires and attached the braket.
5 Connected the ground (green cable) and place the top back on place (screwed the top from inside the oven).
6 turned the power on
2 Opened the oven door and found two screws that hold the top part of the range. I removed the screws and disconnected the green cable (ground) so I could have access to the Element-surt
3 Disconnected the four wires that connects the Element and removed the braket that holds it.
4 Replaced the new element, connected the wires and attached the braket.
5 Connected the ground (green cable) and place the top back on place (screwed the top from inside the oven).
6 turned the power on
Parts Used:
-
luis from Lincoln, NE
-
Difficulty Level:Really Easy
-
Total Repair Time:30 - 60 mins
-
Tools:Screw drivers
20 of 25 people
found this instruction helpful.
Was this instruction helpful to you?
Thank you for voting!
Defective Surface Burner Element - 1800W
First discount Ac from wall, then take out 2 screws on the front of the range top and lift up the top of the range surface, then while holding up the surface top take out the front burner and replaced new burner element.Let the surface top down and screw in the two screws. the surface top of the range is hinged so it would be good to have someone to hold the top up while you replace the element or use a piece of wood to hold it up,this is a piece of cake to repair. would like to thank parts select for their service. I have ordered from them before and they back up their products
Robert
Robert
Parts Used:
-
Robert from Daytona Beach, FL
-
Difficulty Level:Really Easy
-
Total Repair Time:30 - 60 mins
-
Tools:Screw drivers
23 of 35 people
found this instruction helpful.
Was this instruction helpful to you?
Thank you for voting!
right rear burner was inop for last 4 years
1. tripped circuit breaker for stovetop
2. pulled the stove top out of its cabinet.
3. turned in over carefully due to the glass cooking surface.
4. used 1/4 inch nutdriver on cordless drill to remove all the screws holding the lower cover in place. lifted cover off without removing completely as power wires still attached.
5. did continuity test on burner and found it open circuit while all the other 3 burners had continuity.
6. removed defective burner by removing two more screws and saw element was fried on the cooking side.
7. wrote down all part numbers and put it all back together.
8. changed the burner out when new one arrived by repeating steps 1 thru 6. Pay attention to the correct wiring setup. Do one wire at a time to make sure you don't mess up. MAKE SURE THE CIRCUIT BREAKER IS TRIPPED BEFORE YOU KILL YOUR SELF.
Have a tall one to celebrate the savings of two repair man call out fee's of minimum $60 each time and paying list price for the element. You probably just saved yourself $150.
Tom in Steinhatchee
2. pulled the stove top out of its cabinet.
3. turned in over carefully due to the glass cooking surface.
4. used 1/4 inch nutdriver on cordless drill to remove all the screws holding the lower cover in place. lifted cover off without removing completely as power wires still attached.
5. did continuity test on burner and found it open circuit while all the other 3 burners had continuity.
6. removed defective burner by removing two more screws and saw element was fried on the cooking side.
7. wrote down all part numbers and put it all back together.
8. changed the burner out when new one arrived by repeating steps 1 thru 6. Pay attention to the correct wiring setup. Do one wire at a time to make sure you don't mess up. MAKE SURE THE CIRCUIT BREAKER IS TRIPPED BEFORE YOU KILL YOUR SELF.
Have a tall one to celebrate the savings of two repair man call out fee's of minimum $60 each time and paying list price for the element. You probably just saved yourself $150.
Tom in Steinhatchee
Parts Used:
-
Thomas from Steinhatchee, FL
-
Difficulty Level:Easy
-
Total Repair Time:30 - 60 mins
-
Tools:Nutdriver
19 of 23 people
found this instruction helpful.
Was this instruction helpful to you?
Thank you for voting!
Glass top electric range element not working
Turned off the power . Removed two screws in front, lifted top, used a piece of wood to hold up,took off wires to bad element removed old element, replaced with the new one, put wires back on ,closed top,screws to front,on with power and cooked dinner!
Parts Used:
-
Gary from Stockton, CA
-
Difficulty Level:Really Easy
-
Total Repair Time:Less than 15 mins
-
Tools:Screw drivers
17 of 19 people
found this instruction helpful.
Was this instruction helpful to you?
Thank you for voting!
Damaged knob
Had to remove drawer under range to get id number with flashlight. Ordered the part from a very helpful employee and it arrived in timely fashion . I placed the knob on the rod on the stove top and Voila! Excellent service. Thanks.
Parts Used:

-
love from newnan, GA
-
Difficulty Level:Really Easy
-
Total Repair Time:Less than 15 mins
15 of 19 people
found this instruction helpful.
Was this instruction helpful to you?
Thank you for voting!
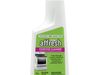
Baked on sauce
Used cooktop creme, oven cleaner and Mr. Clean sponges. After many days of working on the surface, we were able to remove 99% of the sauce.
Parts Used:
-
Julie from Newnan, GA
-
Difficulty Level:A Bit Difficult
-
Total Repair Time:More than 2 hours
11 of 15 people
found this instruction helpful.
Was this instruction helpful to you?
Thank you for voting!
Back heating element stopped working
I had some confusion about the correct series number associated with my stove and called Partselect. They confirmed the part I was looking at was correct in less than 5 minutes. I then completed the order online. Even with standard shipping my order was processed immediately and I received the heating element the next day.
Turned off the breaker. Removed the two screws in the front holding the range top down. Loosened the screws holding the element in place while balancing the range top with my shoulder. Removed the wires from the older element one at a time and attached them to the new element. Put the new element in place and screwed back in place. If I had a little help with the range top I think I could have completed it in 5 minutes but I was at home alone and the other stories of doing this repair made it seem easy enough and it was.
Turned off the breaker. Removed the two screws in the front holding the range top down. Loosened the screws holding the element in place while balancing the range top with my shoulder. Removed the wires from the older element one at a time and attached them to the new element. Put the new element in place and screwed back in place. If I had a little help with the range top I think I could have completed it in 5 minutes but I was at home alone and the other stories of doing this repair made it seem easy enough and it was.
Parts Used:
-
James from Peachtree City, GA
-
Difficulty Level:Really Easy
-
Total Repair Time:15 - 30 mins
-
Tools:Nutdriver
9 of 10 people
found this instruction helpful.
Was this instruction helpful to you?
Thank you for voting!
Element Burned out
looked for how to video on you tube. It saved me lots of money. Anyone could do it.
Parts Used:
-
Buford from Sun City Center, FL
-
Difficulty Level:Really Easy
-
Total Repair Time:15 - 30 mins
-
Tools:Nutdriver, Pliers, Screw drivers
9 of 13 people
found this instruction helpful.
Was this instruction helpful to you?
Thank you for voting!
Burnt out burner
Had this range for 6 years. My daughter turned on the burner and it went "pop". She was very upset. I found the best price at PartSelect, and ordered the same day.
the first burner arrived broken in the box. We contacted PartSelect, and they immediately sent another and rushed shipping. It arrived in excellent condition.
To replace the unit: First, I turned off the circuit breaker for the range. Then I removed the two Philips screws that held the cooktop down. Next I removed the nut screws holding the burner to the cooktop.
Then I placed the new burner next to the old one, and one by one swapped the wires (this way I was sure I had the right wire on the right connector). One of the wire connectors broke when removing it from the old burner. PartSelect had provided 4 repacement connector pieces (oddly, all of which were too small for the burner element). So I located a replacement connector at a local hardware store. Stripped the end of the wire and used pliers to fasten the new connector.
After all connectors were secured to the new burner, I screwed the burner to the cooktop, then closed the cooktop and secured it with the two screws.
Turned on the circuit breaker, and it works like new! Saved over $100 by doing it myself!
the first burner arrived broken in the box. We contacted PartSelect, and they immediately sent another and rushed shipping. It arrived in excellent condition.
To replace the unit: First, I turned off the circuit breaker for the range. Then I removed the two Philips screws that held the cooktop down. Next I removed the nut screws holding the burner to the cooktop.
Then I placed the new burner next to the old one, and one by one swapped the wires (this way I was sure I had the right wire on the right connector). One of the wire connectors broke when removing it from the old burner. PartSelect had provided 4 repacement connector pieces (oddly, all of which were too small for the burner element). So I located a replacement connector at a local hardware store. Stripped the end of the wire and used pliers to fasten the new connector.
After all connectors were secured to the new burner, I screwed the burner to the cooktop, then closed the cooktop and secured it with the two screws.
Turned on the circuit breaker, and it works like new! Saved over $100 by doing it myself!
Parts Used:
-
John from Clermont, FL
-
Difficulty Level:Easy
-
Total Repair Time:15 - 30 mins
-
Tools:Nutdriver, Pliers, Screw drivers
6 of 7 people
found this instruction helpful.
Was this instruction helpful to you?
Thank you for voting!