















IP44003 Inglis Washer - Instructions
Keep searches simple. Use keywords, e.g. "leaking", "pump", "broken" or "fit".
Washer would not spin and the agitator would not turn
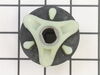
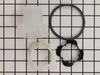
I basically dismantled the washer and turned the washer over to access the motor,transmission and pump.I disconnected the electrical connections first.I then released the clips for the pump and the clips for the transmission.The coupler was broken in little pieces.I went to Google to search for parts and happened to reach your Web Site.I found the part number for the coupler from the schematic and ordered it.It was then I discovered the part number for the cam dogs for the agitator so I ordered it also.While on you site I read the various troubleshooting stories and how each was repaired.I put myself through a lot of unnecessary work by dismantling the whole washer when all I had to do was turn it over and access it from the bottom.The parts arrived in three days and the install was rather simple thanks to the direction of your site.I had a heck of a time reassembling the washer but all in all $42.00 was a lot cheaper than a repairman or a new washer.We now have a working washer and no leaks.
Thanks to your site ,I have a happy wife and clean clothes.
Thanks to your site ,I have a happy wife and clean clothes.
Parts Used:
-
Gilbert from Fair Lawn, NJ
-
Difficulty Level:Really Easy
-
Total Repair Time:1- 2 hours
-
Tools:Pliers, Screw drivers, Socket set
31 of 39 people
found this instruction helpful.
Was this instruction helpful to you?
Thank you for voting!
Washer would fill and stop, would not agitate; advance the cycles
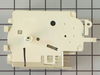
First I went to the Whirlpool site and downloaded the illustrated parts list for this model (a PDF file).
Seeing the part number, I then ordered the part from PartSelect.com.
While waiting for the part I tried to research how to remove the timer knob, but none of the online help I found was correct- the knob does not unscrew, but is held in place by a black plastic "keeper" on the back of the timer. The removal instructions are printed on the timer.
When the timer arrived I unscrewed the 2 screws at the back and edge of the console panel. Then the panel lifts up and out, exposing the timer. I released the knob, then removed a small screw beneath the knob that holds the timer.
Then I unplugged the wiring harness from the timer and removed it. I then reversed these procedures and installed the new timer.
As it turned out, the problem was not with the timer at all, but rather a defective lid switch, which is also located under the console panel.
Once I replaced the lid switch (very easy), the washer worked perfectly again.
Despite my imperfect initial diagnosis, a very satisfying experience.
Thanks for the great service.
Rick
Seeing the part number, I then ordered the part from PartSelect.com.
While waiting for the part I tried to research how to remove the timer knob, but none of the online help I found was correct- the knob does not unscrew, but is held in place by a black plastic "keeper" on the back of the timer. The removal instructions are printed on the timer.
When the timer arrived I unscrewed the 2 screws at the back and edge of the console panel. Then the panel lifts up and out, exposing the timer. I released the knob, then removed a small screw beneath the knob that holds the timer.
Then I unplugged the wiring harness from the timer and removed it. I then reversed these procedures and installed the new timer.
As it turned out, the problem was not with the timer at all, but rather a defective lid switch, which is also located under the console panel.
Once I replaced the lid switch (very easy), the washer worked perfectly again.
Despite my imperfect initial diagnosis, a very satisfying experience.
Thanks for the great service.
Rick
Parts Used:
-
Rick from Littleton, NH
-
Difficulty Level:Easy
-
Total Repair Time:15 - 30 mins
-
Tools:Pliers, Screw drivers
29 of 33 people
found this instruction helpful.
Was this instruction helpful to you?
Thank you for voting!
Agitator loose spinning
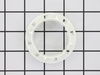
Three of the four agitator cogs had broken. The agitator was able to spin freely both clockwise encounter clockwise which it should not be doing. I replaced the cogs as well as a couple additional parts just to be sure but the cogs were the important one. Very easy.
Parts Used:


-
Matthew from AUSTIN, TX
-
Difficulty Level:Easy
-
Total Repair Time:30 - 60 mins
-
Tools:Socket set
27 of 28 people
found this instruction helpful.
Was this instruction helpful to you?
Thank you for voting!
Severe water leak
1) Unplugged electrical cord
2) Removed hot/cold water hoses
3) Took drain hose from laundry room recepatcle
4) Moved washing machine to area where I could lay it down on its back (very important for easy fix)
5) Found (easy accessible in my case) water pump with an inlet and outlet water hose held on with spring clamps.
6) Removed each of the two clamps with pliers and each hose by twisting loose
7) Remove two metal clips holding pump to motor housing
8) Slide pump off shaft - removal is finished!
9) Reversed process for installation, making sure to gently align pump housing when the pump is aligned with the shaft
[probably took less than 15 minutes]
2) Removed hot/cold water hoses
3) Took drain hose from laundry room recepatcle
4) Moved washing machine to area where I could lay it down on its back (very important for easy fix)
5) Found (easy accessible in my case) water pump with an inlet and outlet water hose held on with spring clamps.
6) Removed each of the two clamps with pliers and each hose by twisting loose
7) Remove two metal clips holding pump to motor housing
8) Slide pump off shaft - removal is finished!
9) Reversed process for installation, making sure to gently align pump housing when the pump is aligned with the shaft
[probably took less than 15 minutes]
Parts Used:

-
Noel from Pollock, ID
-
Difficulty Level:Really Easy
-
Total Repair Time:15 - 30 mins
-
Tools:Pliers, Screw drivers
27 of 29 people
found this instruction helpful.
Was this instruction helpful to you?
Thank you for voting!
Agitatorwouldn't agitate on the washing machine
before ordering the parts, I pulled the cap of the agitator, removed some internal parts of the agitator - had to remove one hex head bolt, and noticed the threads on the 3 little teenie weenie plastic dogs were worn off. I bought the repair kit on line after entering the model number, parts were here in a few days, and the repair took about 15 minutes. Works like new again.
The directions provided with the parts were very clear and made the job quick, easy, and painless.
The directions provided with the parts were very clear and made the job quick, easy, and painless.
Parts Used:
-
Kelly from Newport News, VA
-
Difficulty Level:Easy
-
Total Repair Time:15 - 30 mins
-
Tools:Socket set
26 of 28 people
found this instruction helpful.
Was this instruction helpful to you?
Thank you for voting!
Agitator directional cogs worn out
Removed bolt holding top of agitator, removed top of agitator. Replaced parts. Reinstalled agitator. An old machine now works like a new model.
Parts Used:
-
Do n from LAWTON, OK
-
Difficulty Level:Really Easy
-
Total Repair Time:15 - 30 mins
-
Tools:Socket set
26 of 30 people
found this instruction helpful.
Was this instruction helpful to you?
Thank you for voting!
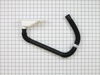
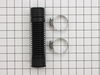
Two leaking hoses in my washing machine
Put the machine on its side. Remove old hoses and screw new ones into place. Done in under 20 minutes.
Parts Used:
-
Marc from Morton Grove, IL
-
Difficulty Level:Really Easy
-
Total Repair Time:15 - 30 mins
-
Tools:Pliers, Screw drivers
29 of 39 people
found this instruction helpful.
Was this instruction helpful to you?
Thank you for voting!
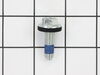
Upper agitator not working
Read the directions in the repair kit first- a 7/16" socket and 10" extension is needed. Assembled new dogs on agitator "cup" and retainer, added marine(waterproof) grease to assembly washer, replaced bolt anyway and installed new o ring. Took less than 15 minutes-READ ALL DIRECTIONS FIRST!
Parts Used:

-
Eric from Saint Petersburg, FL
-
Difficulty Level:Easy
-
Total Repair Time:Less than 15 mins
-
Tools:Socket set
23 of 25 people
found this instruction helpful.
Was this instruction helpful to you?
Thank you for voting!
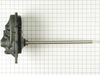
The spin gear was striped.
I had to take the motor and transmission out. They are one piece. Removed the clutch, take off trans. cover, remove a snap ring, take the striped gear off, and put the new one on. Then put put everything back on the way it came off.
Parts Used:
-
Aaron from Lake Mills, WI
-
Difficulty Level:A Bit Difficult
-
Total Repair Time:1- 2 hours
-
Tools:Pliers, Socket set
25 of 31 people
found this instruction helpful.
Was this instruction helpful to you?
Thank you for voting!
Washer lid switch worked sometime, sometime not
First, I'm so excited that this site exists because I knew that the problem was minor and I didn't want to pay the outrageous housecall price of a repairman. I read other customers' experiences on how they fixed the problem and that made it sooo easy! Basically unscrewed the screws on the far left and right on the top panel, folded it down toward front, unscrewed and unplugged the ground wire and replaced the part. Someone else had warned that the lid should be open to remove it and that was a huge time-saver. Thanks so much! The part was broken because of very poor design. The part actually worked fine, but the piece of thin plastic that held the part in place broke. Back to the drawing board Whirlpool.
Parts Used:

-
Jill from Alexandria, LA
-
Difficulty Level:Really Easy
-
Total Repair Time:15 - 30 mins
-
Tools:Screw drivers, Wrench (Adjustable)
23 of 25 people
found this instruction helpful.
Was this instruction helpful to you?
Thank you for voting!
Agitator was locked up
I had a little difficulty at first, trying to remove the back of the unit. I then figured out that the repair was to be made by leaning the washer back and removing it from underneath. That became really easy as the bottom is open.I had to remove one nut and then the agitator from inside, then tilt the machine back, disconnect the two hoses from the pump, remove three bolts and lower the motor/ transmission assembly. Then I had to disconnect the motor from the pump ( with two snap on clips) and remove the broken plastic coupling. The new coupling had a metal insert that seems to make it stronger than the original piece.I then just reversed the procedure to put it together again and it worked fine. The part was shipped immediately and I got it sooner than I expected so I greatly appreciate that. Overall it went well, and by the way, it was my daughters washer and she was happy as well.Thanks, Roger
Parts Used:
-
Roger from Palmyra, IN
-
Difficulty Level:Easy
-
Total Repair Time:30 - 60 mins
-
Tools:Nutdriver, Pliers, Screw drivers, Socket set
24 of 28 people
found this instruction helpful.
Was this instruction helpful to you?
Thank you for voting!
My washer stopped mid-cycle and acted completely dead
I thought the click of the lid switch sounded different so I pulled the top console and tested it for continuity in both positions and found none. When I by-passed the switch the washer started up, so I knew what the problem was. There are four screws involved to remove the console which reveals the lid switch to the left side. There's a single screw for a ground wire but the switch itself is simply snapped in place after disconnecting the wire harness plug (must be done with the lid open btw).
I was lucky to diagnose the problem accurately so that the first thing I suspected turned out to be the problem!
I was lucky to diagnose the problem accurately so that the first thing I suspected turned out to be the problem!
Parts Used:
-
Jeff from Ventura, CA
-
Difficulty Level:Really Easy
-
Total Repair Time:Less than 15 mins
-
Tools:Nutdriver, Screw drivers
22 of 23 people
found this instruction helpful.
Was this instruction helpful to you?
Thank you for voting!
In the spin cycle, drum would'nt spin unless assisted
First off unplug the machine then turned off H/C water supply and removed hoses, laid the machine on its side, removed 3 motor supp. bolts, loosened drum pulled out shaft and clutch assembly was right there. Also replaced coupling while it was apart. And to think, a svce company wanted 179.00 just to walk in my door and diagnose the pblm. Then, parts and labor were extra. Thanks for the help/advice, piece of cake!!!!!!!
Parts Used:

-
ANTHONY from NY, NY
-
Difficulty Level:Really Easy
-
Total Repair Time:30 - 60 mins
-
Tools:Nutdriver, Pliers, Screw drivers, Socket set
22 of 24 people
found this instruction helpful.
Was this instruction helpful to you?
Thank you for voting!
agitator making noise and didn't want to turn
I unsnapped the top of the mechanism and removed the agitor assembly, (I had already put together the new one,) I just had to unsrew the old one to get it out and screw in the new one. This took me less than 10 minutes from start to finish. My husband was away for the week and this was left up to me if I wanted it done. So I (a female) decided that I would attempt it.
A Piece of Cake. thanks to Parts Select, I have a few more years with this machine. I was really hating to purchase a new machine. So for less than $25.00 with no service call "I Fixed It!"
A Piece of Cake. thanks to Parts Select, I have a few more years with this machine. I was really hating to purchase a new machine. So for less than $25.00 with no service call "I Fixed It!"
Parts Used:
-
Jo Anne from Crossville, TN
-
Difficulty Level:Really Easy
-
Total Repair Time:Less than 15 mins
-
Tools:Socket set
21 of 22 people
found this instruction helpful.
Was this instruction helpful to you?
Thank you for voting!
Cog stripped causing agitator to not turn
Removed top cap on agitator w/ flathead screwdriver. Removed protective cap over bolt and cog housing shaft. Used 7/16 deep socket w/ extension to remove bolt. Removed housing where stripped cogs were located. Cogs seated loosely in shaft housing no tools required to remove cogs. Replaced cogs in housing, made sure everything was lined correctly. re-inserted housing into shaft. ,screwed bolt, replaced caps and works like new.
Parts Used:
-
Vicki from Houston, TX
-
Difficulty Level:Easy
-
Total Repair Time:Less than 15 mins
-
Tools:Screw drivers, Wrench set
22 of 25 people
found this instruction helpful.
Was this instruction helpful to you?
Thank you for voting!