















91142479890 Kenmore Cooktop - Instructions
Keep searches simple. Use keywords, e.g. "leaking", "pump", "broken" or "fit".
There was no heat on the coils.
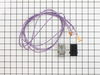
I opened the lid, and found that the terminal blocks were burnt, the wires were melted. I ordered one set of terminal block to replace the burnt one, and it worked. Before I started, I shut off the electricity in the whole house to be safe.
Parts Used:
-
Shaohui from East Lansing, MI
-
Difficulty Level:Easy
-
Total Repair Time:15 - 30 mins
-
Tools:Pliers
48 of 52 people
found this instruction helpful.
Was this instruction helpful to you?
Thank you for voting!
Surface burner coil did not work.
TURN OFF ALL POWER TO KITCHEN. Took off all burner coils and plates below them. Lift hood. Locate part. Remove old part and replace with new part in same way as was previously installed. The wire that comes with the kit is actually too much wire, but just arrange it the best you can and leave it....no big deal. I didn't have a magnet, but needed one. The wire from burner coil to switch runs through a harness which is screwed on to the body of the oven (below the range). Be careful NOT to drop it behind oven when taking it out. I dropped it and took forever to get it. That turned a 20 minuate job into an hour and a half. Otherwise this is an easy job that anyone can do. Refrigerator compressor is next. Have fun.
Parts Used:
-
Gregory from Mont Belvieu, TX
-
Difficulty Level:Easy
-
Total Repair Time:30 - 60 mins
-
Tools:Nutdriver, Screw drivers, Socket set
23 of 33 people
found this instruction helpful.
Was this instruction helpful to you?
Thank you for voting!
Previous home owners replaced 3 drip bowls with wrong style
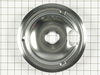
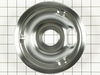
I removed the heating elements and the drip bowls (wrong style). I then positioned the correct drip bowls on the stove and reinserted the heating elements. I snapped the heating coils into the small slots on the far side of the bowls to make sure that the heating elements would lay flat.
The whole process took less than 2 minutes.
The whole process took less than 2 minutes.
Parts Used:
-
Diane from Corpus Christi, TX
-
Difficulty Level:Really Easy
-
Total Repair Time:Less than 15 mins
3 of 4 people
found this instruction helpful.
Was this instruction helpful to you?
Thank you for voting!
Old Terminal Block was arcing.
Cut Wires to old terminal block and wired in new Terminal Block
Parts Used:
-
Robert from HOUSTON, TX
-
Difficulty Level:Really Easy
-
Total Repair Time:15 - 30 mins
-
Tools:Screw drivers
1 person
found this instruction helpful.
Was this instruction helpful to you?
Thank you for voting!
Blackened and rusted drip bowls on range.
Pulled out heating elements, removed old drip bowls, replaced with new drip bowls, re-connected heating elements. Done! Looks like a new stove!
Parts Used:
-
Rachel from Franklin, TN
-
Difficulty Level:Really Easy
-
Total Repair Time:Less than 15 mins
0 of 1 people
found this instruction helpful.
Was this instruction helpful to you?
Thank you for voting!
stove top in rental home missing a chrome drip bowl
I installed the chrome drip bowl and plugged in the burner to make sure that it worked. Voila!! everything is now perfect and i have a happy renter. thank you so much for your fast delivery.
Parts Used:
-
Sheila from Wellton, AZ
-
Difficulty Level:Really Easy
-
Total Repair Time:Less than 15 mins
0 of 1 people
found this instruction helpful.
Was this instruction helpful to you?
Thank you for voting!
Slot to small
What I had to do was open the slot for the burner pan more as it would not fit properly in. So we snip the burner pan a little and now it fits great.
Parts Used:
-
Lori from Waterford, WI
-
Difficulty Level:Really Easy
-
Total Repair Time:Less than 15 mins
0 of 1 people
found this instruction helpful.
Was this instruction helpful to you?
Thank you for voting!
scorched burner drip bowls, plating peeled
It only took a few minutes to remove the old drip bowls and insert the new ones. No harder than cleaning! It's nice to cook things on my range now and not have drip bowls with scorched on food causing a fire hazard or setting off the smoke alarms.
Parts Used:
-
Charlene from Portland, OR
-
Difficulty Level:Really Easy
-
Total Repair Time:Less than 15 mins
Was this instruction helpful to you?
Thank you for voting!
Right Front [surface burner terminal block kit]
We did the repair by following the inclosed instructions. we are elderly retired average ages 82. This was our first repair and it went very well. We are so pleased to have saved over $80.00 compared with hired labor 3 yre. ago for the same part. Thanks so much for your good service.
Parts Used:
-
Wayne from Montoursville, PA
-
Difficulty Level:Really Easy
-
Total Repair Time:Less than 15 mins
-
Tools:Nutdriver, Screw drivers
Was this instruction helpful to you?
Thank you for voting!
Drip bowls very old and crusty
It was a piece of cake to replace them. Wish I had done it sooner with correct bowls, had purchased replacements from hardware store which were poor quality. :(
Parts Used:
-
Sherie from Tacoma, WA
-
Difficulty Level:Really Easy
-
Total Repair Time:Less than 15 mins
Was this instruction helpful to you?
Thank you for voting!
Burner was unreliable...would stop working...I had already replaced the burner
I did as the video suggested.....I cut the old wires and spliced new ones already attached to the new terminal block. It would have been nice to have some instructions with the parts as I expected one piece but had to connect the wires to the new block and the new metal cover. I was guessing a bit. Also, I needed to use the holder strip off my old part so that it displaced the new part back far enough to insert the burner connections. That meant finding a screw and nut small enough to allow the metal cover to fit on the block. But the burner works great. I've learned that any repair requires some ingenuity.
Parts Used:
-
Lelia from Vienna, VA
-
Difficulty Level:A Bit Difficult
-
Total Repair Time:15 - 30 mins
-
Tools:Pliers, Screw drivers
Was this instruction helpful to you?
Thank you for voting!
the wires were not long enough to use the original path.
the original path was from the right front control knob around the back of the range and left side of range,which i dismantaled to install the new wires to the right front burner. When I found them to be to short I had to also dismantal the right side so the wires could be routed there. The new wires worked fine but did take some extra time.
Parts Used:
-
Ronald L. from Cedaredge, CO
-
Difficulty Level:A Bit Difficult
-
Total Repair Time:30 - 60 mins
-
Tools:Nutdriver, Screw drivers
Was this instruction helpful to you?
Thank you for voting!
Missing knob
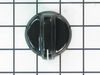
Went to the front door and retrieved package. Went to kitchen and grabbed scissors. Cut open the package. Cut open second package. Removed knob. Placed on thermostat control. I was nervous but i did it all by myself. I didn't have to ask my boyfriend for help. Seriously though. I was very happy with the turn around time. Thank you.
Parts Used:
-
Jennifer from Oshkosh, WI
-
Difficulty Level:Very Difficult
-
Total Repair Time:More than 2 hours
Was this instruction helpful to you?
Thank you for voting!
Drip pans. Seriously easy
Made my range look brand new. I originally had generic drip pans that rusted and look terrible. Hopefully these OEM ones last longer. Now the burners are level because they slot into the drip pan. Just pull the burners out with your hands and replace the pans. Very east.
Parts Used:
-
Karen from Norwich, CT
-
Difficulty Level:Really Easy
-
Total Repair Time:Less than 15 mins
Was this instruction helpful to you?
Thank you for voting!