EasyApplianceParts is now PartSelect! We've merged our sites to provide a better shopping experience for you.   Full Details

Find Parts

Parts Departments

Top Model Types

Top Brands

Repair Help

Expert Repair Videos

Keep typing for more specific results...

79097323410 Kenmore Range - Parts

1 - 12 of 56

Enter a part description. DIY Heroes keep it simple, eg. "belt" or "pump".

Search filter:
Clear Filter
Your search term must have 3 or more characters.
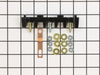
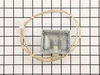
Main Terminal Block Kit – Part Number: 5304409888
$40.60
In Stock
Main Terminal Block Kit
★★★★★
★★★★★
(14)
Part #5304409888
Terminal block kits are also known as terminal boards, or terminal strips, and they are found in a wide variety of household appliances. Most often in ranges, wall ovens, and dryers. This kit attaches the power cord to the inner wiring of your appliance. If the terminal block is faulty, your appliance will not get the power it needs to operate properly. When removing the old block pay close attention to the wire placement, this will make installing your new part much easier. If you notice any of the wires or wire terminals are corroded or damaged they will also need to be replaced.
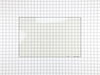
GLASS – Part Number: 5304503232
$95.93
In Stock
GLASS
★★★★★
★★★★★
(14)
Part #5304503232
This tempered glass is supplied by the original manufacturer and measures 20 inches by 13 inches. It is an inner door glass, designed for use in ranges/ovens and has several purposes which include providing heat insulation, acting as protective barrier, and providing an opening to monitor the cooking/heating process. Over time the glass can break or break from impact, thermal shock, or improper installation. If the glass is defective, it needs to be replaced promptly to avoid leaking, loss of insulation and potential harm to the user. Remove any fasteners or clips that secure the glass and carefully dispose of it. Position the new glass in the same position and secure it appropriately.
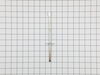
PROBE – Part Number: 5304525427
$46.18
In Stock
PROBE
Part #5304525427
This OEM-manufactured metal temperature sensor, or oven probe, measures and regulates the temperature within the oven. If you find that your food is being overcooked, undercooked, or is not cooking evenly, the sensor may be faulty. You can verify this by testing it with a multimeter or looking out for an error code on the control board. If you do not replace the broken sensor, your oven will run too hot or too cold. To replace the sensor, you first need to turn off the power to the oven and let it cool down. Access the probe inside the oven cavity, it is commonly attached to the rear wall. Using a screwdriver or pliers, remove any screws or clips that are securing the sensor in position. You may also need to unscrew or unclip the wire attached to the probe from the back of the oven. This sensor is sold as a single unit.
CLIP – Part Number: 316461700
$23.40
Special Order
CLIP
Part #316461700
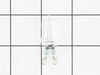
Light Bulb – Part Number: 318946500
$53.85
In Stock
Light Bulb
Part #318946500
This replacement light bulb provides clear illumination to improve visibility during appliance operation. It is commonly replaced when the original bulb burns out, flickers, or no longer produces adequate light.
LAMP ASSEMBLY – Part Number: 139001800
No Longer Available
LAMP ASSEMBLY
★★★★★
★★★★★
(1)
Part #139001800
This halogen lamp assembly in your oven illuminates the cavity and is often located near the back wall or on the ceiling, so that you can easily monitor the cooking progress of your food. It consists of a bulb and a protective cover. To check if it is broken, look for a burned-out or broken bulb, a cracked or missing cover, or loose connections. If the bulb does not light up despite being functional, there may be an issue with the assembly. Not replacing a damaged assembly can make it difficult to check your food or identify heating or spillage issues, so prompt replacement is essential. To remove your lamp assembly, first turn off the oven and allow it to cool down to avoid burns or electrical shock. If there is a separate power switch for the lamp assembly, turn it off. Alternatively, switch off the power at the circuit breaker for complete safety. Consult your user guide to find the wire connection point for the lamp assembly. You may need to remove a small cover or access panel to access it. Carefully unplug or detach the wire from the oven. Once the wire is disconnected, you can remove the entire lamp assembly from its mounting location. This OEM replacement part comes with a covered bulb and a wire connector.
Toe Panel Insulation – Part Number: 318372017
$29.60
In Stock
Toe Panel Insulation
Part #318372017
Hinge Bracket – Part Number: 316580800
$18.31
In Stock
Hinge Bracket
Part #316580800
Strap Ground – Part Number: 5304536404
$6.55
On Order
Strap Ground
Part #5304536404
Bodyside Bumper – Part Number: 318141910
$8.14
In Stock
Bodyside Bumper
Part #318141910
ELEMENT,RADIANT,100W,WARMER – Part Number: 140273621015
$44.23
In Stock
ELEMENT,RADIANT,100W,WARMER
Part #140273621015
SCREW – Part Number: 5303324184
$26.35
Special Order
SCREW
Part #5303324184
1 - 12 of 56