















79097213410 Kenmore Range - Instructions
Keep searches simple. Use keywords, e.g. "leaking", "pump", "broken" or "fit".
Cord was not tightened enough by delivery crew.
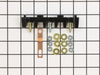
PF alarm appeared on display. Noticed clicking when cord was moved. Had arced for some time and melted original block. New part slightly different. Only has 3 lugs, old one had six. Stack using washers provided. Take note of colors before disassembly. Use caution while working through access opening. The edges are sharp. Only tools needed are phillips screwdriver, deep socket for lug nuts. Nut driver optional. Hope this is helpful.
Parts Used:
-
Timothy from Spring Valley, AL
-
Difficulty Level:Really Easy
-
Total Repair Time:15 - 30 mins
-
Tools:Screw drivers, Socket set
109 of 174 people
found this instruction helpful.
Was this instruction helpful to you?
Thank you for voting!
burned out burner
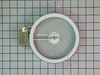
First we removed two screws under the rim of the range top to open the lid. Lifted the lid and removed the screws from the bracket that holds the elements, Be careful with the clips that hold the element in, if you break them or bend them there aren't any more! Also note which holes they were in, they are marked according to the different sizes of elements. Disconnected the wires, needed needlenose pliers to grip them...connected new element, popped it back in place, replaced bracket, closed top ...Easy peasy!!!
Parts Used:
-
Lori from Winter Haven, FL
-
Difficulty Level:Easy
-
Total Repair Time:Less than 15 mins
-
Tools:Pliers, Screw drivers
70 of 99 people
found this instruction helpful.
Was this instruction helpful to you?
Thank you for voting!
Switch Was Making A Arcing Sound When Burner Was On
Removed the back cover of the range. Removed the knob from the front of the switch. Removed 2 screws holding switch to range. Removed wires one at a time and connected to proper poles on replacement switch and reinstalled new switch on range
Parts Used:
-
Gerald from Paris, TN
-
Difficulty Level:Easy
-
Total Repair Time:15 - 30 mins
-
Tools:Screw drivers
59 of 83 people
found this instruction helpful.
Was this instruction helpful to you?
Thank you for voting!
Burned element
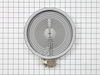
Flip up top, remove wires and two screws. Replace in opposite way. Turn off power to stove first.
Parts Used:
-
Tom from Wallingford, CT
-
Difficulty Level:Really Easy
-
Total Repair Time:Less than 15 mins
-
Tools:Nutdriver, Screw drivers
65 of 120 people
found this instruction helpful.
Was this instruction helpful to you?
Thank you for voting!
new switch was not wired like old one
i first replaced element after old smoked & quit. replaced switch but i noticed when i started to replace the wires one at a time something didn't seem right. after checking the #s on the old one, they didn't match up with the new one.luckily i had the stove diagram from a packet on the back of the stove. i traced each wire according to the diagram and everything worked out fine. i'm just glad i didn't replace each wire to wire.the #'s were on the switch where each wire went which was different than the org. even though they looked the same.
Parts Used:
-
PERRY from LECANTO, FL
-
Difficulty Level:A Bit Difficult
-
Total Repair Time:30 - 60 mins
-
Tools:Screw drivers
20 of 33 people
found this instruction helpful.
Was this instruction helpful to you?
Thank you for voting!
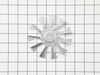
replacing the fan on a convection oven (fan was making a vibration noise)
This was the first time replacing the fan. It is a lot easier to work in the oven compartment with the oven door removed, only two screws on the door and the hinges were released. I found that a couple of the screws were either rusted or stripped so I used a pair of pliers to remove the screws that were holding the diffuser in place. Once there was access to the fan I found that the fan was warped and that the blades were scraping against the back wall of the oven. The next challenge was to remove the retaining nut. I used a sheet metal screw to secure the warped fan to keep it from spinning. once I figured out that you have to turn the retaining nut to the right to loosen, it came off easily. 1/2" socket with extension. When I replace the fan I used two washers for spacers to make sure that the fan would not scrape the wall of the oven. Its been tested many times and the oven does not make that horrible sound anymore.
Parts Used:
-
John from Stevensville, MD
-
Difficulty Level:A Bit Difficult
-
Total Repair Time:30 - 60 mins
-
Tools:Pliers, Screw drivers, Socket set
17 of 26 people
found this instruction helpful.
Was this instruction helpful to you?
Thank you for voting!
Old element connections different from new element
Disconnected power at breaker. Removed cooktop mounting screws, lifted top and propped in up position. Removed two screws and lowered two front burners mounting frame. Wiggled dual element free at the clips and proceeded to swap wires one at a time and realized the difference with connectors 1a and 2b much later when only the center portion was heating up. Finally figured out the problem and everything works as advertised. Pay attention if you own a Kenmore product.
Parts Used:
-
Frederic from KILLEEN, TX
-
Difficulty Level:A Bit Difficult
-
Total Repair Time:30 - 60 mins
-
Tools:Pliers, Screw drivers, Socket set
11 of 14 people
found this instruction helpful.
Was this instruction helpful to you?
Thank you for voting!
Element Burn out
-
Jesse from Forest, VA
-
Difficulty Level:Really Easy
-
Total Repair Time:Less than 15 mins
-
Tools:Nutdriver, Screw drivers
25 of 60 people
found this instruction helpful.
Was this instruction helpful to you?
Thank you for voting!
One section of heating element failed to heat.
Followed on-line instructions to remove the defective heating element. Some connection tabs on the replacement unit were different than the original. One tab was too wide to accept the stove's slip-on wire connector without fling down the tab width on the heating element. Thanks to some on-line instructions, wire connections to element 1a and 2a had to be reversed. If not for those instructions I would probably have ended up sending the unit back to the supplier, as an incorrect replacement !
Parts Used:
-
Fred from VESTAL, NY
-
Difficulty Level:A Bit Difficult
-
Total Repair Time:1- 2 hours
-
Tools:Pliers, Screw drivers
7 of 7 people
found this instruction helpful.
Was this instruction helpful to you?
Thank you for voting!
2 elements stopped working.
My husband followed the video instructions and it was easy to fix.
Parts Used:
-
Ruth from MORGANTOWN, WV
-
Difficulty Level:Really Easy
-
Total Repair Time:30 - 60 mins
-
Tools:Nutdriver
9 of 14 people
found this instruction helpful.
Was this instruction helpful to you?
Thank you for voting!
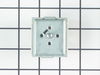
The front left dual element stopped regulating temperature
Replaced the dual element switch and that fixed it up
Parts Used:
-
Miguel from PLANT CITY, FL
-
Difficulty Level:Really Easy
-
Total Repair Time:15 - 30 mins
-
Tools:Nutdriver, Screw drivers
6 of 6 people
found this instruction helpful.
Was this instruction helpful to you?
Thank you for voting!
Top oven overheating
Have a double wall oven and the top oven would not shut off or broiler part would stay on and burn tops of food. Since bottom oven was not having any issues felt like it could
Not be control panel so decided to try the temp sensor. Since replacing oven has worked properly.
Not be control panel so decided to try the temp sensor. Since replacing oven has worked properly.
Parts Used:
-
Ronald from NEVADA, MO
-
Difficulty Level:Very Easy
-
Total Repair Time:Less than 15 mins
-
Tools:Screw drivers
8 of 12 people
found this instruction helpful.
Was this instruction helpful to you?
Thank you for voting!
old element coil burned apart breaking the circuit.
removed the old burner and put the new one in it's place.
Parts Used:
-
James from WARRENTON, MO
-
Difficulty Level:A Bit Difficult
-
Total Repair Time:15 - 30 mins
-
Tools:Nutdriver, Screw drivers
6 of 8 people
found this instruction helpful.
Was this instruction helpful to you?
Thank you for voting!
The elements were not heating up
It was really easy just unplugged it took off the back cover changed the part out put back cover on plugged it in and the elements were working great!
Parts Used:
-
Tanya from KALISPELL, MT
-
Difficulty Level:Really Easy
-
Total Repair Time:15 - 30 mins
-
Tools:Screw drivers
6 of 8 people
found this instruction helpful.
Was this instruction helpful to you?
Thank you for voting!
Burner indicator light lense broke off
The light apparatus was loose behind the panel. Remove the remaining part of the lens. Install the new lens from the outside of the panel and hold it in position, protruding into the inside of the panel. Slide the light apparatus onto the lens from the inside, allowing the bracket to hold it in place - it will be spring loaded, which will hold it in place.
Parts Used:
-
Kathy from NEW BERN, NC
-
Difficulty Level:Really Easy
-
Total Repair Time:Less than 15 mins
-
Tools:Nutdriver
5 of 5 people
found this instruction helpful.
Was this instruction helpful to you?
Thank you for voting!