















79095751990 Kenmore Range - Instructions
Keep searches simple. Use keywords, e.g. "leaking", "pump", "broken" or "fit".
Back Burner didn't function
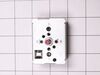
We moved into our townhouse about 6 yrs ago. During the home inspection we checked the range and saw the Red light come on when we turned on each burner. After moving in we realized the large back burner did not work. The light came on but the element never got hot. I of course replaced the element but that did not work. Several years passed and we just ignored the issue. We just got by with 3 burners. Lately we realized how much easier it would be to have all four burners working. Knowing that we will be selling our townhome soon we figured we should either fix the problem or replace the range.
I didn't want to call a repair man because I didn't want to be charged a $150 to have him come out and they to pay extra for parts (and of course a 2nd visit). So I went to www.Partselect.com and typed in the model of my range. Found the diagrams for my range and saw that from the switch ran a pair of wires to a Universal Receptacle (aka Terminal Block Kit). I figured since the Red light turns on when I turn the switch on it has to be the Terminal Block.
I ordered the part from www.Partselect.com ($14.00 including shipping) and replaced the part. The burner still would not get hot. I decided to test the switch. I removed the Control Panel cover (which is secure by 2 screws just below the digital clock). Once the cover was off, I saw the Blue wires going from the switch to the Terminal Block. To test the switch, I disconnected the two Blue Wires from connectors H1 and H2 and temporarily connected them to H1 and H2 of another switch. Sure enough, when I turned the other switch the element got hot.
So I placed another order from www.Partselect.com for a replacement switch ($50 including shipping). When that part came, I flipped the electrical circuit going to the range. I then removed the Control Panel cover again. With the new switch in hand (holding it near the old switch still attached to the Control Panel, I used the pliers to pull out each wire from it's connector and place it to it's corresponding connector on the new switch. Once all the wires were connected to the new switch, I pulled the knob of the switch off then used a phillips screwdriver to remove the two screws holding the switch to the control panel. I replaced the old switch with the new one put the screws back in, replaced the knob. Turned the circuit back on and tested to make sure that the element got hot. When it did, then I replaced the Control Panel cover and enjoyed a nice dinner that was cooked in less time than we're accustomed to because of the new burner. So I spent a total of $64.00 to fix our range. Less than half the amount I would've spent if I called for a technican. And far less then buying a new range.
Partselect is a great resource for information. They have diagrams and schematics available to view and/or download. And when ordering it's a snap because there's an "Add to Cart" button next to each part it lists. So there's no confusion. I've already recommended Partselect.com to about 5 people. And will continue to do so!!
I didn't want to call a repair man because I didn't want to be charged a $150 to have him come out and they to pay extra for parts (and of course a 2nd visit). So I went to www.Partselect.com and typed in the model of my range. Found the diagrams for my range and saw that from the switch ran a pair of wires to a Universal Receptacle (aka Terminal Block Kit). I figured since the Red light turns on when I turn the switch on it has to be the Terminal Block.
I ordered the part from www.Partselect.com ($14.00 including shipping) and replaced the part. The burner still would not get hot. I decided to test the switch. I removed the Control Panel cover (which is secure by 2 screws just below the digital clock). Once the cover was off, I saw the Blue wires going from the switch to the Terminal Block. To test the switch, I disconnected the two Blue Wires from connectors H1 and H2 and temporarily connected them to H1 and H2 of another switch. Sure enough, when I turned the other switch the element got hot.
So I placed another order from www.Partselect.com for a replacement switch ($50 including shipping). When that part came, I flipped the electrical circuit going to the range. I then removed the Control Panel cover again. With the new switch in hand (holding it near the old switch still attached to the Control Panel, I used the pliers to pull out each wire from it's connector and place it to it's corresponding connector on the new switch. Once all the wires were connected to the new switch, I pulled the knob of the switch off then used a phillips screwdriver to remove the two screws holding the switch to the control panel. I replaced the old switch with the new one put the screws back in, replaced the knob. Turned the circuit back on and tested to make sure that the element got hot. When it did, then I replaced the Control Panel cover and enjoyed a nice dinner that was cooked in less time than we're accustomed to because of the new burner. So I spent a total of $64.00 to fix our range. Less than half the amount I would've spent if I called for a technican. And far less then buying a new range.
Partselect is a great resource for information. They have diagrams and schematics available to view and/or download. And when ordering it's a snap because there's an "Add to Cart" button next to each part it lists. So there's no confusion. I've already recommended Partselect.com to about 5 people. And will continue to do so!!
Parts Used:
-
William from Burke, VA
-
Difficulty Level:Easy
-
Total Repair Time:15 - 30 mins
-
Tools:Screw drivers
134 of 150 people
found this instruction helpful.
Was this instruction helpful to you?
Thank you for voting!
Cord was not tightened enough by delivery crew.
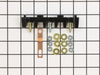
PF alarm appeared on display. Noticed clicking when cord was moved. Had arced for some time and melted original block. New part slightly different. Only has 3 lugs, old one had six. Stack using washers provided. Take note of colors before disassembly. Use caution while working through access opening. The edges are sharp. Only tools needed are phillips screwdriver, deep socket for lug nuts. Nut driver optional. Hope this is helpful.
Parts Used:
-
Timothy from Spring Valley, AL
-
Difficulty Level:Really Easy
-
Total Repair Time:15 - 30 mins
-
Tools:Screw drivers, Socket set
107 of 172 people
found this instruction helpful.
Was this instruction helpful to you?
Thank you for voting!
burned out burner
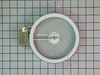
First we removed two screws under the rim of the range top to open the lid. Lifted the lid and removed the screws from the bracket that holds the elements, Be careful with the clips that hold the element in, if you break them or bend them there aren't any more! Also note which holes they were in, they are marked according to the different sizes of elements. Disconnected the wires, needed needlenose pliers to grip them...connected new element, popped it back in place, replaced bracket, closed top ...Easy peasy!!!
Parts Used:
-
Lori from Winter Haven, FL
-
Difficulty Level:Easy
-
Total Repair Time:Less than 15 mins
-
Tools:Pliers, Screw drivers
70 of 97 people
found this instruction helpful.
Was this instruction helpful to you?
Thank you for voting!
Oven light receptacle broken - bulb base broke off
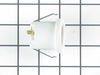
Turned power off at electrical panel. Pulled oven away from wall. Removed back cover (6 screws), then unplugged wires from old receptacle. I had to pull the squeeze clips backwards & break them to remove the old receptacle - couldn't squeeze them enough to remove them otherwise. The old receptacle came out through the inside of the oven, and the new one snapped in easily from inside the oven as well. Replaced wiring, installed new bulb, restored power & tested. Replaced back cover. Good time to vacuum under/behind where the oven usually lives before sliding it back to the wall.
Parts Used:
-
Paul from Spokane Valley, WA
-
Difficulty Level:Easy
-
Total Repair Time:30 - 60 mins
-
Tools:Screw drivers
69 of 111 people
found this instruction helpful.
Was this instruction helpful to you?
Thank you for voting!
Internal glass broke on the oven door
All the was needed was a Phillips screw driver. It's not difficult. Watch out because the door is spring loaded and does seperate quickly after all the screws are out. Be sure to watch the front panel, it appears to be heavy glass and can come out of the slots during the repair. I only had to re-assemble and dis-assemble 4 times before I got it right but it's still fairly easy to do if you take your time.
Parts Used:

-
EDWARD from PHOENIX, AZ
-
Difficulty Level:Easy
-
Total Repair Time:30 - 60 mins
-
Tools:Screw drivers
41 of 43 people
found this instruction helpful.
Was this instruction helpful to you?
Thank you for voting!
If burner was placed on HIGH, it wouldnt lower heat once LOW setting chosen
I had to replace the switch in the back of the control knobs. I was very grateful to the female phone attendant who answered my call. Since my part number had switched a few times, she took the time to reverify the "blueprints" of my machine with the parts carried at Parts Select and she helped me be assured that I was buying the correct part for my machine. She was SOOOO helpful. Will definately buy again from your store.
Parts Used:
-
Juilo from Lake City, FL
-
Difficulty Level:Really Easy
-
Total Repair Time:15 - 30 mins
-
Tools:Pliers, Screw drivers
38 of 40 people
found this instruction helpful.
Was this instruction helpful to you?
Thank you for voting!
Front Burner was on high all the time when on
Turn off the breaker to the stove. Very important because when you move the control panel around after removing it, you can inadvertently touch a hot wire to a grounded metal part on the stove. Remove the 3 nuts from the back of the control panel and the two nuts from under neath the control panel on either far side. Pull the control knob off by pulling straight away from the control panel. Remove the switch by unscrewing the two screws. Match the 5 wires from the old switch to the new switch by removing one at a time and paying attention to the labeling of each on both switches. Reassemble in reverse order. Turn breaker back on.
Parts Used:
-
Gregory from Monument, CO
-
Difficulty Level:Easy
-
Total Repair Time:15 - 30 mins
-
Tools:Nutdriver, Screw drivers
32 of 36 people
found this instruction helpful.
Was this instruction helpful to you?
Thank you for voting!
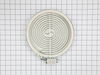
rf burner was not working
First I removed 2 screws that held the stove top in place. Raised the stove top and support it. Then, I removed the hold down spring for the burner and removed three wires from the old burner. I found that the connector on the white wire was spread open too much so I crimped it closed for a better fit on the terminal. I reattached the three wires, put the hold down spring back in place, lowered the stove top and installed the 2 screws. JOB DONE
Parts Used:
-
Neil from Jessup, PA
-
Difficulty Level:Really Easy
-
Total Repair Time:Less than 15 mins
-
Tools:Screw drivers
34 of 48 people
found this instruction helpful.
Was this instruction helpful to you?
Thank you for voting!
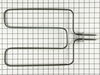
Broiler element burned out
Remove old element by removing two screws on back wall of oven, pull attached wires out about 6" and disconnect. Reverse to install, very easy. Of course the oven door makes it harder to get at things, but it all worked out. Partselect was the only place I could find the element since the stove is 18 years old. I love keeping appliances going as long as possible.
Parts Used:
-
louis from cuba, NY
-
Difficulty Level:Easy
-
Total Repair Time:15 - 30 mins
-
Tools:Socket set
27 of 34 people
found this instruction helpful.
Was this instruction helpful to you?
Thank you for voting!
Oven wouldn't heat up-panel kept showing F-3
Pulled out the stove, removed the screws that held on the back panel, took out the 2 screws that held in the element and disconnected the wires and put the new one in. I put the screw back in and was finished!
Parts Used:
-
Marilyn from Richmond, MO
-
Difficulty Level:Really Easy
-
Total Repair Time:15 - 30 mins
-
Tools:Pliers, Screw drivers
25 of 30 people
found this instruction helpful.
Was this instruction helpful to you?
Thank you for voting!
Lens missing for burner "on" indication
Lifted the oven top, removed the controls cover, slipped the lens into the hole and slid the light holder device onto the lens
Parts Used:
-
Carol from Houma, LA
-
Difficulty Level:Really Easy
-
Total Repair Time:Less than 15 mins
-
Tools:Screw drivers
22 of 28 people
found this instruction helpful.
Was this instruction helpful to you?
Thank you for voting!
Large burner would turn on high and not cycle off
TURN BREAKER TO RANGE OFF! Move range out to access rear of the unit. Remove 6 screws to gain access to rear of controls panel. Pull knob off switch. Remove 2 pan head Phillips screws to take switch out. Lugs not in matching pattern but are clearly labled, swap wires one at a time. Reverse the disassembly steps and push the range back in place. DONE
Parts Used:
-
Kevin from Nashville, TN
-
Difficulty Level:Really Easy
-
Total Repair Time:Less than 15 mins
-
Tools:Nutdriver, Pliers, Screw drivers
17 of 20 people
found this instruction helpful.
Was this instruction helpful to you?
Thank you for voting!
burner knob post busted off....and burner element burned out
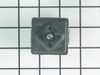
My husband opened the oven door.He removed the metal strip at the top just under where the knobs are.I held the top of the stove up while he unscrewed the 2 screws on either side of where the knob goes and he unplugged the connectors on the switch assembly one at a time a reconnected the new ones. We slid the post through the hole and lined up the two holes put the screws back in. Walah. I cont. holding up stove he got a socket to unscrew the strip holding the back elements in place. He undid just the one side used pliers to squeeze clamp together pushed the little post through the slot....unplugged the connectors keeping track of them. He used a screwdriver to unscrew clamps to screw them onto the new element at the same number as he took them off the old element. We popped the new element back in hooking up all connectors poked the little clamp posts through the holes attached the screw that is the strip holding elements in place. We closed the stovetop We lined the metal strip up at top of oven door underneath the knobs and put the 4 screws back in and closed the door. Done. I would say it took maybe 30 min.if that. Works like a champ.
Parts Used:
-
Terri from Seabeck, WA
-
Difficulty Level:Really Easy
-
Total Repair Time:15 - 30 mins
-
Tools:Screw drivers, Socket set
19 of 27 people
found this instruction helpful.
Was this instruction helpful to you?
Thank you for voting!
glass broke while self cleaning.
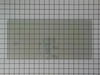
i had to remove all the broken glass then removed the metal that was holding the glass. set the new glass in the metal strips and screwed it back togethr. i also had to remove the frame from the door in order to get to the inside glass. then i had to put the door back together.
Parts Used:
-
MARY from GARNERVILLE, NY
-
Difficulty Level:Easy
-
Total Repair Time:30 - 60 mins
-
Tools:Screw drivers
16 of 24 people
found this instruction helpful.
Was this instruction helpful to you?
Thank you for voting!
Inside oven glass was cracked
The repair was fairly easy. The oven door was attached to a spring arm that had one screw holding each arm to the door. Once off, the outside set of screws were removed and saved in a small dish. Each section had 6-10 screws, to it's best to keep each set separate from each other. Each of the three layers (of the door) came apart easily by removing the screws for each section. The inside (broken glass) lifted out, was replaced, and the sequence was repeated in reverse. During the reassembly I was able to clean the other layers of glass that had gotten build-up on them over the years. Total time start to finish was about 30 minutes. Only tool required was a screw driver! Probably saved 100+ dollars!
Parts Used:

-
JOSEPH from PATASKALA, OH
-
Difficulty Level:Easy
-
Total Repair Time:15 - 30 mins
-
Tools:Screw drivers
12 of 14 people
found this instruction helpful.
Was this instruction helpful to you?
Thank you for voting!