TURN BREAKER TO RANGE OFF! Move range out to access rear of the unit. Remove 6 screws to gain access to rear of controls panel. Pull knob off switch. Remove 2 pan head Phillips screws to take switch out. Lugs not in matching pattern but are clearly labled, swap wires one at a time. Reverse the disassembly steps and push the range back in place. DONE
Block terminal burnt out, hot plate not working, needed to replace the terminal block
This should take approx 15-30 mins. It took me 1.5 hours as I pushed the terminals into the wrong end of the block. It's very difficult to get them out when you do that... However, there are no easy instructions on the block or in the instructions to tell you which end to push the terminals into!!! So, with a 50:50 chance of getting it right, I got it wrong. I think most people would need to buy a new part if they do this. It would be very much easier if the block, had an arrow that simply said IN here so that this type of simple mistake is less easy to do... If you get that right, the fix is quite and straight forward. Good luck.
i first replaced element after old smoked & quit. replaced switch but i noticed when i started to replace the wires one at a time something didn't seem right. after checking the #s on the old one, they didn't match up with the new one.luckily i had the stove diagram from a packet on the back of the stove. i traced each wire according to the diagram and everything worked out fine. i'm just glad i didn't replace each wire to wire.the #'s were on the switch where each wire went which was different than the org. even though they looked the same.
oven would not heat up error code F10 showing on veiw screen
move the range out and unplug power supply, removing the back cover allows access to the probe, this can be done with screw driver or nut driver, loosen clamp that holds power cord in place and move backing out of the way, be careful sheet metal can be sharp, locate the probe unplug the connector and remove screw holding probe, pull old probe out install new probe, fasten down and plug in connector. attach backing and tighten clamp on power cord, plug in to power supply, turn on oven and give it several minutes for probe to work, it took only 20 minutes to replace the bad probe and the oven works like new hop this helps
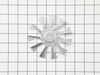
replacing the fan on a convection oven (fan was making a vibration noise)
This was the first time replacing the fan. It is a lot easier to work in the oven compartment with the oven door removed, only two screws on the door and the hinges were released. I found that a couple of the screws were either rusted or stripped so I used a pair of pliers to remove the screws that were holding the diffuser in place. Once there was access to the fan I found that the fan was warped and that the blades were scraping against the back wall of the oven. The next challenge was to remove the retaining nut. I used a sheet metal screw to secure the warped fan to keep it from spinning. once I figured out that you have to turn the retaining nut to the right to loosen, it came off easily. 1/2" socket with extension. When I replace the fan I used two washers for spacers to make sure that the fan would not scrape the wall of the oven. Its been tested many times and the oven does not make that horrible sound anymore.
First I unpluggd the range and removed the back cover using a nut driver. Then I removed the knob by pulling (using a little force),Not very hard to do. I uscrewed two screws that hold the switch from the front of the range. Then I pulled the switch out about three inches and used pliers to disconnect the wires one at a time and connect them to the new switch. finally I finished the installation by reversing all the steps. Total time to install the switch took approximately 5(five) minutes.
Took upper back off ( 6 screws), chech to be sure was right switch, pulled spade clip wires of, put on new switch, checked to see that it worked, replace cover.
Both front burners began heating too fast and too high. One damaged the finish on the splash pan.
At the Frigidaire parts website, I found the parts and saw that there are videos that show how to replace the burner controls. In brief: 1) Slide the range/oven out so you can get to the back of the control hood. 2) There are three screws that hold the cover in place (the video showed four). 2a) The video also suggests using a #1 square bit. I found that there was indeed a square hole in the caps of the screws, but they also had a hex head that a 1/4" hex nut driver fits. So I used that. 2b) Be careful taking out the last (top center) screw. When it comes free, the cover can drop and bruise or cut your foot or the floor. Having a helper is worth it! 3) The switch for the larger elements has a red dot on front and back. Match it with the one in place that has a red dot. The switch for the small element doesn't have a dot. 3a) Holding a new switch in your hand, remove one wire at a time from the switch in the control hood and put it in the same place on the new switch. I found that for my stove, there was a fixture holding two wires and another holding three wires. This made it impossible to put the wires on wrong. 3b) When all wires have been transferred, pull off the control knob in front and unscrew the two screws that hold the old switch in place. Take out the old switch and replace it with the new switch. 3c) Use the two screws to attach the new switch in its place and replace the control knob. 4) Repeat for as many switches as you purchased. I did all four. 5) Replace the cover. 6) Slide the range back into place.
I found black deposits on all the switches, that must have come from a contactor inside, so I was glad I replaced them all.
Another tip: while the unit is out, clean off the sides and back that you couldn't get to while it was in place. For us, this took as long or longer than the steps above for replacing the switches.