Enter the code DIYDAD10 at checkout to apply your discount. Discount will be applied at checkout when the code is entered & applies to all parts. Cannot be combined with any other coupon or special offer & cannot be applied to a previously placed order. Not valid toward tax or shipping & handling. Discount has no cash value. Discount expires on June 17 at 11:59pm EST.
You've Got 10% Off Your First Order!Save 10% with code at checkout *click to copy coupon code
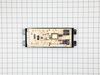
Pulled oven away from wall and unplugged. Removed back panel with nut driver. Took a picture of wiring on bad clock/timer. Removed wiring and installed new one.
oven would not heat up error code F10 showing on veiw screen
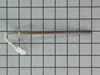
move the range out and unplug power supply, removing the back cover allows access to the probe, this can be done with screw driver or nut driver, loosen clamp that holds power cord in place and move backing out of the way, be careful sheet metal can be sharp, locate the probe unplug the connector and remove screw holding probe, pull old probe out install new probe, fasten down and plug in connector. attach backing and tighten clamp on power cord, plug in to power supply, turn on oven and give it several minutes for probe to work, it took only 20 minutes to replace the bad probe and the oven works like new hop this helps
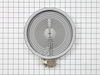
Old element connections different from new element
Disconnected power at breaker. Removed cooktop mounting screws, lifted top and propped in up position. Removed two screws and lowered two front burners mounting frame. Wiggled dual element free at the clips and proceeded to swap wires one at a time and realized the difference with connectors 1a and 2b much later when only the center portion was heating up. Finally figured out the problem and everything works as advertised. Pay attention if you own a Kenmore product.
Followed on-line instructions to remove the defective heating element. Some connection tabs on the replacement unit were different than the original. One tab was too wide to accept the stove's slip-on wire connector without fling down the tab width on the heating element. Thanks to some on-line instructions, wire connections to element 1a and 2a had to be reversed. If not for those instructions I would probably have ended up sending the unit back to the supplier, as an incorrect replacement !
Your service was OUTSTANDING...Ordered one afternoon, and before lunch time the next day, the delivery man rang my door bell...Thanks a bunch for you excellent service.....
Oven light stayed on & smelled like electrical burning.
Wife was cooking our thanks giving turkey, when an oder of burning was noticed. I walked over to the oven and smelled the area of oven light, it was bad. I turned off and unpluged oven. Got a screw driver, unscrewed 4 screws then noticed the burned switch from under the oven top. removed 3 wires, covered w/ elec. tape, and pulled oven light switch out front. looked at part number and ordered online. We were able to cook our turkey and enjoyed our meal.
When the part arrived, I open the box. Cut off my breaker to the range. Pulled back the stove and unscrewed the back. Located the probe, unscrewed the one screw that held it in. I then unclamped the white connectors, remove the old probe, replaced it with the new one reclamped the connectors. Screwed it back into the range. Replaced the back and screwed that back together. It was so easy I was very proud of my self. I cut the breaker back on and cooked a can of biscuits just to see if it really worked. And it did. My bread was not burned, it was cooked to perfection.
The light apparatus was loose behind the panel. Remove the remaining part of the lens. Install the new lens from the outside of the panel and hold it in position, protruding into the inside of the panel. Slide the light apparatus onto the lens from the inside, allowing the bracket to hold it in place - it will be spring loaded, which will hold it in place.
While removing burned out light bulb, the glass cover fell to the floor of the oven and broke!!
Husband very ill in bed. It's up to me!! Got a new bulb at HomeDepot and figured out how to get that wire 'thing' back in and the new glass cover installed. I DID IT!! WOW! My husband has always done these jobs around the house.......but now it's up to me.......and I'm not so dumb after all! I DID IT!! Now everyone who comes in the house.....I show them what I DID!! :-)
With no install instructions (NOT good for diy-ers), looked through reviews and watched video for help. Replacement part - not same as original. Had to use magnifying glass to id the terminals / take a picture before disassembly. reassembled - found out terminals are different & black wire is too short. Took off element - rotated the clips one number counter clockwise, reassembled - removed black wire from harness for extra reach. Hooked up, lowered top for test. power on - everything OK. Power off - complete assembly. Power on - test. Seems to be good. When I called customer service for assistance because there was no instruction, they told me I should contact a local appliance repair person. (big joke).
Replaced switch by according to video with no issues, Terminals were nearly identical as the new switch.
The terminals on the new burner were not located in the same position as the terminals on the old burner. I had to reference the wiring diagram to locate the correct wire to terminal location. There was not enough slack in the wires to position the new burner in the same position as the old burner. I had to rotate the new burner so the wires would reach. This cause me to have to rotate the warming burner because rotating the new burner, the terminals interfered with the terminals on the warming burner. I also had to reposition some of the wires so they would not contact the burner and terminals.