















79075603704 Kenmore Range - Instructions
Keep searches simple. Use keywords, e.g. "leaking", "pump", "broken" or "fit".
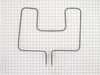
oven element broken
The repair was simple; first I removed the 2 screws from the old element and disconnected the wires and then I inserted the new element reconnected the wires and replaced the screws . The repair was easy and took less that 15 min. The oven works as good as new and I saved alot of money by doing it myself.
Parts Used:
-
Van from Sanford, NC
-
Difficulty Level:Really Easy
-
Total Repair Time:Less than 15 mins
-
Tools:Screw drivers
169 of 194 people
found this instruction helpful.
Was this instruction helpful to you?
Thank you for voting!
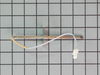
Oven not heating to desired temperature
Replaced clock control by removing surface burner control knobs and plastic nuts, and then the cover over the oven control. Two screw hold the clock in place, after removal and disconnecting the plug-in you can reinstall the new clock control. The Heat Sensor inside the oven will also need to be replaced. It is located inside the oven and attached with two screws; the back of the oven will need to be removed to unplug. Reverse removal procedure and turn the power back on to the stove.
Parts Used:
-
Dan from Bellevue, ID
-
Difficulty Level:Easy
-
Total Repair Time:15 - 30 mins
-
Tools:Screw drivers
155 of 242 people
found this instruction helpful.
Was this instruction helpful to you?
Thank you for voting!
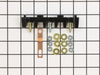
Cord was not tightened enough by delivery crew.
PF alarm appeared on display. Noticed clicking when cord was moved. Had arced for some time and melted original block. New part slightly different. Only has 3 lugs, old one had six. Stack using washers provided. Take note of colors before disassembly. Use caution while working through access opening. The edges are sharp. Only tools needed are phillips screwdriver, deep socket for lug nuts. Nut driver optional. Hope this is helpful.
Parts Used:
-
Timothy from Spring Valley, AL
-
Difficulty Level:Really Easy
-
Total Repair Time:15 - 30 mins
-
Tools:Screw drivers, Socket set
109 of 174 people
found this instruction helpful.
Was this instruction helpful to you?
Thank you for voting!
Broil element wasn't working...
I pulled my unit out of the wall and noticed that the insulation around the top broiler element was a bit brown. Closer inspection revealed that the element had shorted somehow to the oven itself and caused the element to become non-functional. I tried measuring the resistance first, and it was within typical values for the other elements, but I decided to replace the element anyway.
I ordered from PD and the part arrived just a few days letter by regular shipping. I undid the screws holding in the element, undid the wire connectors and replaced the broken element with the new one. The element worked like a charm and I was back in business for cooking.
I ordered from PD and the part arrived just a few days letter by regular shipping. I undid the screws holding in the element, undid the wire connectors and replaced the broken element with the new one. The element worked like a charm and I was back in business for cooking.
Parts Used:

-
Kevin from Alexandria, VA
-
Difficulty Level:Really Easy
-
Total Repair Time:Less than 15 mins
-
Tools:Screw drivers
93 of 132 people
found this instruction helpful.
Was this instruction helpful to you?
Thank you for voting!
lower element burned out
PartsSelect serivce was AMAZING - I ordered online on Sunday afternoon, and the part arrived Tuesday with standard shipping! First I removed the two screws that hold the element in place. I then pulled the element out about 3 inches and disconnected the two wires from the old element, then replaced with new. WARNING - you MUST kill the breaker, because the element is "hot" even when it's off.
Parts Used:
-
Michael from Pleasant View, TN
-
Difficulty Level:Easy
-
Total Repair Time:15 - 30 mins
-
Tools:Screw drivers
53 of 55 people
found this instruction helpful.
Was this instruction helpful to you?
Thank you for voting!
I had a fire in the oven and the unit had split apart.
I removed the two screws and then used pliers to pry apart the wiring. I unplugged the connectors and removed the element. The new unit arrived in three days and I plugged it in, replaced the screws and turned the oven on and made a pie! Very Satisfying and easier then I ever thought it would be. We figured we saved $200.00. The service place where we live charges $125.00 to come out and assess and then parts and service on top of that.
Parts Used:
-
susan from bainbridge Island, WA
-
Difficulty Level:Really Easy
-
Total Repair Time:Less than 15 mins
-
Tools:Screw drivers
23 of 26 people
found this instruction helpful.
Was this instruction helpful to you?
Thank you for voting!
Bake Element burned out
Took out the bad element and replaced it with the new element in less than 5 minutes. Simple Stuff with the right part. Thanks Parts Select!
Parts Used:
-
John from Albrightsville, PA
-
Difficulty Level:Really Easy
-
Total Repair Time:Less than 15 mins
-
Tools:Screw drivers
18 of 19 people
found this instruction helpful.
Was this instruction helpful to you?
Thank you for voting!
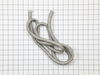
the gasket around the oven door was severly scorced and hard. Would no longer seal door.
Easier than painting my toenails!! The gasket came out easily just by pulling with my hands. Replacing it with the new one was even simpler. The clips are already attached to the gasket and easily slip into the holes on the door. I used the end of a tupperware orange peeler to push the unfinished ends of the gasket into a slot at the bottom and that was it! A new, perfect seal and it looks and works great!
Parts Used:
-
Vicki from Warrenton, MO
-
Difficulty Level:Really Easy
-
Total Repair Time:Less than 15 mins
14 of 14 people
found this instruction helpful.
Was this instruction helpful to you?
Thank you for voting!
Oven would not maintain correct set temperature.
Removed electrical connector and two screws. Attached the electrical connector to the new probe and attached with the two screws.
Parts Used:
-
Barbara from RAINBOW CITY, AL
-
Difficulty Level:Very Easy
-
Total Repair Time:Less than 15 mins
-
Tools:Screw drivers
17 of 26 people
found this instruction helpful.
Was this instruction helpful to you?
Thank you for voting!
replacing the fan on a convection oven (fan was making a vibration noise)
This was the first time replacing the fan. It is a lot easier to work in the oven compartment with the oven door removed, only two screws on the door and the hinges were released. I found that a couple of the screws were either rusted or stripped so I used a pair of pliers to remove the screws that were holding the diffuser in place. Once there was access to the fan I found that the fan was warped and that the blades were scraping against the back wall of the oven. The next challenge was to remove the retaining nut. I used a sheet metal screw to secure the warped fan to keep it from spinning. once I figured out that you have to turn the retaining nut to the right to loosen, it came off easily. 1/2" socket with extension. When I replace the fan I used two washers for spacers to make sure that the fan would not scrape the wall of the oven. Its been tested many times and the oven does not make that horrible sound anymore.
Parts Used:

-
John from Stevensville, MD
-
Difficulty Level:A Bit Difficult
-
Total Repair Time:30 - 60 mins
-
Tools:Pliers, Screw drivers, Socket set
17 of 26 people
found this instruction helpful.
Was this instruction helpful to you?
Thank you for voting!
My inner glass shattered during the cleaning cycle.
I looked online and read what other people had done. The best advice was keeping all the screws in the order they were taken out. I also separated the screws that had come from the top, sides and inner side of the door. This helped immensely as I reassembled the door. I spread out a heavy garbage bag that I cut open. This kept debris and glass off of my kitchen floor. This is NOT a difficult repair; Parts Select said it would take three days to get me the glass; it arrived in TWO! Start to finish, the entire job took just about an hour. I saved myself over $100, and again, this is NOT difficult!
Parts Used:
-
Christie from Prairie Villiage, KS
-
Difficulty Level:Easy
-
Total Repair Time:30 - 60 mins
-
Tools:Screw drivers
15 of 21 people
found this instruction helpful.
Was this instruction helpful to you?
Thank you for voting!
Noticed oven was heating but upper element not coming on.
Removed two screws holding broiler element. Released two spring hangers on near the front of the element. Pulled element away from oven and pulled two wire connectors off. Simply reverse process to install new one. Wasn't the problem.
Parts Used:
-
Daniel from LEXINGTON, SC
-
Difficulty Level:Very Easy
-
Total Repair Time:Less than 15 mins
-
Tools:Screw drivers
14 of 19 people
found this instruction helpful.
Was this instruction helpful to you?
Thank you for voting!
Replaced Bake Element
Based on previous responses we anticipated this repair to be easy, however, it was a little more challenging than expected. The method of repair was easy enough, just would have been better if there had been more wire to pull out to connect to the new bake element. It took two of us to fish for the wires back inside the stove with a needle-nose pliers after removing the element. One had to hold the wire with the pliers while it took the other to attach it to the new element with second pair of pliers as there was no room for using fingers. Retrieving and attaching the second wire to the element was even more challenging because now the half-attached element was in the way. Disappointed and not sure why the element burned out in the first place on a 4year old appliance.
Parts Used:
-
Sandy from Baileys Harbor, WI
-
Difficulty Level:A Bit Difficult
-
Total Repair Time:15 - 30 mins
-
Tools:Pliers, Screw drivers
12 of 15 people
found this instruction helpful.
Was this instruction helpful to you?
Thank you for voting!
Oven wouldn’t get up to temperature
I removed the sensor from inside the oven with a 1/4” nut driver, pulled the sensor out slowly and then took the connection apart and found out that the connector was different, I cut the connector off of the oven side and then cut the connector off of the new sensor and wired it together. I am still trying to find the ceramic nuts. My oven is working for now. Very easy fix, just wish there were ceramic wire nuts with the new sensor
Parts Used:
-
Al from THORNTOWN, IN
-
Difficulty Level:Very Easy
-
Total Repair Time:15 - 30 mins
-
Tools:Nutdriver
8 of 9 people
found this instruction helpful.
Was this instruction helpful to you?
Thank you for voting!
Oven light bulb went dark; it needed replacing

-
Lise from CEDAR GROVE, NJ
-
Difficulty Level:Very Easy
-
Total Repair Time:Less than 15 mins
10 of 17 people
found this instruction helpful.
Was this instruction helpful to you?
Thank you for voting!