















79073771100 Kenmore Range - Instructions
Keep searches simple. Use keywords, e.g. "leaking", "pump", "broken" or "fit".
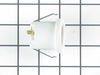
Oven light receptacle broken - bulb base broke off
Turned power off at electrical panel. Pulled oven away from wall. Removed back cover (6 screws), then unplugged wires from old receptacle. I had to pull the squeeze clips backwards & break them to remove the old receptacle - couldn't squeeze them enough to remove them otherwise. The old receptacle came out through the inside of the oven, and the new one snapped in easily from inside the oven as well. Replaced wiring, installed new bulb, restored power & tested. Replaced back cover. Good time to vacuum under/behind where the oven usually lives before sliding it back to the wall.
Parts Used:
-
Paul from Spokane Valley, WA
-
Difficulty Level:Easy
-
Total Repair Time:30 - 60 mins
-
Tools:Screw drivers
69 of 111 people
found this instruction helpful.
Was this instruction helpful to you?
Thank you for voting!
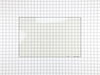
Cracked oven door inner glass
Repair was quite easy, as long as you have the instructions for removing the door. The screws that hold the bottom of the door to the fixed hinge are placed into the side of the hinge assembly after removal; this holds the door at a 45 degree angle for easy removal. After that, just place the door on a flat surface and dismantle the door from the inside. The inner glass is contained in a metal frame with another piece of glass; this frame comes apart easily using the clips in each side. The door assembles easily after the glass is replaced; just take your time and give yourself enough room to lay out the parts as you go. Good luck!
Parts Used:
-
Mitch from Fernandina Beach, FL
-
Difficulty Level:Easy
-
Total Repair Time:15 - 30 mins
-
Tools:Screw drivers
75 of 131 people
found this instruction helpful.
Was this instruction helpful to you?
Thank you for voting!
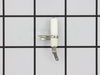
Igniter porcelain was cracked and burner would not light.
un-pluged stove,removed the one screw holding the broken igniter. disconected the one wire. installed new igniter and slipped on wire. The igniter came with a new bracket, the old one rusted away which is why the old igniter broke.
Parts Used:
-
Rusty from Howell, NJ
-
Difficulty Level:Easy
-
Total Repair Time:15 - 30 mins
-
Tools:Screw drivers
53 of 76 people
found this instruction helpful.
Was this instruction helpful to you?
Thank you for voting!
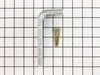
anti-tip bracket not installed
I was selling my home and did not realize that the anti-tip bracket was not originally installed. A home inspection caught the problem and the buyers required that I install one. I could not find the original and obviously the installer never put it in place to begin with. The buyers wanted this resolved within a week so I had to act fast. I could not find one locally so I found what I needed on your website. It arrived in a couple of days and was easy to install. I used the template provided in the kit and drove the screws through the bracket into the wood plate behind the drywall. Pushed the range back in place and that's it. Couldn't get any easier.
Parts Used:
-
Brian from Panama City Beach, FL
-
Difficulty Level:Really Easy
-
Total Repair Time:Less than 15 mins
35 of 47 people
found this instruction helpful.
Was this instruction helpful to you?
Thank you for voting!
Oven wouldn't heat up-panel kept showing F-3
Pulled out the stove, removed the screws that held on the back panel, took out the 2 screws that held in the element and disconnected the wires and put the new one in. I put the screw back in and was finished!
Parts Used:
-
Marilyn from Richmond, MO
-
Difficulty Level:Really Easy
-
Total Repair Time:15 - 30 mins
-
Tools:Pliers, Screw drivers
25 of 30 people
found this instruction helpful.
Was this instruction helpful to you?
Thank you for voting!
Broken glass interior oven door
Had to reference original owner's manual for instruction(s) on how to remove oven door. Used several "YouTube" videos to reference oven door design (Oven door glass is actually several layers of glass.) After completing about 30 mins of research and finding the right square drive bit, the repair went smoothly and without complications. The biggest challenge was researching and understanding what part(s) were needed and how to replace them. It seemed liked a lot of work doing the research however it sure beat a $350 repair bill. It cost me $90 and about 1 1/2 hours of total time. Oven works better than ever, thanks parts select for the part(s) and diagram(s) ...
Parts Used:
-
stephen from garden grove, CA
-
Difficulty Level:Easy
-
Total Repair Time:30 - 60 mins
-
Tools:Screw drivers
33 of 56 people
found this instruction helpful.
Was this instruction helpful to you?
Thank you for voting!
Long time before oven would light / propane smell
Unplug range, remove oven racks, remove 2 screws at the rear of oven bottom sheet metal panel. Lift the back of the panel and slide to the rear a little , then remove panel. Remove nut on top of heat shield and remove shield.. Open broiler draw slightly Note wire connections to gas valve. Remove Philips head screw from sheet metal guard bottom left rear to access wire connection. remove 2 hex head screws the hold igniter in place and install new igniter. remove spade connectors from gas valve and connect spade connectors from new igniter. , remove molex connector from bottom left rear and connect one from new igniter..Install shield in left rear bottom. install heat shield over burner and install nut. Install sheet metal panel in bottom of oven and 2 rear screws.. install oven racks and plug range back in. set clock and test your repair.
Parts Used:
-
Thomas from CAMPTON, NH
-
Difficulty Level:Really Easy
-
Total Repair Time:30 - 60 mins
-
Tools:Nutdriver, Screw drivers
22 of 27 people
found this instruction helpful.
Was this instruction helpful to you?
Thank you for voting!
Lens missing for burner "on" indication
Lifted the oven top, removed the controls cover, slipped the lens into the hole and slid the light holder device onto the lens
Parts Used:
-
Carol from Houma, LA
-
Difficulty Level:Really Easy
-
Total Repair Time:Less than 15 mins
-
Tools:Screw drivers
22 of 28 people
found this instruction helpful.
Was this instruction helpful to you?
Thank you for voting!
missing oven racks
-
ALLAN from APACHE JUNCTION, AZ
-
Difficulty Level:Really Easy
-
Total Repair Time:Less than 15 mins
20 of 25 people
found this instruction helpful.
Was this instruction helpful to you?
Thank you for voting!
Bad igniter.
The stove was older so the burner was hard to get out. The small screw heads broke off, so I had to carefully center punch and drill out the screw bodies. The igniter screw was also frozen in the pot metal burner. That screw requied drilling and tapping with the installation of a new 6-32 screw. Once the burner was refurbished, the igniter mounted easily. Afte attaching the gas line and igniter wire, the burner worked great.
Parts Used:
-
chris from Venice, CA
-
Difficulty Level:A Bit Difficult
-
Total Repair Time:1- 2 hours
-
Tools:Nutdriver, Pliers, Screw drivers, Wrench set
16 of 18 people
found this instruction helpful.
Was this instruction helpful to you?
Thank you for voting!
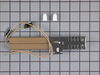
Ignitor burnt out
I removed the broiler burner assembly held in by 5 screws across the inside top of the oven, as I removed the assembly the igniter slid out from the back of the oven and was attached to the assembly with a cannon plug, I disconnected the cannon plug and removed the whole assembly out of the oven and replaced the igniter which was attached by two screws and reassembled in the oven. Where I live in remote Alaska calling a repair technician is not an option, either figure it out or have a new appliance barged in.
Parts Used:
-
Gregg from Naukati, AK
-
Difficulty Level:Really Easy
-
Total Repair Time:15 - 30 mins
-
Tools:Nutdriver, Screw drivers
14 of 18 people
found this instruction helpful.
Was this instruction helpful to you?
Thank you for voting!
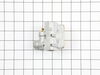
Regulator had propane leak past diaphragm
removed two screws disconnected inlet pipe and two outlet pipes, removed regulator. Replaced with new regulator. performed leak Test.
Parts Used:
-
Albern from Bainbridge IS., WA
-
Difficulty Level:Easy
-
Total Repair Time:30 - 60 mins
-
Tools:Nutdriver, Wrench set
14 of 19 people
found this instruction helpful.
Was this instruction helpful to you?
Thank you for voting!
the oven stoped working and an F3 displayed on the board also a smell of gass was present
thanks to you 'r assistsnce First I removed the two screws that hold the element in place. I then pulled the element out about 3 inches and disconnected the two wires, and changing the regulator was just as easy.
Parts Used:
-
juan from hallandale, FL
-
Difficulty Level:Really Easy
-
Total Repair Time:15 - 30 mins
-
Tools:Socket set, Wrench (Adjustable)
15 of 24 people
found this instruction helpful.
Was this instruction helpful to you?
Thank you for voting!
burner would not lite
no need to remover burner. Lift top up use a 1x4x5" to hold top up. Use short #2 screw driver remove screw and replace with new igniter
Parts Used:
-
Terry from Wilkinson, IN
-
Difficulty Level:Really Easy
-
Total Repair Time:Less than 15 mins
-
Tools:Screw drivers
12 of 16 people
found this instruction helpful.
Was this instruction helpful to you?
Thank you for voting!
Oven Racks needed to be replaced.
-
Peter from Chicago, IL
-
Difficulty Level:Really Easy
-
Total Repair Time:Less than 15 mins
11 of 14 people
found this instruction helpful.
Was this instruction helpful to you?
Thank you for voting!