















79061752102 Kenmore Range - Instructions
Keep searches simple. Use keywords, e.g. "leaking", "pump", "broken" or "fit".
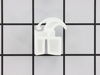
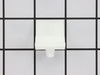
drawer glides were broke on front and back
used a screwdriver pushed the old ones out put the new in. the video instructions were great.
Parts Used:
-
bryan from sparta, WI
-
Difficulty Level:Really Easy
-
Total Repair Time:Less than 15 mins
-
Tools:Screw drivers
576 of 600 people
found this instruction helpful.
Was this instruction helpful to you?
Thank you for voting!
Front slide of bottom drawer broke off.
Inserted new slide as directed by video. Very easy and video was very helpful.
Parts Used:
-
Jeanette from Alpharetta, GA
-
Difficulty Level:Really Easy
-
Total Repair Time:Less than 15 mins
468 of 472 people
found this instruction helpful.
Was this instruction helpful to you?
Thank you for voting!
rental property stove only had 2 working burners and bottom drawer off track
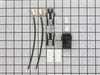
first i took out burners then i took out the screws of the termnal block bracket. i then raised the lid on the stoveand clipped the wires on all 4 of the terminal block kits.i then slipped the shrink wrap on wires and used the wire nuts to connect wires together then heated the shrink wrap. I then put screws back in terminal block brackets. I then put the burners on while looking under lid so i would know they were making good connections as this is a bad design from factory. if you pull out burners to clean them and they are not put back in right you dont have a good connection and that causes the terminal blocks to get hot and melt. thats what happened in my case.
As far as the drawer glides they just snap into place
As far as the drawer glides they just snap into place
Parts Used:
-
Steven from Taylors, SC
-
Difficulty Level:Easy
-
Total Repair Time:1- 2 hours
-
Tools:Pliers, Screw drivers
381 of 390 people
found this instruction helpful.
Was this instruction helpful to you?
Thank you for voting!
broken slide
Pulled broken one out, slid in the new. Most unbeliveable service I have ever received. Tremndous job, you should sell it to others, Many thanks
Parts Used:
-
Joseph D. from Stuart, FL
-
Difficulty Level:Really Easy
-
Total Repair Time:Less than 15 mins
-
Tools:Screw drivers
368 of 376 people
found this instruction helpful.
Was this instruction helpful to you?
Thank you for voting!
Back Burner didn't function
We moved into our townhouse about 6 yrs ago. During the home inspection we checked the range and saw the Red light come on when we turned on each burner. After moving in we realized the large back burner did not work. The light came on but the element never got hot. I of course replaced the element but that did not work. Several years passed and we just ignored the issue. We just got by with 3 burners. Lately we realized how much easier it would be to have all four burners working. Knowing that we will be selling our townhome soon we figured we should either fix the problem or replace the range.
I didn't want to call a repair man because I didn't want to be charged a $150 to have him come out and they to pay extra for parts (and of course a 2nd visit). So I went to www.Partselect.com and typed in the model of my range. Found the diagrams for my range and saw that from the switch ran a pair of wires to a Universal Receptacle (aka Terminal Block Kit). I figured since the Red light turns on when I turn the switch on it has to be the Terminal Block.
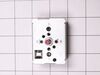
I ordered the part from www.Partselect.com ($14.00 including shipping) and replaced the part. The burner still would not get hot. I decided to test the switch. I removed the Control Panel cover (which is secure by 2 screws just below the digital clock). Once the cover was off, I saw the Blue wires going from the switch to the Terminal Block. To test the switch, I disconnected the two Blue Wires from connectors H1 and H2 and temporarily connected them to H1 and H2 of another switch. Sure enough, when I turned the other switch the element got hot.
So I placed another order from www.Partselect.com for a replacement switch ($50 including shipping). When that part came, I flipped the electrical circuit going to the range. I then removed the Control Panel cover again. With the new switch in hand (holding it near the old switch still attached to the Control Panel, I used the pliers to pull out each wire from it's connector and place it to it's corresponding connector on the new switch. Once all the wires were connected to the new switch, I pulled the knob of the switch off then used a phillips screwdriver to remove the two screws holding the switch to the control panel. I replaced the old switch with the new one put the screws back in, replaced the knob. Turned the circuit back on and tested to make sure that the element got hot. When it did, then I replaced the Control Panel cover and enjoyed a nice dinner that was cooked in less time than we're accustomed to because of the new burner. So I spent a total of $64.00 to fix our range. Less than half the amount I would've spent if I called for a technican. And far less then buying a new range.
Partselect is a great resource for information. They have diagrams and schematics available to view and/or download. And when ordering it's a snap because there's an "Add to Cart" button next to each part it lists. So there's no confusion. I've already recommended Partselect.com to about 5 people. And will continue to do so!!
I didn't want to call a repair man because I didn't want to be charged a $150 to have him come out and they to pay extra for parts (and of course a 2nd visit). So I went to www.Partselect.com and typed in the model of my range. Found the diagrams for my range and saw that from the switch ran a pair of wires to a Universal Receptacle (aka Terminal Block Kit). I figured since the Red light turns on when I turn the switch on it has to be the Terminal Block.
I ordered the part from www.Partselect.com ($14.00 including shipping) and replaced the part. The burner still would not get hot. I decided to test the switch. I removed the Control Panel cover (which is secure by 2 screws just below the digital clock). Once the cover was off, I saw the Blue wires going from the switch to the Terminal Block. To test the switch, I disconnected the two Blue Wires from connectors H1 and H2 and temporarily connected them to H1 and H2 of another switch. Sure enough, when I turned the other switch the element got hot.
So I placed another order from www.Partselect.com for a replacement switch ($50 including shipping). When that part came, I flipped the electrical circuit going to the range. I then removed the Control Panel cover again. With the new switch in hand (holding it near the old switch still attached to the Control Panel, I used the pliers to pull out each wire from it's connector and place it to it's corresponding connector on the new switch. Once all the wires were connected to the new switch, I pulled the knob of the switch off then used a phillips screwdriver to remove the two screws holding the switch to the control panel. I replaced the old switch with the new one put the screws back in, replaced the knob. Turned the circuit back on and tested to make sure that the element got hot. When it did, then I replaced the Control Panel cover and enjoyed a nice dinner that was cooked in less time than we're accustomed to because of the new burner. So I spent a total of $64.00 to fix our range. Less than half the amount I would've spent if I called for a technican. And far less then buying a new range.
Partselect is a great resource for information. They have diagrams and schematics available to view and/or download. And when ordering it's a snap because there's an "Add to Cart" button next to each part it lists. So there's no confusion. I've already recommended Partselect.com to about 5 people. And will continue to do so!!
Parts Used:
-
William from Burke, VA
-
Difficulty Level:Easy
-
Total Repair Time:15 - 30 mins
-
Tools:Screw drivers
134 of 150 people
found this instruction helpful.
Was this instruction helpful to you?
Thank you for voting!
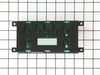
Oven elements would not heat
Initially, I tested the temperature sensor and it was OK. I pulled out the range and shut off the circuit breaker to it. I removed the upper back sheet metal panel to expose the clock timer. I removed the 4 screws to it, unplugged the wires to it and plugged them into the new clock timer. I carefully removed the plastic facing stuck to the face of the old clock timer and stuck it on the new clock timer. No new adhesive was necessary. I placed the newly connected clock timer in position and secured it with the 4 screws that secured the old clock timer. I pushed the range back into position and reset the circuit breaker. I turned the oven on and the problem was resolved.
Parts Used:
-
earl from seattle, WA
-
Difficulty Level:Really Easy
-
Total Repair Time:Less than 15 mins
-
Tools:Nutdriver, Pliers, Screw drivers
119 of 133 people
found this instruction helpful.
Was this instruction helpful to you?
Thank you for voting!
Bottom drawer broken
Frst I slid the drawer out.I then pryed the broken drawer glides off with a flat blade screwdriver. The new drawer glides then just snap into place,then reinstall the drawer and check for smooth operation.
Parts Used:
-
Michael from Middleton, NH
-
Difficulty Level:Easy
-
Total Repair Time:Less than 15 mins
-
Tools:Screw drivers
148 of 273 people
found this instruction helpful.
Was this instruction helpful to you?
Thank you for voting!
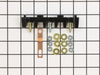
Cord was not tightened enough by delivery crew.
PF alarm appeared on display. Noticed clicking when cord was moved. Had arced for some time and melted original block. New part slightly different. Only has 3 lugs, old one had six. Stack using washers provided. Take note of colors before disassembly. Use caution while working through access opening. The edges are sharp. Only tools needed are phillips screwdriver, deep socket for lug nuts. Nut driver optional. Hope this is helpful.
Parts Used:
-
Timothy from Spring Valley, AL
-
Difficulty Level:Really Easy
-
Total Repair Time:15 - 30 mins
-
Tools:Screw drivers, Socket set
107 of 172 people
found this instruction helpful.
Was this instruction helpful to you?
Thank you for voting!
drawer was tilting and wouldn't slide open easily.
The old glides were broken off so I didn't know I needed these glides until I saw the parts section of the Manuel. When they arrived I snapped them in with no effort at all.
P.S. The shipping is fantastic here......i ordered on Monday received them on Tuesday. Now that's shipping:>)
P.S. The shipping is fantastic here......i ordered on Monday received them on Tuesday. Now that's shipping:>)
Parts Used:
-
jennifer from La Habra, CA
-
Difficulty Level:Really Easy
-
Total Repair Time:Less than 15 mins
75 of 78 people
found this instruction helpful.
Was this instruction helpful to you?
Thank you for voting!
Replacing Broken Parts
The two back door glides were missing and broken (one of each), and needed to be replaced. Finding the parts online was MUCH easier than I expected,and the repair was remarkably simple. Parts snapped into place, the drawer had to be lined up, and it slid right into place. Very easy!
Parts Used:
-
Scott from Noblesville, IN
-
Difficulty Level:Really Easy
-
Total Repair Time:Less than 15 mins
100 of 166 people
found this instruction helpful.
Was this instruction helpful to you?
Thank you for voting!
plastic clips were cracked.
-
EDWARD from ONSTED, MI
-
Difficulty Level:Really Easy
-
Total Repair Time:Less than 15 mins
-
Tools:Pliers
67 of 70 people
found this instruction helpful.
Was this instruction helpful to you?
Thank you for voting!
Range would not come on
Turned off power, took back off stove removed old probe.
I had to splice wires since new probe ends did not match up.
the instructions were to splice the wires. I had the breaker off for about 3 hours. this is not in the instructions, but being a widow, I had to ask a few people why it would not come on after I connected the wires.
After waiting, I turned the breaker on and my range came back on.
I had to splice wires since new probe ends did not match up.
the instructions were to splice the wires. I had the breaker off for about 3 hours. this is not in the instructions, but being a widow, I had to ask a few people why it would not come on after I connected the wires.
After waiting, I turned the breaker on and my range came back on.
Parts Used:
-
MaryLou from Monroe, NC
-
Difficulty Level:Easy
-
Total Repair Time:30 - 60 mins
-
Tools:Pliers, Screw drivers
107 of 192 people
found this instruction helpful.
Was this instruction helpful to you?
Thank you for voting!
Broke drawer glide
This was very simple I just snap the part on no tools required. it took less than 2 seconds.
Parts Used:
-
Tracy from Poulan, GA
-
Difficulty Level:Really Easy
-
Total Repair Time:Less than 15 mins
95 of 158 people
found this instruction helpful.
Was this instruction helpful to you?
Thank you for voting!
Oven and broiler don't work, but everything else does.
One day my wife turned on the oven and it didn't get hot. The heating element was cold even after it was turned on for a few minutes. The same story with the broiler. The stove top and timer worked fine, you could turn the oven on, it just never even started to heat up.
I ordered the new clock assembly and it got to my house in 2 or 3 days.
Once I got the new clock assembly, it was pretty easy to put in. Just take the back panel off (6 screws), unplug 5 or 6 wires, and 2 more screws and the old clock assembly is out. I peeled off the face sticker from my old clock and stuck it on the new one.
Putting it back in was just the reverse of taking the old one out. 2 screws, plugging in the wires, and then putting the back panel on.
Its been working as good as new for over a month.
I ordered the new clock assembly and it got to my house in 2 or 3 days.
Once I got the new clock assembly, it was pretty easy to put in. Just take the back panel off (6 screws), unplug 5 or 6 wires, and 2 more screws and the old clock assembly is out. I peeled off the face sticker from my old clock and stuck it on the new one.
Putting it back in was just the reverse of taking the old one out. 2 screws, plugging in the wires, and then putting the back panel on.
Its been working as good as new for over a month.
Parts Used:
-
Joshua from Normal, IL
-
Difficulty Level:Easy
-
Total Repair Time:30 - 60 mins
-
Tools:Nutdriver, Screw drivers
60 of 66 people
found this instruction helpful.
Was this instruction helpful to you?
Thank you for voting!
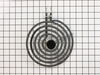
burner shorted out
I followed the directions by clipping wires to old burner socket, splicing the wires to new terminal block, screwing down new "block bracket," and plugging in new burner.
Parts Used:
-
David from Encinitas, CA
-
Difficulty Level:Easy
-
Total Repair Time:15 - 30 mins
-
Tools:Pliers, Screw drivers
61 of 75 people
found this instruction helpful.
Was this instruction helpful to you?
Thank you for voting!