















79046262503 Kenmore Range - Instructions
Keep searches simple. Use keywords, e.g. "leaking", "pump", "broken" or "fit".
Oven not heating to desired temperature
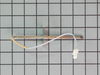
Replaced clock control by removing surface burner control knobs and plastic nuts, and then the cover over the oven control. Two screw hold the clock in place, after removal and disconnecting the plug-in you can reinstall the new clock control. The Heat Sensor inside the oven will also need to be replaced. It is located inside the oven and attached with two screws; the back of the oven will need to be removed to unplug. Reverse removal procedure and turn the power back on to the stove.
Parts Used:
-
Dan from Bellevue, ID
-
Difficulty Level:Easy
-
Total Repair Time:15 - 30 mins
-
Tools:Screw drivers
155 of 242 people
found this instruction helpful.
Was this instruction helpful to you?
Thank you for voting!
Broil element wasn't working...
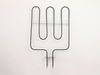
I pulled my unit out of the wall and noticed that the insulation around the top broiler element was a bit brown. Closer inspection revealed that the element had shorted somehow to the oven itself and caused the element to become non-functional. I tried measuring the resistance first, and it was within typical values for the other elements, but I decided to replace the element anyway.
I ordered from PD and the part arrived just a few days letter by regular shipping. I undid the screws holding in the element, undid the wire connectors and replaced the broken element with the new one. The element worked like a charm and I was back in business for cooking.
I ordered from PD and the part arrived just a few days letter by regular shipping. I undid the screws holding in the element, undid the wire connectors and replaced the broken element with the new one. The element worked like a charm and I was back in business for cooking.
Parts Used:
-
Kevin from Alexandria, VA
-
Difficulty Level:Really Easy
-
Total Repair Time:Less than 15 mins
-
Tools:Screw drivers
93 of 131 people
found this instruction helpful.
Was this instruction helpful to you?
Thank you for voting!
Oven light receptacle broken - bulb base broke off
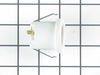
Turned power off at electrical panel. Pulled oven away from wall. Removed back cover (6 screws), then unplugged wires from old receptacle. I had to pull the squeeze clips backwards & break them to remove the old receptacle - couldn't squeeze them enough to remove them otherwise. The old receptacle came out through the inside of the oven, and the new one snapped in easily from inside the oven as well. Replaced wiring, installed new bulb, restored power & tested. Replaced back cover. Good time to vacuum under/behind where the oven usually lives before sliding it back to the wall.
Parts Used:
-
Paul from Spokane Valley, WA
-
Difficulty Level:Easy
-
Total Repair Time:30 - 60 mins
-
Tools:Screw drivers
69 of 111 people
found this instruction helpful.
Was this instruction helpful to you?
Thank you for voting!
Oven would not maintain correct set temperature.
Removed electrical connector and two screws. Attached the electrical connector to the new probe and attached with the two screws.
Parts Used:
-
Barbara from RAINBOW CITY, AL
-
Difficulty Level:Very Easy
-
Total Repair Time:Less than 15 mins
-
Tools:Screw drivers
17 of 26 people
found this instruction helpful.
Was this instruction helpful to you?
Thank you for voting!
Noticed oven was heating but upper element not coming on.
Removed two screws holding broiler element. Released two spring hangers on near the front of the element. Pulled element away from oven and pulled two wire connectors off. Simply reverse process to install new one. Wasn't the problem.
Parts Used:
-
Daniel from LEXINGTON, SC
-
Difficulty Level:Very Easy
-
Total Repair Time:Less than 15 mins
-
Tools:Screw drivers
14 of 19 people
found this instruction helpful.
Was this instruction helpful to you?
Thank you for voting!
Oven wouldn’t get up to temperature
I removed the sensor from inside the oven with a 1/4” nut driver, pulled the sensor out slowly and then took the connection apart and found out that the connector was different, I cut the connector off of the oven side and then cut the connector off of the new sensor and wired it together. I am still trying to find the ceramic nuts. My oven is working for now. Very easy fix, just wish there were ceramic wire nuts with the new sensor
Parts Used:
-
Al from THORNTOWN, IN
-
Difficulty Level:Very Easy
-
Total Repair Time:15 - 30 mins
-
Tools:Nutdriver
8 of 9 people
found this instruction helpful.
Was this instruction helpful to you?
Thank you for voting!
Oven light bulb went dark; it needed replacing

-
Lise from CEDAR GROVE, NJ
-
Difficulty Level:Very Easy
-
Total Repair Time:Less than 15 mins
10 of 17 people
found this instruction helpful.
Was this instruction helpful to you?
Thank you for voting!
Temperature in the oven was not consistent
1. Turn off power to the electric oven
2. Removed the two screws in the top side of the oven that hold it into the cabinet.
3. Made a support to set the oven on once you remove it from the wall. Or set it on the floor. You will need help this is not a one person job.
4. Used a Philips head screw drive removed the back of the oven panel. I did not have to remove the whole thing just took out half the screws and the electrical plug for the temperature sensor is right on the edge.
5. Unplugged sensor
6. Took out the two screw on the inside of the oven that holds the thermal sensor in place. Pulled it out the front.
7. Side the new thermal sensor in place replace the screws.
8. Pull the plug out and plug it back in. Check and push the insulation back in place where the thermal sensor.
9. Replace the back and replace the screws.
10. Slide oven back into the wall.
11. Replace the two screws that hold the oven in place in the frame.
12. Turn power back on
Check the temperature
2. Removed the two screws in the top side of the oven that hold it into the cabinet.
3. Made a support to set the oven on once you remove it from the wall. Or set it on the floor. You will need help this is not a one person job.
4. Used a Philips head screw drive removed the back of the oven panel. I did not have to remove the whole thing just took out half the screws and the electrical plug for the temperature sensor is right on the edge.
5. Unplugged sensor
6. Took out the two screw on the inside of the oven that holds the thermal sensor in place. Pulled it out the front.
7. Side the new thermal sensor in place replace the screws.
8. Pull the plug out and plug it back in. Check and push the insulation back in place where the thermal sensor.
9. Replace the back and replace the screws.
10. Slide oven back into the wall.
11. Replace the two screws that hold the oven in place in the frame.
12. Turn power back on
Check the temperature
Parts Used:
-
Cheryl from PRAIRIEVILLE, LA
-
Difficulty Level:Really Easy
-
Total Repair Time:30 - 60 mins
-
Tools:Screw drivers
6 of 6 people
found this instruction helpful.
Was this instruction helpful to you?
Thank you for voting!
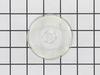
broken lens over oven light
Your service was OUTSTANDING...Ordered one afternoon, and before lunch time the next day, the delivery man rang my door bell...Thanks a bunch for you excellent service.....
Parts Used:
-
Leslie from Warsaw, VA
-
Difficulty Level:Really Easy
-
Total Repair Time:Less than 15 mins
11 of 22 people
found this instruction helpful.
Was this instruction helpful to you?
Thank you for voting!
Error Code F1
I usually try the cheapest part to replace when I come to a fork In the road but I wasn't home at the time and my other half called in the "expert". He said it was the clock timer and it would be $450 to replace it. She sent him away and I bought one online for $200 and put it in only to find out that it didn't solve the problem. Did some reading and found out that it could be the sensor. Put an ohm meter on it and found that to be the problem. Left the new clock timer in it anyway so now we're good for another 100,000 cookies or 1000 pizzas, which ever comes first
Parts Used:
-
Jon from Little Silver, NJ
-
Difficulty Level:Easy
-
Total Repair Time:Less than 15 mins
-
Tools:Screw drivers
6 of 7 people
found this instruction helpful.
Was this instruction helpful to you?
Thank you for voting!
Refrigerator Light bulb went out
I replaced the bulb using my hands to twist the bulb in the socket located at the top of the refrigerator.
Parts Used:
-
ANGELA from MEBANE, NC
-
Difficulty Level:Very Easy
-
Total Repair Time:Less than 15 mins
7 of 10 people
found this instruction helpful.
Was this instruction helpful to you?
Thank you for voting!
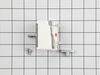
No power to burner until after dial setting 3 reached and would not reach highest setting.
1. Remove all four control knobs.
2. Unscrew all four plastic "nuts" found under each knob holding front
panel to stove.
3. Lift front panel off.
4. Removed all Phillips screws holding metal shield to which control
switches are fastened.
5. Lift entire assembly up.
6. Remove two screws holding bad switch to metal shield.
7. BEFORE REMOVING ANY WIRES LABEL EACH WIRE
ACCORDING TO CODE EMBOSSED ON BACK OF BAD
SWITCH. These will be H1, H2, L1, L2 and P. They are not in
the same place on the new switch as they are on the old one.
The reason for labeling is that in case you make a mistake you
have this back-up to go by. Also to double check your finished
job.If just one wire is connected to the
wrong terminal a disaster will happen.
8. Remove each wire, one at a time from the old switch and connect
it to the correct terminal on the new switch as indicated by the
codes on the back of the new switch. When done double check
to be certain the labels on each wire match the code for the
connected terminal.
9. Slide furnished bushing onto the new switch.
10. Insert new switch through the back of the metal shield and attach
with the supplied screws. The old screws were too short in my
case so be certain to use the ones supplied with the new switch.
11. Re-attach the shield assembly to the stove.
12. Install the front panel back over the switch stems.
13. Secure the front panel with the four plastic nuts.
14. Install the control knobs.
15. Test the new switch.
2. Unscrew all four plastic "nuts" found under each knob holding front
panel to stove.
3. Lift front panel off.
4. Removed all Phillips screws holding metal shield to which control
switches are fastened.
5. Lift entire assembly up.
6. Remove two screws holding bad switch to metal shield.
7. BEFORE REMOVING ANY WIRES LABEL EACH WIRE
ACCORDING TO CODE EMBOSSED ON BACK OF BAD
SWITCH. These will be H1, H2, L1, L2 and P. They are not in
the same place on the new switch as they are on the old one.
The reason for labeling is that in case you make a mistake you
have this back-up to go by. Also to double check your finished
job.If just one wire is connected to the
wrong terminal a disaster will happen.
8. Remove each wire, one at a time from the old switch and connect
it to the correct terminal on the new switch as indicated by the
codes on the back of the new switch. When done double check
to be certain the labels on each wire match the code for the
connected terminal.
9. Slide furnished bushing onto the new switch.
10. Insert new switch through the back of the metal shield and attach
with the supplied screws. The old screws were too short in my
case so be certain to use the ones supplied with the new switch.
11. Re-attach the shield assembly to the stove.
12. Install the front panel back over the switch stems.
13. Secure the front panel with the four plastic nuts.
14. Install the control knobs.
15. Test the new switch.
Parts Used:
-
Ronald from FRENCH VLG, MO
-
Difficulty Level:Easy
-
Total Repair Time:30 - 60 mins
-
Tools:Screw drivers
5 of 5 people
found this instruction helpful.
Was this instruction helpful to you?
Thank you for voting!
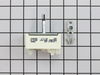
Broken burner switch. Would not shut off.
Turn off breaker to the oven. Removed four knows by pulling them up and out. Using either a large flat blade screwdriver or adjustable wrench (depending upon stove top model) remove threaded style holders at each burner switch control to remove the glass clock control top panel. Remove glass panel and note ldgasket position. Place glass panel on top of stove top on a cloth towel to prevent scratches. Remove 8 screws and remove/lift up burner control assembly. Invert and place on its side to gain access to broken contol switch. Took a picture of wiring and close up off switch to help remember where each wire plugs into switch. Remove 2 Phillips screws from the old switch and remove from panel. Using a flat blade screwdriver gently remove one wire at a time and using knob to orientate the off position of the new switch. Remove each wire one at a time and install on the new switch. Compare numbers on both the old and new switch to assist where each wire goes. The numbers are beside each terminal and using a flashlight and magnifying glass will help making the job easier. DO NOT mix the wires up. Use the 2 longer screws and threaded bracket supplied fasten the new switch to the glass panel. Reinstall the glass panel using the screws removed and thread on clips at each switch and tighten using a large flat blade screwdriver. Be sure to route the wiring to not pinch the wires and install the gasket along the front edge which fills the gap along the burner top and side for a tight seal keeping water and food particles out. The infinite control switch has letters such as H1, H2 etc as the switch fits several models with different wiring diagrams and colours so it's impt to note this when transferring the old wires to the new switch. Also the gasket along the top glass edge ensure to note exactly how it is placed to reinstall to be exact when you reassemble. Replace the 4 control knobs by pushing them on after aligning to fit as they were removed. New switch should be positioned the same as the others with off at the top and a notable click. Be sure to note this when transferring wires from the old to new switch. Turn breaker on. Note: If you have minimal skills this should be left to someone who is an electrician or has repair experience in this field.
Parts Used:
-
Douglas from PONCE INLET, FL
-
Difficulty Level:Easy
-
Total Repair Time:30 - 60 mins
-
Tools:Screw drivers, Wrench (Adjustable)
6 of 8 people
found this instruction helpful.
Was this instruction helpful to you?
Thank you for voting!
Oven would overheat and not control properly
Simply took oven out of wall, removed back plate, unplugged old sensor, went in the front and unscrewed old sensor, put in new sensor, went in back and plugged in new sensor, put on back plate, push oven in wall. Turn on power
Parts Used:
-
Mason from WESTVILLE, OK
-
Difficulty Level:Really Easy
-
Total Repair Time:Less than 15 mins
-
Tools:Screw drivers
5 of 5 people
found this instruction helpful.
Was this instruction helpful to you?
Thank you for voting!
When oven was set at 400, actual temp would run about 285.
1 Turned off the oven breaker.
2. Removed the oven racks.
3. With a Phillips screwdriver, removed the mounting screws holding the temperature sensor and unplugged it.
4. New sensor plug did not match 20 year old connector. Had to cut and solder splice the connectors.
5. Installed the new sensor and now oven holds temperature steady.
Easy order, quick delivery and easy installation, happy wife.
2. Removed the oven racks.
3. With a Phillips screwdriver, removed the mounting screws holding the temperature sensor and unplugged it.
4. New sensor plug did not match 20 year old connector. Had to cut and solder splice the connectors.
5. Installed the new sensor and now oven holds temperature steady.
Easy order, quick delivery and easy installation, happy wife.
Parts Used:
-
James from MOBILE, AL
-
Difficulty Level:Really Easy
-
Total Repair Time:30 - 60 mins
-
Tools:Screw drivers
7 of 12 people
found this instruction helpful.
Was this instruction helpful to you?
Thank you for voting!