















79042509315 Kenmore Range - Instructions
Keep searches simple. Use keywords, e.g. "leaking", "pump", "broken" or "fit".
Cord was not tightened enough by delivery crew.
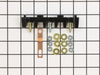
PF alarm appeared on display. Noticed clicking when cord was moved. Had arced for some time and melted original block. New part slightly different. Only has 3 lugs, old one had six. Stack using washers provided. Take note of colors before disassembly. Use caution while working through access opening. The edges are sharp. Only tools needed are phillips screwdriver, deep socket for lug nuts. Nut driver optional. Hope this is helpful.
Parts Used:
-
Timothy from Spring Valley, AL
-
Difficulty Level:Really Easy
-
Total Repair Time:15 - 30 mins
-
Tools:Screw drivers, Socket set
109 of 174 people
found this instruction helpful.
Was this instruction helpful to you?
Thank you for voting!
Cracked oven door inner glass
Repair was quite easy, as long as you have the instructions for removing the door. The screws that hold the bottom of the door to the fixed hinge are placed into the side of the hinge assembly after removal; this holds the door at a 45 degree angle for easy removal. After that, just place the door on a flat surface and dismantle the door from the inside. The inner glass is contained in a metal frame with another piece of glass; this frame comes apart easily using the clips in each side. The door assembles easily after the glass is replaced; just take your time and give yourself enough room to lay out the parts as you go. Good luck!
Parts Used:

-
Mitch from Fernandina Beach, FL
-
Difficulty Level:Easy
-
Total Repair Time:15 - 30 mins
-
Tools:Screw drivers
75 of 131 people
found this instruction helpful.
Was this instruction helpful to you?
Thank you for voting!
Broken glass interior oven door
Had to reference original owner's manual for instruction(s) on how to remove oven door. Used several "YouTube" videos to reference oven door design (Oven door glass is actually several layers of glass.) After completing about 30 mins of research and finding the right square drive bit, the repair went smoothly and without complications. The biggest challenge was researching and understanding what part(s) were needed and how to replace them. It seemed liked a lot of work doing the research however it sure beat a $350 repair bill. It cost me $90 and about 1 1/2 hours of total time. Oven works better than ever, thanks parts select for the part(s) and diagram(s) ...
Parts Used:
-
stephen from garden grove, CA
-
Difficulty Level:Easy
-
Total Repair Time:30 - 60 mins
-
Tools:Screw drivers
33 of 56 people
found this instruction helpful.
Was this instruction helpful to you?
Thank you for voting!
new drip pans that FIT!!!
My old drip pans had become soiled and rusty and I tried to buy some and local stores, none fitting like they should. Ordered these and the fit beatifully!
Parts Used:

-
Barbara from Jamestown, ND
-
Difficulty Level:Really Easy
-
Total Repair Time:Less than 15 mins
8 of 12 people
found this instruction helpful.
Was this instruction helpful to you?
Thank you for voting!
The elements were not heating up
It was really easy just unplugged it took off the back cover changed the part out put back cover on plugged it in and the elements were working great!
Parts Used:
-
Tanya from KALISPELL, MT
-
Difficulty Level:Really Easy
-
Total Repair Time:15 - 30 mins
-
Tools:Screw drivers
6 of 8 people
found this instruction helpful.
Was this instruction helpful to you?
Thank you for voting!
Broken ; oven door inner glass
Watched the repair video on your web site. Used the video as a step by step guide in the actual repair.
Parts Used:
-
Garland Futrell from CHESAPEAKE, VA
-
Difficulty Level:Very Easy
-
Total Repair Time:1- 2 hours
-
Tools:Screw drivers, Socket set
5 of 6 people
found this instruction helpful.
Was this instruction helpful to you?
Thank you for voting!
showing age
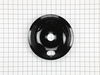
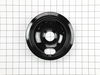
bought drip bowl from big box store and the 8 inch did not fit . yours fit perfect will use you for future diy jobs thank you
Parts Used:
-
Lisa from N MYRTLE BCH, SC
-
Difficulty Level:Really Easy
-
Total Repair Time:Less than 15 mins
5 of 6 people
found this instruction helpful.
Was this instruction helpful to you?
Thank you for voting!
crummy chrome drip pans were worn out. replaced wtih enamel ones.
I just pulled the old ones out of the sockets, cleaned underneath, and replaced with new ones. No-brainer.
Parts Used:
-
Katherine H. from SEAL BEACH, CA
-
Difficulty Level:Very Easy
-
Total Repair Time:Less than 15 mins
4 of 4 people
found this instruction helpful.
Was this instruction helpful to you?
Thank you for voting!
Oven wires arced and caused the terminal block to melt and become detached from the back of the range
Removed the wires that I could, then terminal block. Installing the new terminal block was very easy; however the wires that arced were fused to the terminal bock screws and needed to be cut and new connectors had to be put on the wires to allow them to be reattached to the block safely.
Once all was replaced and reinstalled the oven has worked great. The length of the repair was increased because of the melted parts and having to run to the store to get the new wire connectors big enough to fit on the wires. If we were simply replacing the block and had not encountered the melted ends, it would have been a very quick and easy repair.
Once all was replaced and reinstalled the oven has worked great. The length of the repair was increased because of the melted parts and having to run to the store to get the new wire connectors big enough to fit on the wires. If we were simply replacing the block and had not encountered the melted ends, it would have been a very quick and easy repair.
Parts Used:
-
Daniel from Falmouth, MA
-
Difficulty Level:A Bit Difficult
-
Total Repair Time:30 - 60 mins
-
Tools:Nutdriver, Pliers, Screw drivers, Wrench set
3 of 3 people
found this instruction helpful.
Was this instruction helpful to you?
Thank you for voting!
Cooktop burner was wore out from age
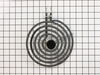
Just pulled the old cook top burner out and put the new one in .it took about 1 1/2 minutes
Parts Used:
-
John from HAYDEN, AL
-
Difficulty Level:Very Easy
-
Total Repair Time:Less than 15 mins
3 of 3 people
found this instruction helpful.
Was this instruction helpful to you?
Thank you for voting!
Heating element burned out
All you do it unplug the old one and plug in the new one.
Parts Used:
-
Pat from GREELEY, CO
-
Difficulty Level:Very Easy
-
Total Repair Time:Less than 15 mins
3 of 4 people
found this instruction helpful.
Was this instruction helpful to you?
Thank you for voting!
Change on e of the inside glass
removed the screws holding the front part of the door and from there worked my way, untill the third glass.
It took a couple hours, my first time,. Overall easy,
It took a couple hours, my first time,. Overall easy,
Parts Used:
-
Ronald from Ozone Park, NY
-
Difficulty Level:Easy
-
Total Repair Time:1- 2 hours
-
Tools:Screw drivers
4 of 7 people
found this instruction helpful.
Was this instruction helpful to you?
Thank you for voting!
Crack in inner door glass
Removed two screws that are attached to handle then removed four screws from bottom edge of oven door. I was then able to remove the outer door glass,this gave me access to the three inner glasses. After removing the retainer for the glass assembly,I was able to remove all three and replace the inner one.I reversed this proceedure to reassemble.
Parts Used:
-
Robert from Richmond, IN
-
Difficulty Level:Really Easy
-
Total Repair Time:1- 2 hours
-
Tools:Screw drivers
4 of 7 people
found this instruction helpful.
Was this instruction helpful to you?
Thank you for voting!
Original Element physically broke
There is an installation video , but it was so easy, and if you clean your drip pans from those inevitable spills you can do this. I have zero mechanical abilities and I did. The website makes it easy to find your part, and the original literature you got with your appliance will direct you where to find the Model # and serial # on your Frigidaire Range. Order your part on line, get it in the mail and insert the Element yourself.Very happy with my transaction.
Parts Used:
-
Beverly from WEATOGUE, CT
-
Difficulty Level:Very Easy
-
Total Repair Time:Less than 15 mins
2 of 2 people
found this instruction helpful.
Was this instruction helpful to you?
Thank you for voting!
Heavy jam boiler caused elements to sag
-
Danny L from CHELAN, WA
-
Difficulty Level:Really Easy
-
Total Repair Time:Less than 15 mins
2 of 3 people
found this instruction helpful.
Was this instruction helpful to you?
Thank you for voting!