















6289468893 Kenmore Range - Instructions
Keep searches simple. Use keywords, e.g. "leaking", "pump", "broken" or "fit".
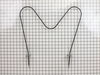
Baking Heating Element Burned Up
Used a screw driver with a socket head to remove the two hex head screws holding the old element. Pulled the old element forward until the two wire attachements were visable. The wires were attached with a simple tab connector. Removed the wires from the element. Attached wires to new element slide the element and wires back into wall of oven and replaced screws. Done!
Parts Used:
-
Christopher from North Salt Lake, UT
-
Difficulty Level:Really Easy
-
Total Repair Time:Less than 15 mins
-
Tools:Socket set
193 of 202 people
found this instruction helpful.
Was this instruction helpful to you?
Thank you for voting!
blown bake element
Removed the two screws that hold the element in place at the rear of the oven.Unplug each prob,you may need pliers as they can be a little tight.Reconnected the new element.Keep the old screws.New element does not come with screws.Always unplug range when doing repairs.
Parts Used:
-
joseph from washington, PA
-
Difficulty Level:Really Easy
-
Total Repair Time:Less than 15 mins
-
Tools:Nutdriver, Pliers
59 of 62 people
found this instruction helpful.
Was this instruction helpful to you?
Thank you for voting!
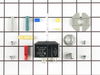
High heat reluctant to turn down.
Most of the job is simple fastener mechanics.
Use a nut driver or Phillips screwdriver. Remove rear panel.
Pull out control knob. If it is stuck, wrap a small rag around the back of it and pull the rag steadily.
Carefully match marked terminals on the replacement switch with those on original. Switch terminals may not be in the same location. Replace wires one for one, one at a time.
Carefully select the correct knob filler for the switch post. Several are supplied. Proceed with logic and measure the shaft length and the filler length and type to match.
Use a nut driver or Phillips screwdriver. Remove rear panel.
Pull out control knob. If it is stuck, wrap a small rag around the back of it and pull the rag steadily.
Carefully match marked terminals on the replacement switch with those on original. Switch terminals may not be in the same location. Replace wires one for one, one at a time.
Carefully select the correct knob filler for the switch post. Several are supplied. Proceed with logic and measure the shaft length and the filler length and type to match.
Parts Used:
-
George from New Port Richey, FL
-
Difficulty Level:Easy
-
Total Repair Time:15 - 30 mins
-
Tools:Nutdriver, Pliers, Screw drivers
45 of 49 people
found this instruction helpful.
Was this instruction helpful to you?
Thank you for voting!
Element went out in 20+ year old oven
First I removed the two screws that hold the element in place. I then pulled the element out about 3 inches and disconnected the two wires. Replaced the element and put back in place. Took about 10 minutes. Repair part came in 2 days. Very awesome website!
Parts Used:
-
Dennis from Flatwoods, KY
-
Difficulty Level:Really Easy
-
Total Repair Time:Less than 15 mins
-
Tools:Socket set
28 of 34 people
found this instruction helpful.
Was this instruction helpful to you?
Thank you for voting!
Right front burner would over-heat
First of all I removed the top panel then removed the switch. I then took pictures of the switch & drew a sketch with all the info. Then I went to your web site, matched up the switch & ordered.
When the switch arrived I went thru the above replacing the bad switch.
When the switch arrived I went thru the above replacing the bad switch.
Parts Used:
-
Melvin from Attica, MI
-
Difficulty Level:Really Easy
-
Total Repair Time:15 - 30 mins
-
Tools:Nutdriver, Screw drivers
23 of 27 people
found this instruction helpful.
Was this instruction helpful to you?
Thank you for voting!
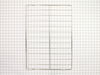
missing oven racks
-
ALLAN from APACHE JUNCTION, AZ
-
Difficulty Level:Really Easy
-
Total Repair Time:Less than 15 mins
20 of 25 people
found this instruction helpful.
Was this instruction helpful to you?
Thank you for voting!
oven wouldnt heat
I assumed the bake element was the problem,so I ordered one from Part Select.I was amazed that I got it in 2 days! After removing the 2 screws that held the element in place,I disconnected the 2 wires from the element.I wasnt being very careful and let one of the wires slip back into the hole in the back of the oven.Couldnt get the wire back out,so I had to take the back of the stove off to get to it.Next time,I'll be careful to keep the wires from going back into the holes.Then I connected the element,screwed it in place an turned the oven on.Success !!!
Parts Used:
-
Matthew from Beverly Hills, FL
-
Difficulty Level:Really Easy
-
Total Repair Time:15 - 30 mins
-
Tools:Nutdriver
17 of 18 people
found this instruction helpful.
Was this instruction helpful to you?
Thank you for voting!
The left front burner would not turn off, and the switch was sparking
First I unplugged the stove, and removed the upper-back panel. Then I pulled off the control knob. Then I removed the two screws holding the switch to the stove. Then one-by-one I removed the wires from the old switch and connected them to the corresponding tabs on the new switch. Then, using the knob adapter supplied with the new switch, I figured out how much of the knob shaft I had to remove from the new switch to position the knob the correct distance from the face of the stove. Then I tested the switch with a voltmeter as instructed, and then I hooked up the last wire.
Partselect.com is an awsome website!!! I was able to review comments form other do-it-yourselfers that had similar problems. Then I looked up the Partselect schematic drawings of my stove and was easily able to find and order the part I needed. The part arrived at my house within a couple of days and I had the stove fixed in no time.
Partselect.com is an awsome website!!! I was able to review comments form other do-it-yourselfers that had similar problems. Then I looked up the Partselect schematic drawings of my stove and was easily able to find and order the part I needed. The part arrived at my house within a couple of days and I had the stove fixed in no time.
Parts Used:
-
Dan from Mulvane, KS
-
Difficulty Level:Easy
-
Total Repair Time:15 - 30 mins
-
Tools:Nutdriver, Pliers, Screw drivers
15 of 17 people
found this instruction helpful.
Was this instruction helpful to you?
Thank you for voting!
Old element visibly burned out
Unplugged oven, unscrewed element, removed back pannel, unclamped old element and removed it, installed new element, clamped it to wires, screwed element to inside of oven, then replaced back pannel
Whole thing took about five minutes.
Whole thing took about five minutes.
Parts Used:
-
Jule from New Salem, PA
-
Difficulty Level:Really Easy
-
Total Repair Time:Less than 15 mins
-
Tools:Socket set
13 of 17 people
found this instruction helpful.
Was this instruction helpful to you?
Thank you for voting!
Oven Racks needed to be replaced.
-
Peter from Chicago, IL
-
Difficulty Level:Really Easy
-
Total Repair Time:Less than 15 mins
11 of 14 people
found this instruction helpful.
Was this instruction helpful to you?
Thank you for voting!
Heating element in the lower unit of the doubleoven broke.
First I disconnnected the breaker for the oven and then removed the broken element by unscrewing the screws that held it in with a nut driver. I then pulled the element out exposing the connected wires. I removed the wires from the element by pulling them off with my fingers. Using a set of hemistat pliers I secured the wires so they wouldn't slip into the holes at the back of the oven. I connected the new element by slipping the connectors onto the element and finished by putting the ends of the element back into the holes and securing it into place with the screws using the nut driver.
Parts Used:
-
Lisa from Helena, MT
-
Difficulty Level:Easy
-
Total Repair Time:15 - 30 mins
-
Tools:Nutdriver, Pliers
10 of 11 people
found this instruction helpful.
Was this instruction helpful to you?
Thank you for voting!
Broken element
First turned off the breaker to the oven, I opened the oven door, took out the baking racks, removed the two screws that hold the element in place. Pulled the element out about 3 inches, disconnected the wires, Installed the new element in the reverse order.
Parts Used:
-
Mike from Hot Springs, AR
-
Difficulty Level:Easy
-
Total Repair Time:Less than 15 mins
-
Tools:Nutdriver
9 of 10 people
found this instruction helpful.
Was this instruction helpful to you?
Thank you for voting!
Old switch killed by a short between wires
Turn off the electricity
Remove knob
Unscrew old switch
Lift stovetop & prop
Remove wires from switch
Remove switch
Plug wires onto new switch
Put new switch in place
Shut stovetop
Screw new switch in place
Trim knob post
Put adapter on post
Put knob back on
Turn electricity back on
Cook dinner :)
Remove knob
Unscrew old switch
Lift stovetop & prop
Remove wires from switch
Remove switch
Plug wires onto new switch
Put new switch in place
Shut stovetop
Screw new switch in place
Trim knob post
Put adapter on post
Put knob back on
Turn electricity back on
Cook dinner :)
Parts Used:
-
Darren from San Diego, CA
-
Difficulty Level:Easy
-
Total Repair Time:30 - 60 mins
-
Tools:Pliers, Screw drivers
9 of 12 people
found this instruction helpful.
Was this instruction helpful to you?
Thank you for voting!
Oven wouldn't heat
I could see a visible burnout on the element.
Got it really fast.
Removed two screws, pulled it out, disconnected two wires. installed a new one in, and was done!
Got it really fast.
Removed two screws, pulled it out, disconnected two wires. installed a new one in, and was done!
Parts Used:
-
GREGORY from W Hollywood, CA
-
Difficulty Level:Really Easy
-
Total Repair Time:15 - 30 mins
-
Tools:Screw drivers
9 of 12 people
found this instruction helpful.
Was this instruction helpful to you?
Thank you for voting!
element burnt out
(e.g. First I removed the two screws that hold the element in place. I then pulled the element out about 3 inches and disconnected the two wires...
Really really easy . I am a single woman with no repair experance and had no problems.
Really really easy . I am a single woman with no repair experance and had no problems.
Parts Used:
-
linda from plant City, FL
-
Difficulty Level:Really Easy
-
Total Repair Time:Less than 15 mins
-
Tools:Nutdriver
7 of 7 people
found this instruction helpful.
Was this instruction helpful to you?
Thank you for voting!