















550WH Admiral Range - Instructions
Keep searches simple. Use keywords, e.g. "leaking", "pump", "broken" or "fit".
Electric burner on stove would not work
The first thing I did was to turn the power off to the stove by turning the Stove circuit breaker off at the Main breaker panel. I next removed the 4 burners by pulling them out of their plug-in blocks. I then removed the four screws that held the top of the stove to the body so I could access the bad plug-in block, the screws were located under each of the burners drip pans. I next removed the screw holding the bad block. I lifted up the top of the stove so as to relocate the bad block, with wires connected, through the opening of the back burner. The bad block was located in the front rt part of the stove and by rerouting this to the back I could lay the top down and have easy access to what I needed to replace. I next used the knife to make a cut down the length of the old shrink tubing so as to gain access to the old splice. I next removed the old wire nuts which allowed the removal of the bad block. I then install the new clips into the new block. I installed one each shrink tubing onto each of the pigtails from the new clips and twisted the one new wire to the stove wiring harnes were the old wire was connected . I connected the seconded wire in the same manner. I pulled on each wire to verify that they were tightly secured together. I then positioned each shrink tubing over each wire nut (you have to fold the wire nut and wires down against the wire so as the shrink tubing will slip over the wire nut) and used a heating tool (hair dryer on high) to shrink the tubing around the wire nutted connection. I next installed the metal clip that would hold the block to the stove top. I placed the new block back to the location where the old block came from and secured it with the new screw provided by the kit. I re-installed the four screws to hold the top down, plugged in the four burners, turned the power on at the breaker box and turned the burner on to test that it work.
Parts Used:

-
Ronald from Fresno, CA
-
Difficulty Level:Easy
-
Total Repair Time:30 - 60 mins
-
Tools:Screw drivers
5 of 5 people
found this instruction helpful.
Was this instruction helpful to you?
Thank you for voting!
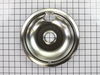
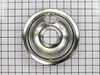
Store-bought drip bowls wouldn't fit.
My elements just plug in so all I had to do was pull them out and replace the drip bowls. They fit perfectly!
Parts Used:
-
Sharon from Yacolt, WA
-
Difficulty Level:Really Easy
-
Total Repair Time:Less than 15 mins
5 of 6 people
found this instruction helpful.
Was this instruction helpful to you?
Thank you for voting!
Electric stove burners working intermitantly.
replaced old, worn blocks with new style surface plug in block kits - all 4 burners. Completely resolved the problem at very low cost (less than $50.00).
Parts Used:
-
Michael from St. Louis, MO
-
Difficulty Level:Really Easy
-
Total Repair Time:15 - 30 mins
-
Tools:Pliers, Screw drivers
4 of 4 people
found this instruction helpful.
Was this instruction helpful to you?
Thank you for voting!
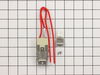
The heating element socket had crumbled with age.
Changing the socket with a new one simply required removing one screw and splicing the two existing wires to the pigtails on the new socket. It took longer to unpack the replacement part than actually doing the job.
Parts Used:
-
Edward from Webster, NY
-
Difficulty Level:Really Easy
-
Total Repair Time:Less than 15 mins
-
Tools:Pliers, Screw drivers
4 of 4 people
found this instruction helpful.
Was this instruction helpful to you?
Thank you for voting!
Burner no longer worked.
First I removed a screw that held the element in place then disconnected the two wires . Then I just reattached the two wires put the screw back in place and was done in about 10 minutes. Fairly easy fix, I had this go out a few years ago and had a repairman fix it, and saw how easy it was, so this time I did it myself. Easy job!!
Parts Used:
-
Marcus from Emmett, KS
-
Difficulty Level:Easy
-
Total Repair Time:Less than 15 mins
-
Tools:Screw drivers
4 of 5 people
found this instruction helpful.
Was this instruction helpful to you?
Thank you for voting!
The drip bowls were all caked and corroded.
This wasn't a "repair", but I got an email asking for my story, so here it is. :-)
I followed the owner's manual instructions by pulling out the burner elements, lifting up the old drip bowls, setting in the new ones, replacing the elements.
I followed the owner's manual instructions by pulling out the burner elements, lifting up the old drip bowls, setting in the new ones, replacing the elements.
Parts Used:
-
Terry from Mountain City, TN
-
Difficulty Level:Really Easy
-
Total Repair Time:Less than 15 mins
4 of 5 people
found this instruction helpful.
Was this instruction helpful to you?
Thank you for voting!
Sparks emitted at burner connection and burner does not work.
1. Turn off circuit breaker, pull out element and remove reflector pan.
2. Unfasten terminal block mounting screw and remove terminal block from casing.
3. Cut wires as close to defective terminal block as possible (not as per instructions) since you will need the maximum possible length of wire.
4. Slip on heat shrink sleeves, strip stove wires and connect to new terminal block per instructions.
5. Heat shrink sleeves per instructions.
2. Unfasten terminal block mounting screw and remove terminal block from casing.
3. Cut wires as close to defective terminal block as possible (not as per instructions) since you will need the maximum possible length of wire.
4. Slip on heat shrink sleeves, strip stove wires and connect to new terminal block per instructions.
5. Heat shrink sleeves per instructions.
Parts Used:
-
Doug from Puyallup, WA
-
Difficulty Level:Easy
-
Total Repair Time:15 - 30 mins
-
Tools:Pliers, Screw drivers
4 of 5 people
found this instruction helpful.
Was this instruction helpful to you?
Thank you for voting!
Stove-top Burner intermittently shut off and on-wouldn't heat properly
removed old Plug-in block by removing 1 screw and cutting 2 wires. (Screw was so tight and rusty that I had to use vise grips to remove it). Installed new Plug-in block with wire nuts and heat shrink wraps. YOU just have to make sure the wires are seated in the block properly. This job was much easier than I anticipated. The burner works great now!
Parts Used:
-
George from New Bloomfield, PA
-
Difficulty Level:A Bit Difficult
-
Total Repair Time:15 - 30 mins
-
Tools:Pliers, Screw drivers
3 of 3 people
found this instruction helpful.
Was this instruction helpful to you?
Thank you for voting!
Burner wouldn't heat (wiring failure)
1. Shut the breaker off; Jenn-Air's design will have you working around hot leads if you don't.
2. Raise the control panel
3. Remove burner and unscrew the burner connector; trace the wires back to the control panel bottom and remove them
4. On the replacement connector, add the electrical for the control panel. These are not included and can be found at any hardware store; they are a standard size.
5. Connect the new wires and put everything back together.
6. Reset the break and test.
2. Raise the control panel
3. Remove burner and unscrew the burner connector; trace the wires back to the control panel bottom and remove them
4. On the replacement connector, add the electrical for the control panel. These are not included and can be found at any hardware store; they are a standard size.
5. Connect the new wires and put everything back together.
6. Reset the break and test.
Parts Used:
-
Eugene from San Antonio, TX
-
Difficulty Level:A Bit Difficult
-
Total Repair Time:15 - 30 mins
-
Tools:Pliers, Screw drivers, Wrench set
3 of 4 people
found this instruction helpful.
Was this instruction helpful to you?
Thank you for voting!
piece of cake. The pictures with the grid background on your website gave me ability to verify what I was purchasing.
This is the second use of Parts Select. First time was for another obscure part for an old microwave, which also worked out VERY well. Both appliances still in action.
Parts Used:
-
George from Irving, TX
-
Difficulty Level:Really Easy
-
Total Repair Time:Less than 15 mins
3 of 4 people
found this instruction helpful.
Was this instruction helpful to you?
Thank you for voting!
Front Burner Would Not Heat
I cut the power to the circuit. Removed the burner and then unscrewed the old aluminum plate attached to the range top cover. Opened the topcover to access the wires. I cut the two wires being sure that I left enough length. I then slipped the two new wires with the brass contacts into the new black plastic holder until it locked. Reattached the new metal plate to the range cover, fed the wires through and snapped the new plastic holder into the aluminum plate. Secured wire ends with the ceramic wire nuts. Total time about 30 minutes.
Parts Used:
-
GAIL from ORCHARD PARK, NY
-
Difficulty Level:Easy
-
Total Repair Time:15 - 30 mins
-
Tools:Pliers, Screw drivers
2 of 2 people
found this instruction helpful.
Was this instruction helpful to you?
Thank you for voting!
Screw hard to get off
Drilled a pilot hole with a 1/16 th drill bit and tapped off screw head.
Parts Used:
-
Lawrence from BROOKSVILLE, FL
-
Difficulty Level:A Bit Difficult
-
Total Repair Time:30 - 60 mins
-
Tools:Screw drivers
2 of 2 people
found this instruction helpful.
Was this instruction helpful to you?
Thank you for voting!
Drip pans were not original to range, I could not get them clean.
I reoved old drip pans and installed new ones. Very easy, they look great!
Parts Used:
-
Lynn from BRADENTON, FL
-
Difficulty Level:Really Easy
-
Total Repair Time:Less than 15 mins
2 of 2 people
found this instruction helpful.
Was this instruction helpful to you?
Thank you for voting!
Burner would not heat up.
Removed 2 screws, cut the wires, pulled the part out that the element plugs into. Replaced the old part with the new one and put the screws back in to hold it, reconnected the wires and plugged in the element. Turned stove on and Valaaaa! It was fixed in 10 minutes! Thanks for the great repair parts!
Parts Used:
-
Nancy from Baldwinsville, NY
-
Difficulty Level:Really Easy
-
Total Repair Time:Less than 15 mins
-
Tools:Screw drivers
2 of 2 people
found this instruction helpful.
Was this instruction helpful to you?
Thank you for voting!
Used part
Lift burners out of plug discard old drip pans replace new drip pans into plugs and done .
Parts Used:
-
Sabrina from FREMONT, CA
-
Difficulty Level:Very Easy
-
Total Repair Time:Less than 15 mins
2 of 3 people
found this instruction helpful.
Was this instruction helpful to you?
Thank you for voting!