















4530A Frigidaire Range - Instructions
Keep searches simple. Use keywords, e.g. "leaking", "pump", "broken" or "fit".
our rental stove needed new drip bowls and heat elements
i at first had a hard time finding the model # on this older electric stove. i did a chat with a rep from partselect.com and they sent me a web site that showed me where to look for it. that helped a lot. found it and searched on partselect.com . they had just what was needed. the purchase was easy and shipping was fast. i was worried it was going to be time consuming finding what i needed, not true once i found their web site. also, installation was easy.
Parts Used:


-
bobby from PARKER, AZ
-
Difficulty Level:Very Easy
-
Total Repair Time:Less than 15 mins
7 of 8 people
found this instruction helpful.
Was this instruction helpful to you?
Thank you for voting!
Oven light bulb went dark; it needed replacing

-
Lise from CEDAR GROVE, NJ
-
Difficulty Level:Very Easy
-
Total Repair Time:Less than 15 mins
10 of 17 people
found this instruction helpful.
Was this instruction helpful to you?
Thank you for voting!
Insulation was missing
Apparently, the original insulation had been removed due to a mouse infestation-the unit had been in storage for a while. After removing about 50 screws, I had all the body panels off and cleaned out the interior of the stove then installed the new insulation. I put it all back together and hooked it up- works just like new. I only paid 60 bucks for this oven, so all in all, not a bad deal.
Parts Used:
-
Bryan from Holland, MI
-
Difficulty Level:A Bit Difficult
-
Total Repair Time:More than 2 hours
-
Tools:Nutdriver, Screw drivers
8 of 12 people
found this instruction helpful.
Was this instruction helpful to you?
Thank you for voting!
Oven racks rusted
-
Wendell from Ocala, FL
-
Difficulty Level:Really Easy
-
Total Repair Time:Less than 15 mins
11 of 21 people
found this instruction helpful.
Was this instruction helpful to you?
Thank you for voting!
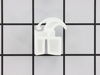
Broken Drawer Glide
-
Sharon from Hamlin, NY
-
Difficulty Level:Really Easy
-
Total Repair Time:Less than 15 mins
6 of 6 people
found this instruction helpful.
Was this instruction helpful to you?
Thank you for voting!
Surface element didn't work
Make sure whichever surface element you are to replace is OFF.Carefully remove surface element by pulling it out of socket and remove drip bowl. Cleaned area around range top and place new or old drip bowl in place. Line up drip bowl cutouts and place on range top and simply push in/plug (2 prongs)in new surface element and place on drip bowl. It's that easy! To install 2 new surface elements and drip bowls took less than 5 minutes.
Parts Used:
-
chris from DEWEY BEACH, DE
-
Difficulty Level:Very Easy
-
Total Repair Time:Less than 15 mins
6 of 6 people
found this instruction helpful.
Was this instruction helpful to you?
Thank you for voting!
Needed new drip bowls.
Pulled out heating elements. Removed old drip bowls. Inserted new drip bowls and re-installed heating elements.
I was extremely pleased with the very quick delivery of needed parts.
I was extremely pleased with the very quick delivery of needed parts.
Parts Used:
-
Robert from Oradell, NJ
-
Difficulty Level:Really Easy
-
Total Repair Time:Less than 15 mins
7 of 9 people
found this instruction helpful.
Was this instruction helpful to you?
Thank you for voting!
OLD STOVETOP COILS
LOOKED FOR MODEL# OF STOVE.. ENTERED MODEL # IN PARTS.COM SEARCH.
MATCHED COIL AND DRIP PANS
ITEM NUMBERS AND SIZE.
PLACED ORDER.
ARRIVED FOLLOWING WEEK WELL PACKED.
PULLED OUT OLD COILS/DRIP PANS.
PLACE *NEW* DRIP PANS IN FIRST. THEN PUSH IN *NEW* COILS
**NO PAID INVOICE WAS RECEIVED**
Wed4/24/2024
MATCHED COIL AND DRIP PANS
ITEM NUMBERS AND SIZE.
PLACED ORDER.
ARRIVED FOLLOWING WEEK WELL PACKED.
PULLED OUT OLD COILS/DRIP PANS.
PLACE *NEW* DRIP PANS IN FIRST. THEN PUSH IN *NEW* COILS
**NO PAID INVOICE WAS RECEIVED**
Wed4/24/2024
Parts Used:
-
SANDY from TOMAH, WI
-
Difficulty Level:Very Easy
-
Total Repair Time:Less than 15 mins
6 of 6 people
found this instruction helpful.
Was this instruction helpful to you?
Thank you for voting!
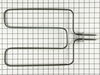
Element burned out
First I removed the two screws that hold the element in place. I then pulled the element out about 3 inches and disconnected the two wires. The I reversed the process to install the new element which was exactly the same as the burned out one.
At first I was on the verge of replacing the whole stove before I decided to google " range heating elements". I ordered the part from your company and it arrived promptly.
Needless to say, I am thrilled that I don't have to buy a new stove. This one now works perfectly!
At first I was on the verge of replacing the whole stove before I decided to google " range heating elements". I ordered the part from your company and it arrived promptly.
Needless to say, I am thrilled that I don't have to buy a new stove. This one now works perfectly!
Parts Used:
-
James from Colonial Beach, VA
-
Difficulty Level:Easy
-
Total Repair Time:15 - 30 mins
-
Tools:Nutdriver
6 of 7 people
found this instruction helpful.
Was this instruction helpful to you?
Thank you for voting!
Refrigerator Light bulb went out
I replaced the bulb using my hands to twist the bulb in the socket located at the top of the refrigerator.
Parts Used:
-
ANGELA from MEBANE, NC
-
Difficulty Level:Very Easy
-
Total Repair Time:Less than 15 mins
7 of 10 people
found this instruction helpful.
Was this instruction helpful to you?
Thank you for voting!
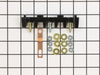
The elements were not heating up
It was really easy just unplugged it took off the back cover changed the part out put back cover on plugged it in and the elements were working great!
Parts Used:
-
Tanya from KALISPELL, MT
-
Difficulty Level:Really Easy
-
Total Repair Time:15 - 30 mins
-
Tools:Screw drivers
6 of 8 people
found this instruction helpful.
Was this instruction helpful to you?
Thank you for voting!
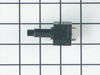
Push button oven light switch broke and fell inside the console.
Determined how to proceed to disassemble the console. Unplugged the power cord, shut off the gas valve, removed six philips head screws from back panel and one philips head screw from side panel that held the front glass cover in place. Removed the nut off of the old switch body and the two oven control knobs and the timer/clock knob. Removed the front glass by pulling the right side forward and sliding it slightly to the right. Disconnected the two wires from the back of the old switch.Removed the nut holding the old switch body to the console frame. Replaced with the new switch and did a reassembly by backtracking my steps. I even remembered to clean both sides of the control console glass before reinstalling it. Placed the range back in position, checked it for level, plugged the power cord in and checked for the proper operation of the new switch, turned on the gas and checked for any possible leaks from moving the range. The switch was a perfect match. The picture on the grid paper background really helped in identifying the switch that I needed.
Parts Used:
-
Daniel from Evansdale, IA
-
Difficulty Level:Easy
-
Total Repair Time:15 - 30 mins
-
Tools:Screw drivers
5 of 6 people
found this instruction helpful.
Was this instruction helpful to you?
Thank you for voting!
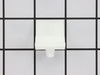
Glides broke on lower storage drawer
The front glides easily snap into a hole on the sides of the range. The rear glides easily snap onto the sides of the lower rear of the drawer.
Parts Used:
-
James from WEST BEND, WI
-
Difficulty Level:Really Easy
-
Total Repair Time:Less than 15 mins
5 of 6 people
found this instruction helpful.
Was this instruction helpful to you?
Thank you for voting!
Couldn't find replacement trays locally. Part Select was very helpful and prompt in shipping.
Just placed the chrome bowl trays in place and was good to go. They look very nice.
Parts Used:
-
Rosemary from St. Albans, ME
-
Difficulty Level:Really Easy
-
Total Repair Time:Less than 15 mins
5 of 7 people
found this instruction helpful.
Was this instruction helpful to you?
Thank you for voting!
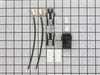
I damaged surface element left kettle on without water in it
The repair was really easy. All I did was unplug the surface element and plug in the new one.
Parts Used:
-
Kenneth from LANOKA HARBOR, NJ
-
Difficulty Level:Really Easy
-
Total Repair Time:Less than 15 mins
4 of 4 people
found this instruction helpful.
Was this instruction helpful to you?
Thank you for voting!