















363JS3 Kenmore Refrigerator - Instructions
Keep searches simple. Use keywords, e.g. "leaking", "pump", "broken" or "fit".
Ice maker kept on making ice
I ordered a new micro switch that was activated by the high ice lever. Once the switch was replaced the ice maker cut off as it should have and stopped producing too much ice. YHis job was of moderate skill level, the most challenging was replacing a spring that popped out then reassembling the unit.
Parts Used:
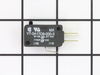
-
Michael from Santa Fe, NM
-
Difficulty Level:A Bit Difficult
-
Total Repair Time:Less than 15 mins
-
Tools:Pliers, Screw drivers
Was this instruction helpful to you?
Thank you for voting!
No problems.
Took out the old, replaced with the new. Needed second person to hold the flash light. That is the secret to get it plugged in and secured.
Parts Used:
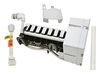
-
Patricia from Norwood, NC
-
Difficulty Level:Easy
-
Total Repair Time:Less than 15 mins
-
Tools:Nutdriver
Was this instruction helpful to you?
Thank you for voting!
no ice
-
Richard from Las Cruces, NM
-
Difficulty Level:Really Easy
-
Total Repair Time:Less than 15 mins
-
Tools:Nutdriver
Was this instruction helpful to you?
Thank you for voting!
Was not making ice
Took old part out , put new part in. Was so easy thought we did it wrong. Ice maker working great, have lots of ice now. Thank you. Colleen
Parts Used:
-
Colleen from Yorba linda, CA
-
Difficulty Level:Really Easy
-
Total Repair Time:Less than 15 mins
-
Tools:Screw drivers
Was this instruction helpful to you?
Thank you for voting!
Cord
-
Laurie from Portland, ME
-
Difficulty Level:Really Easy
-
Total Repair Time:Less than 15 mins
-
Tools:Screw drivers
Was this instruction helpful to you?
Thank you for voting!
Ice maker quit makeing ice
Wathched the video and it was done in less than 15 min making ice again no problem
Parts Used:
-
Dickei from Sugar Land, TX
-
Difficulty Level:Really Easy
-
Total Repair Time:Less than 15 mins
-
Tools:Nutdriver
Was this instruction helpful to you?
Thank you for voting!
Gears were jammed, and broken when jam was cleared causing them to make loud knocking noises when spinning
Popped off the old gears with a screw driver. Put on the new gears with a screwdriver. Problem fixed in less than 5 minutes.
Parts Used:

-
Nathan from Coralville, IA
-
Difficulty Level:Really Easy
-
Total Repair Time:Less than 15 mins
-
Tools:Screw drivers
Was this instruction helpful to you?
Thank you for voting!
Ice Maker not making ice
The video on the GE site was great. Showed step by step instructions on how to remove the old ice maker and install the new one. Also helpful was the detail on the water chute which needed to be moved from the old ice make to the new one. Saved hundreds of dollars by not having to have a repairman do this work for me.
Parts Used:
-
George from Katy, TX
-
Difficulty Level:Easy
-
Total Repair Time:Less than 15 mins
-
Tools:Nutdriver
Was this instruction helpful to you?
Thank you for voting!
my ice maker quit working
I watched the video from the link that was sent to me with the shipping notice. It was very easy to understand. I had no trouble at all. I'm 75 years old woman, however, and I can fix about anything. Don't be afraid to fix appliances yourself if you feel you have the knowledge.
Parts Used:
-
Verma Jean from Lincoln, CA
-
Difficulty Level:Easy
-
Total Repair Time:Less than 15 mins
-
Tools:Socket set
Was this instruction helpful to you?
Thank you for voting!
Icemaker does not make ice
I'm a housewife in her late 40's. Before ordering the part, I watched your video on how to remove and install the new icemaker. First I unplugged the refrigerator. After a few minutes, I unplugged the icemaker and unscrewed it. I lifted it a bit and removed it. I did not use the icecup that comes with the part. Instead I removed the one from the old part and inserted it to the new one. Then I plugged in the new icemaker, placed it inside so as to match the holes and screwed it in. YES, it was that simple. It took me less than 10 minutes to do this. I saved myself over $100!!
Parts Used:
-
Luis from Brownsville, TX
-
Difficulty Level:Really Easy
-
Total Repair Time:Less than 15 mins
-
Tools:Screw drivers
Was this instruction helpful to you?
Thank you for voting!