
















2809A Frigidaire Range - Instructions
Keep searches simple. Use keywords, e.g. "leaking", "pump", "broken" or "fit".
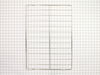
I needed an extra oven rack to bake more at one time.
I just installed the extra rack and re-arranged the existing ones. Works great!
Parts Used:
-
Sally from Cincinnati, OH
-
Difficulty Level:Really Easy
-
Total Repair Time:Less than 15 mins
Was this instruction helpful to you?
Thank you for voting!
Foul ordor coming from stove
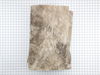
The foul order was the cause of a "Mummified Rat" that I found on the bottom Left /outside wall of the oven. I first Unplugged the stove and turned off the gas. I removed the grates and the burners. Each burner is held down with two (2) 3/16" screws which makes it a total of eight (8) screws in all. After removing all eight screws, you can now pop up the burner lid with a putty knife or a large Screw Driver. I used a large screw driver, After removing the "Lid" you will then see the "Insulation Blanket" draped over the oven, to remove this blanket there are two (2) copper wires securing the blanket in place, you'll have to cut these in order to install your New Blanket. Removing the "Blanket " is a "No Brainer" just be cautious and don't snag any of the "Igniter Wires" The "Insulation Blanket" goes on one way, this can be identified by the pre-cuts on the blanket. I started out on the left side of the stove, and had the right side of the "Blanket rolled up. As I tucked the "Blanket" under the "igniter Wires" and slowly and gently feeding it with my left hand till it lines up with the pre-cut and drapes itself into place as you maneuver it down with your hands Now start with the right side by unrolling the "Blanket" and following the same procedure making sure the "Insulation Blanket" is fully extended on both sides of the oven.
Parts Used:
-
Joe De from Montgomery, AL
-
Difficulty Level:Easy
-
Total Repair Time:15 - 30 mins
-
Tools:Socket set
Was this instruction helpful to you?
Thank you for voting!